Important Notes
This technique can only be done with natural fabrics (such as cotton, linen, silk or wool, ramie), nylon and rayon using Rit All-Purpose Dye.
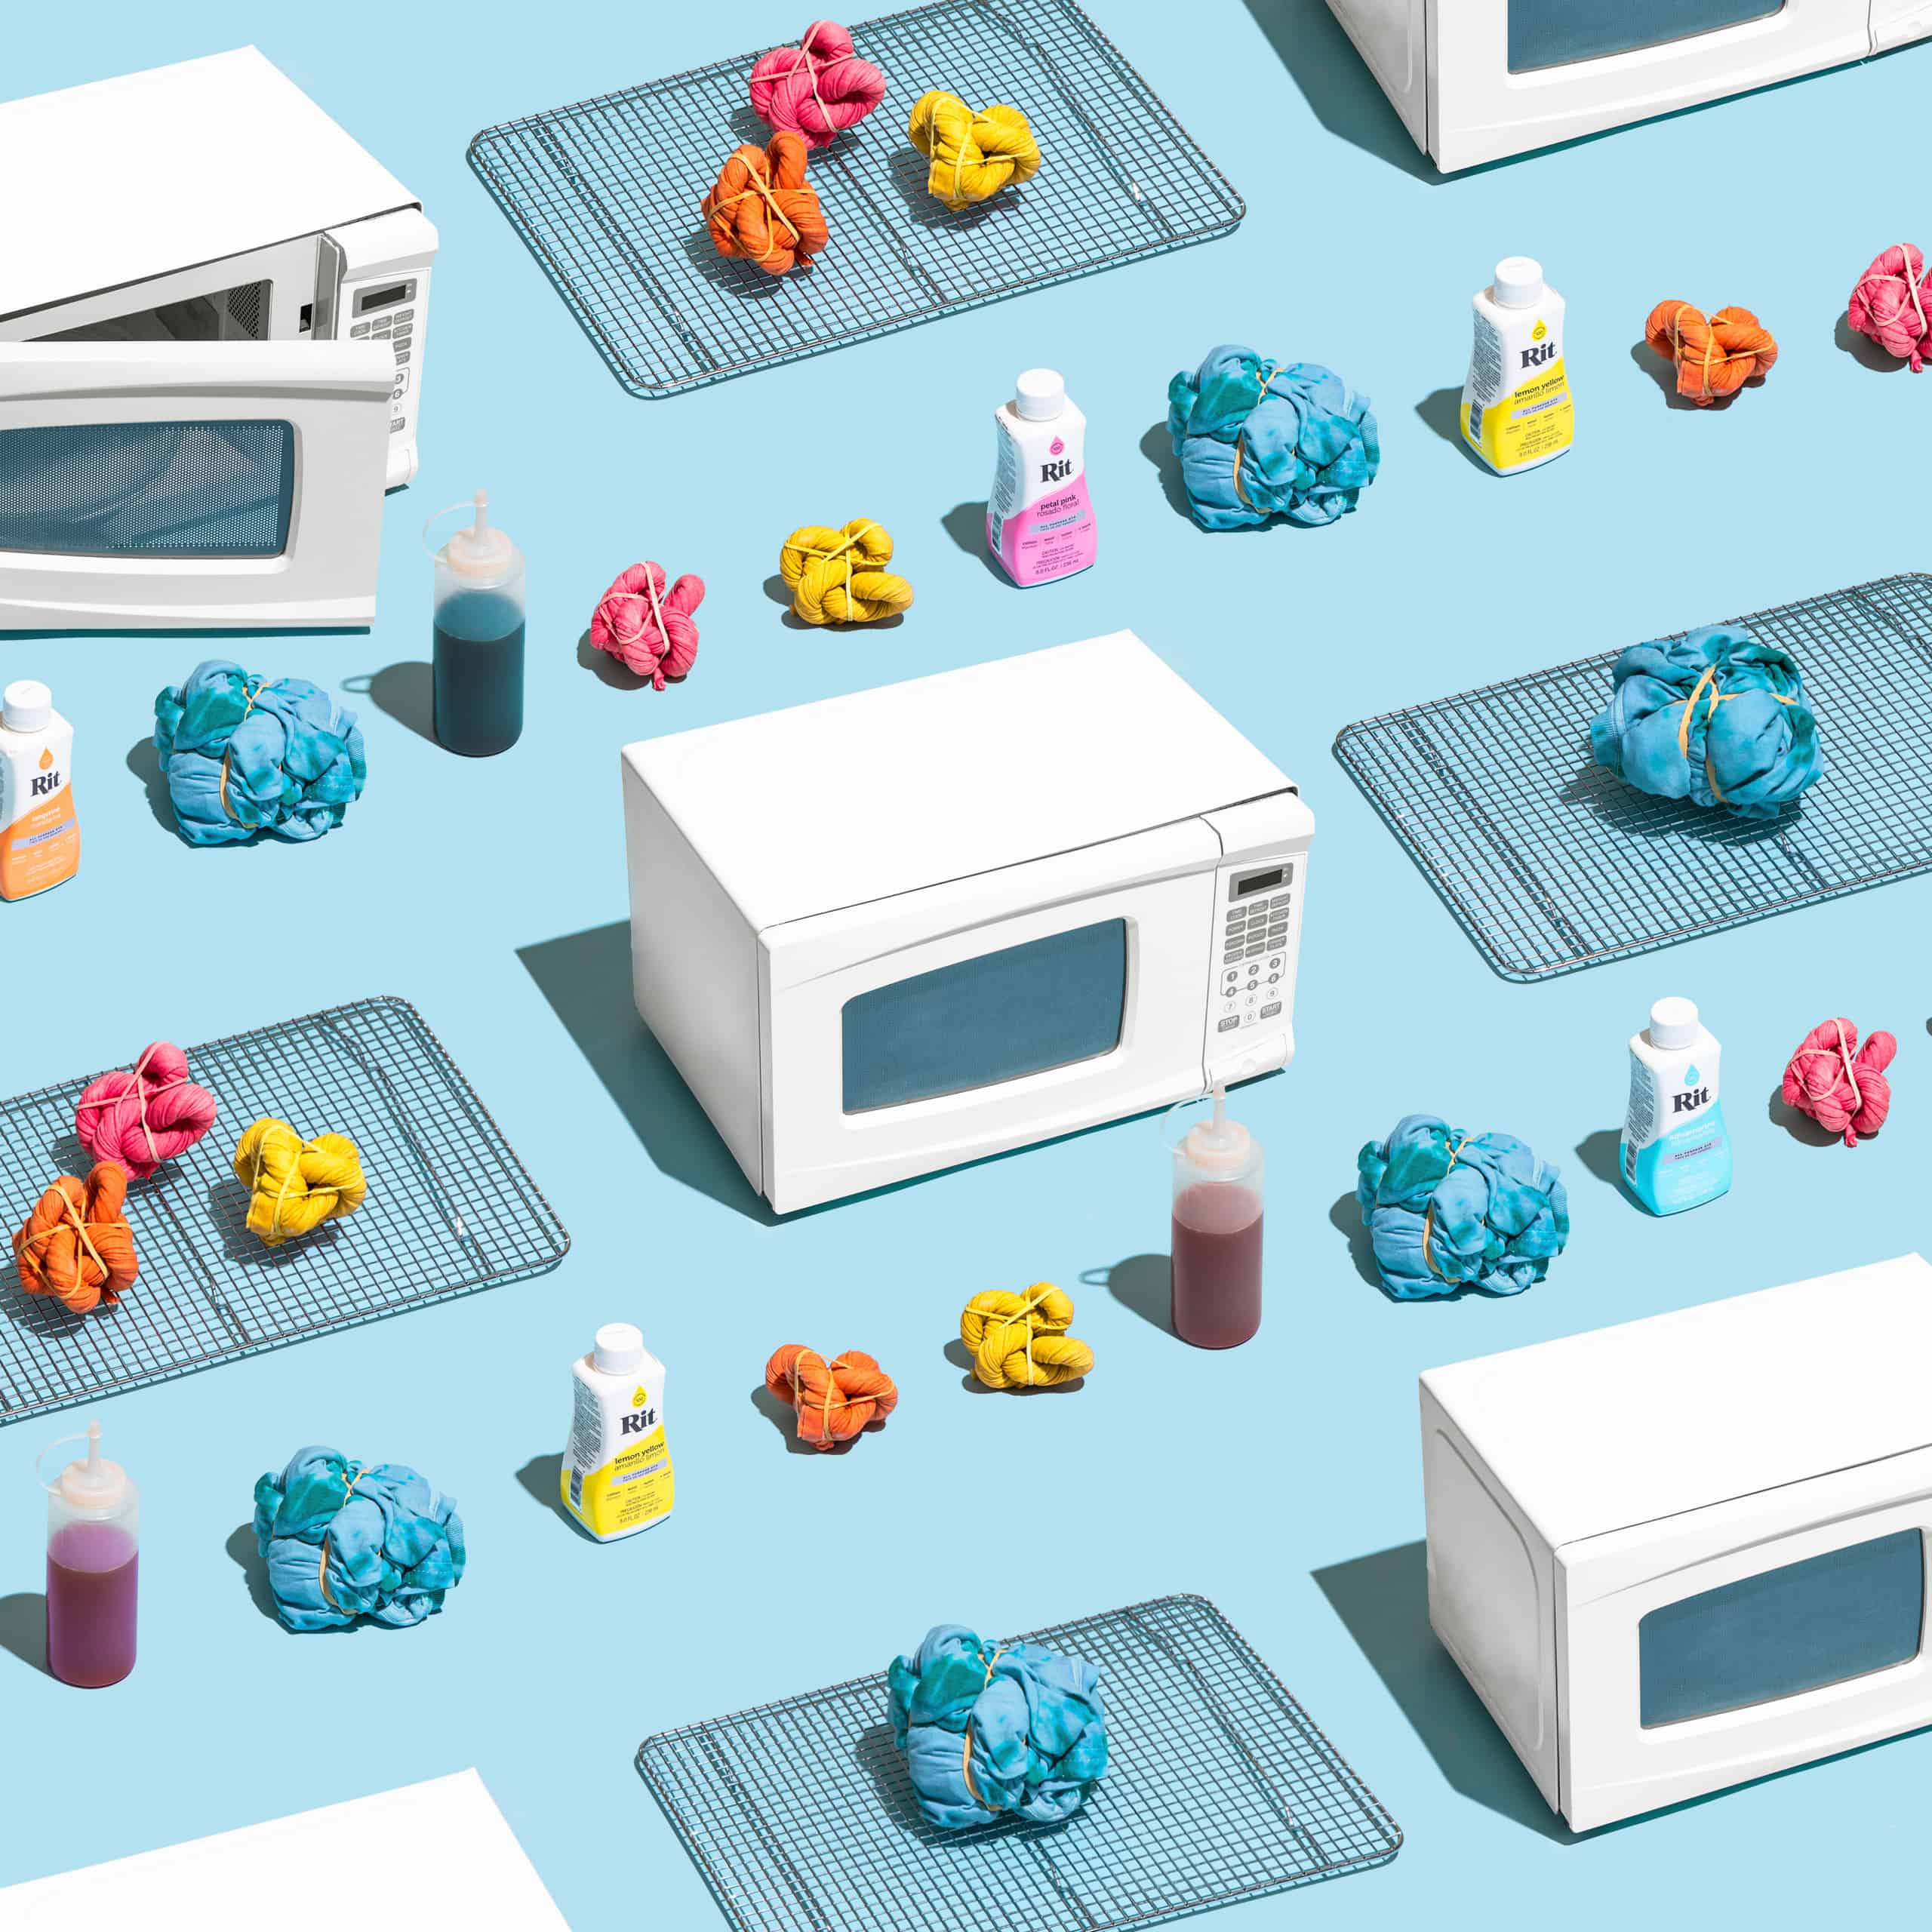
Want to know something great about our dyes? You don’t have to wait overnight for the dye to set. After microwaving (instructions on this below), you can have your reveal!
Instructions
- Before dyeing, remove any visible stains on the fabric. This will help achieve uniform color results when dyeing. Prewash item in warm, soapy water without any fabric softeners. This helps to remove any finishes that may interfere with dye absorption.
- Lay damp fabric out on a flat surface.
- Traditional Tie Dye: Pinch, pleat or fold fabric to make a design. Wrap rubber bands tightly around fabric at various points. The rubber bands act as a resist and create white spaces. The more rubber bands you use and the tighter they are wrapped, the more white space there will be.
- Other Designs:
- Swirl: Decide where to place the center of the spiral. Then position your fingers around the center point and slowly begin to twist fabric in a spiral direction. Loosely wrap rubber bands around fabric to hold spiral together.
- Scrunch: Scrunch a section the fabric and secure with rubber bands. The more tightly you secure the scrunch, the more white space you will see in the final result. Repeat scrunching various sections of the fabric. With each section, vary the amount of fabric scrunched. Continue until the majority of the fabric is scrunched. Now shape the fabric into a ball with more rubber bands.
- Sunburst (Video Here): Pinch a section of the fabric or where you want the center of the circle to be. Pull it up toward you to make a tee-pee shape. Then pull up more of the fabric for a larger circle. Close one hand around the point of the tee-pee and tie it off with a rubber band; then add rubber bands down the length of it.
- Stripes: Fold shirt vertically or diagonally, like an accordion or fan, in 2-3 inch/5-7.5 cm-wide folds. Then wrap with rubber bands every 2-3 inches/57.5 cm, or as desired.
- Checks: Accordion pleat fabric in 2-3 inch/5-7.5 cm-wide folds. To achieve a sharp line, press folds with an iron. Then accordion pleat strip into a square. Wrap a rubber band loosely around square fabric in both directions.
- Swirl: Decide where to place the center of the spiral. Then position your fingers around the center point and slowly begin to twist fabric in a spiral direction. Loosely wrap rubber bands around fabric to hold spiral together.
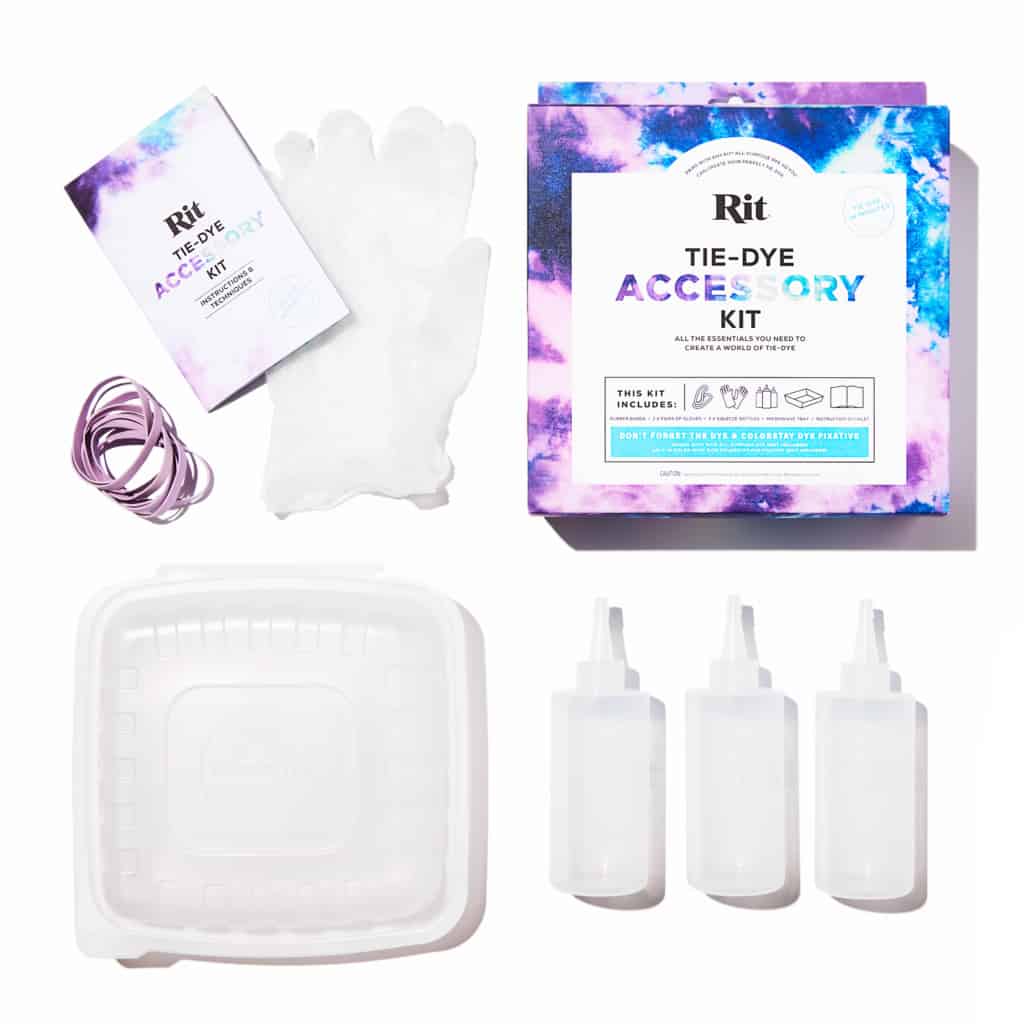
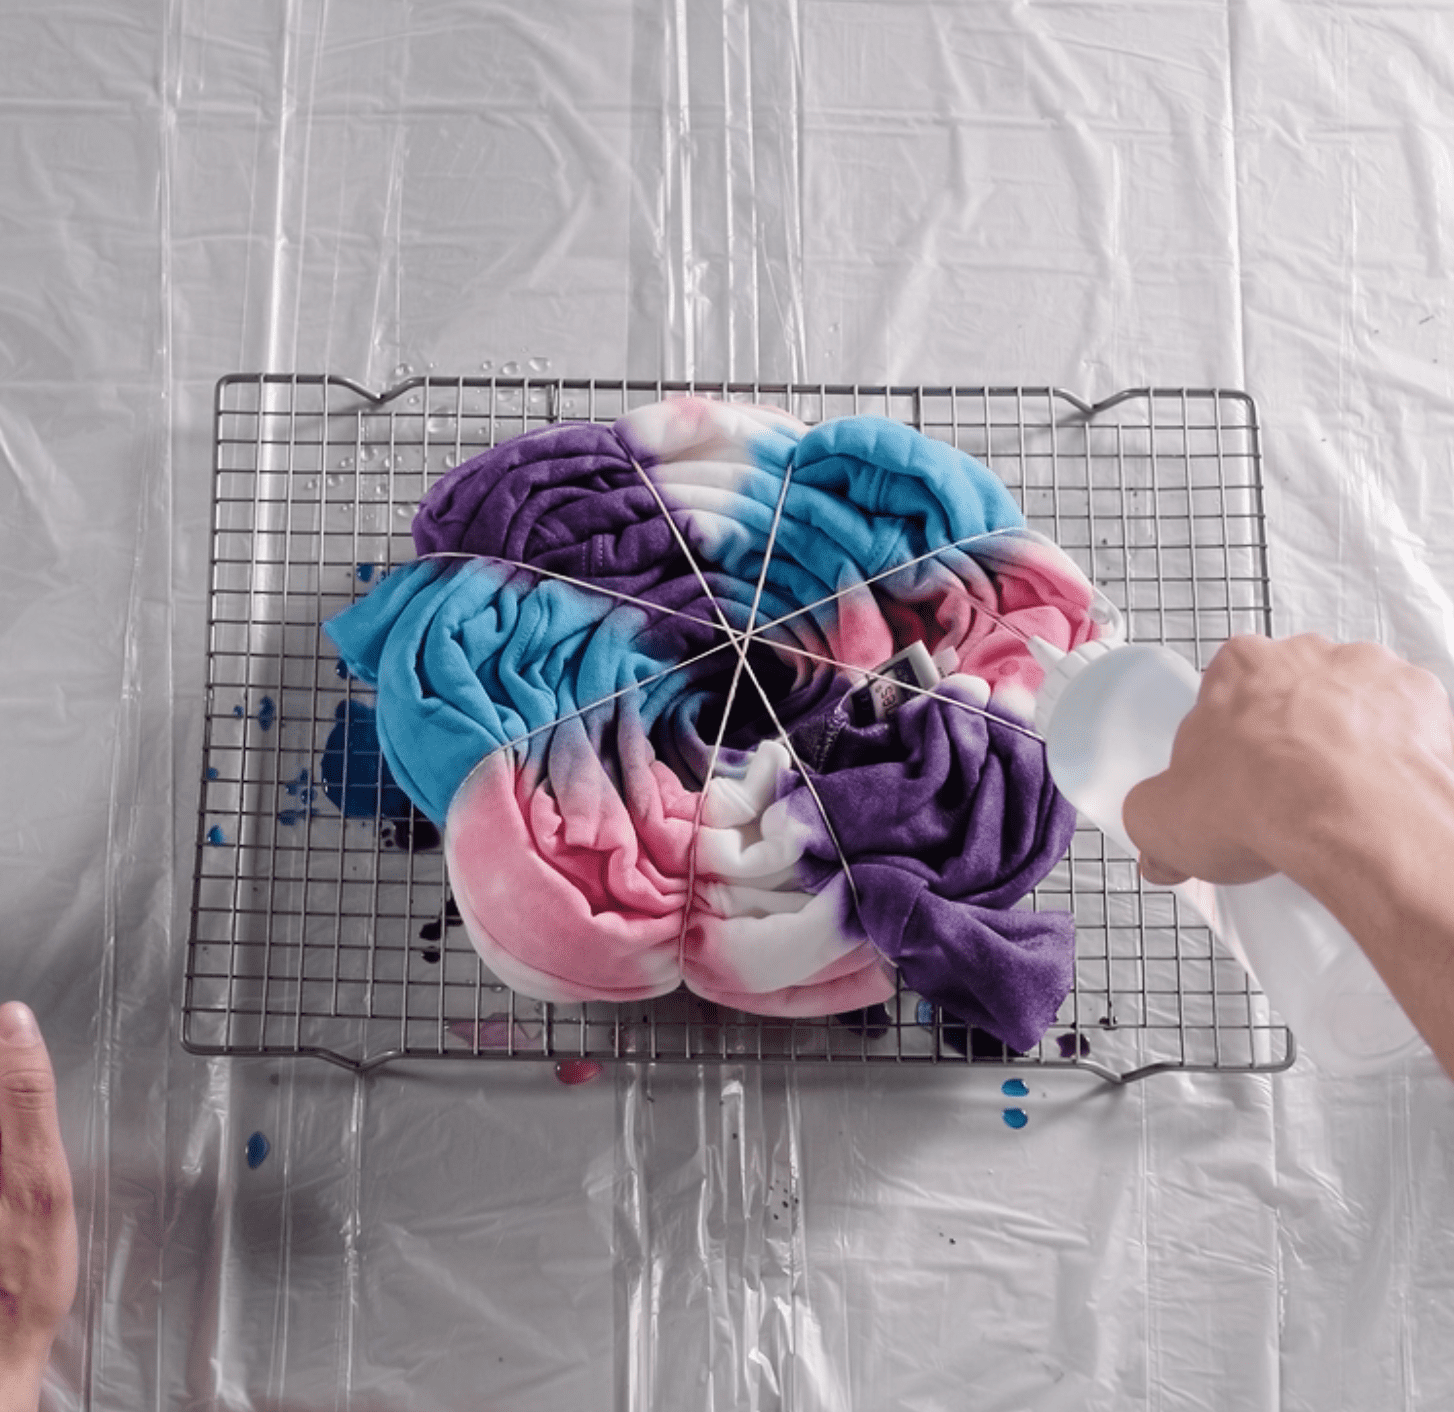
- Gather supplies. We recommend using our Tie-Dye Accessory Kit, which includes 3 perfectly-sized squeeze bottles, 20 rubber bands, 2 pairs of gloves and a microwavable tray. You’ll also want to grab a baking rack so that the dye doesn’t puddle under the fabric when you apply it.
- Wearing rubber gloves, mix 2 tablespoons / 30 mL of well-shaken liquid dye or 1/2 teaspoon/2.5mL of powdered dye with 2 cups / 470 mL of hot tap water. Scale back the concentration to 1 tablespoon / 15mL if using Rose Quartz or Tan.
- Add 1 tablespoon / 15mL of salt.
- Pour into a squirt bottle. Shake well.
- Repeat for each color.
- Place fabric on baking rack with a tray under it. This is very important because it keeps the dye from puddling under the fabric. Squirt each dye color on fabric as desired.
- If you are trying to achieve sections of white space, purposely leave certain sections of the fabric white and undyed.
- If using multiple colors, plan to put adjacent primary colors (red, yellow, blue) or secondary colors (orange, green, purple) next to each other. In the areas where they run together, they will blend together and create a third color. Keep paper towels handy to remove any dye that seeps into an area where you plan to place another color.
- After the dye is applied, let the fabric sit for 30 minutes to allow the dye to absorb.
- To set the dye, do the following while the fabric is still tied up:
- Optional: Apply Rit ColorStay Dye Fixative with a squeeze bottle, which will enhance the colors and reduce bleeding. Mix 2 tablespoons / 30mL of well-shaken ColorStay Dye Fixative with water and apply liberally to both sides of the fabric.
- We strongly recommend using your microwave, as long as the fabric does not have any metal parts on it. After applying ColorStay Dye Fixative, wrap the fabric in plastic wrap and seal the edges. Place the wrapped fabric on a paper towel in the microwave and heat for 2 minutes. Plastic will puff up, creating a heat chamber that helps bond the dye with the fabric. Once the microwave is done, remove the fabric and open the plastic, letting it cool down.
- If a microwave is not available or feasible to use and it is a hot sunny day, lay the wrapped fabric out in the sun for an hour.
- Optional: Apply Rit ColorStay Dye Fixative with a squeeze bottle, which will enhance the colors and reduce bleeding. Mix 2 tablespoons / 30mL of well-shaken ColorStay Dye Fixative with water and apply liberally to both sides of the fabric.
- Rinse in cool water until rinse water begins to run clear. This is very important to prevent unabsorbed dye from bleeding into any white areas. If possible, rinse with the fabric bundle sitting flat on the baking rack. If it is held vertically, some of the unabsorbed dye could run into white areas as it is rinsed off.
- Carefully remove rubber bands with a scissors and unfold the fabric.
- Wash in cold water with a mild detergent, rinse and dry.


