Important Notes
Shoes
For best results, we recommend dyeing canvas shoes or silk bridal type shoes. We do not recommend dyeing leather shoes. The only exception would be Uggs® Sheepskin boots.
Color
If the shoes you are dyeing are white or off white, then you should be able to achieve true color. If the shoes have an existing color, then you can overdye them with a darker color. If you are looking to: (a) dye a dark pair of shoes a lighter color or (b) completely change the color of a pair of shoes from one color to another (such as from purple to blue), then you could try removing the color using Rit Color Remover However, only use the sink or bucket method. We would only suggest trying this with canvas shoes. However, we cannot guarantee you will be able to remove all of the color.
Patterns and Logos
If the shoes you are dyeing have a pattern or logo, the color you use will mix with the existing color(s) in the fabric and create new colors. In other words, the rules of color mixing apply. When selecting a color, think about how it will mix with the colors in the pattern. For example, if you were to use a blue dye on a white pair of shoes with a pink flower pattern, the pink flowers will turn purplish (blue and pink make purple) while the rest of the shoes will dye blue. Even if you were to overdye the patterned shoes with a dark color, you may find that the color will appear lighter along the patterned area.
Bleach Stains and Sun Damage
Sun and bleach actually damage fabric, making it very difficult to dye. You could try using Rit Color Remover on the entire shoe. If you are going to try this, only use the sink or bucket method. We would only suggest doing this with canvas shoes. However, we cannot guarantee successful results.
Instructions
- Before dyeing, remove any visible stains on the shoes. This will help achieve uniform color results when dyeing. Pre-wash item in warm, soapy water without any fabric softener. This helps to remove any finishes that may interfere with dye absorption.
- Cover work area with plastic table cover and have paper towels handy to protect against any possible spills.
- Remove shoe insoles (if your shoes have them), laces and set aside.
- To protect the soles of your shoes from getting dyed, brush a thin coat of Vaseline on the soles. You could also cover the soles with electrical tape. Do not use Vaseline if dyeing anything with silk or leather, as the Vaseline could stain the fabric.

- Fill a plastic container or stainless steel sink with three gallons of hot water. The water should ideally be 140°F60°C. If tap water is not hot enough, heat water on the stove and add to the dyebath.
- Add 1 teaspoon 5 mL of dish detergent to help promote level dyeing.
- Wearing rubber gloves, add 1/2 cup 120 mL of well-shaken Rit All-Purpose Liquid Dye to the dyebath. If you are trying achieve a very dark or bold color, double the dye quantity.
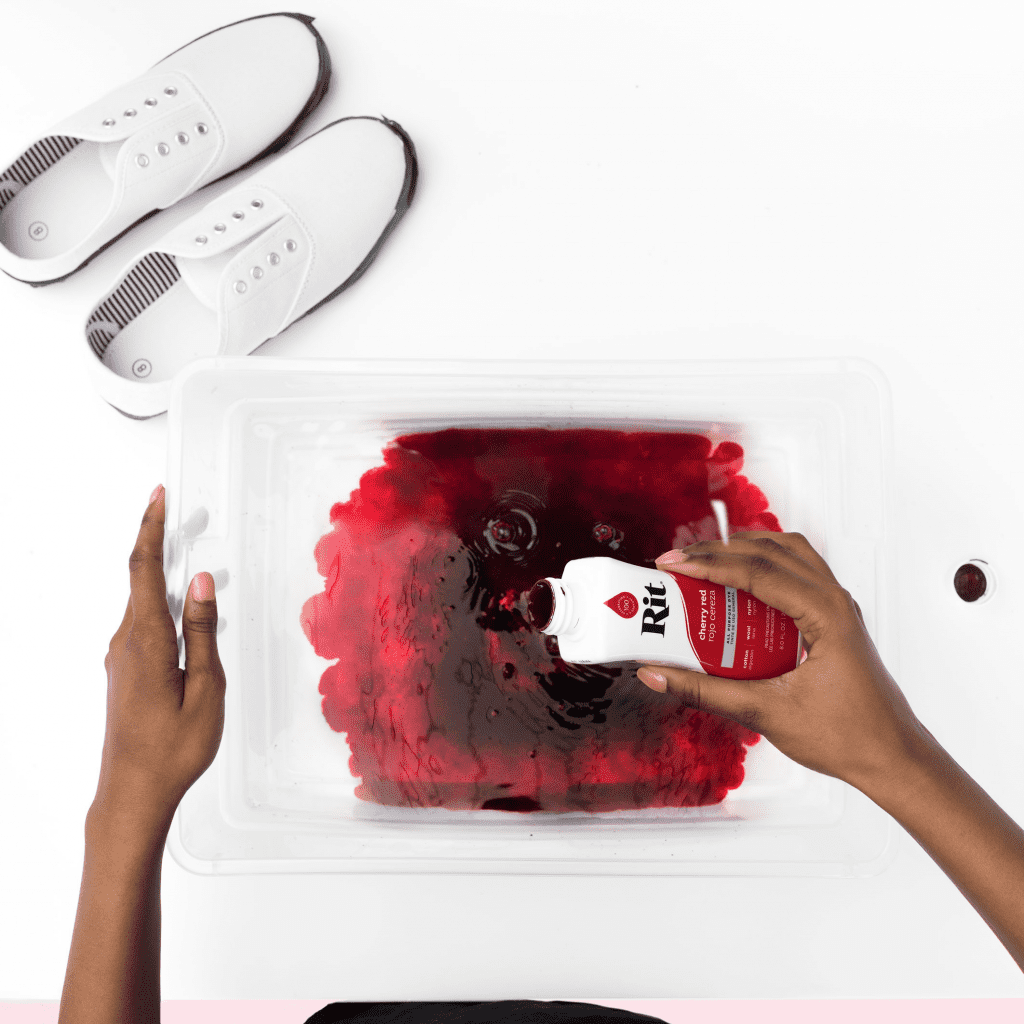
- Mix well.
- Test color by dipping a paper towel into the dyebath. If color is too light, add more dye. If color is too dark, add more water.
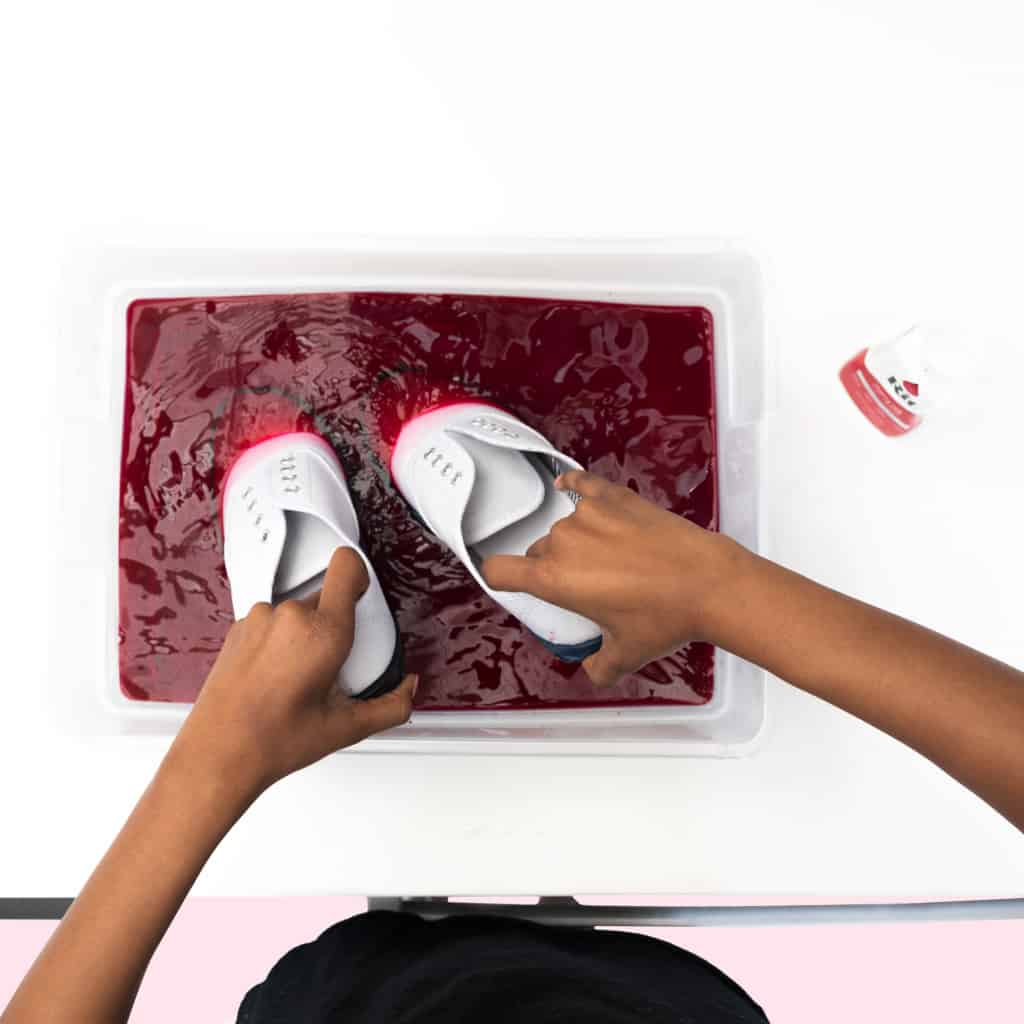
- Wet the shoes you are going to be dyeing and add them to the dyebath.
- For a solid dye: Leave shoes in dyebath from 10 minutes up to one hour. Nylon tends to dye very quickly and much darker than other fibers so the actual time needed in the dyebath is less. When desired color is achieved, remove from dyebath. Fabric will look darker when wet and will dry lighter.
- For a dip dye look: Soak the shoe in the dye for about 2 minutes, depending on how dark or light you want your shoes to be. Repeat the previous step; staggering the length of your dip along the shoes so that the lightest shade starts at the tongue and the darkest shade is at the tip of the toes.
- For a smooth transition from dark to light: Take a damp cloth and gently rub the color, blurring any harsh lines to create a smooth transition from light to dark. Dip the cloth into a watered down cup of dye if needed.
- To enhance the color and reduce color bleeding, use Rit ColorStay Dye Fixative immediately after dyeing and before washing, following these instructions. We recommend doing this with the spray method.
- Rinse in cool water until rinse water begins to run clear.
- Wash in warm water with a mild detergent, rinse and dry.


- Cover work area with plastic table cover and have paper towels handy to protect against any possible spills.
- To protect the inside of the shoes from dye, cover them with electrical tape. Also, put tape along the outside edge of the shoes on the soles and at the back inside of the heels. Then, stuff the toes with paper towels.
- Wearing rubber gloves, mix 1 tablespoon 15 mL of well-shaken Rit All-Purpose Dye with 1 cup 240 mL of very hot tap water. If tap water is not hot enough, heat water on the stove. Stir well.
- To apply dye, dip foam brush into dye. Dab on paper towels. (This will prevent dye from dripping or running.) Then brush dye onto dry shoe, starting in the heel area. We like to start on the heel to make sure we are satisfied with the color. Use a scrap piece of fabric to wipe off any drips or unwanted dye. Use Q-tips to apply dye in narrow or hard-to-reach areas.
- Continue to brush dye evenly onto the sides and top of the shoe. When dipping brush in dye, always dab it on paper towels before applying to shoe.
- Before starting the second shoe, reheat the dye in the microwave.
- Set shoes on paper towels to dry overnight. Dye will appear lighter when dry.
- Save dye in case you want to apply a second coat.
- If a second coat of dye is wanted, reheat dye in the microwave. Then apply second coat of dye to shoes.
- To seal and protect the fabric, spray shoes with Scotchgard.
