

- Cover work area with plastic and gather supplies.
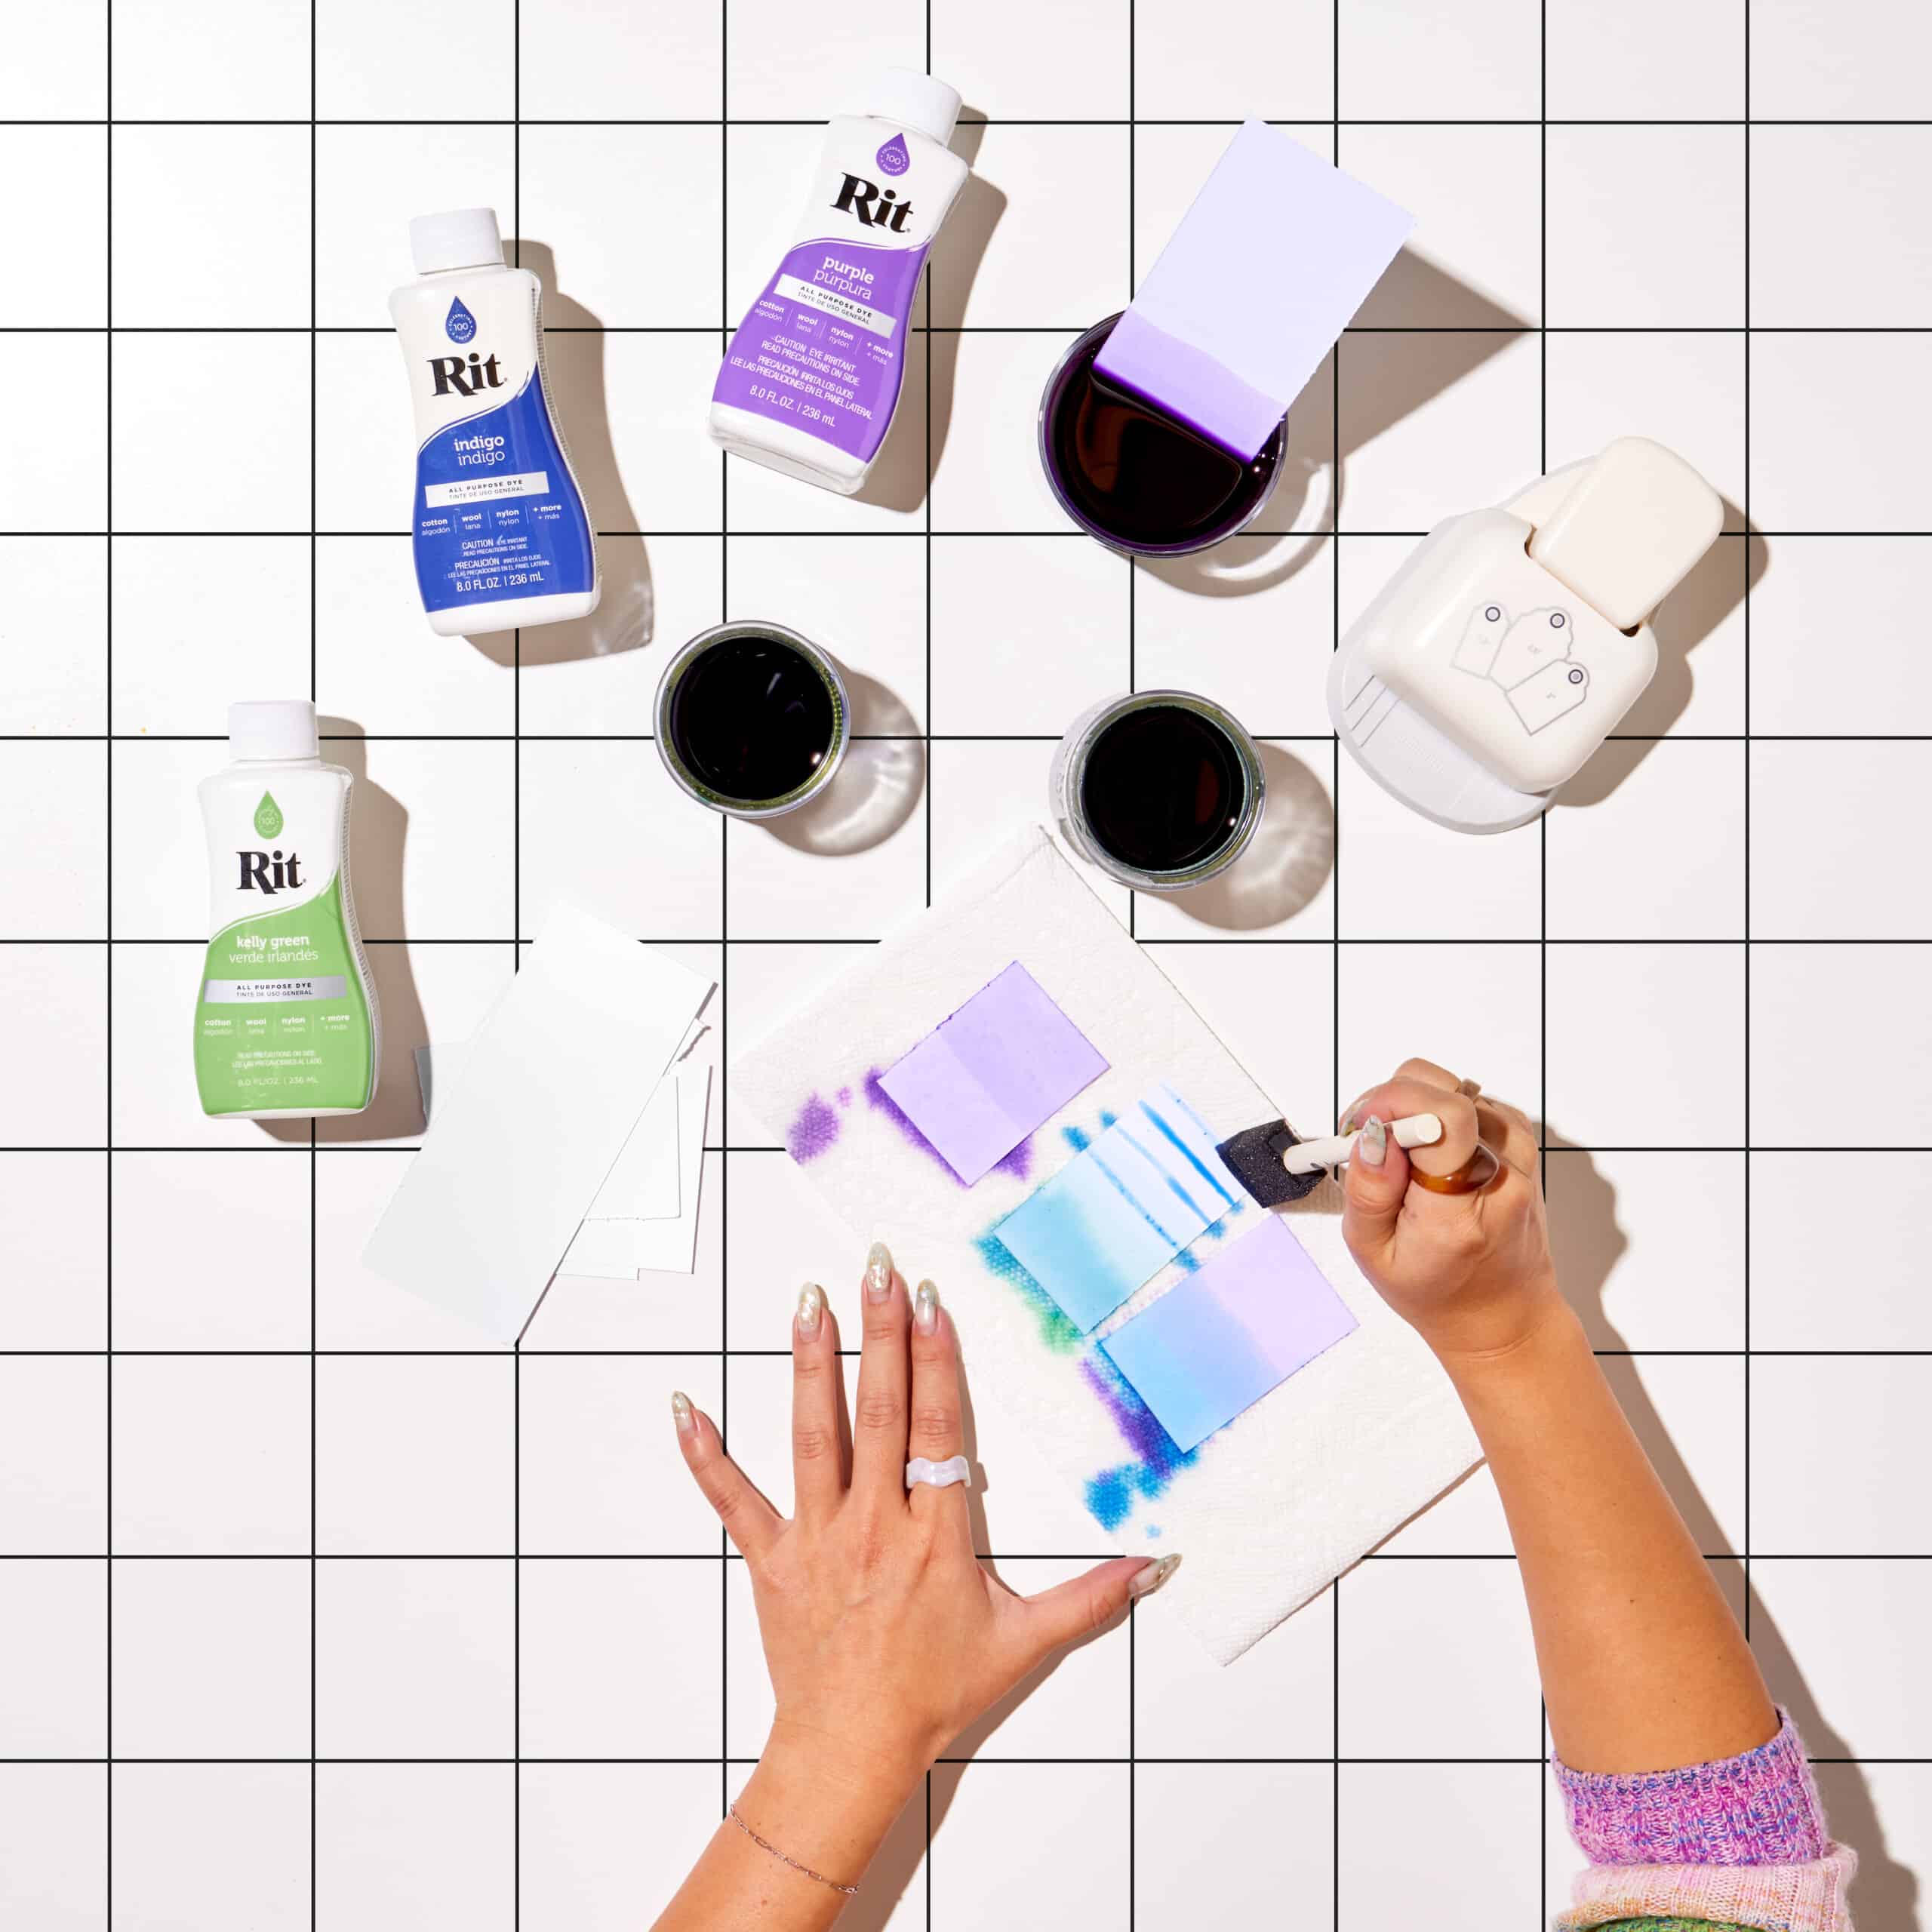
- Fill small containers with about 12 ounces of very hot water. Shake dye bottle before pouring. Wearing gloves, add 1 to 2 tablespoons of your favorite Rit All-Purpose Liquid Dye. Stir well.
- Cut card stock paper into 4-5” panels, or however long you want your gift tags to be.
- Dip paper panel directly into the dyebath. Curl the edges as necessary to fit into the dyebath. If you keep the paper in the dye bath too long, it could warp.
- You can also try tilting the tag on its side to create irregular, organic lines.
- Remove gift tag from dyebath and blot with clean paper towel to remove excess dye. Lay dyed paper on clean dry paper towels until completely dry.
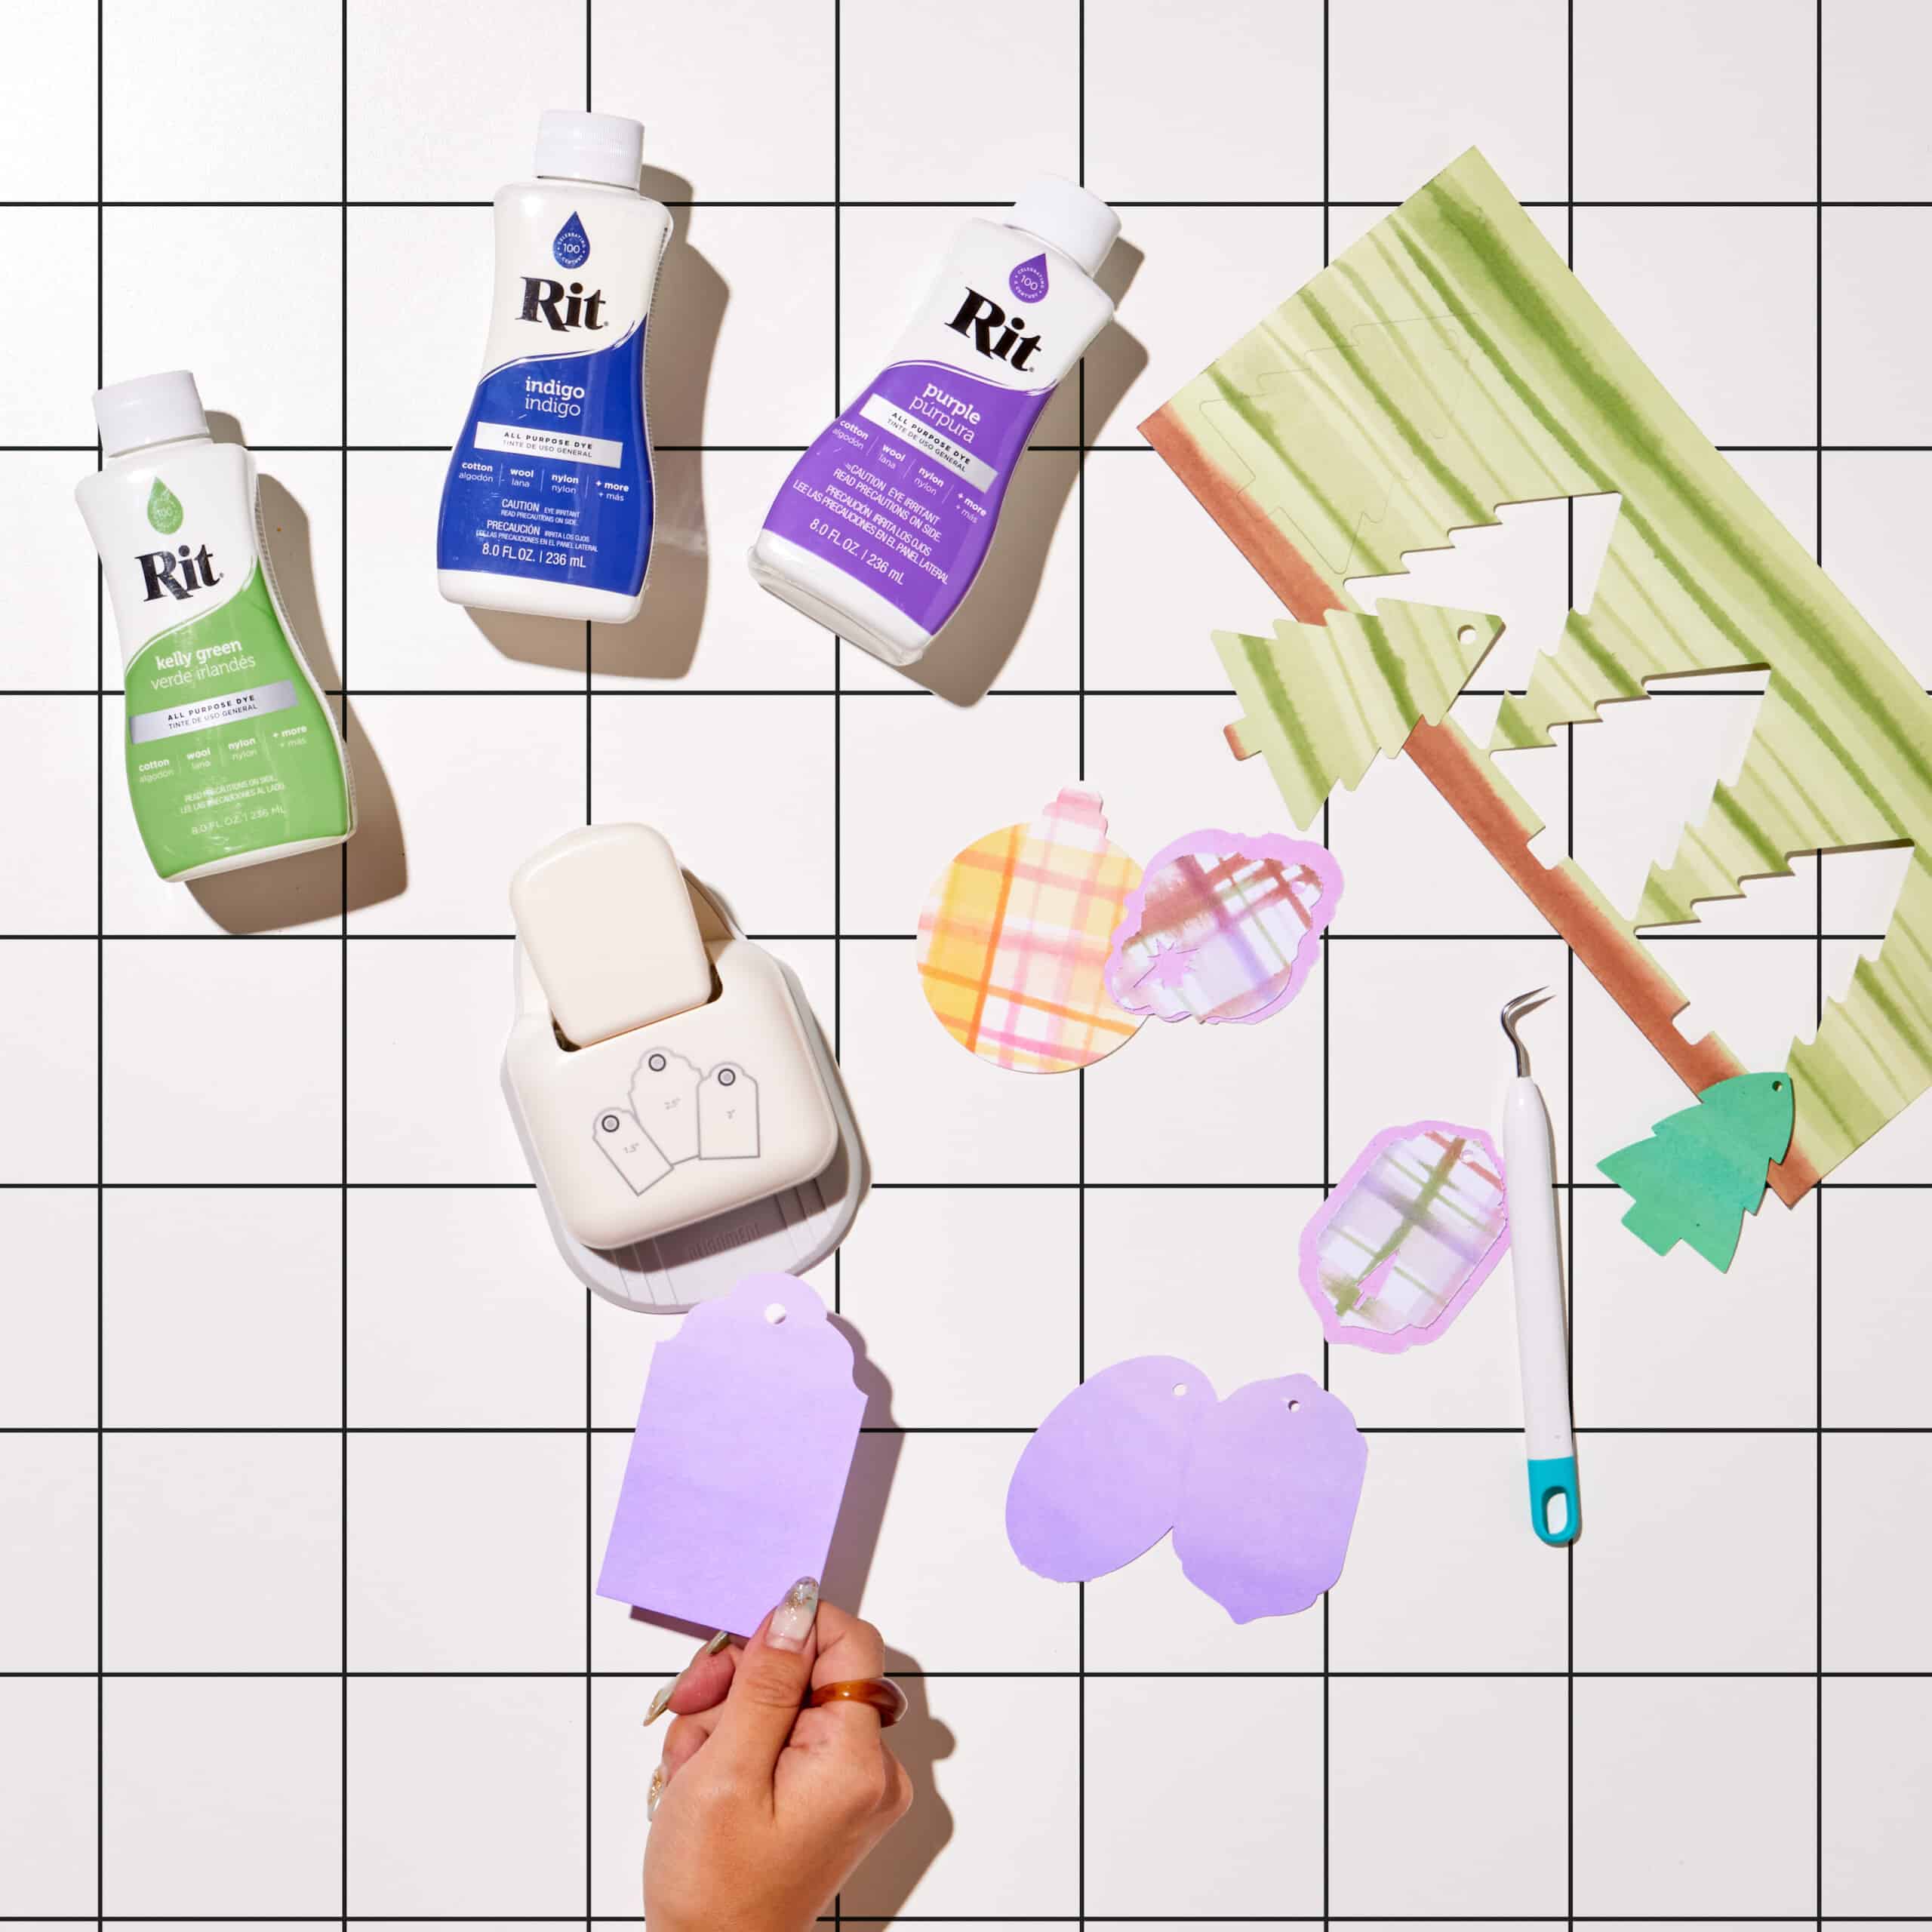
- Create additional small dyebaths and use the paintbrush to apply additional details onto the paper panel. We painted on stripes in multiple colors and thicknesses to create a plaid look.
- Once dry, flatten paper underneath a heavy book or flat object.
- Use scissors, tag punch or cricut to cut out gift tag shapes from dyed paper.


Posts You May Like
