
Time
Total: {{ partial.tML8.total }}
Supplies
- Cotton Pouch
- Rit All-Purpose Powder Dye in Golden Yellow and Petal Pink
- Rit ColorStay Dye Fixative
- Ice
- Wire Rack
- (2) Large Plastic or Stainless Steel Containers
- Measuring Cup
- Measuring Spoons
- Salt
- Liquid Dish Detergent
- Plastic Table Cover
- Plastic Gloves
Difficulty
Beginner Total: {{ partial.tFBH.total }}
Instructions
Ice Dyed Pouch
- Prewash pouch in warm, soapy water without any fabric softener. This helps to remove any finishes that may interfere with dye absorption.
- Gather supplies.
- Cover work area with plastic table cover and have paper towels handy to protect against any possible spills.
- Wear gloves to protect hands from getting stained.
- Wet pouch and randomly scrunch into a small, flat ball.
- Place damp scrunched pouch on top of wire rack, over the plastic tub to catch excess dye.
- Cover pouch completely with ice. Different ice sizes will yield different patterns.
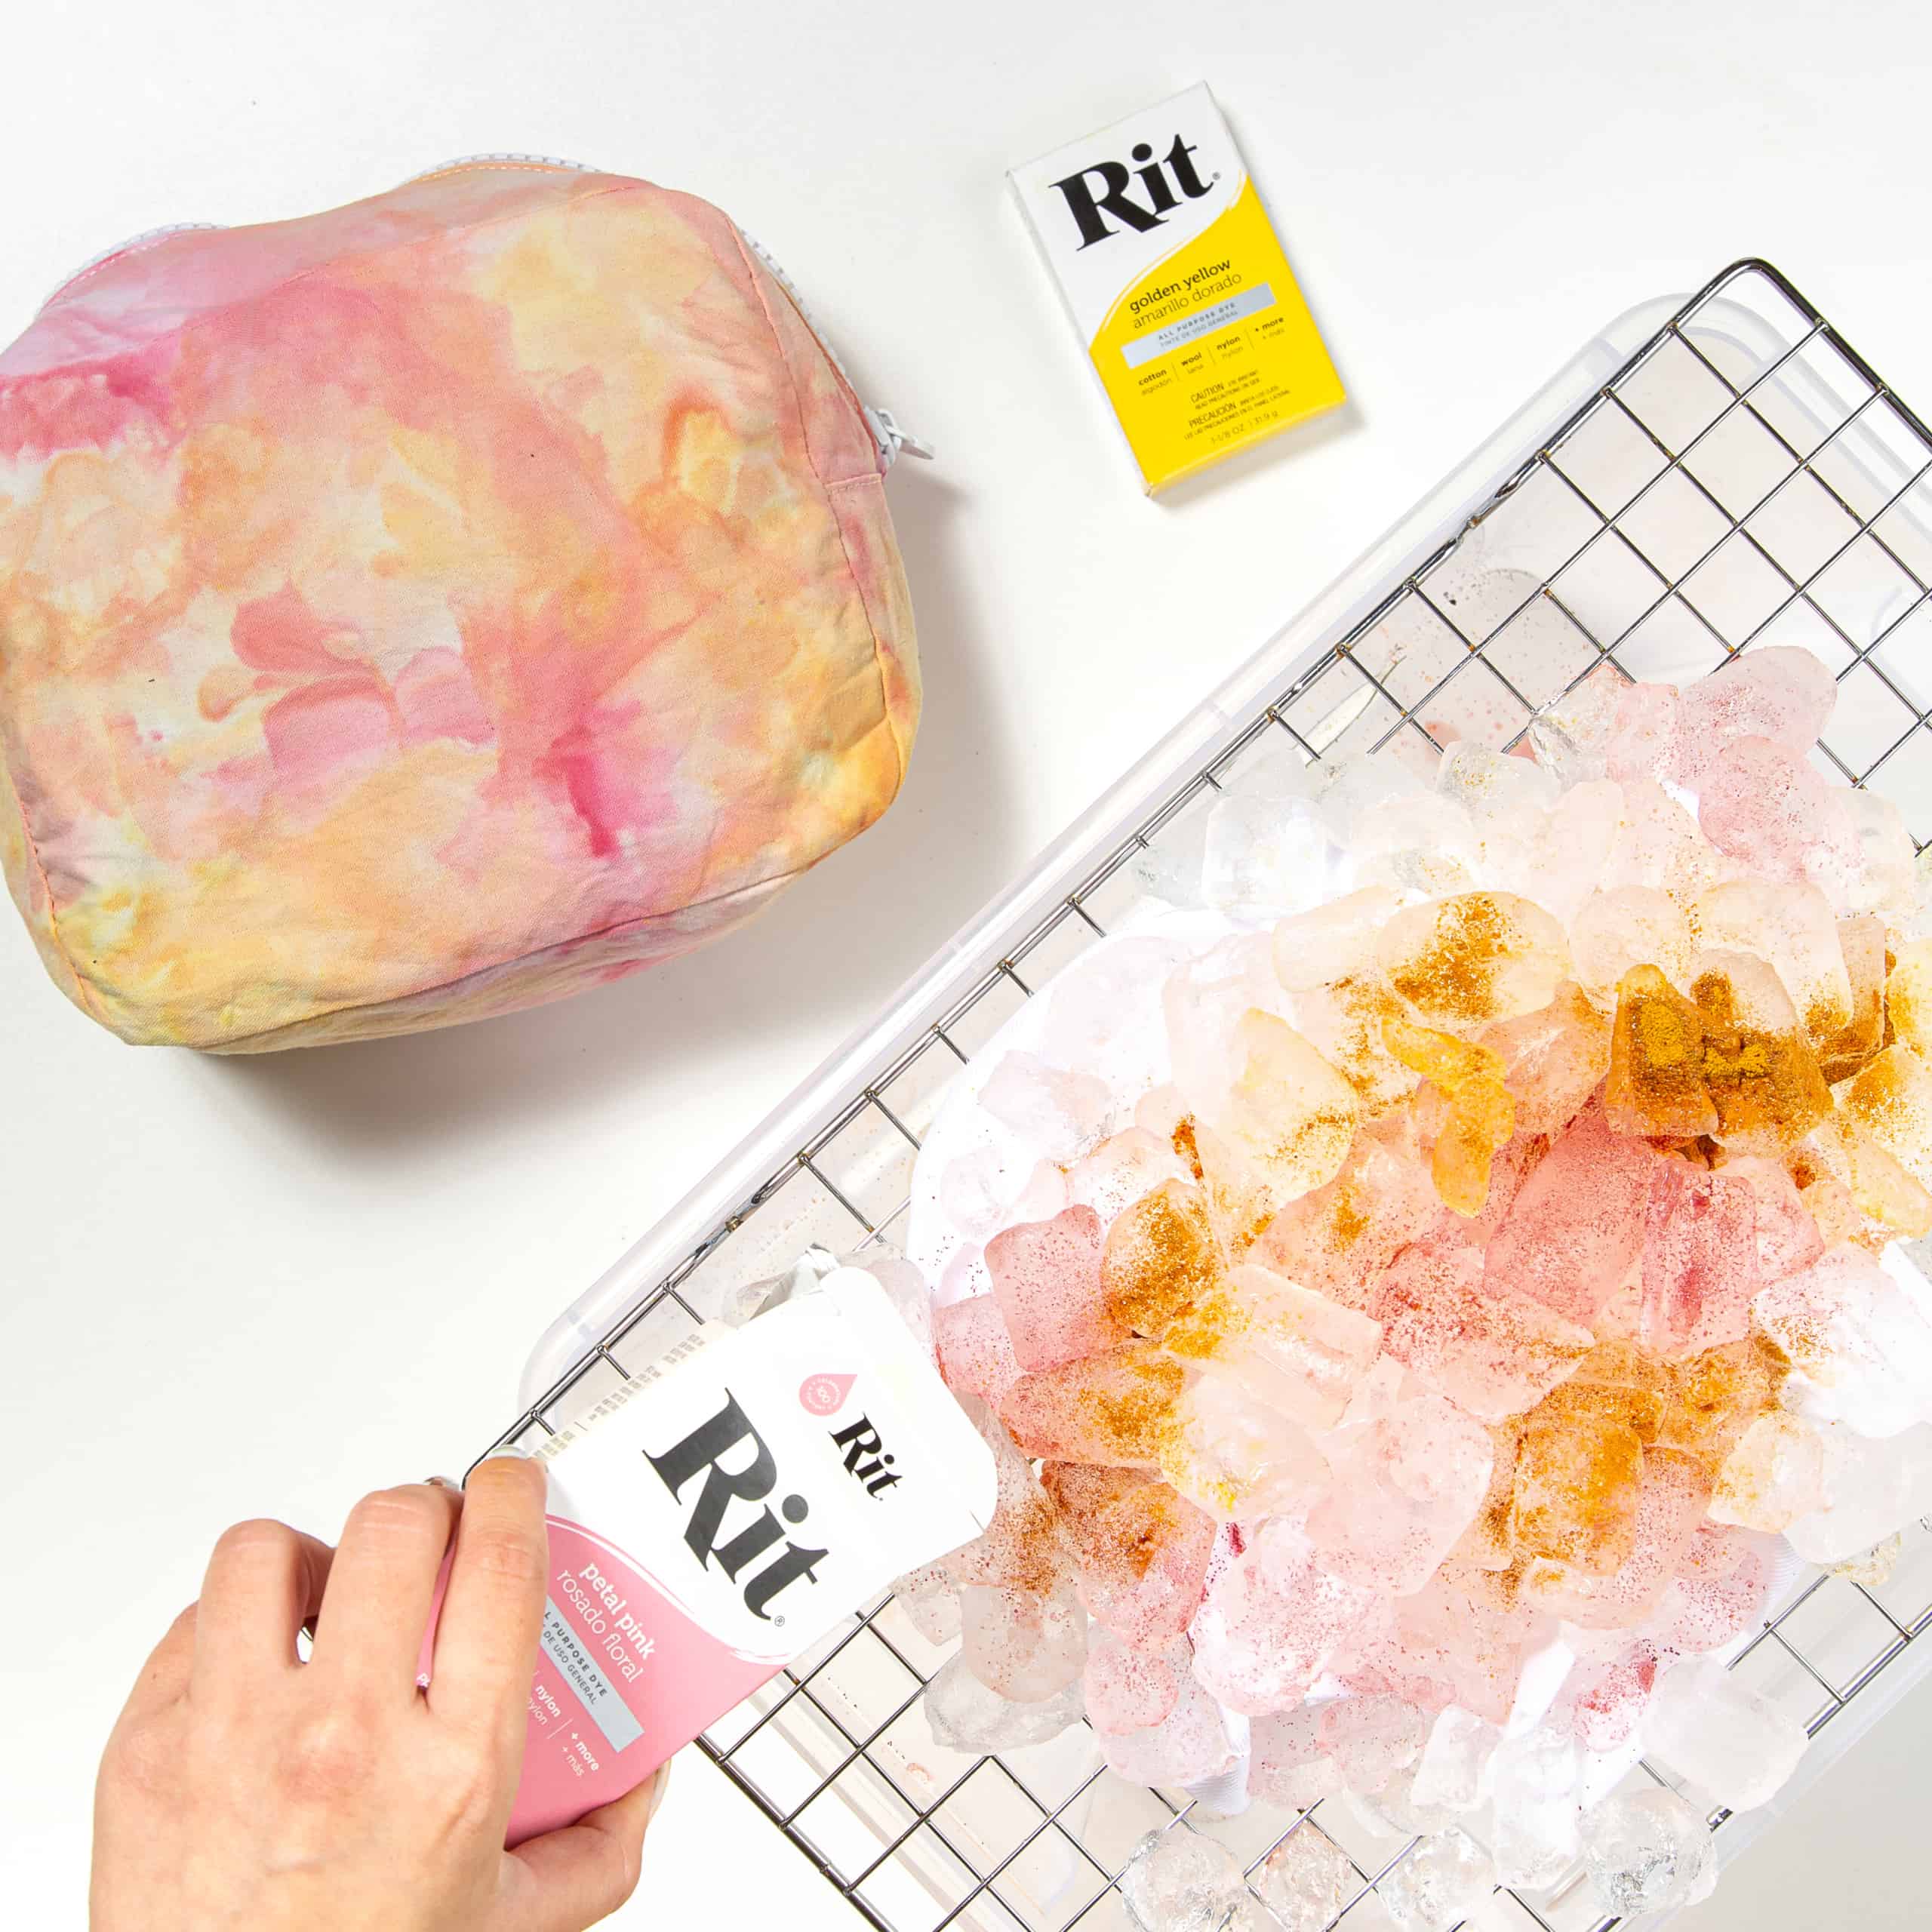
- Open dye packages and sprinkle dye onto the ice. Keep in mind that more powder will yield darker results. For more white space, sprinkle dye on as you might sprinkle salt on food. Use very little dye. You will probably think you aren’t using enough, but you are!
- Let the ice melt completely through the fabric.
- To set the dye, do the following while fabric is still wet:
- Optional: Apply Rit ColorStay Dye Fixative with a spray bottle, which will enhance the colors and reduce bleeding. Mix 2 tablespoons of well-shaken ColorStay Dye Fixative with water and spray liberally to both sides of the fabric.
- Rinse fabric in hot water, then cold until rinse water begins to run clear. This is very important to prevent unabsorbed dye from bleeding into any white areas. If possible, rinse the fabric flat to prevent unabsorbed dye from running into your white areas.
- Wash in cold water with a mild detergent, rinse and dry.

Dip Dyed Pouch
- Pre-wash pouch in warm, soapy water. This helps to remove any finishes that may interfere with dye absorption.
- Gather supplies
- Fill two separate plastic or stainless steel containers with 1.5 gallons of hot water in each. The water should ideally be 140ºF. If tap water is not hot enough, heat water on the stove and add to the dyebath.
- To enhance the color, add one cup of salt to each dyebath. Add 1 teaspoon of dish detergent to help promote level dyeing.
- Wearing rubber gloves, add 1 package of Golden Yellow dye to one container and 1 package of Petal Pink dye to the other container. Stir well.
- Wet pouch.
- Dip half of the pouch into the Petal Pink dyebath. To prevent a straight line, keep moving pouch up and down in the dyebath to create a gradient. Pouch can remain in the dye bath for 5 minutes.
- Remove, squeeze out excess dye and rinse in cool water until the water runs clear.
- Turn the pouch over and dip the other half of the pouch into the Golden Yellow dyebath, following the same steps above.
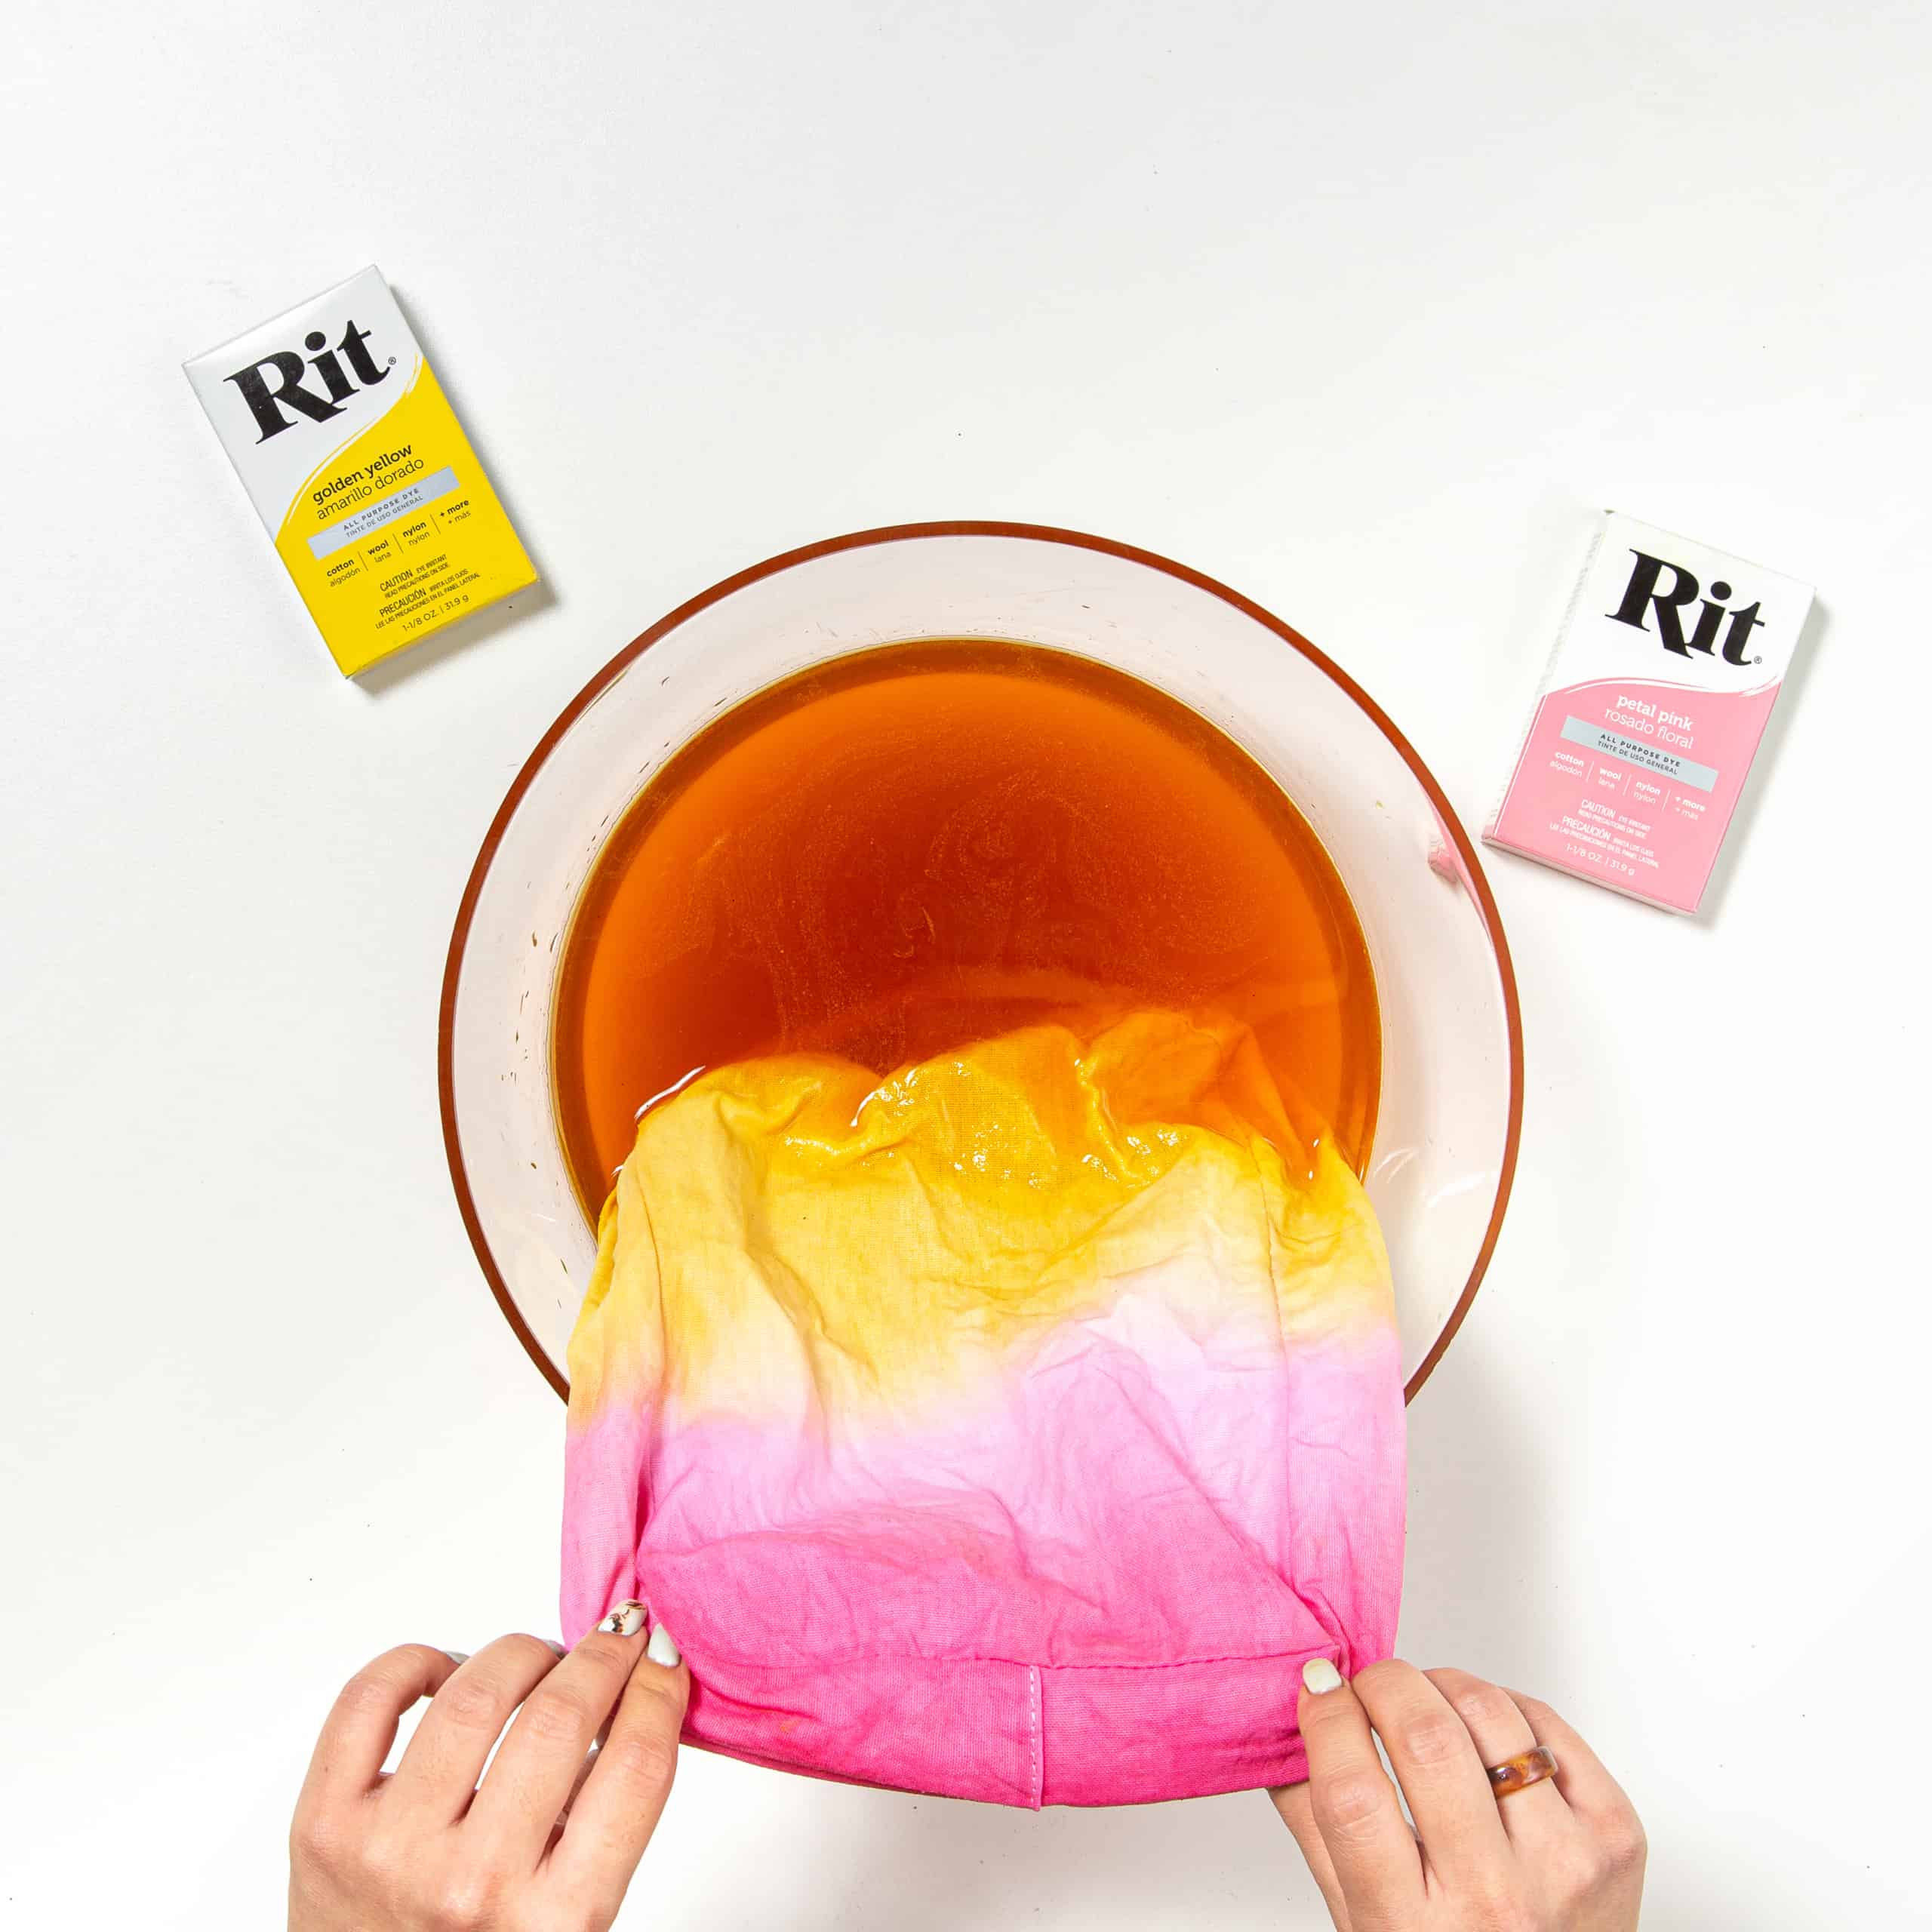
- Remove pouch from the dyebath. Squeeze out excess dye.
- We strongly recommend using Rit ColorStay Dye Fixative immediately after dyeing and before washing. It enhances the color, increases color retention and prevents dye from bleeding into white areas. Follow these instructions.
- Rinse in cool water until rinse water begins to run clear.
- Wash in cold water with a mild detergent, rinse and dry.

Posts You May Like
