
Supplies
- Rit All-Purpose Dye in Black
- Rit ColorStay Dye Fixative
- Cotton Canvas Fabric, 36”x40”
- Wooden Dowel 50”
- Cord for Hanging
- Rubber Bands
- Zip Tie (optional)
- Fabric Chalk
- Squeeze Bottle
- Measuring Cup and Spoon
- Paper Towels
- Plastic Wrap
- Gloves
- Baking Rack
- Plastic Table Cover
Time
Total: {{ partial.t23F.total }}
Difficulty
Intermediate Total: {{ partial.tEKP.total }}
Instructions
- Cover work area with plastic table cover and gather supplies.
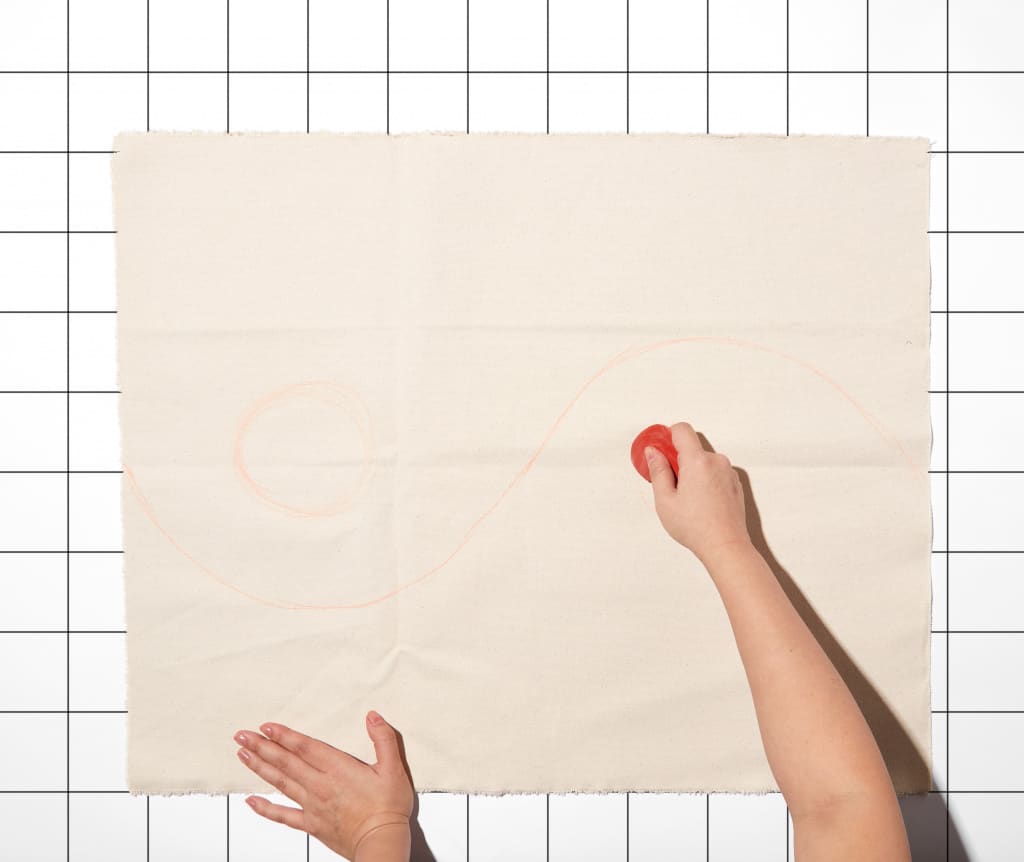
- Lay Cotton Canvas flat on work area and roughly sketch yin and yang design with fabric chalk as shown.
- Pinch the center of one circle and secure with rubber band around the chalk mark. Repeat for second circle.
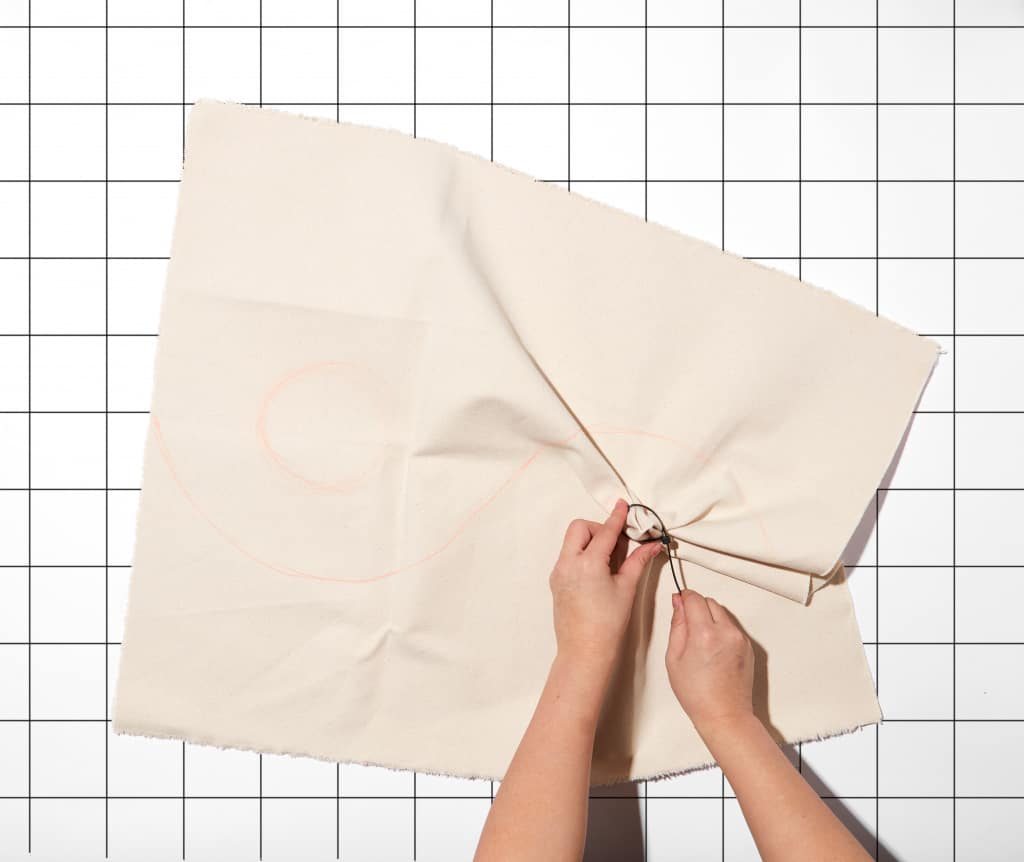
- Following the center line, begin pleating from one end to the other. Make sure the chalk line is straight when gathered. Secure with zip tie or rubber band.
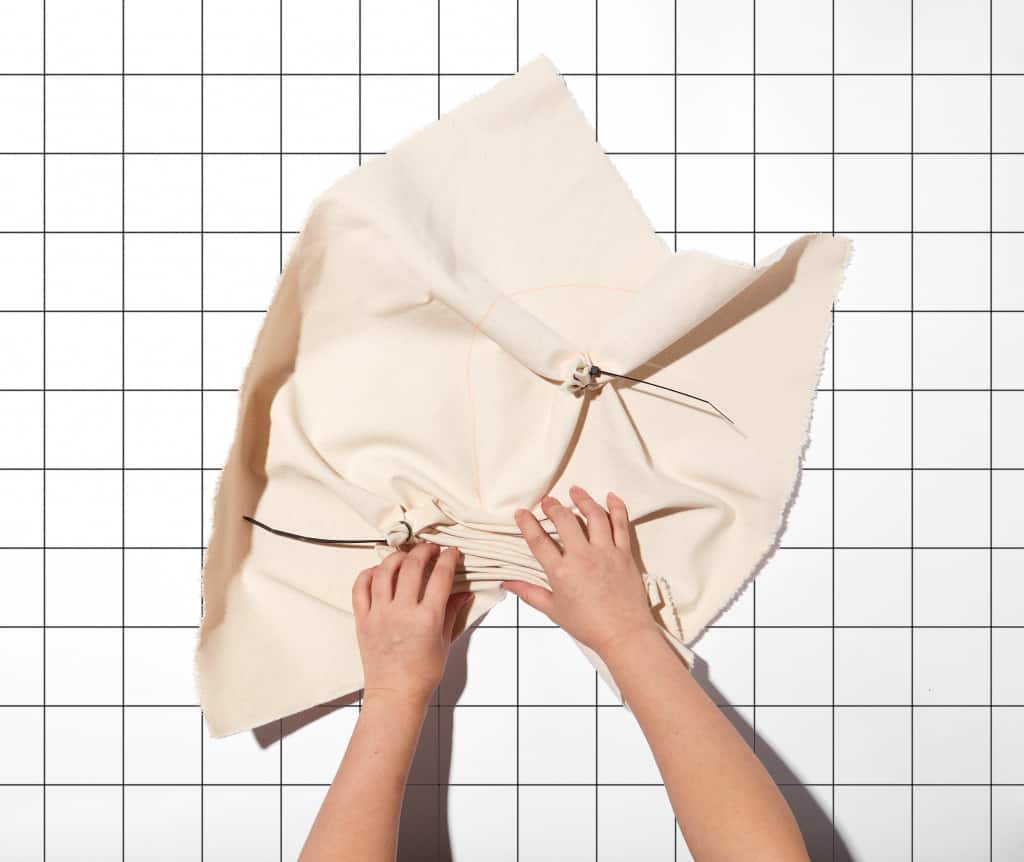
- Cover the entire left side of bound fabric, except for the gathered circle, with plastic wrap. This prevents the dye from bleeding into the rest of the fabric and only dyes the exposed areas.
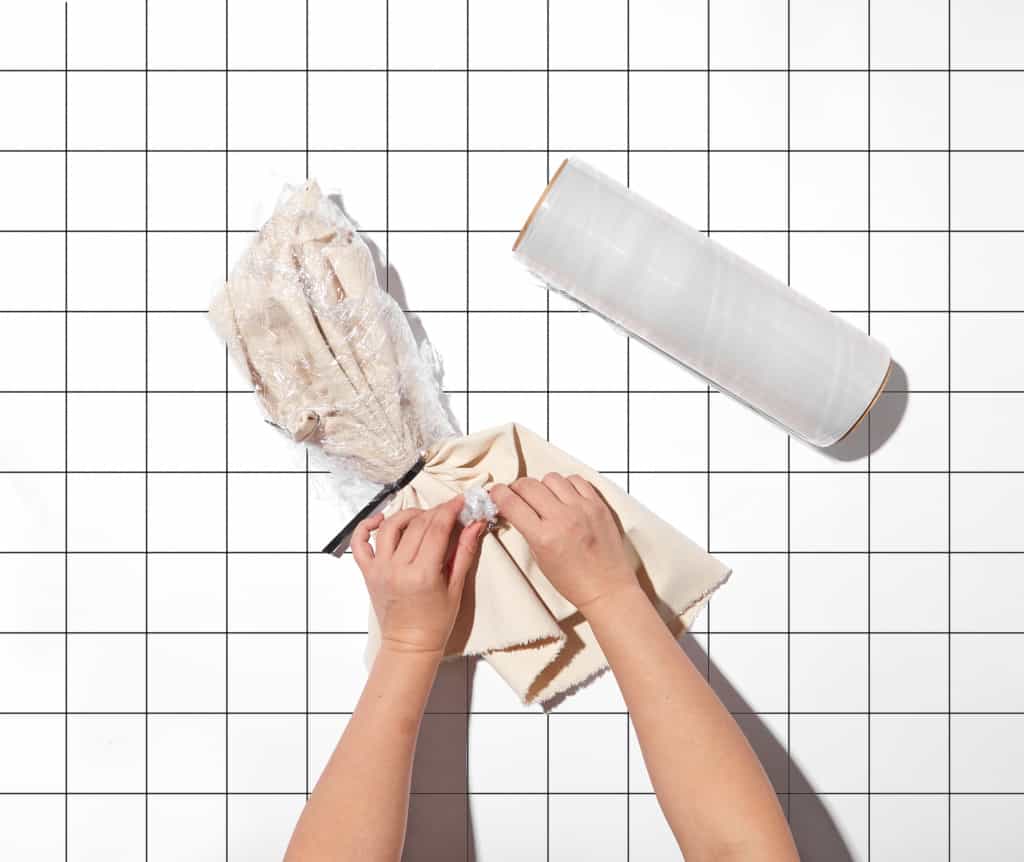
- On the right side of the fabric, cover the gathered circle with plastic wrap and secure with rubber bands. Set aside.
- To create dyebath, fill a plastic container with two gallons of hot water. The water should ideally be 140ºF. If tap water is not hot enough, heat water on the stove and add to the dyebath.
- To enhance the saturation, add one cup of salt when dyeing fabrics containing cotton, rayon, ramie or linen.
- Add 1 tsp of dish detergent to help promote level dyeing.
- Wearing gloves, add ½ cup of well-shaken Black dye to dyebath.
- Add right side of bound fabric from Step 6 into dyebath. For a high contrast pattern, keep the pot cover in the dyebath for 3-5 minutes. For more color and less white areas, leave the pot cover set in the dyebath for 10-20 minutes.
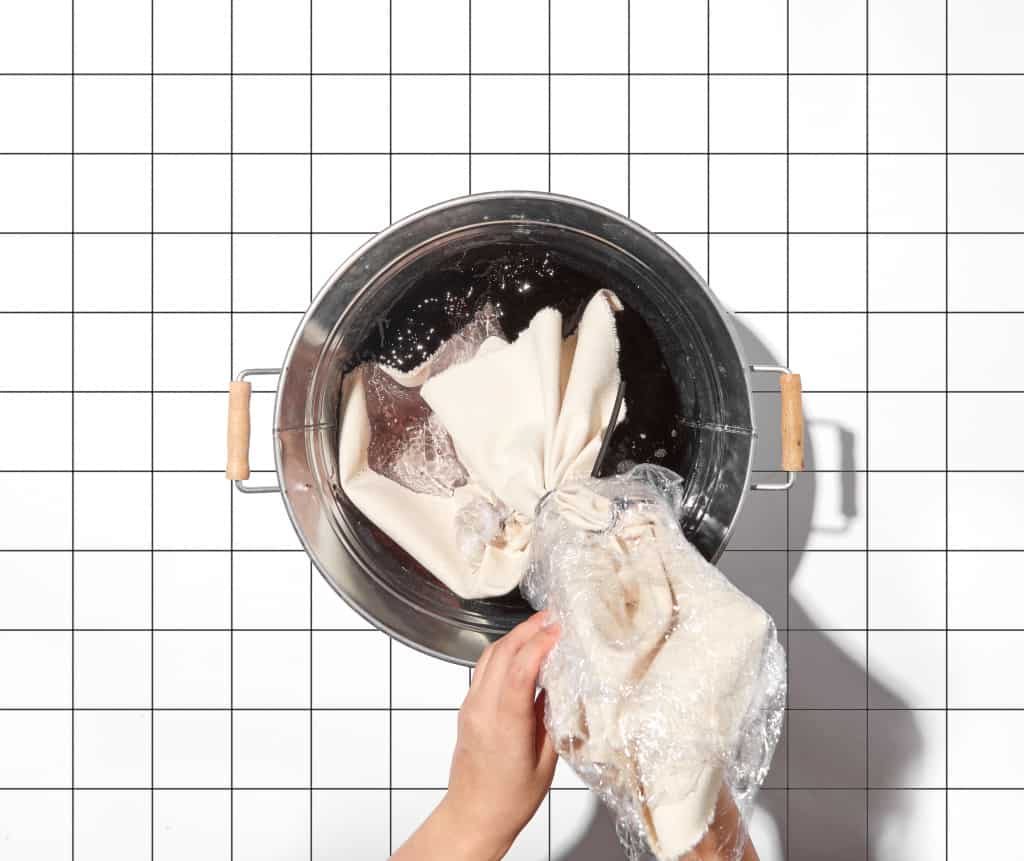
- Pour dye from dyebath into squeeze bottle and carefully apply it onto the gathered circle on the left side. Be careful not to get any dye into the plastic-wrapped areas.
- When desired color is achieved, remove bound fabric from the dyebath. Do not remove rubber bands.
- We strongly recommend using Rit ColorStay Dye Fixative immediately after dyeing and before washing. It enhances the color, increases color retention and prevents dye from bleeding into white areas.
- Fill a plastic container or stainless steel sink with hot tap water. Pour ½ cup of well-shaken Rit ColorStay Dye Fixative into container or sink. Mix well.
- Add bound fabric to bath. Placing unbound fabric into the dyebath could result in dye bleeding into white areas.
- Stir slowly and continuously on and off for 20 minutes.
- Rinse in cool water until rinse water begins to run clear.
- Carefully remove rubber bands and unbind the fabric.
- Wash in warm water with mild detergent, rinse and dry.
- Once dry, fold top hem towards the backside of fabric 2”. Press and stich in place.
- Place wooden dowel through pocket and tie cord on either end of dowel to hang.


Posts You May Like
