
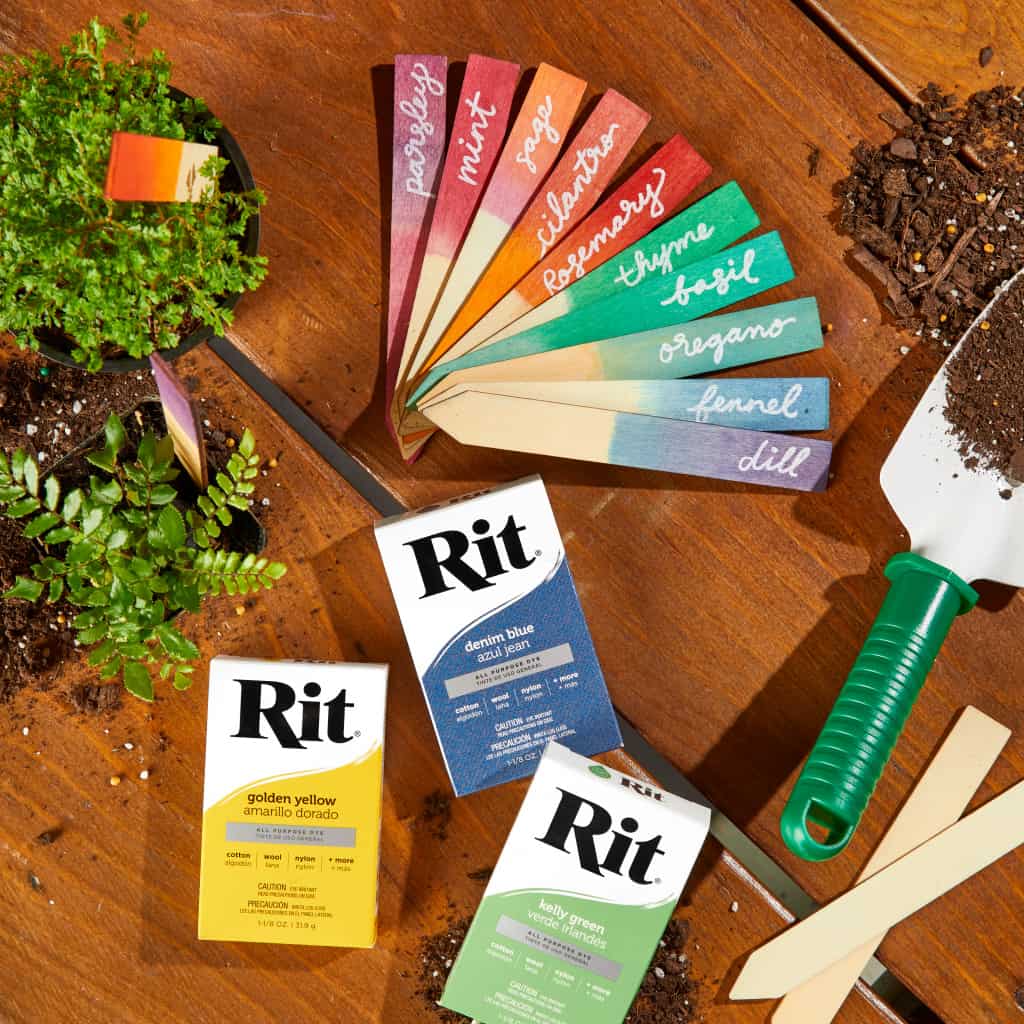
Supplies
- Rit All-Purpose Dye in desired colors
- Unfinished Wood Garden Markers or Popsicle Sticks
- Cups or Jars for Dyeing
- Measuring Cup and Spoon
- Paper Towels
- Plastic Gloves
- Baking Rack
- Plastic Table Cover
- Embossing Pen
- White Embossing Powder
- Heat Gun
Time
Total: {{ partial.tWYE.total }}
Difficulty
Beginner Total: {{ partial.t2W5.total }}
Instructions
- Cover work area with plastic table cover and gather supplies.
- Wet wooden garden markers or popsicle sticks with water and dry off with paper towels. Set aside one wooden garden marker to use as a swatch test later on.
- Choose your Rit All-Purpose Dye colors and create small 1 cup dyebaths using hot tap water.
- Using the garden marker set aside in Step 2, test the colors. If the color is too dark, add water to the dye. If the color is too light, add more dye.
- To dip dye, place damp wooden garden marker from Step 1 halfway into the dyebath while wearing gloves. Allow the wood to absorb the dye until desired look is achieved.
- For an ombre effect, dip the other end of the wooden garden marker into a complementary color. Allow the wood to absorb the dye until desired look is achieved.
- Repeat to create an entire set.
- Place dyed garden markers on a rack and let dry.
- Once dry, use embossing pen to label each garden marker.
- Carefully apply white embossing powder and shake off any excess.
- Set the embossing powder using the heat gun.
- Repeat for each garden marker.

Posts You May Like
