
Supplies
- Rit Color Remover
- Rit All-Purpose Liquid Dyes
- Black 100% Cotton Sweatshirt
- Stainless Steel Pot for Dyeing
- Tongs
- Rubber Bands
- Squeeze Bottles
- Plastic Gloves
- Paper Towels
- Plastic Table Cover
- Measuring Spoon
- Salt
Time
Total: {{ partial.tZNJ.total }}
Difficulty
Beginner Total: {{ partial.tPNZ.total }}
Instructions
- Pre-wash item in warm, soapy water and leave damp.
- Explore our immersion techniques page to pinch, pleat, fold or tie fabric to create resist as desired. We used the swirl method. Once complete, set aside.
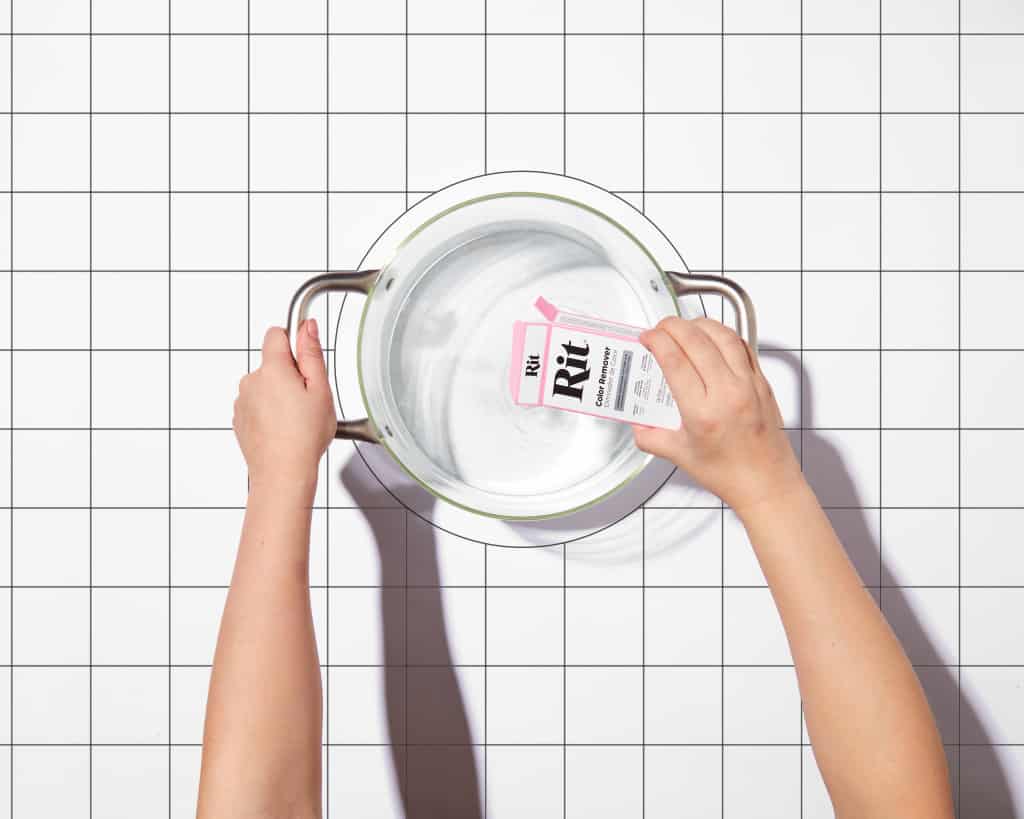
- Fill a stainless steel pot with enough water for the fabric to move freely. Cover pot and heat water on stove top to just below boiling (or around 200ºF).
- When water begins to simmer, add one packet of Color Remover. Mix well.
- Keep temperature at a low simmer.
- Add bound item from Step 2 to the simmering bath. To create the swirl look as shown, dip half of the bound fabric into the bath.
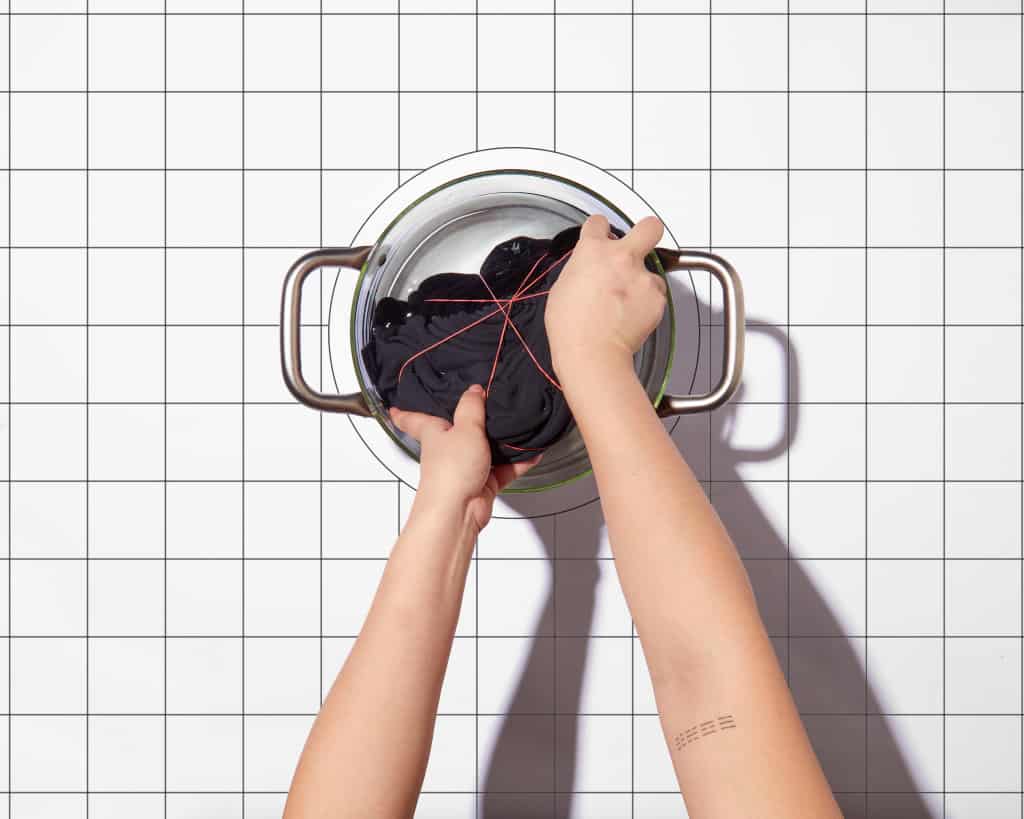
- Stir occasionally. Some fabrics will lose their color in as fast as 10 minutes, others can take up to 20 minutes. Once your garment turns white or off-white, you can remove it from the bath.

- Wash in warm water with mild detergent and leave damp.
- Once the color is removed, your item is now ready to be dyed.
- Prepare squeeze bottles with 2 tablespoons of well-shaken liquid dye or 1/2 teaspoon of powdered dye with two cups of hot tap water and 1 tablespoon of salt.
- Twist and secure your item back to the best of your ability and apply dyes in sections as desired.
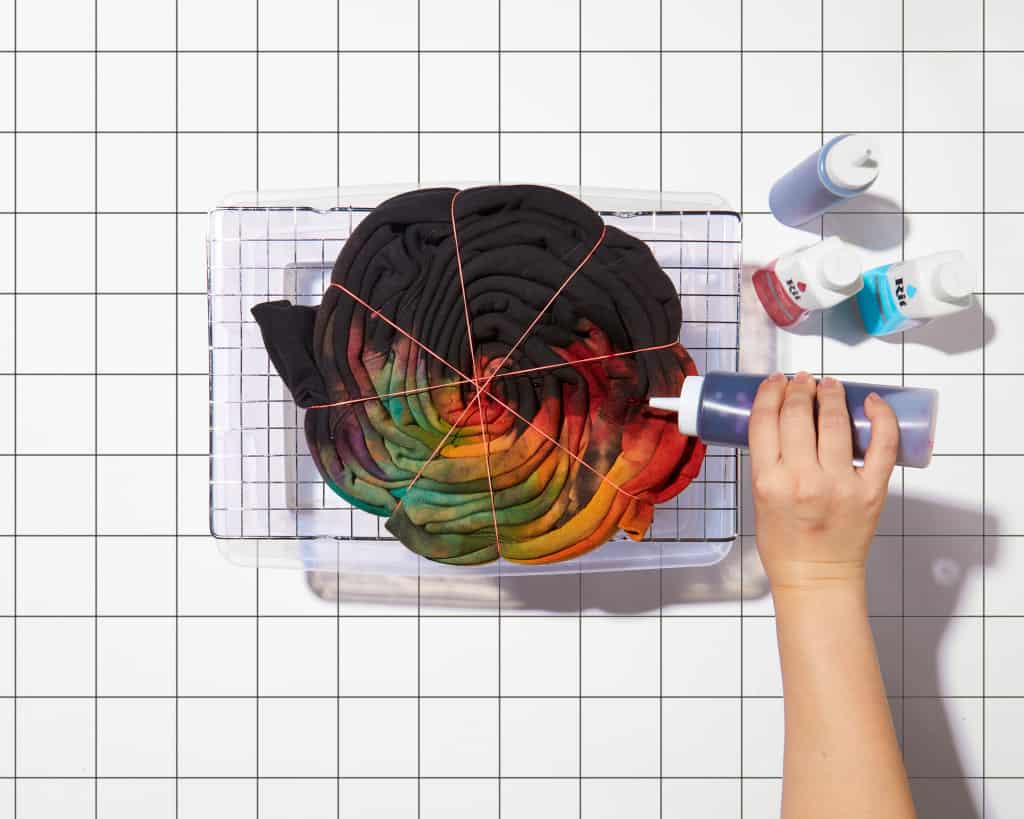
- Let the fabric sit for 30 minutes to allow the dye to absorb.
- To set the dye, do the following while the fabric is still tied up:
- Optional: To set the dye, apply Rit ColorStay Dye Fixative with a squeeze bottle, which will enhance the colors and reduce bleeding. Mix 2 tablespoons of well-shaken ColorStay Dye Fixative with water and apply liberally to both sides of the fabric.
- We strongly recommend using your microwave, as long as the fabric does not have any metal parts on it. After applying ColorStay Dye Fixative, wrap the fabric in plastic wrap and seal the edges. Place the wrapped fabric on a paper towel in the microwave and heat for 2 minutes. Plastic will puff up, creating a heat chamber that helps bond the dye with the fabric. Once the microwave is done, remove the fabric and open the plastic, letting it cool down.
- If a microwave is not available or feasible to use and it is a hot sunny day, lay the wrapped fabric out in the sun for an hour.
- Rinse in cool water until rinse water begins to run clear.
- Carefully remove rubber bands with a scissors and unfold the fabric.

- Wash in cold water with a mild detergent, rinse and dry.


Posts You May Like
