
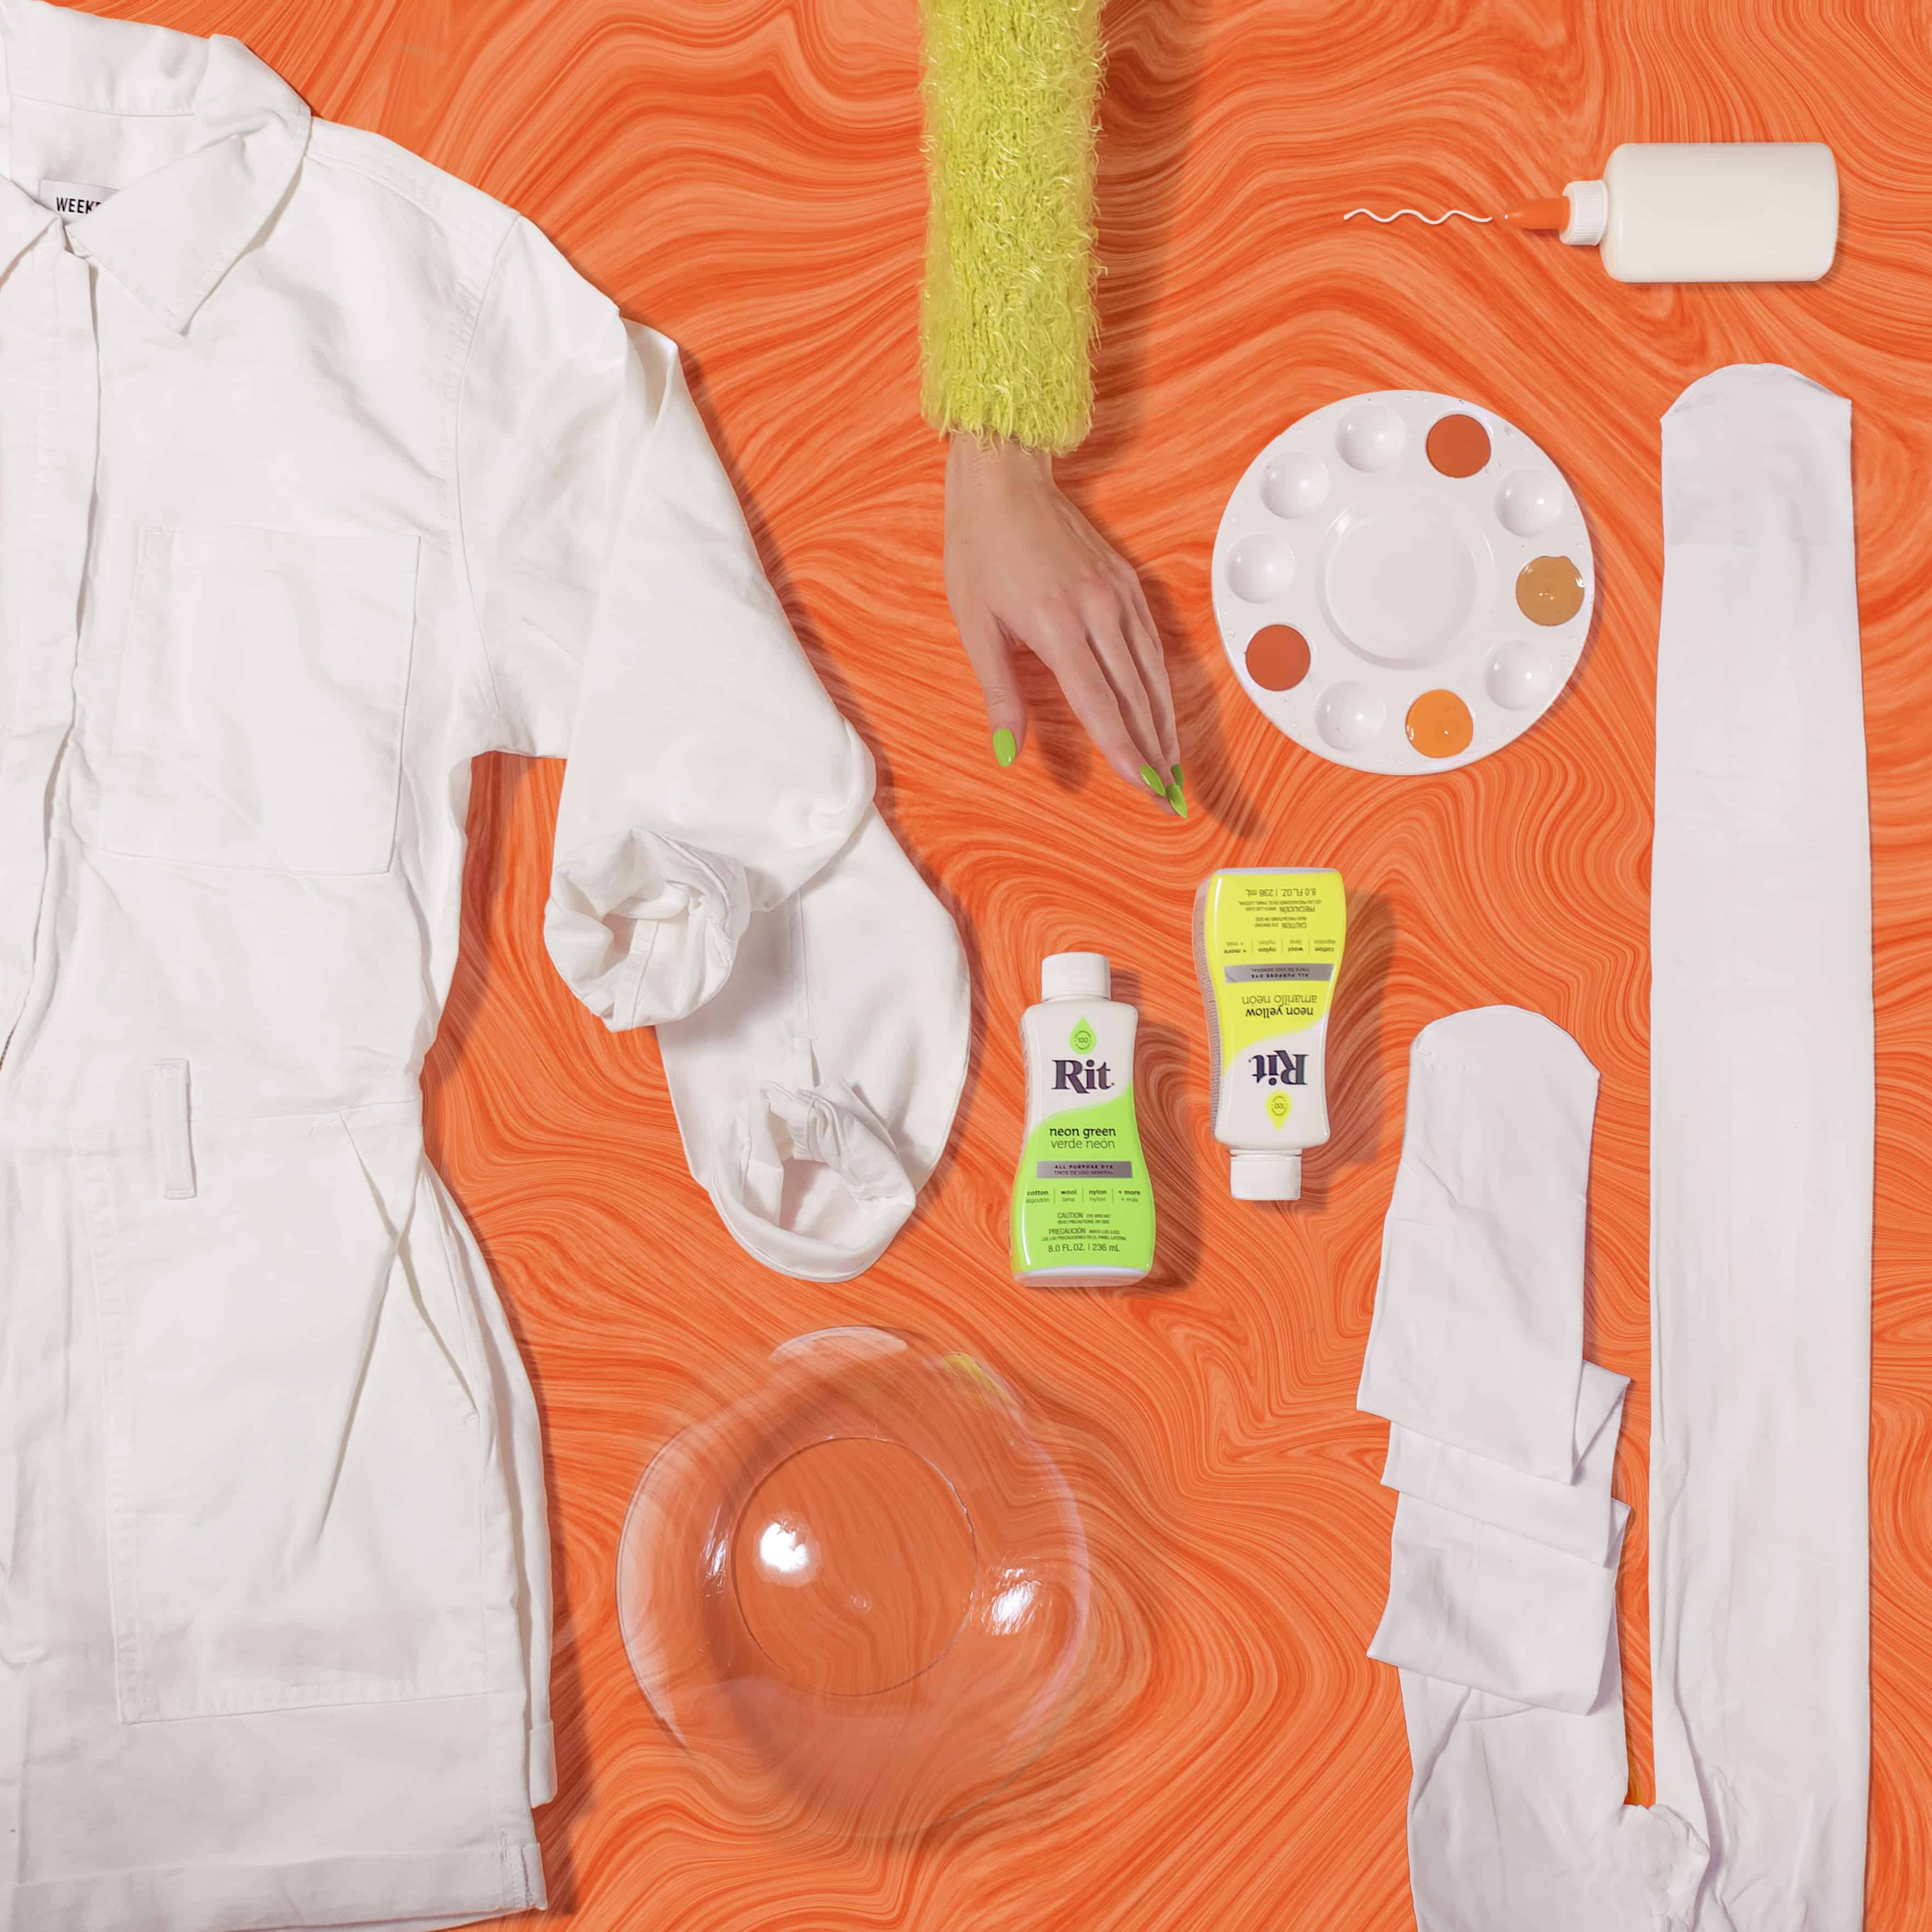
Supplies
- Rit All-Purpose Liquid Dye: Neon Yellow and Neon Green
- Rit ColorStay Dye Fixative
- White Romper
- White Tights
- Large Container for Dyeing
- Measuring Cup
- Metal Stirring Spoon
- Salt
- Liquid Dish Detergent
- Rubber Gloves
- Paper Towels
- Mild Detergent
- Scrap/Recycled Paper (For the UFO Hat)
- (2) 20” x 30” Cardboard Sheets (For the UFO Hat)
- Clear Acrylic Globe (For the UFO Hat)
- Pencil (For the UFO Hat)
- Ruler (For the UFO Hat)
- Hot Glue Gun + Glue (For the UFO Hat)
- White Craft Glue (For the UFO Hat)
- Sponge Brush (For the UFO Hat)
- Box Cutter or Sharp Scissors (For the UFO Hat)
- Silver Spray Paint (For the UFO Hat)
- Miniature Holiday Ball Ornaments (For the UFO Hat)
- Electrical Tape (Optional)
- Fabric Paint (Optional)
Time
2 Hours Total: {{ partial.tLU7.total }}
Difficulty
Beginner Total: {{ partial.t5RG.total }}
Instructions
Directions for Dyeing Romper + Tights:
- Cover table with plastic. Gather supplies.
- Pre-wash romper and tights and leave wet.
- To prepare dyebath: Fill large dye container with 3 gallons very hot tap water (around 140F). If water is not hot enough, heat some water in a cook pot or teapot and add to the dyebath. Shake dye bottle before measuring. Wearing rubber gloves, add ¾ cup Rit All-Purpose Dye in Neon Yellow plus ¼ cup Neon Green to water. Stir well.
- For cotton fabrics, add 1 cup of salt to the dyebath. This helps to intensify the color. Then add a squirt of liquid dish detergent. Stir well.
- Test dye color by dipping a paper towel in the dyebath. If color is too light, add more dye; if color is too dark, add more water.
- Submerge the romper and tights into the dyebath.
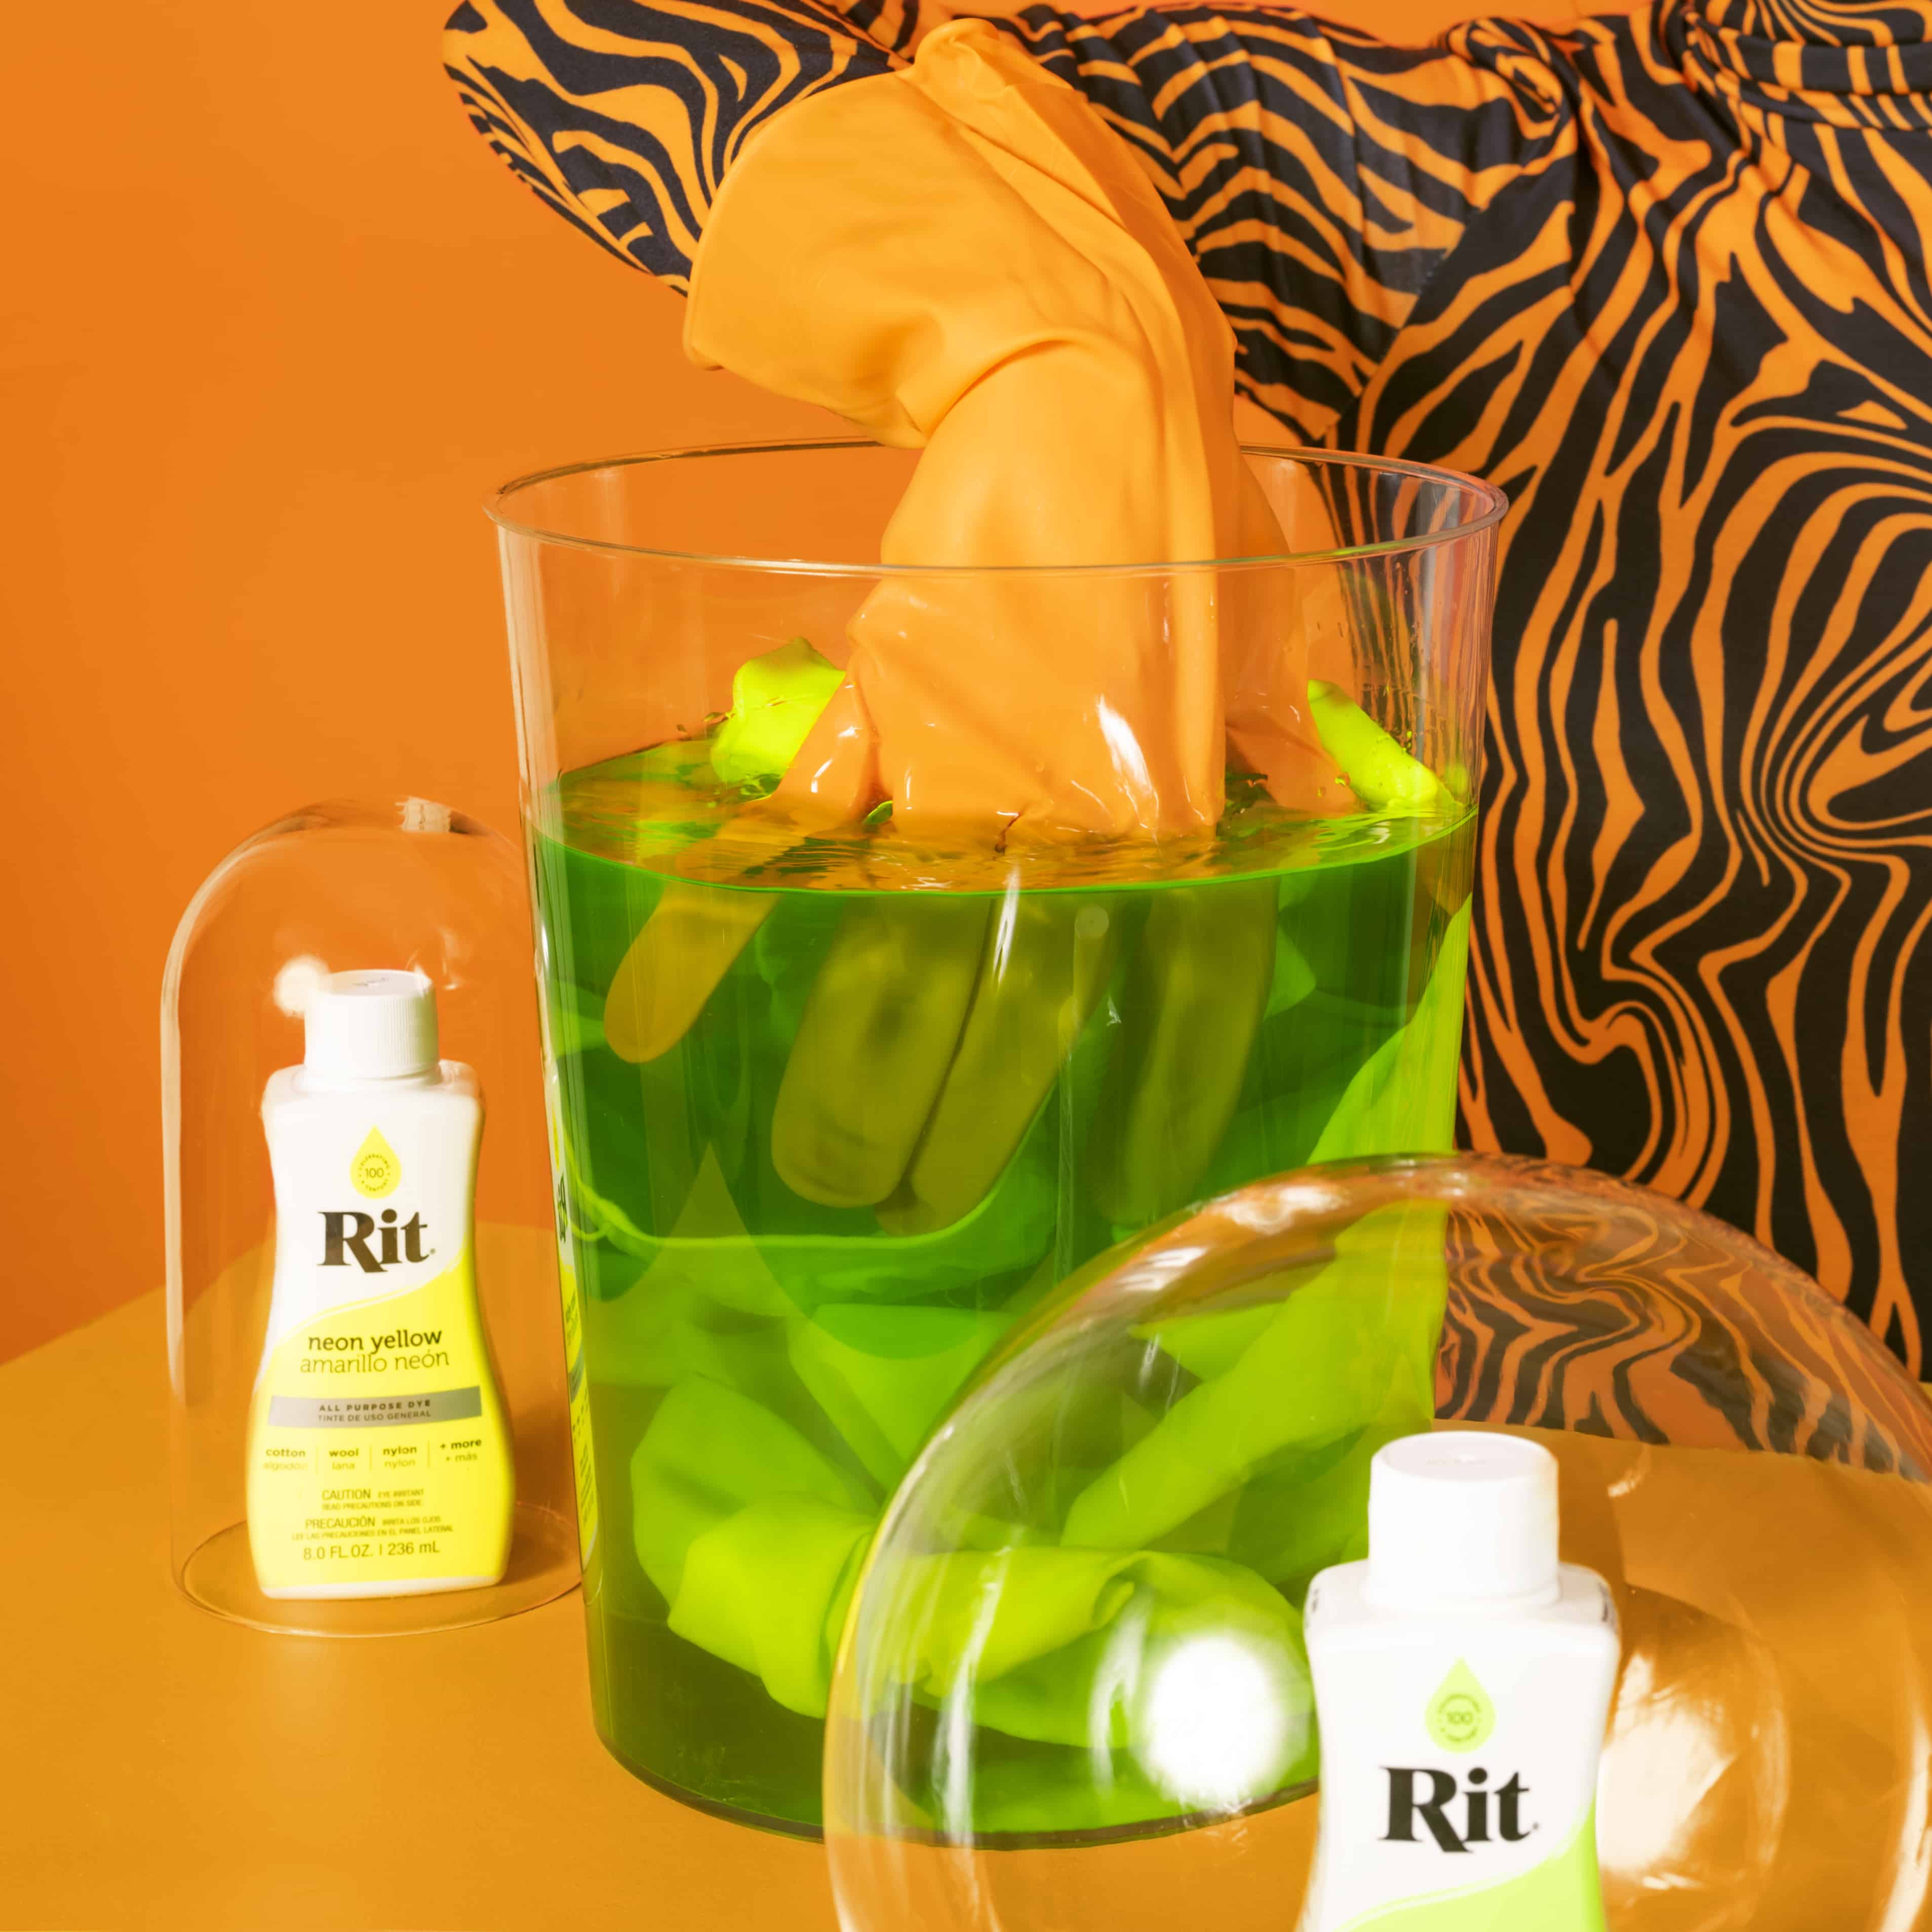
- To agitate, stir the clothing loosely with a spoon, allowing the dye to move freely through the fabric.
- When the desired color is achieved, remove items from the dyebath (about 45 min). Color will appear lighter when dry.
- Recommended: To enhance the color and reduce color bleeding, use Rit ColorStay Dye Fixative immediately after dyeing and before washing, following package instructions.
- Rinse romper and tights in cool water until rinse water begins to run clear.
- Wash in warm water with mild detergent, rinse and dry.
- Using electrical tape, tape off an angled line on the romper starting at the neckline and ending under the arm. Repeat for the other side.
- You can either dye the arms with our Black All-Purpose Dye, following the instructions above. Or, with a sponge brush, apply fabric paint in a contrasting shade. Wait 24 to dry before wearing.


Directions for UFO Hat:
- Using a ruler and pencil like a compass, draw one 19” – 19.5” circle on each of the cardboard sheets (2 circles total).
- Carefully cut out the circles using a box cutter (or sharp scissors).
- In the center of each circle, draw a circle for the width of your head (using a hat you already own is a good way to get the measurement!).
- Cut out the interior circles, making two donut shapes.
- Hot glue the two cardboard circles together, one stacked on the other. This will be the base for the UFO hat, so the double cardboard ensures the brim stays stiff and doesn’t flop.
- With the remaining scraps of cardboard, cut a 26” inch long by 3” inch wide strip of cardboard and score it by lightly using the blade of the box cutter. Apply enough pressure to break through the surface, but be careful not to slice all the way through the cardboard. Scoring allows the strip to be bent into a smooth circle without uneven creases and folds.
- Form the scored cardboard into a circle and hot glue the edge to the hat base around the interior hole. It should look like a sunhat without a top.
- Cut and score another 26” strip of cardboard, this time with a 1.5” width.
- Form a circle from the second strip and hot glue it to the underside of the hat, directly opposite the first one.
- In a small bowl mix one part white craft glue with one part warm water to create a paper mache paste.
- Start forming the shape of the UFO with paper mache, dipping the recycled paper strips into the paste mixture until fully coated (but not dripping wet) and draping them from the ridge of the hat top and wrapping around the brim. Slightly overlap each strip and make sure to smooth any seams and bubbles as you go.
- Apply two layers of paper mache on the top side of the hat, and one or two on the bottom side. Allow each layer to dry between layers (time varies based on humidity/environment, but with a fan pointed toward the project it can take about 2 – 5 hours).
- Once the paper mache is fully dry, spray the entire hat with silver spray paint. Apply a second coat if needed.
- On the top of the hat, hot glue the acrylic globe to the hat, with the opening of the globe facing down into the hole.
- Using the box cutter, cut small X’s evenly spaced along the outer rim of the top of the hat, just wide enough to insert the necks of the holiday ornaments into.
- Remove the caps from the ornaments and pop the necks into the X’s. They should be snug enough that they don’t need to be glued, but you can add a drop of hot glue if desired.
Posts You May Like
