
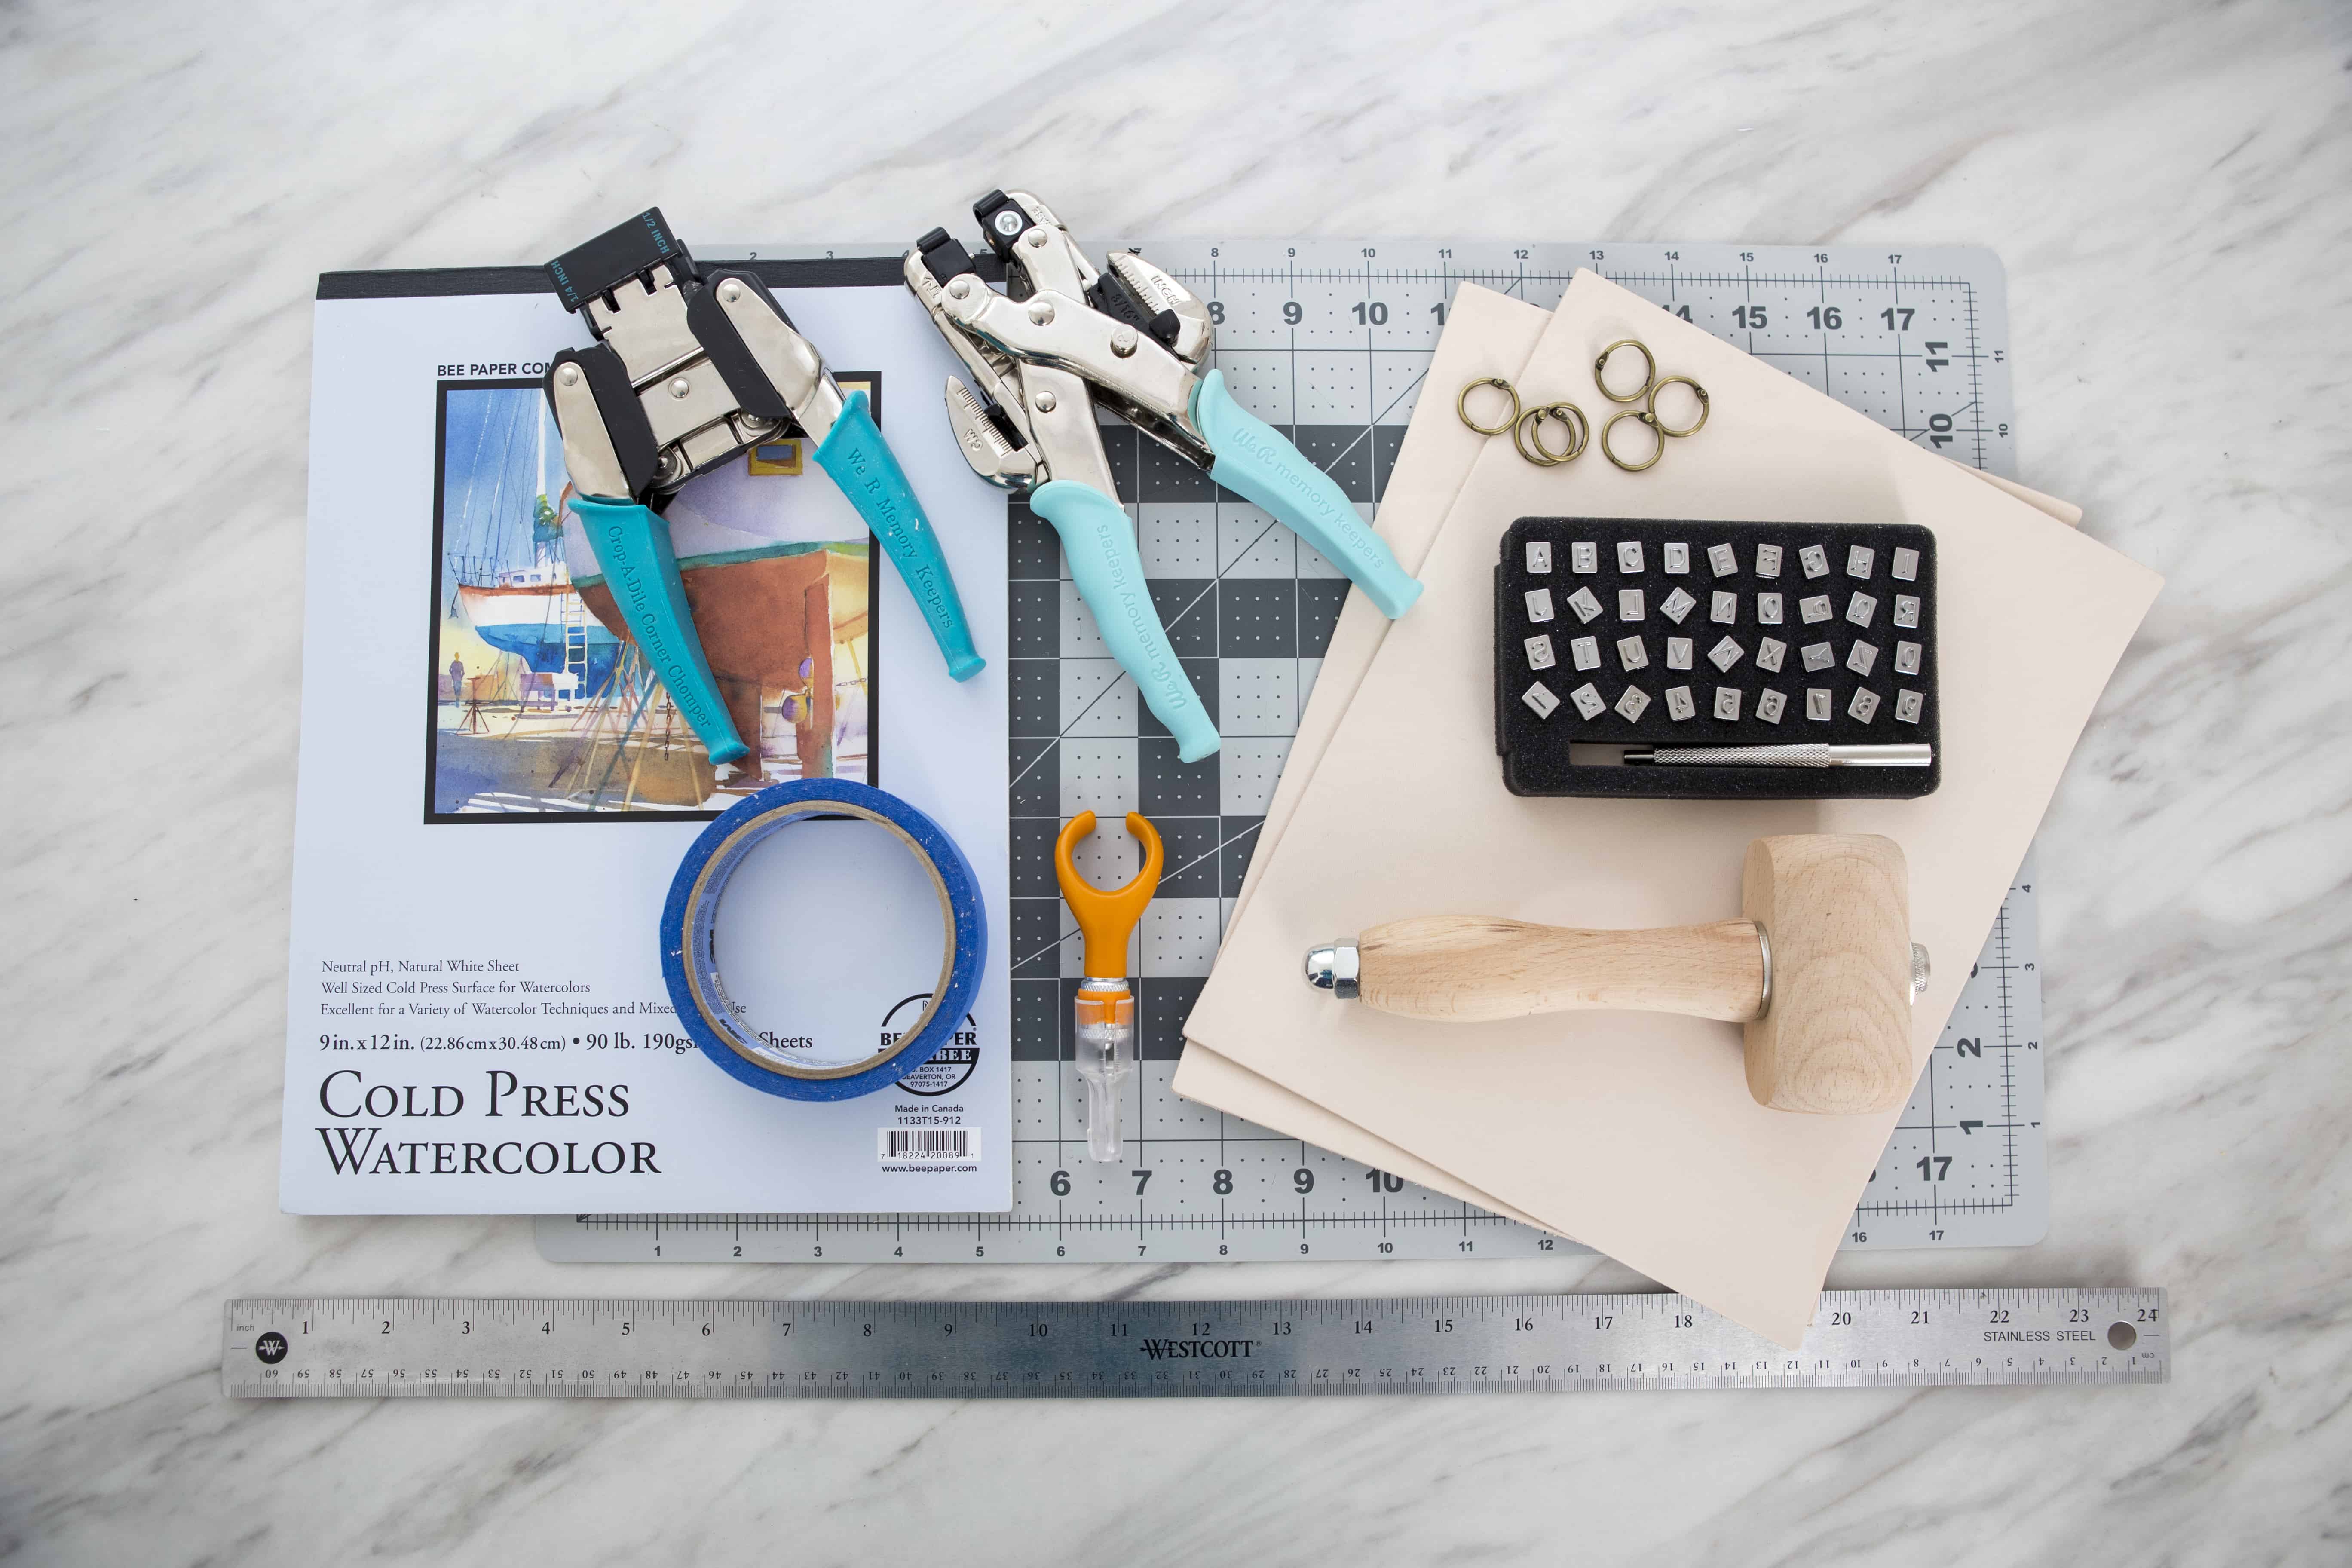
Supplies
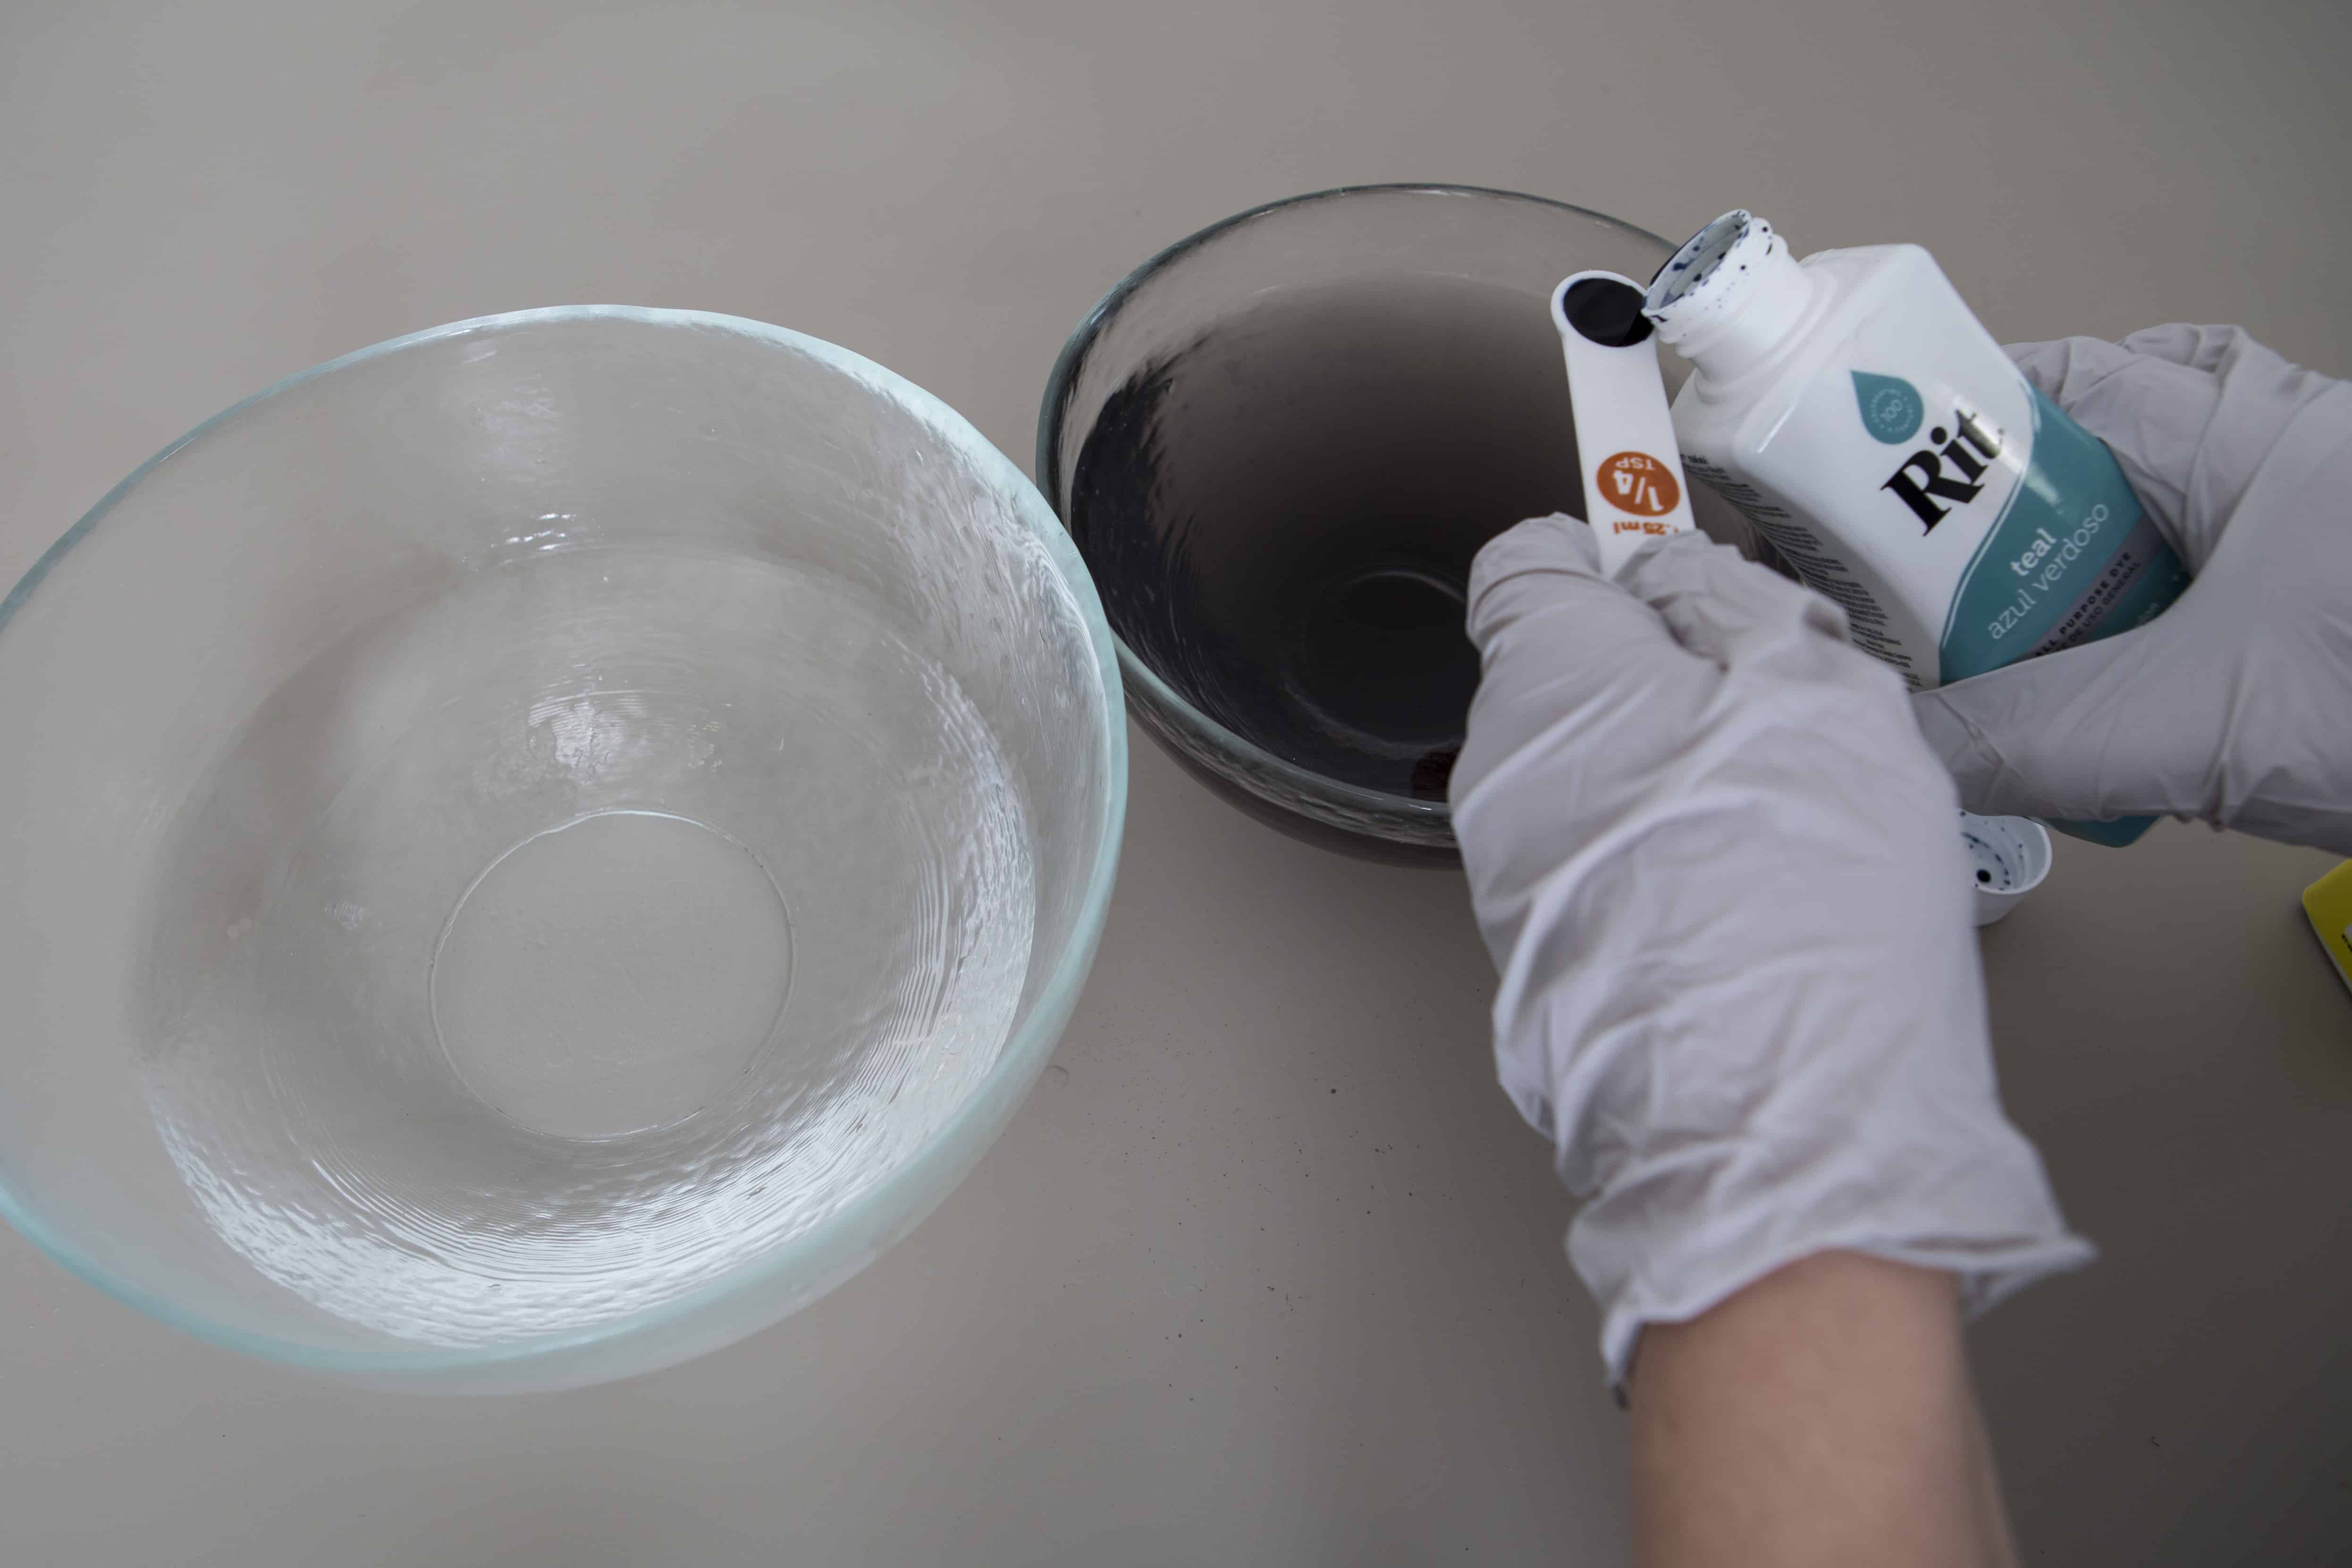
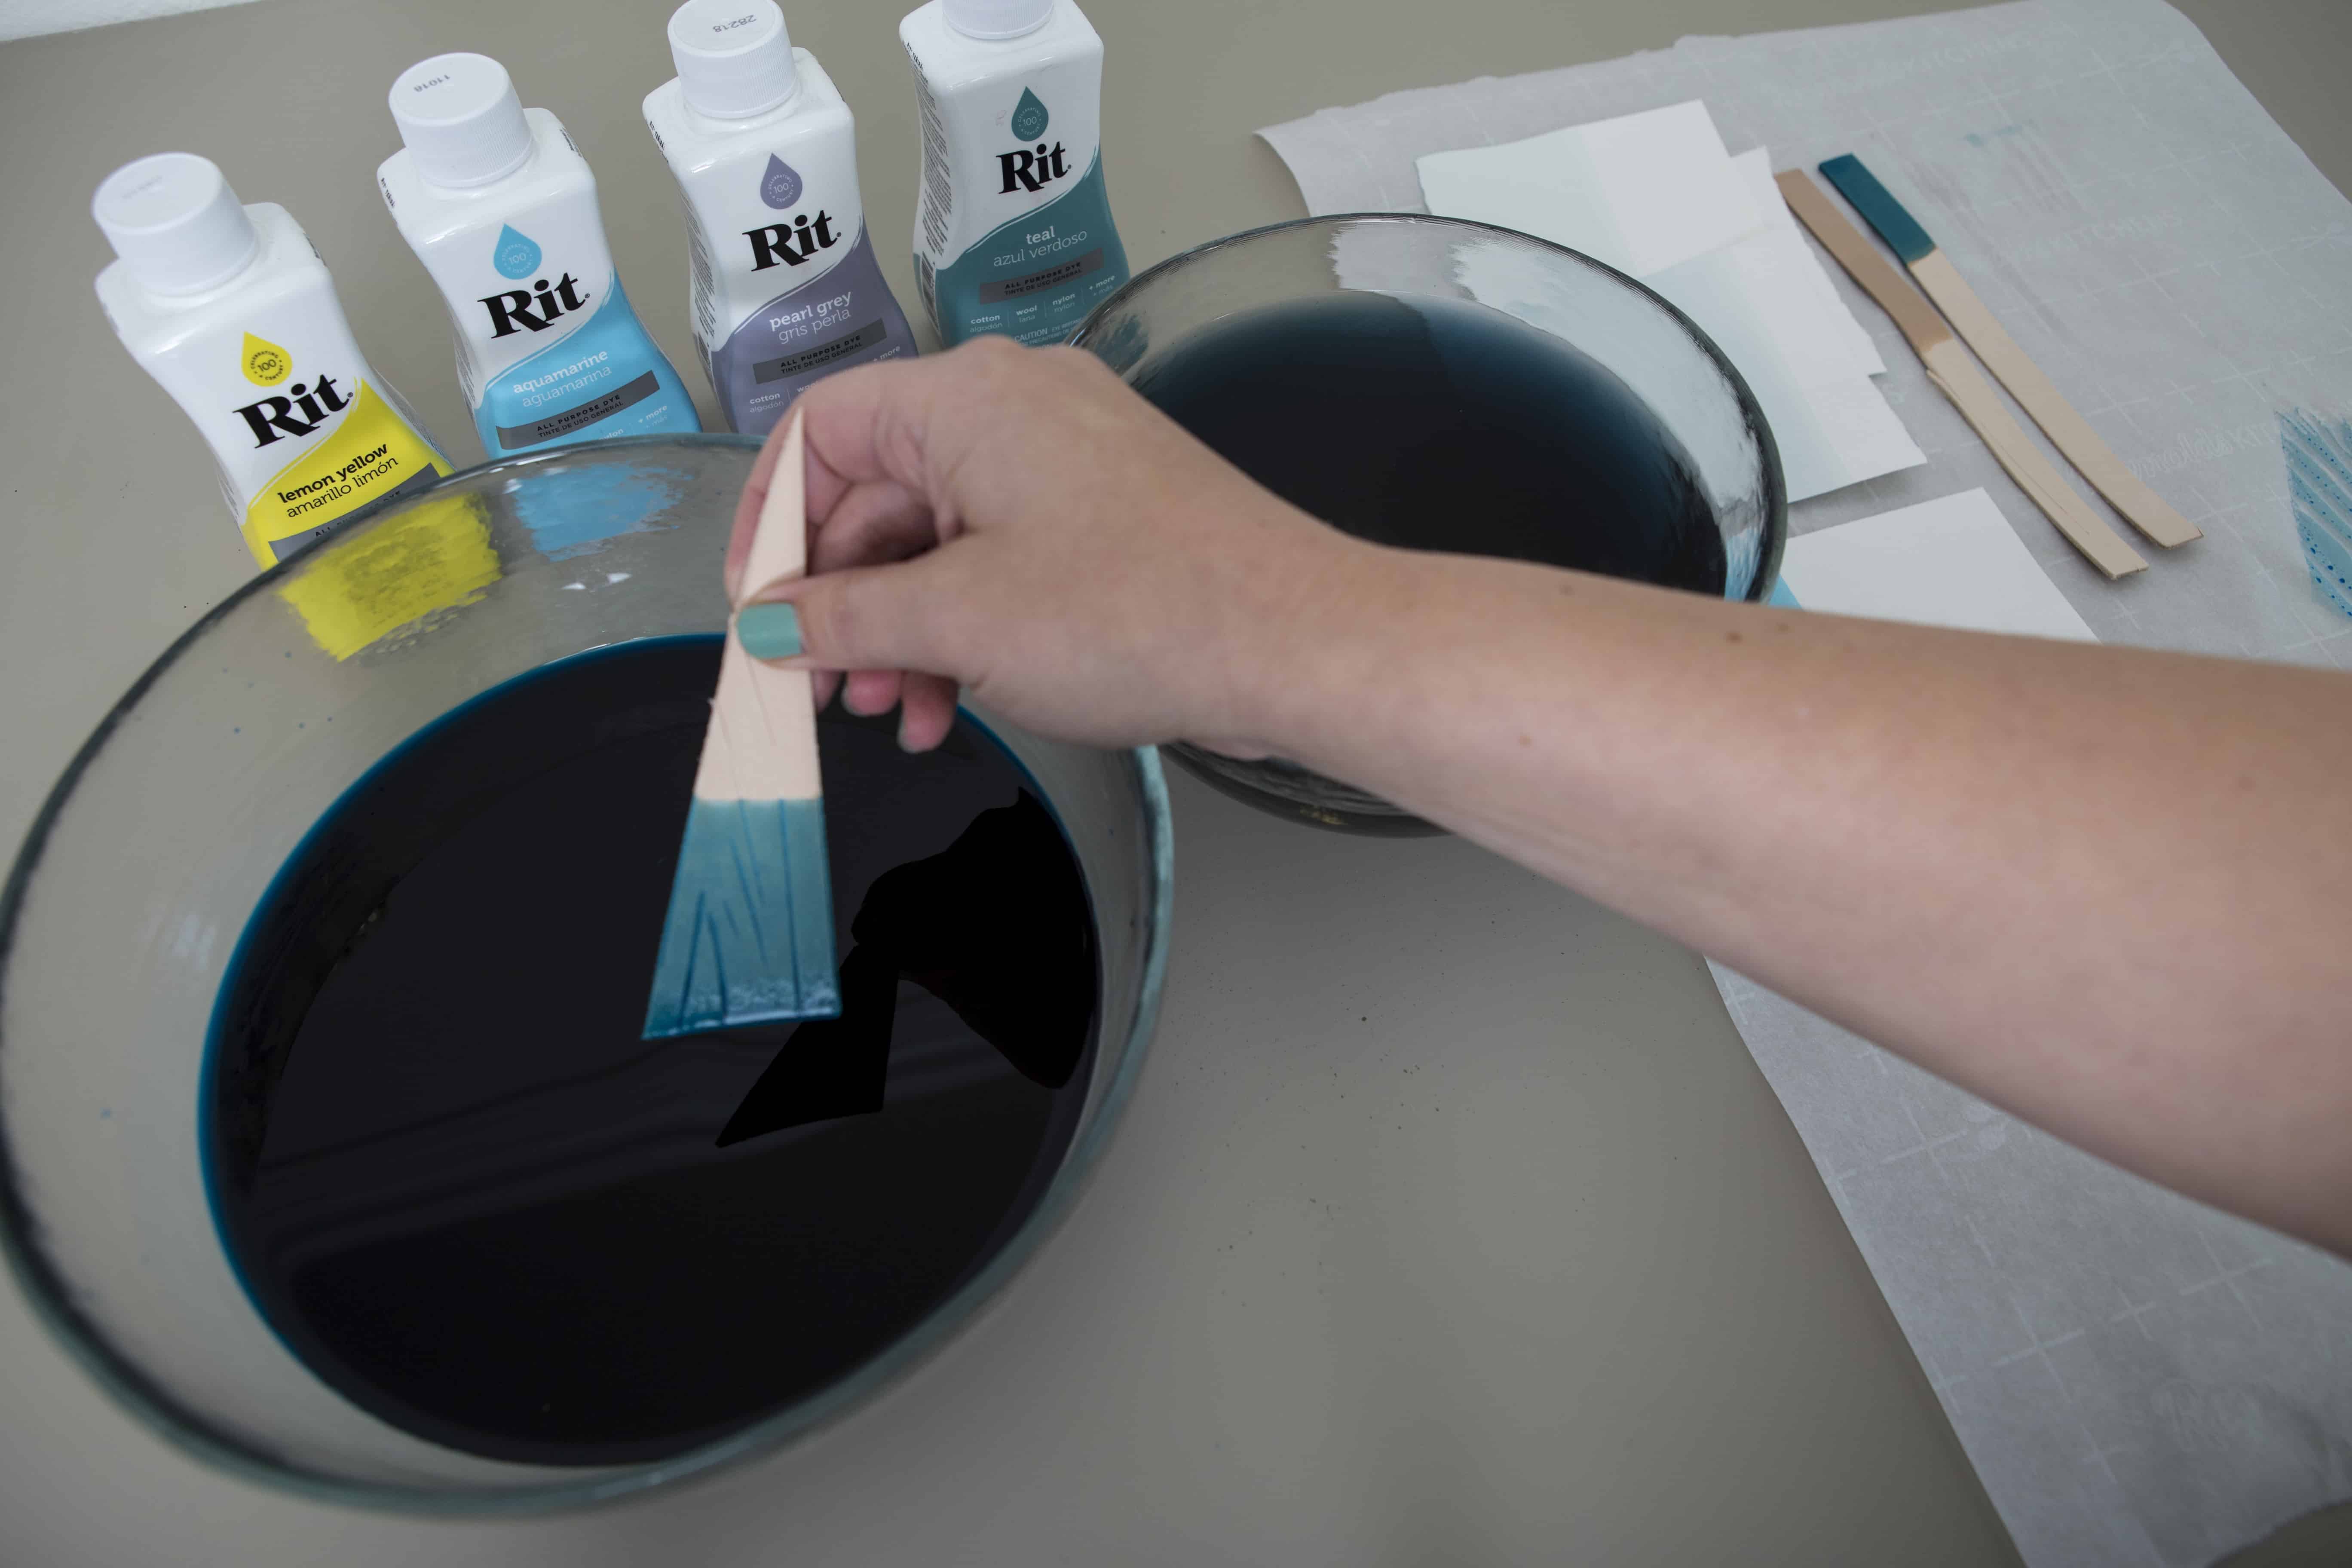
- Rit All-Purpose Liquid Dye: Teal, Aquamarine, Pearl Grey, Hyacinth, Purple, and Lemon Yellow Used Here
- 3-4 oz Tooling Leather
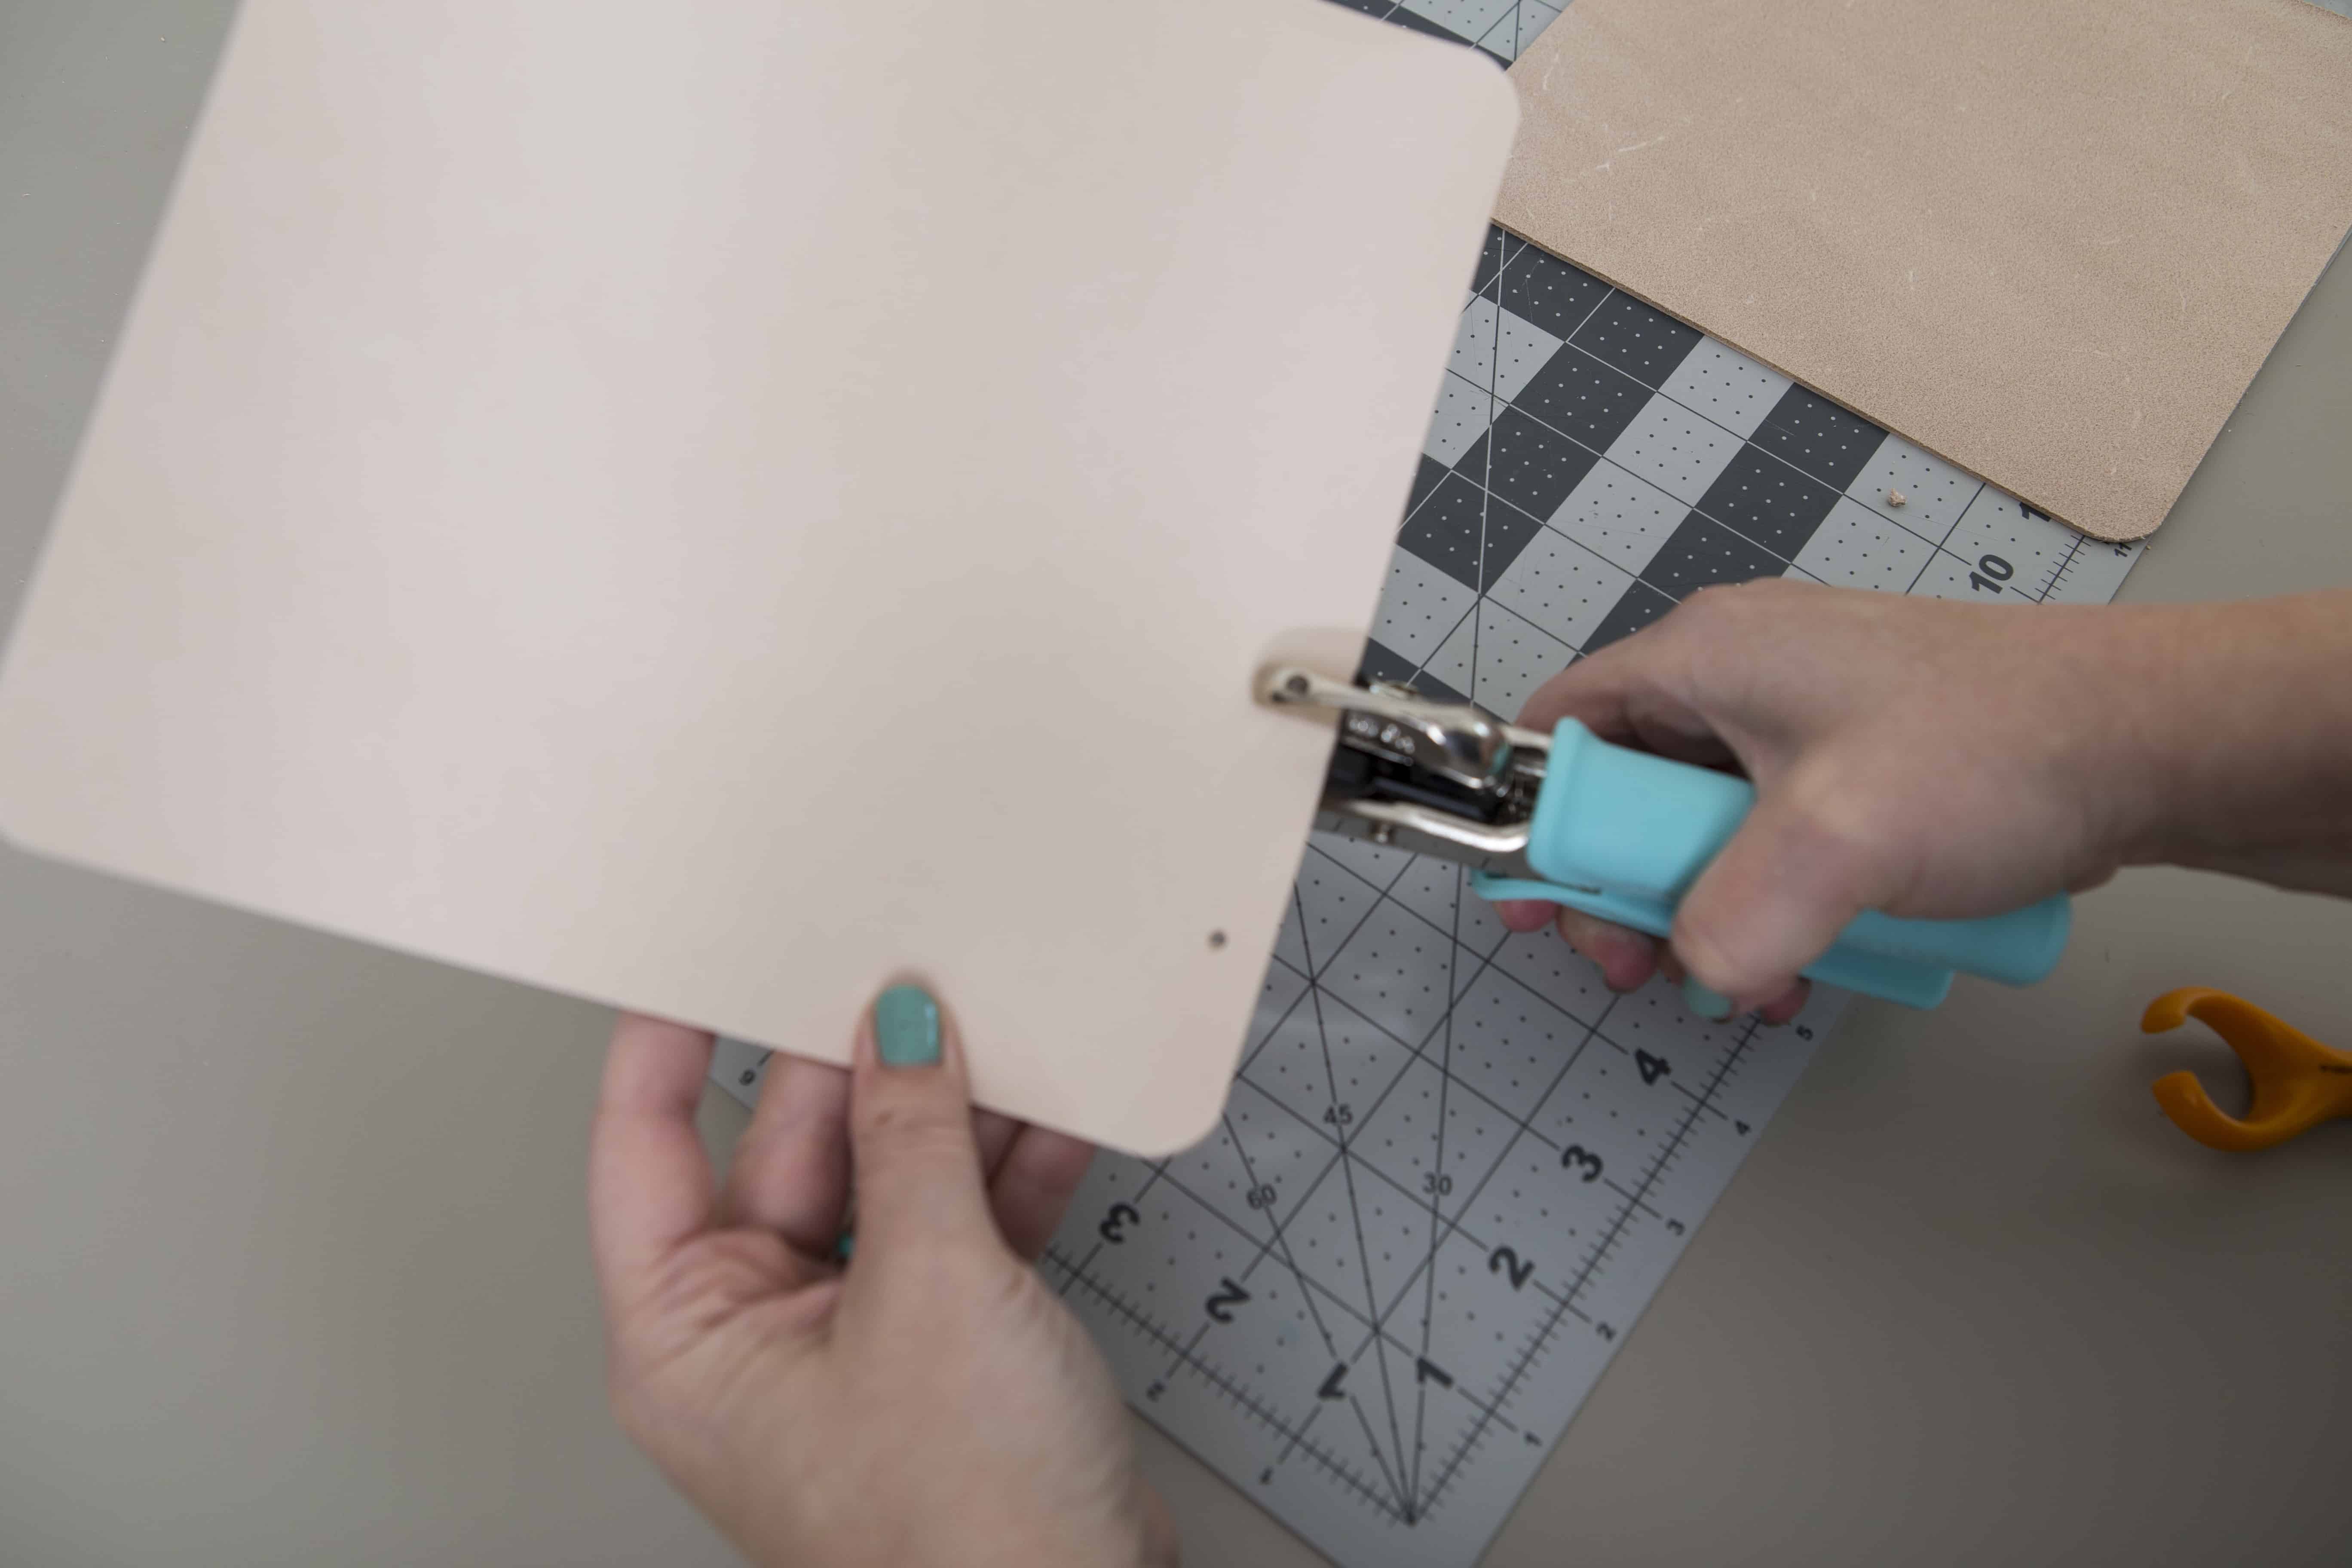
- Heavy Duty Hole Punch
- Heavy Duty Corner Rounder
- Watercolor Paper
- 3/4" Binder Rings
- Alphabet Leather Stamps
- Wooden Mallet
- Resolene
- Paint Brush
- Cutting Mat
- Craft Knife
- Gloves
- Iron
- Paper Towels
- Parchment Paper
Time
Total: {{ partial.tUF3.total }}
Difficulty
Intermediate Total: {{ partial.tSU6.total }}
Instructions
This project is a complete tutorial for making a letter guest book from scratch. However, if you have a leather guestbook that you want to dye, skip to step 6.
- Cover work area and gather supplies.
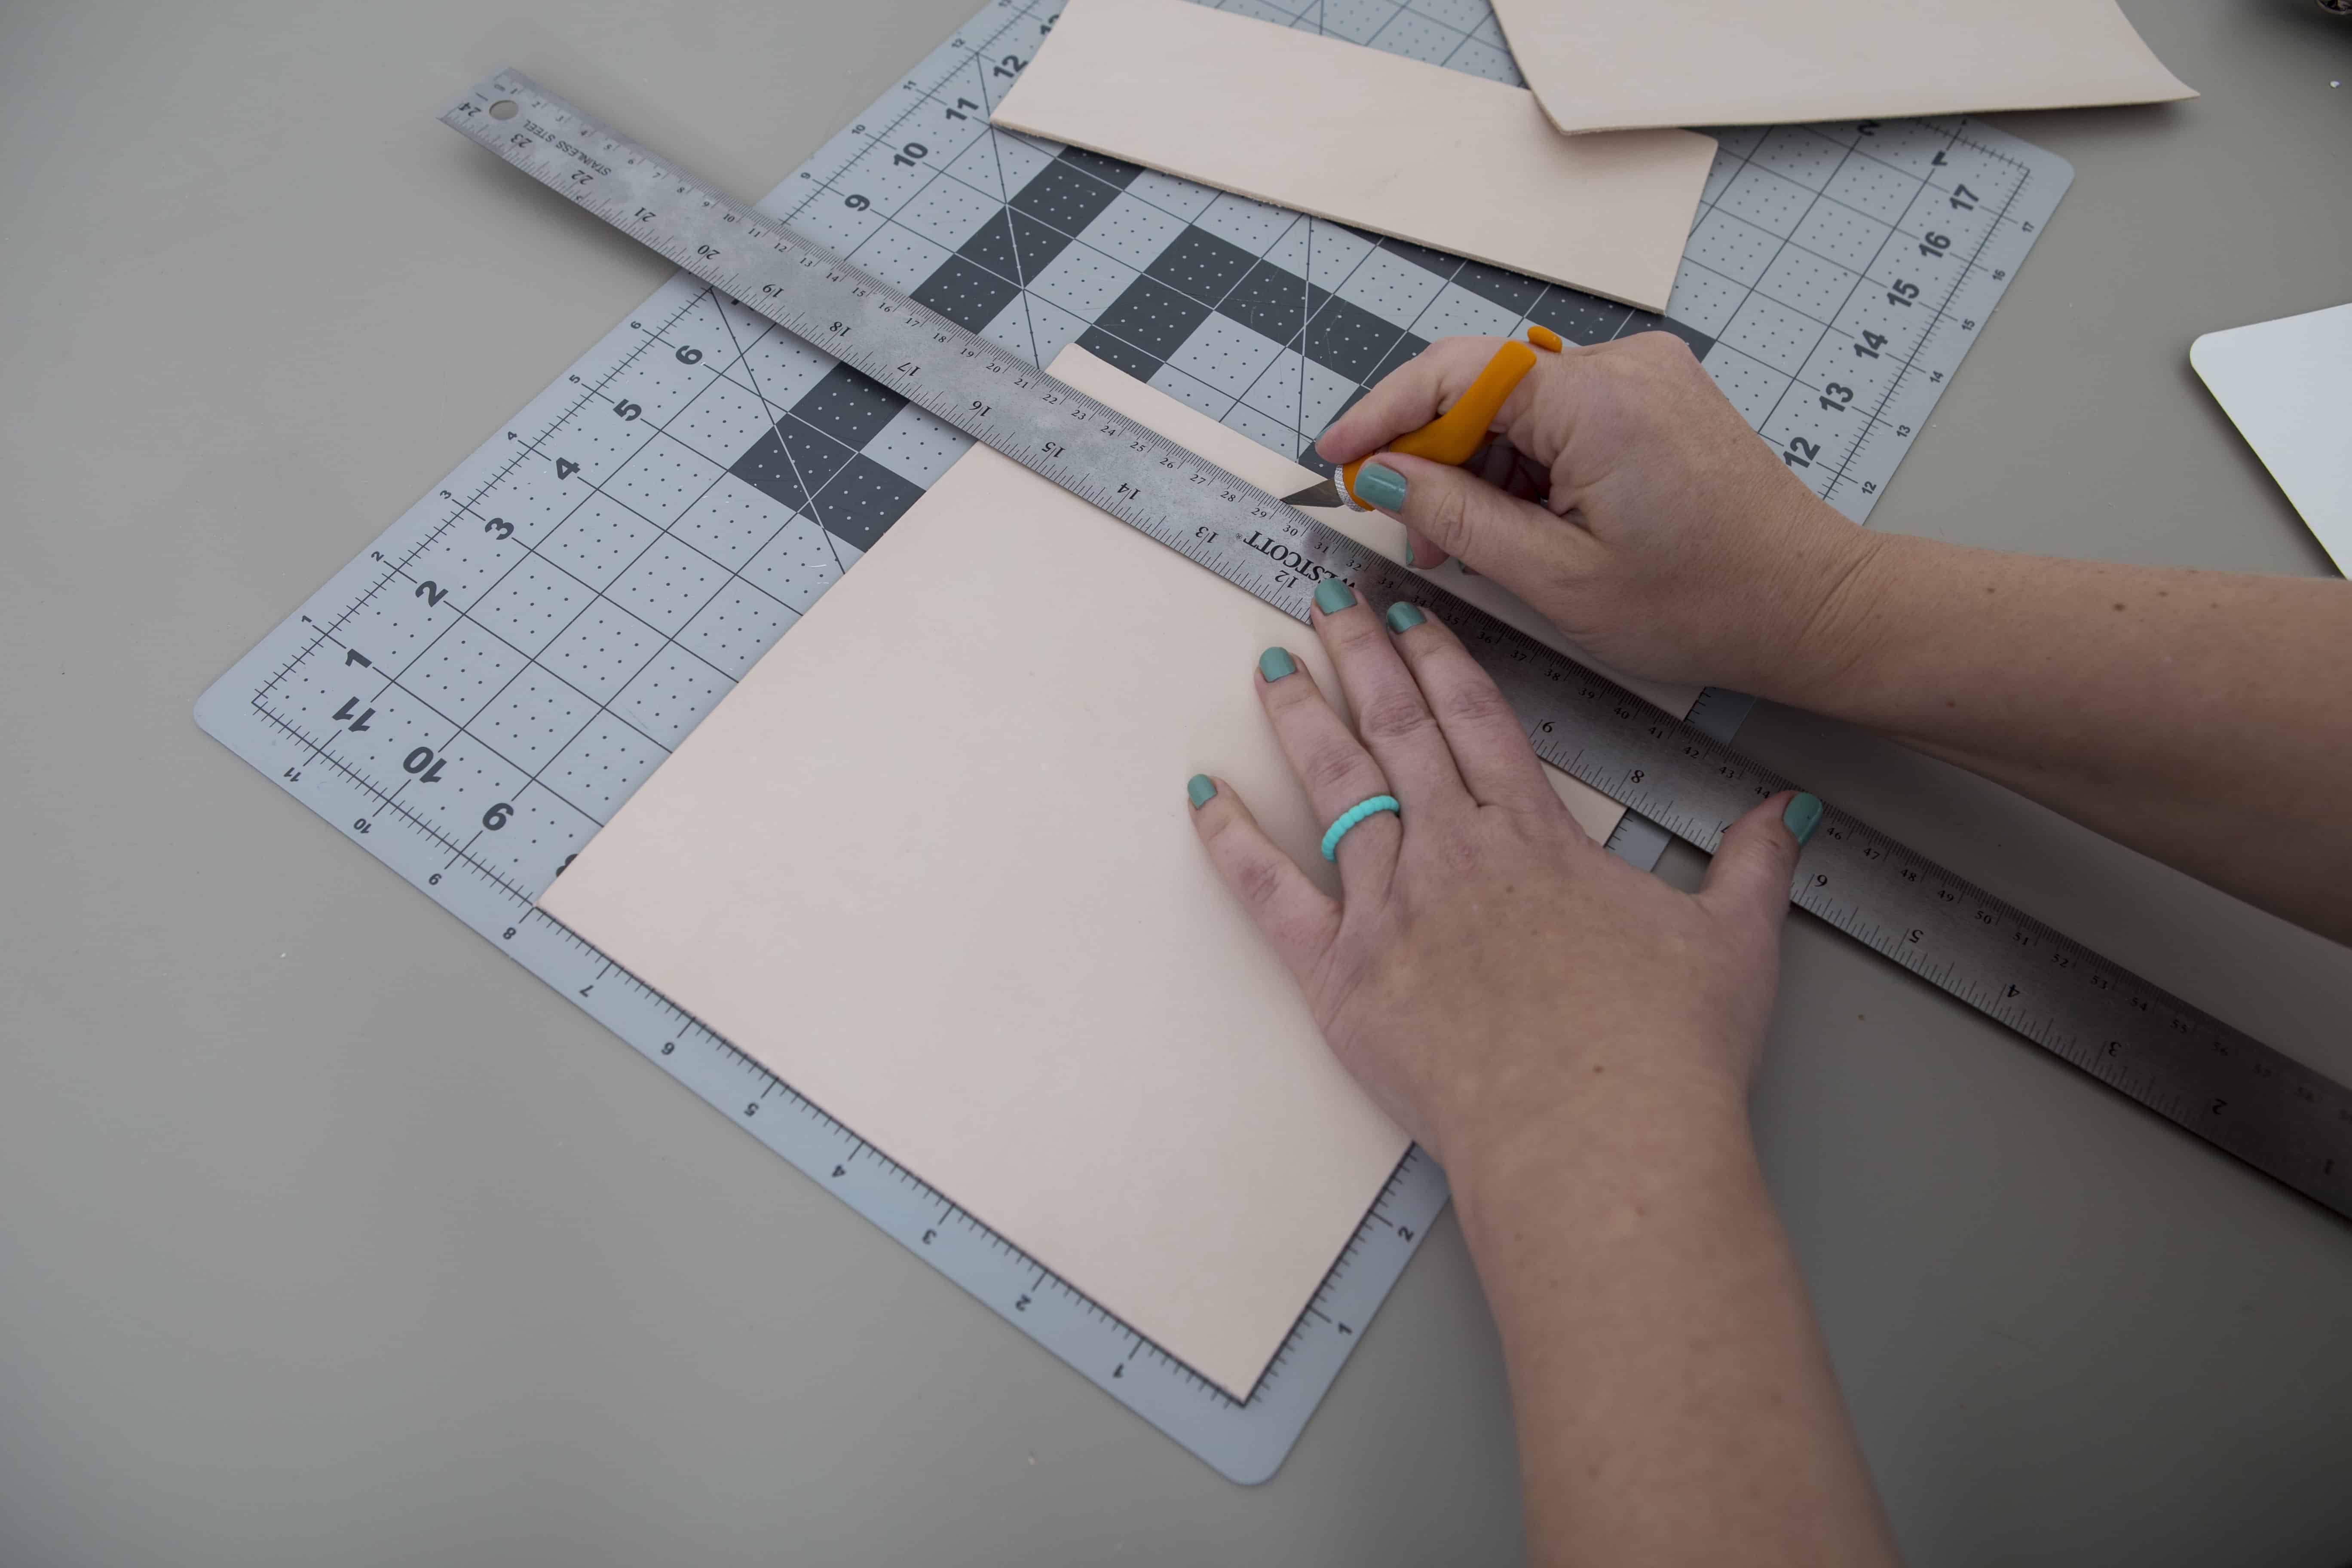
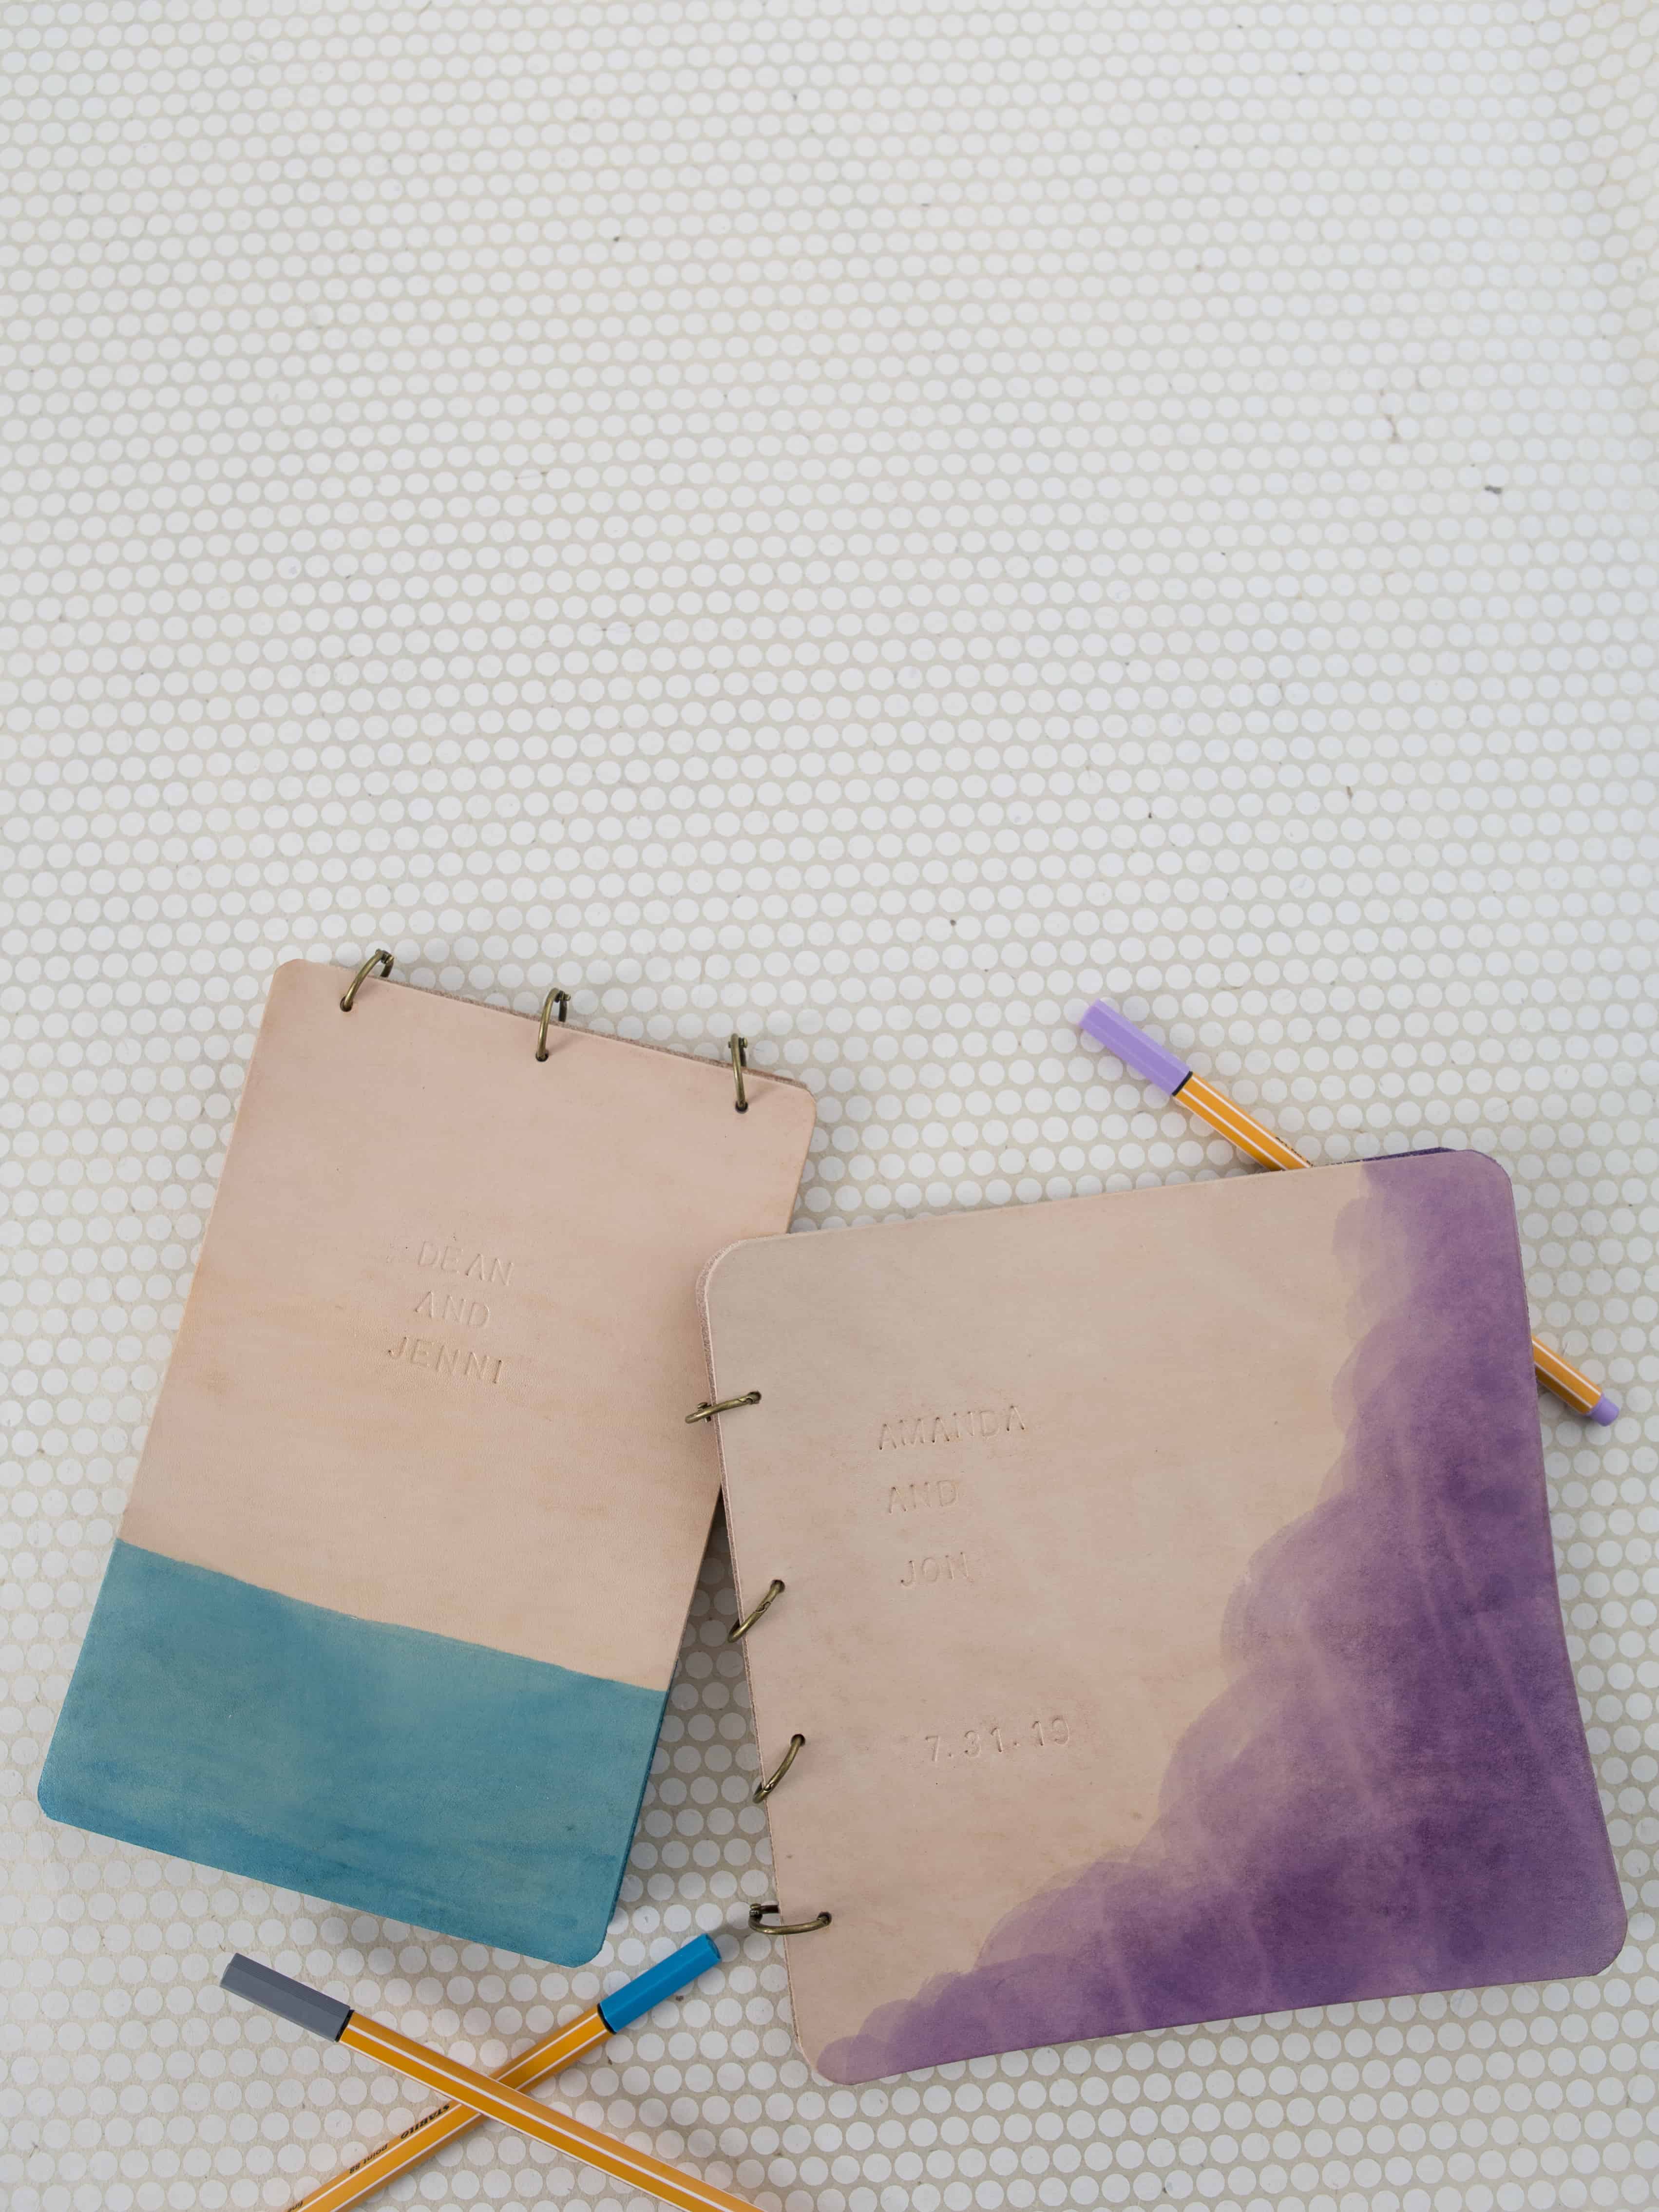
- This project features three different shapes and sizes. Pick a size and shape that appeals to you! Using a craft knife and cutting mat, cut your leather guest book cover.
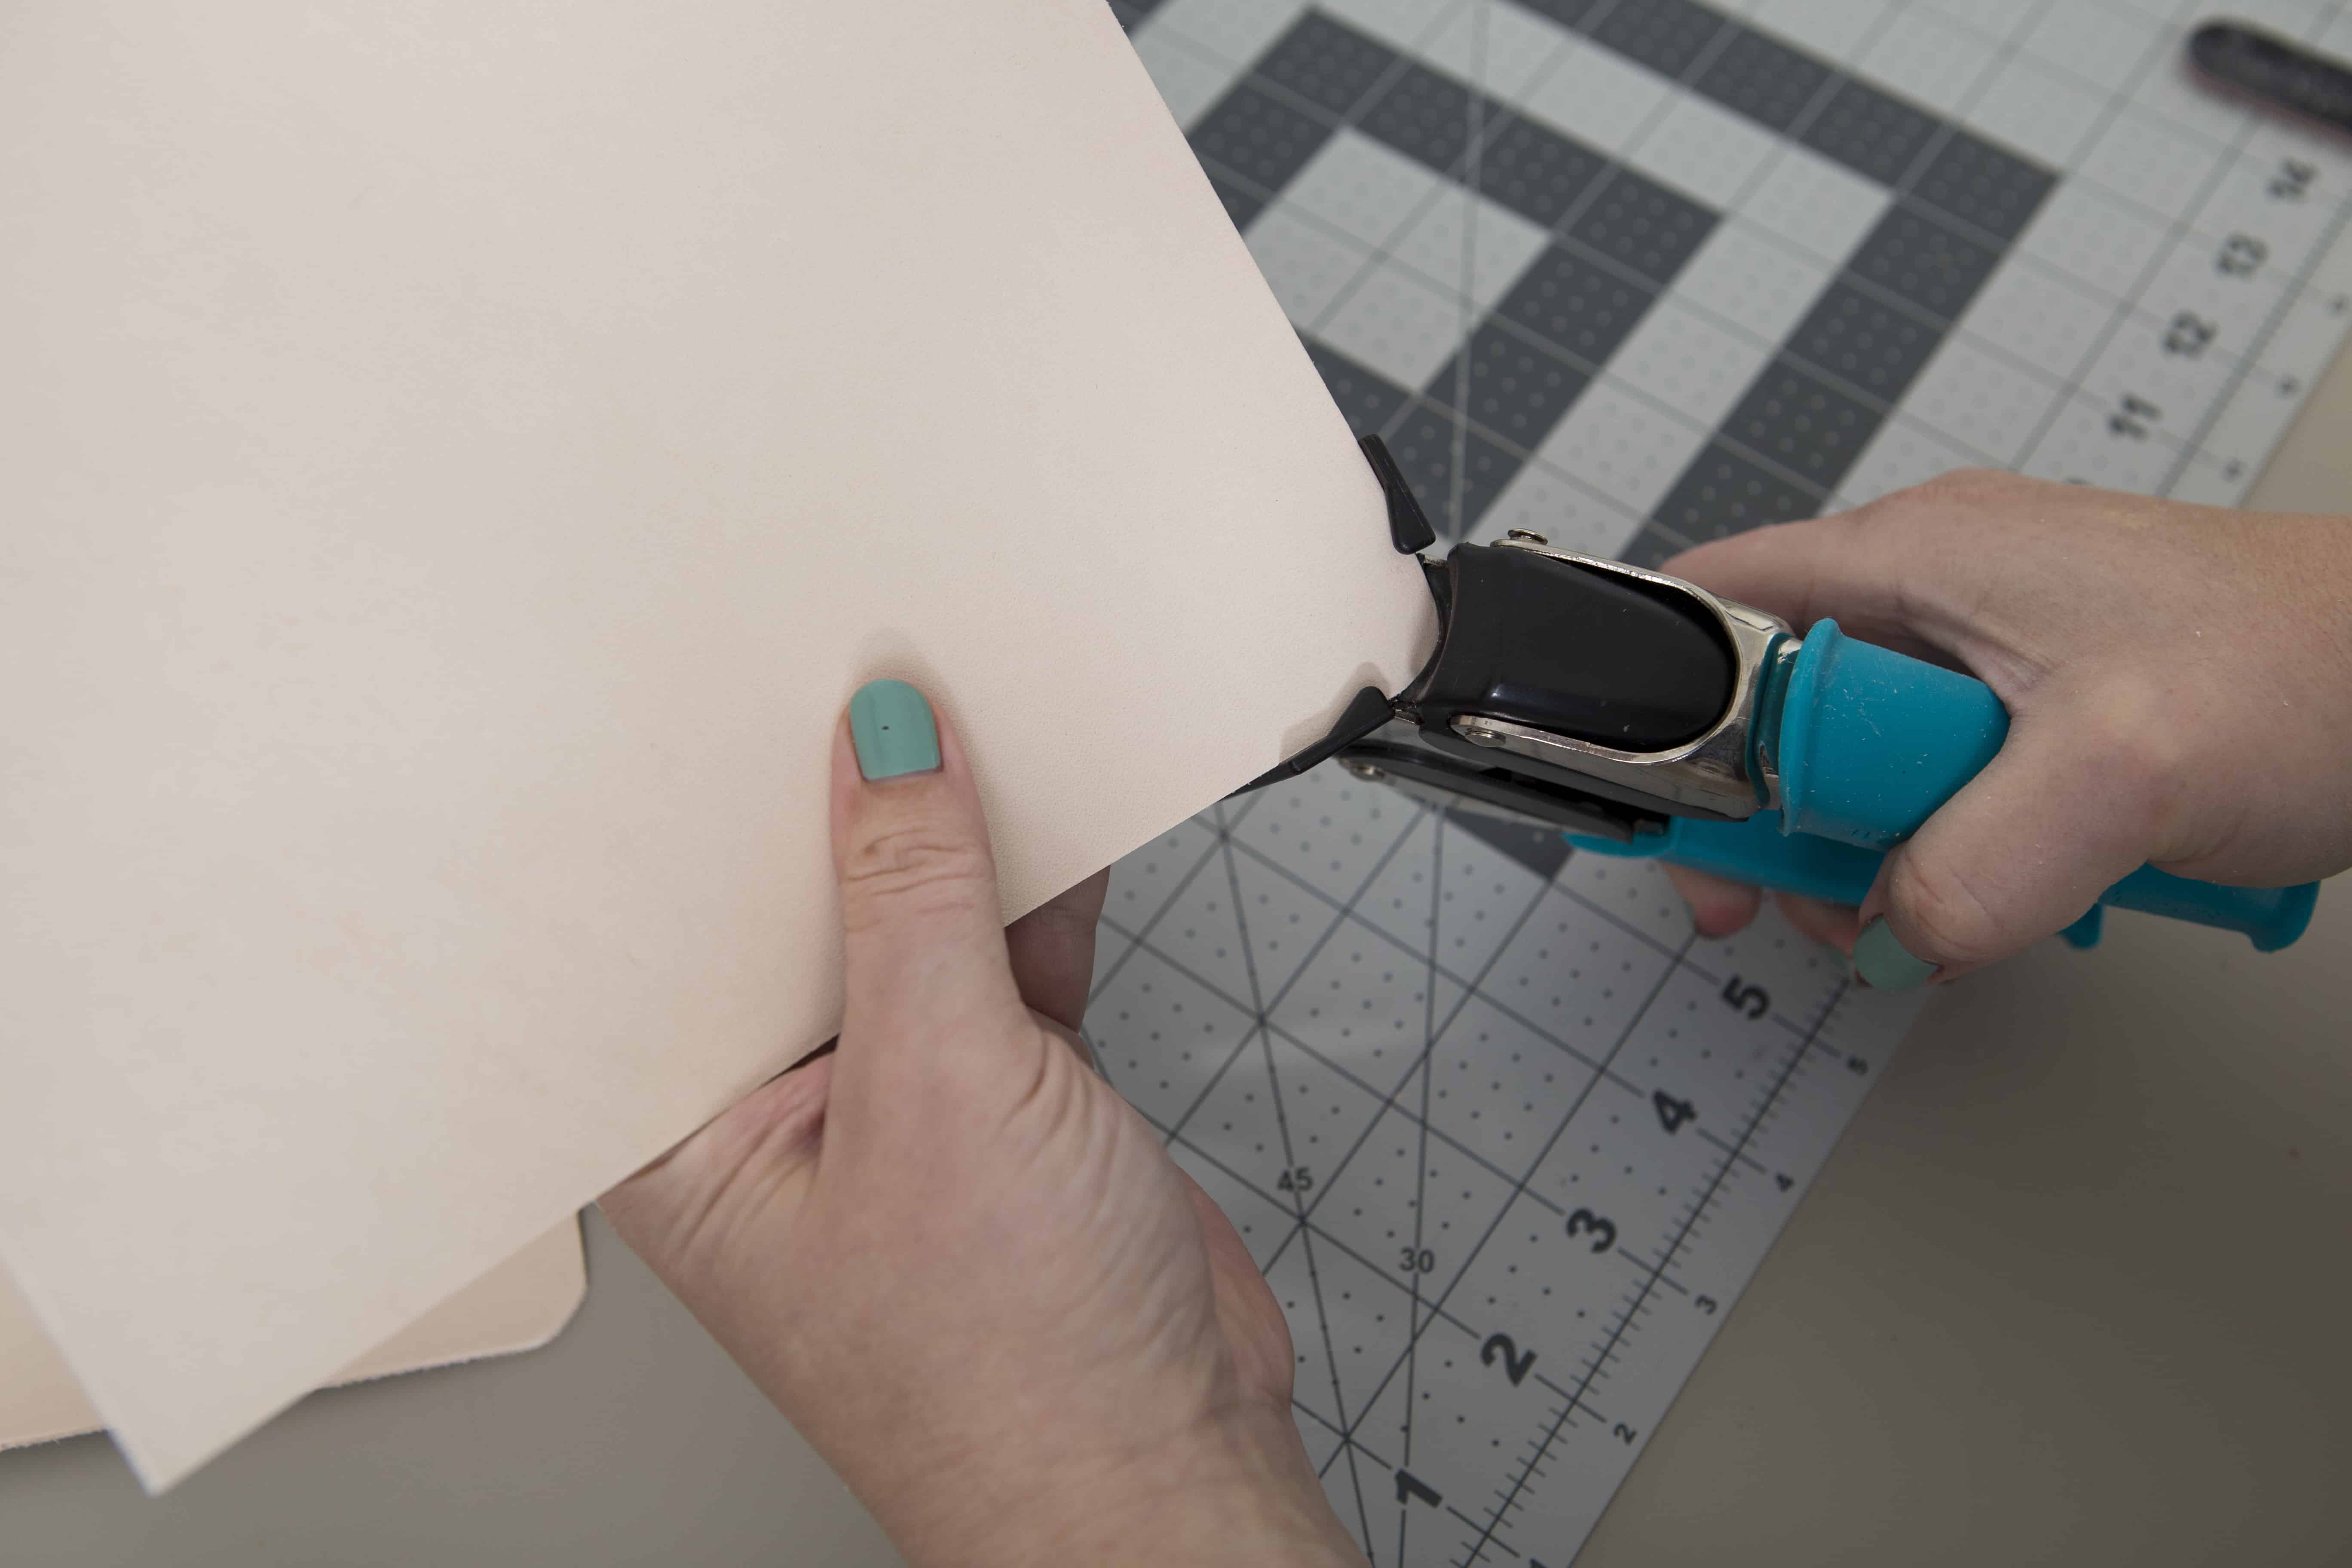
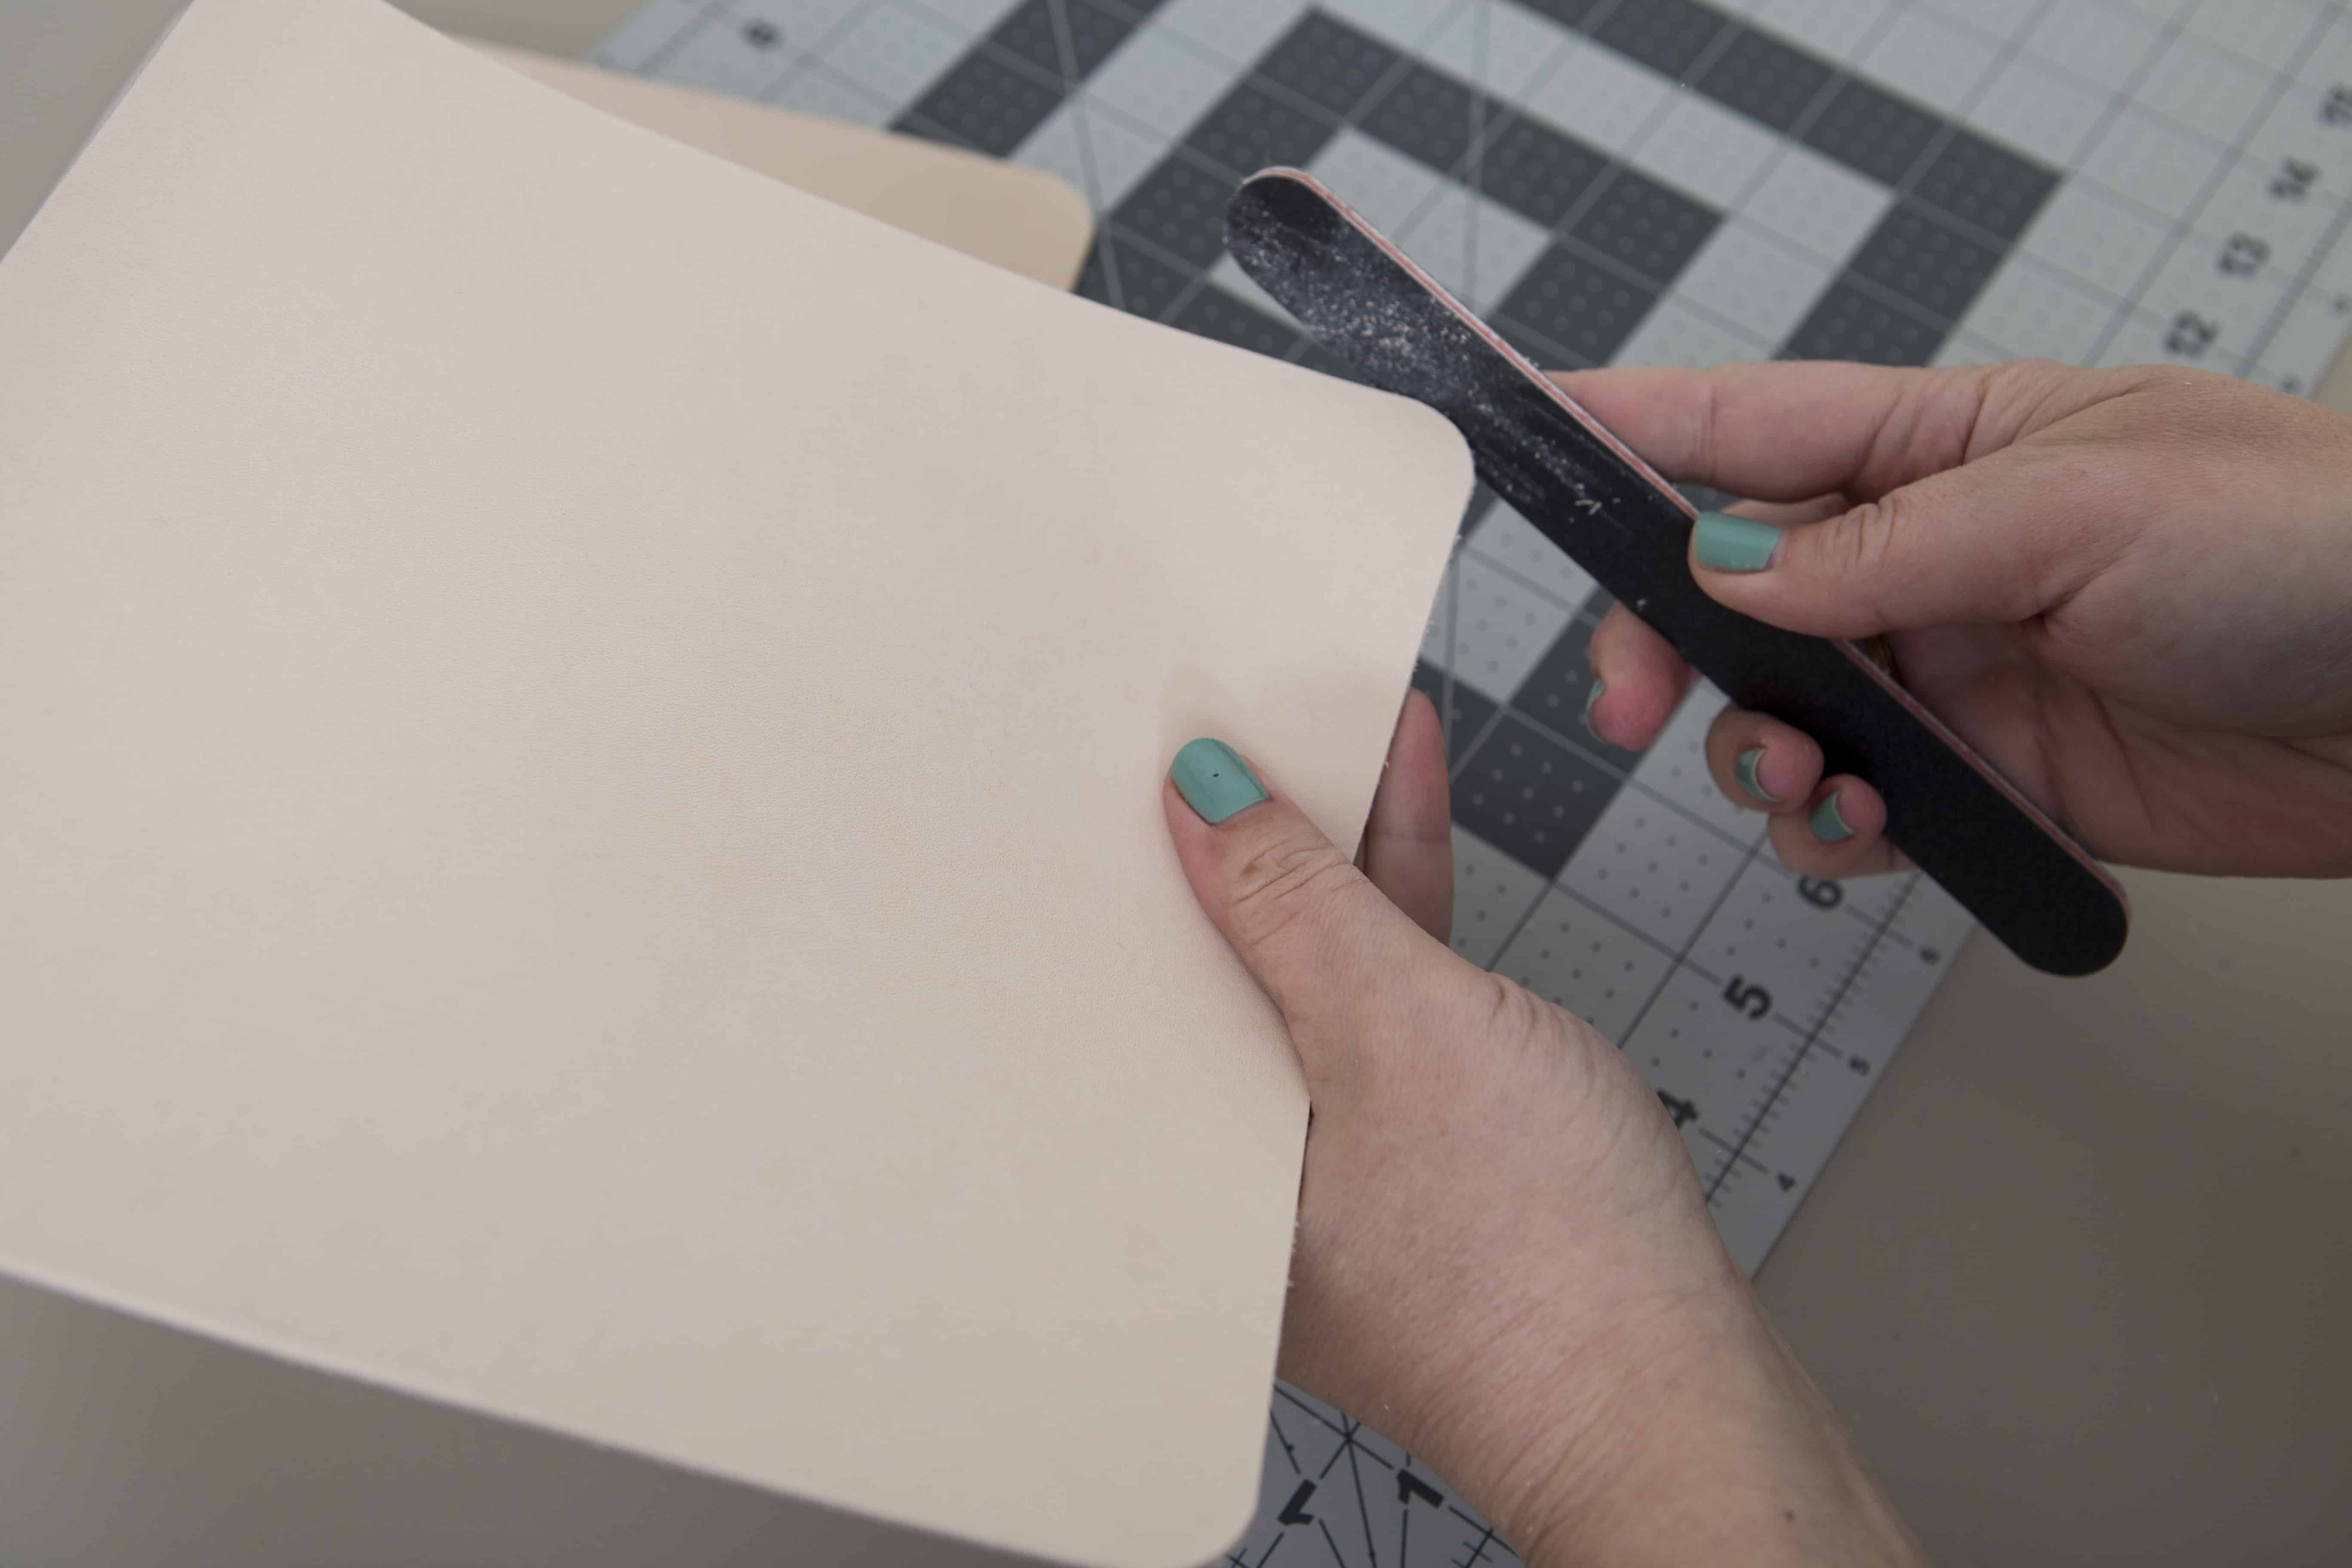
- If you like rounded edges, use a heavy-duty corner rounder punch like Corner Chomper to round the edges of the leather. If there are rough edges, you can sand them with a nail file.
- Add hole punches. Mark them using the ruler on your cutting mat and the craft knife. Then make holes using a heavy-duty punch.
- Add about 20 sheets of paper to your guest book. You can add or remove a few pages depending on the size of your wedding. Cut your pages using the craft knife and cutting mat, roughly 1/4″ smaller than the leather. Punch holes to match.
- To dye the leather and paper featured in this project, four different dyebaths were created.
- For each dyebath, add 3 cups of the hottest tap water into a large plastic container.
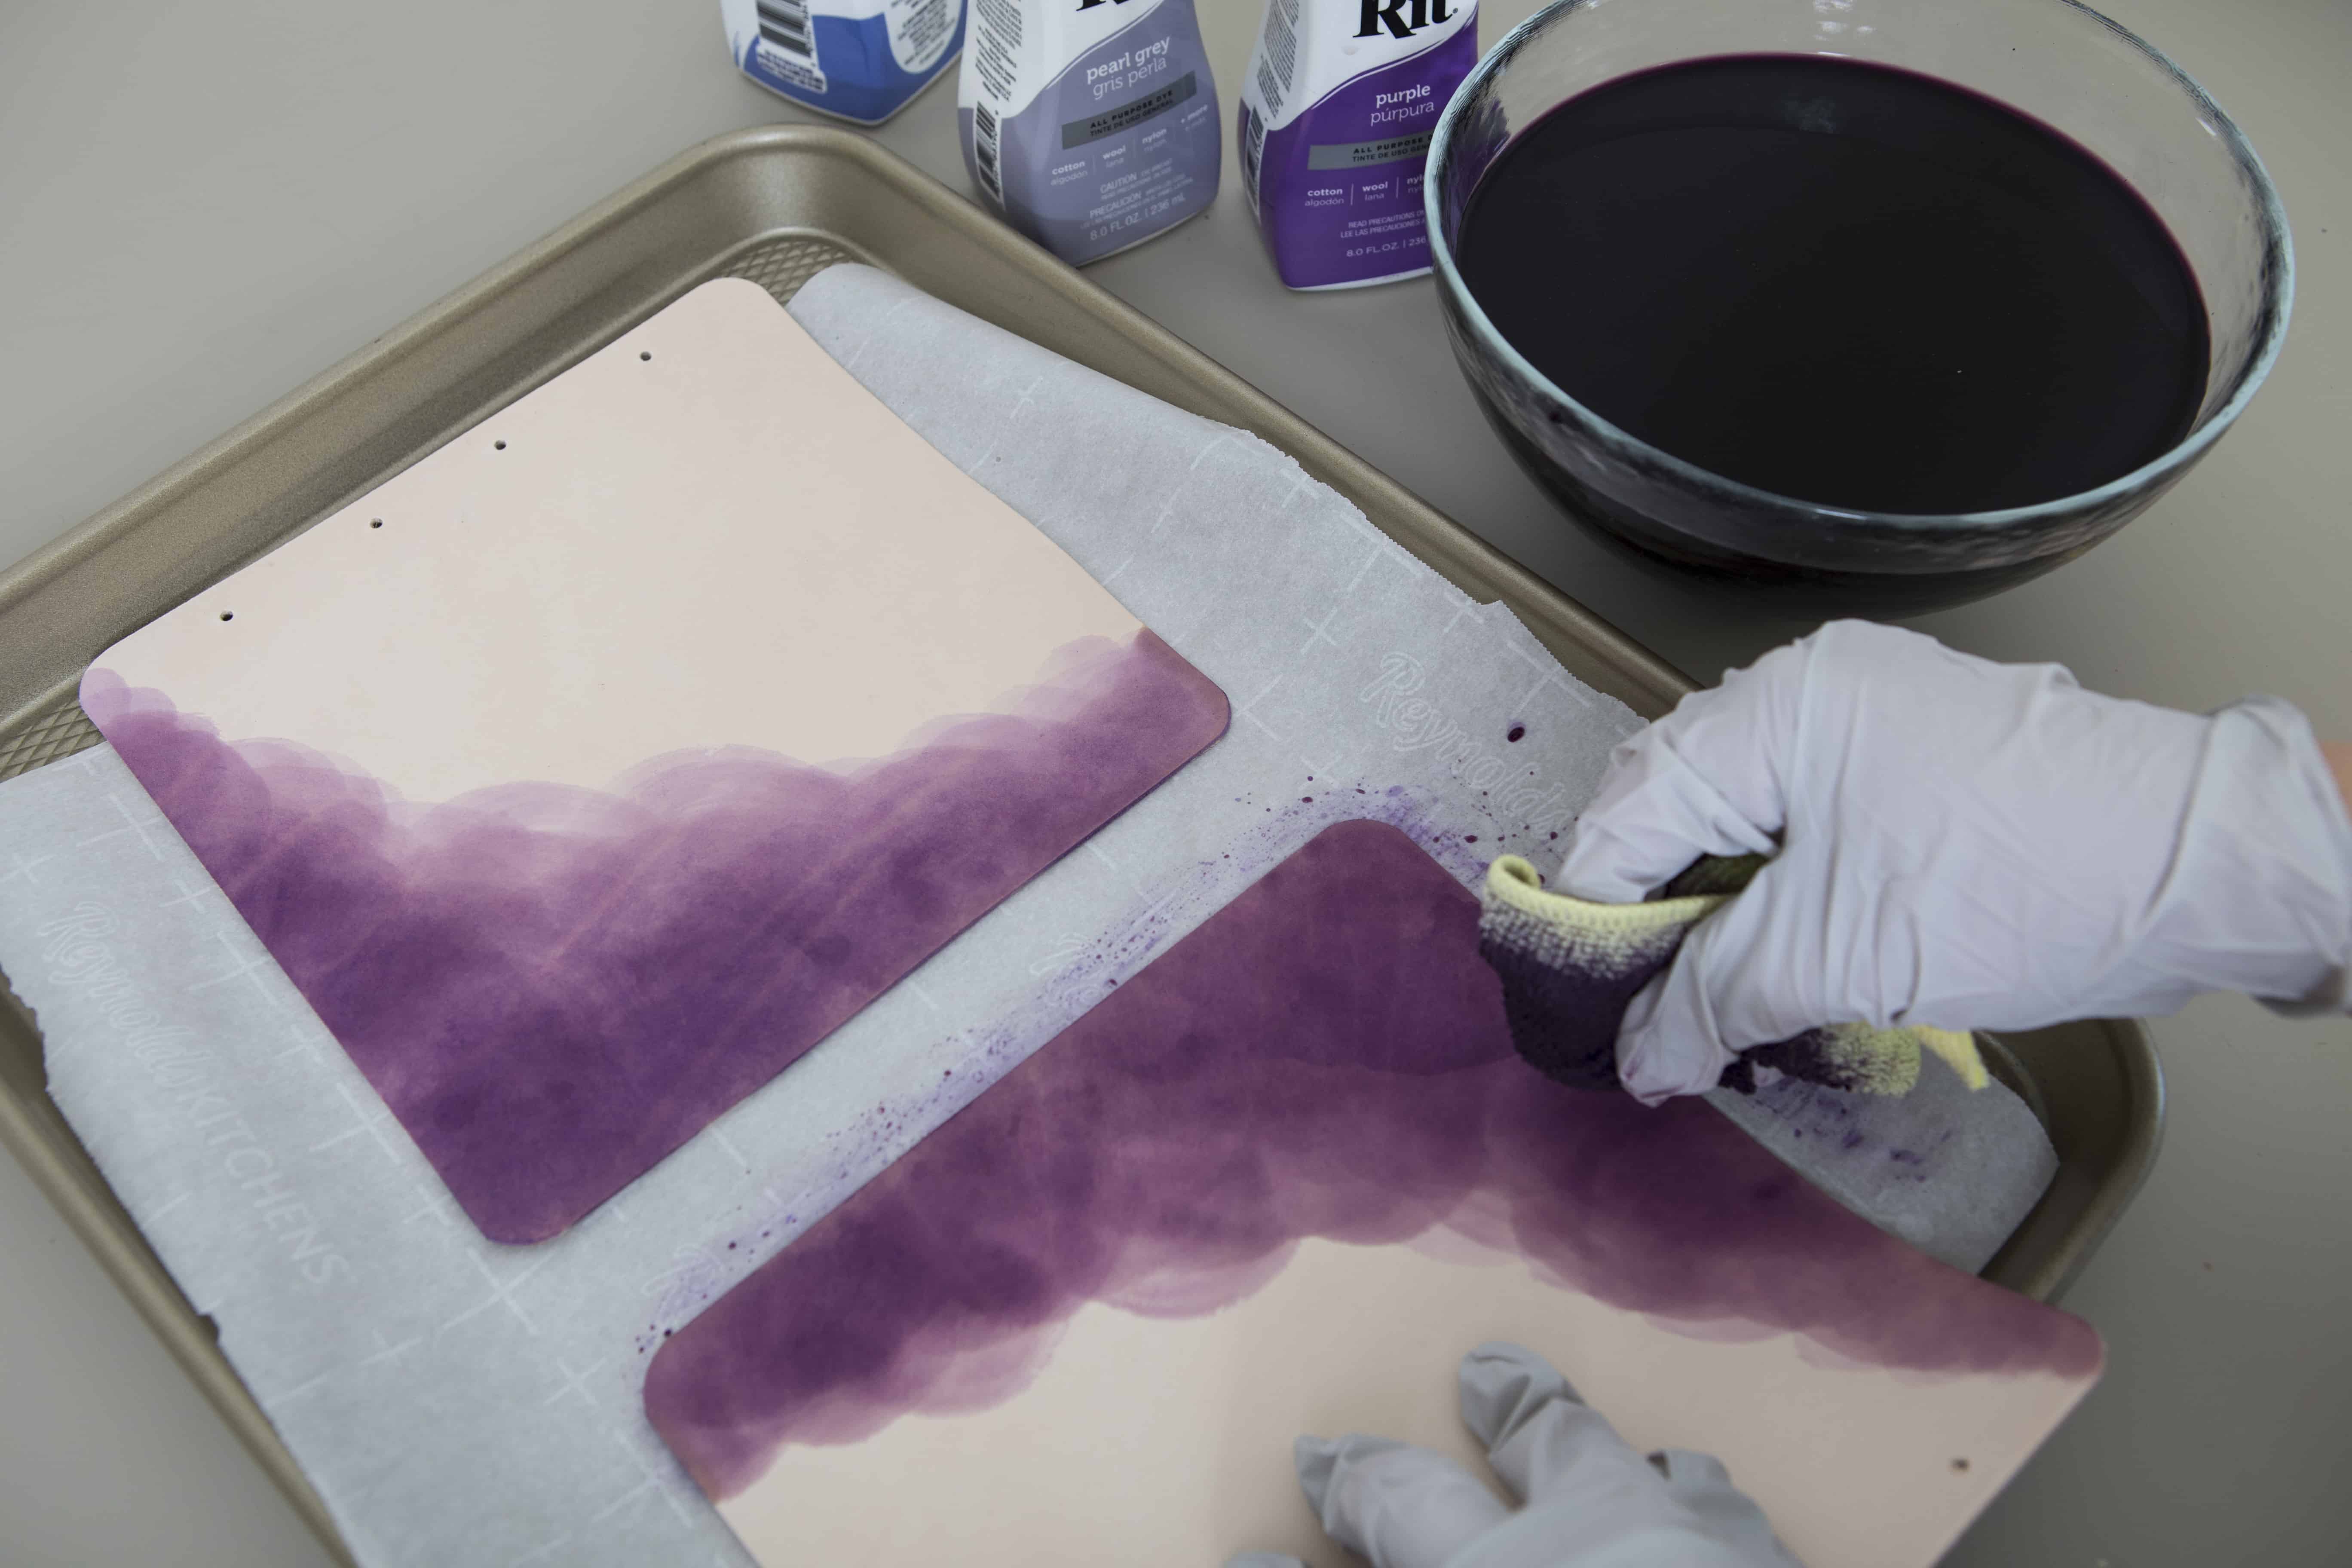
- Add All-Purpose Liquid Dye and stir well. The following color formulas were used in this project. Icy Morn, Jade Green, Cosmic Sky, and Persian Violet.
- Make sure to test the dyebath color with test strips of leather and paper prior to dyeing. Add more dye to the water if the color is too light. If the color is too dark, just add more water.
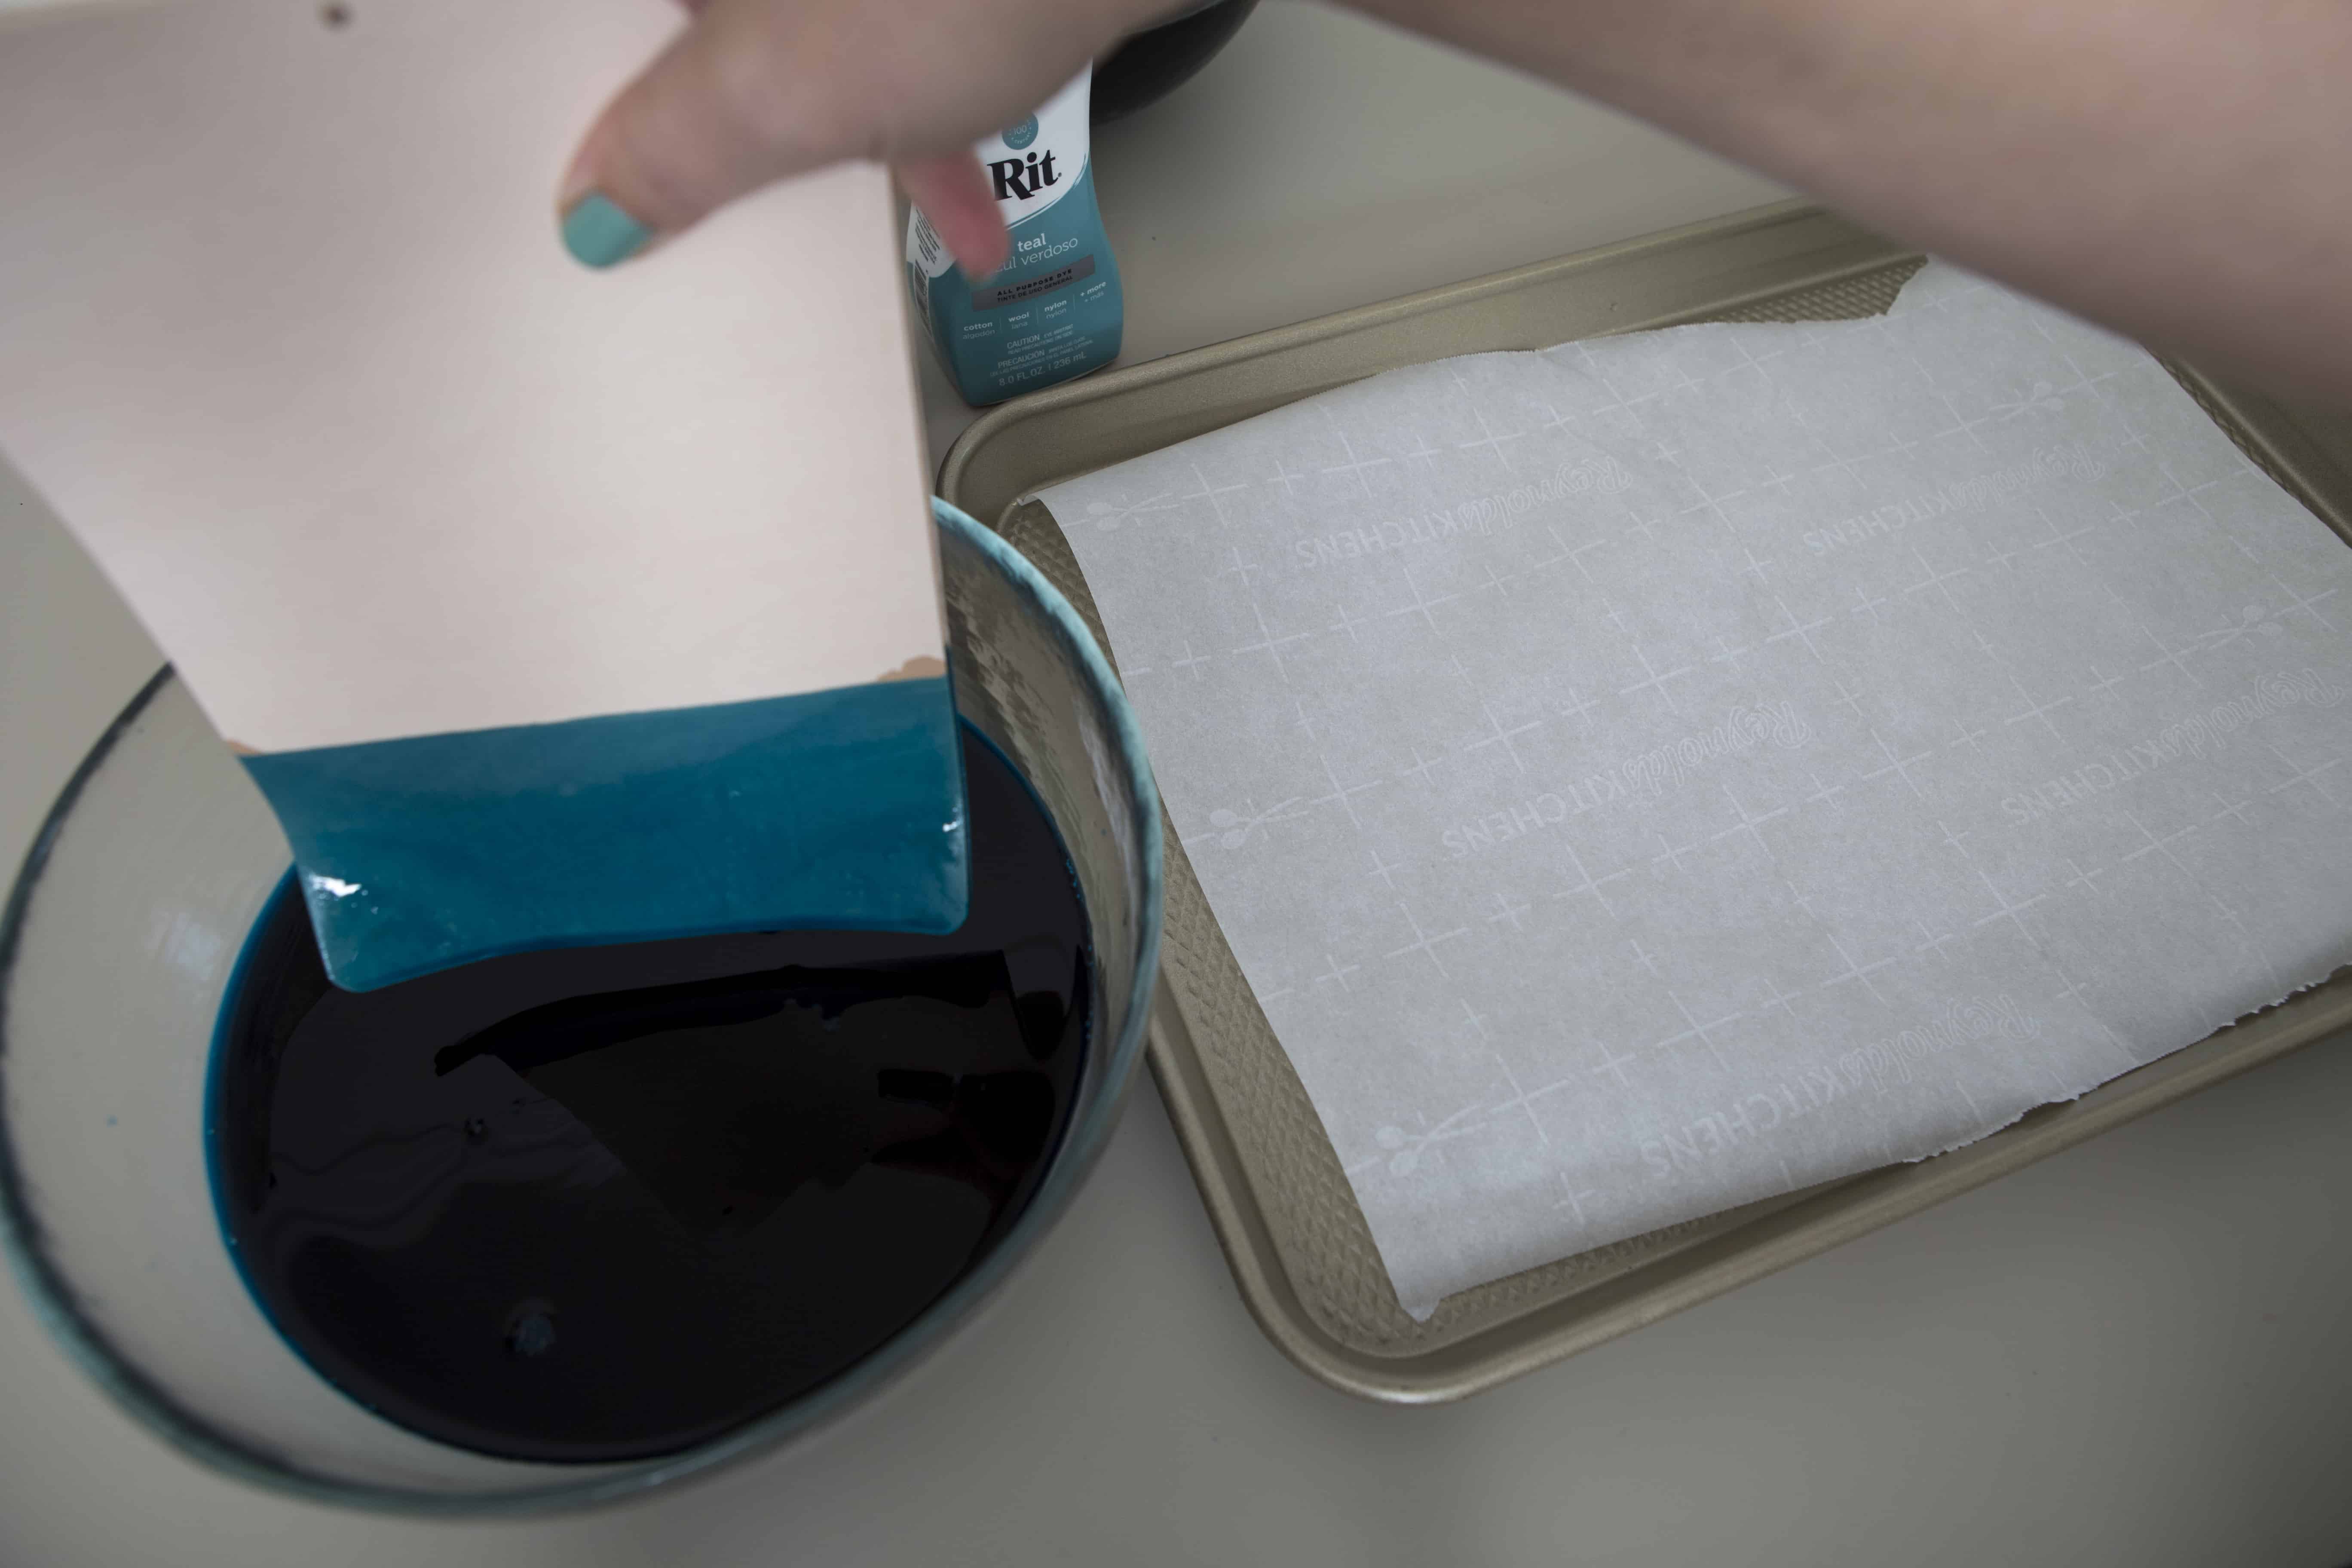
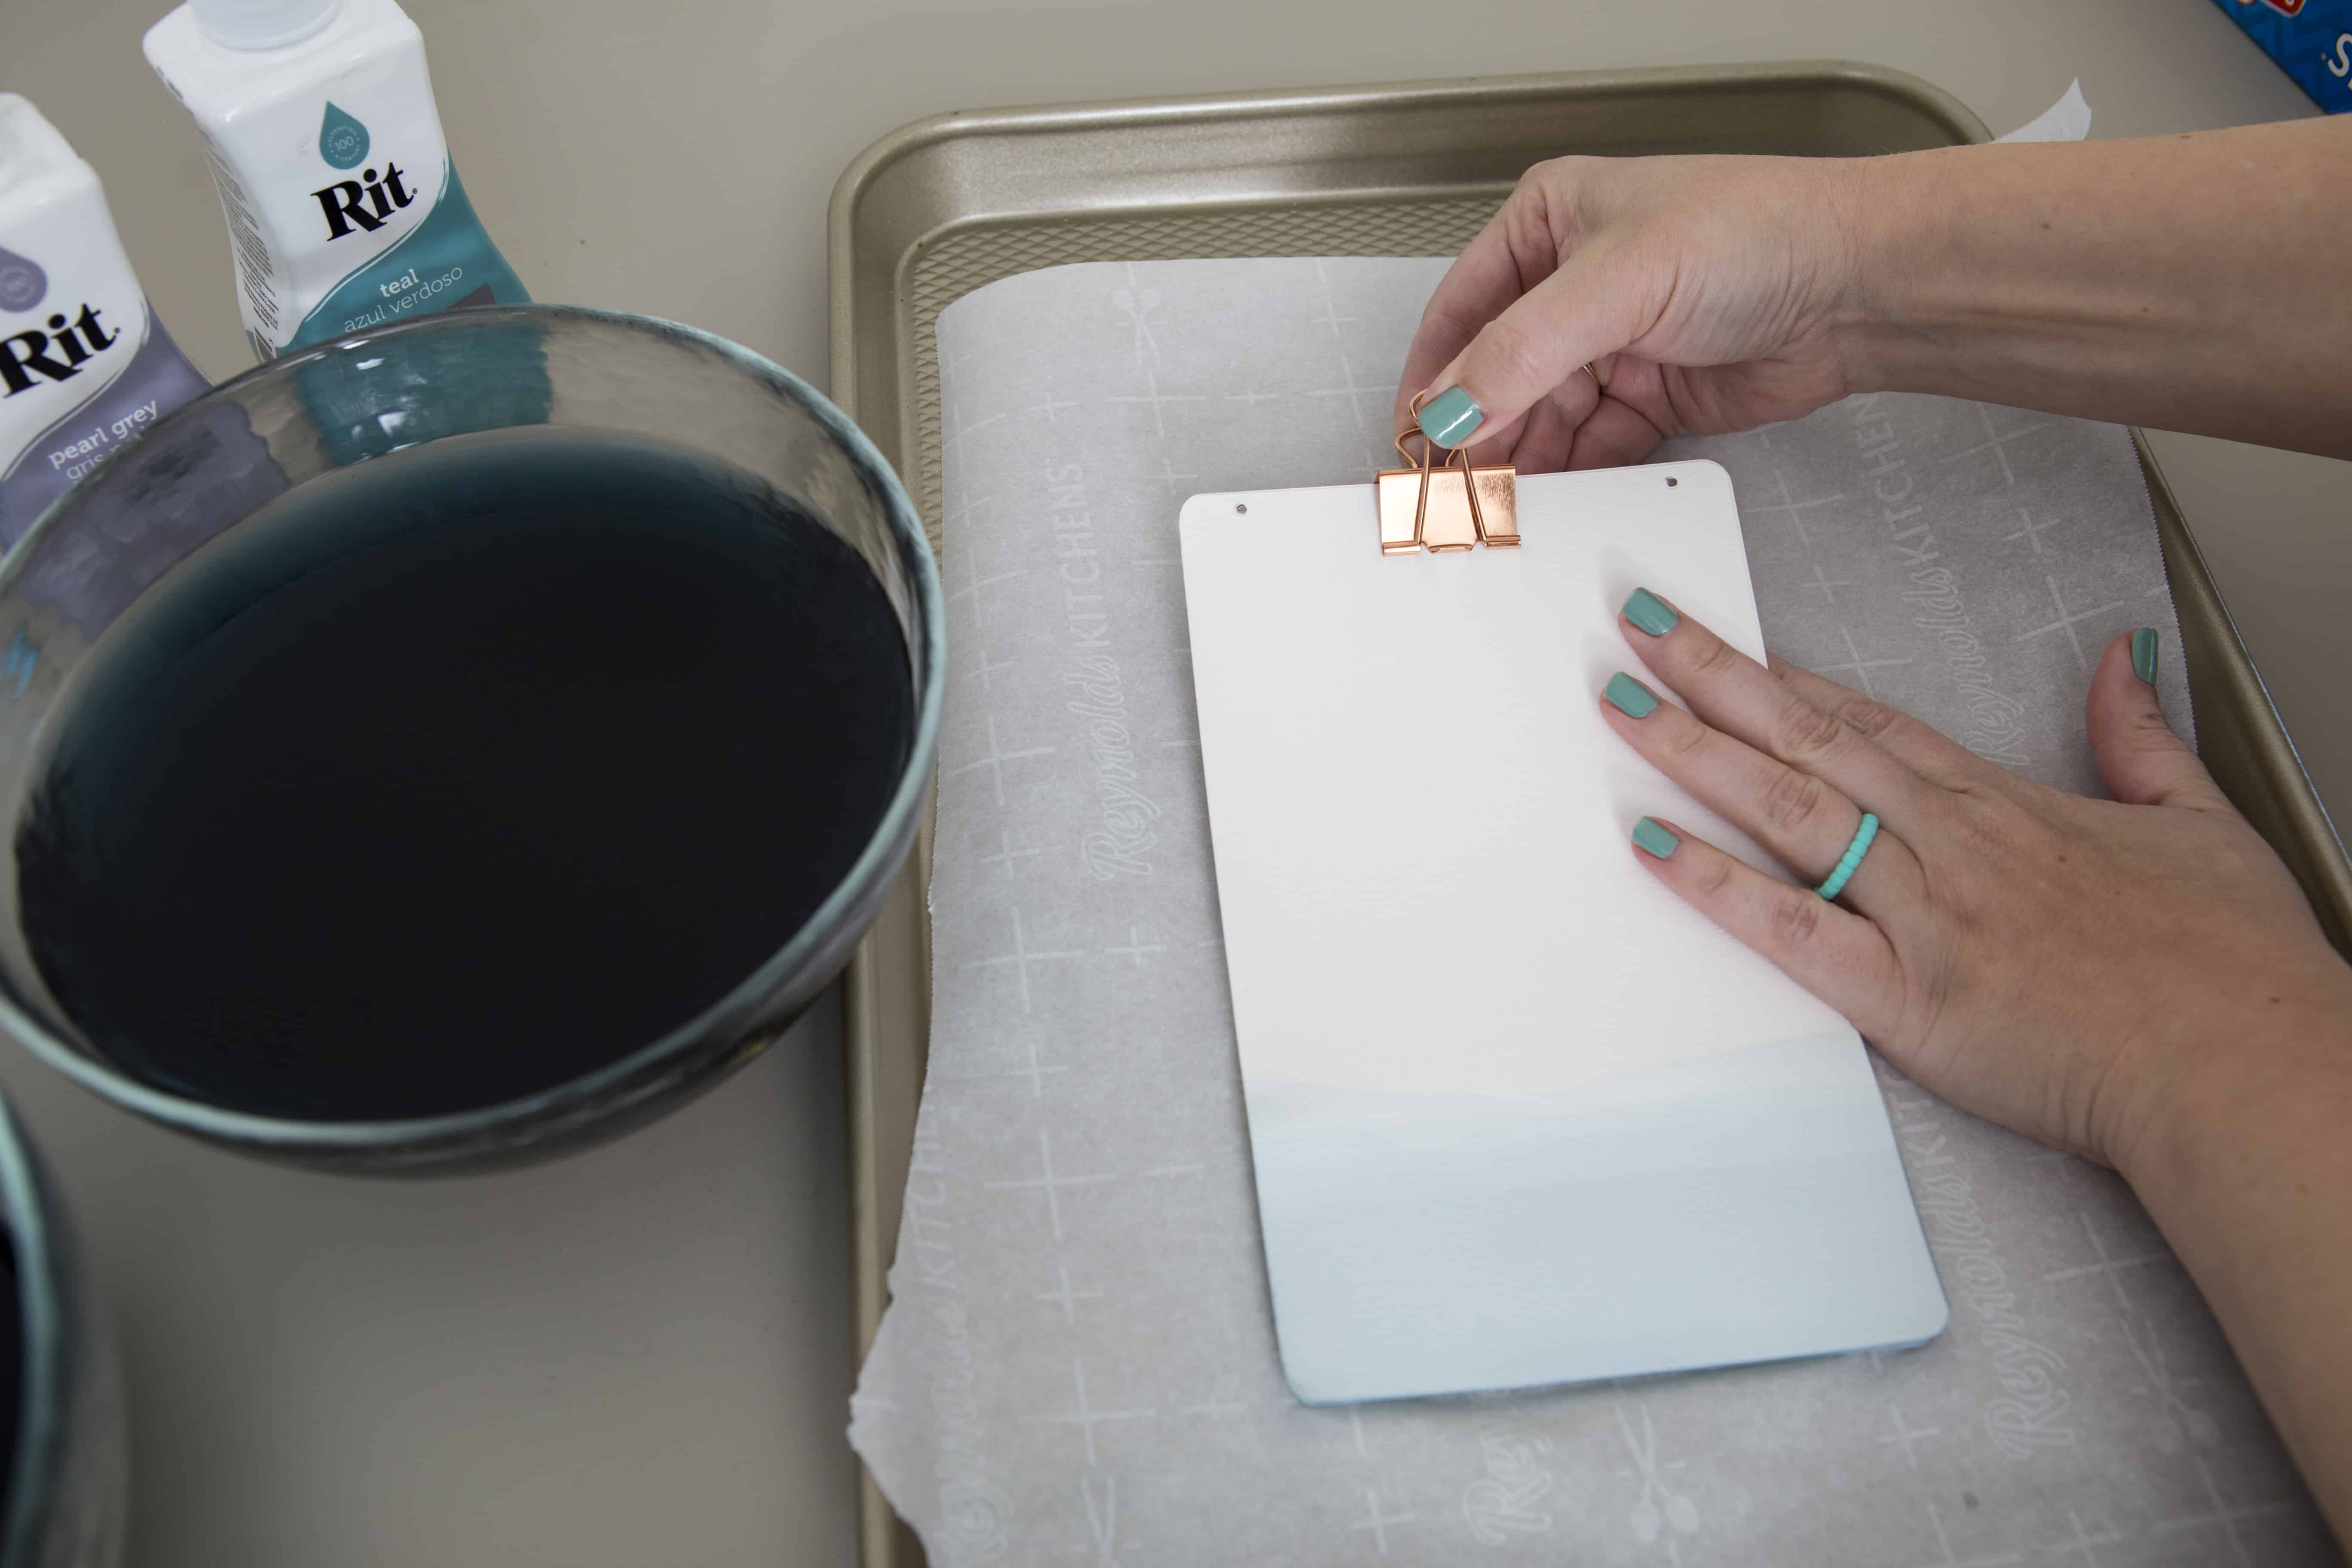
- For the dip dye method, submerge the leather for 30 seconds in the dyebath, holding both the front piece and the back piece together to get the same dip height. Remove and let them dry on parchment paper.
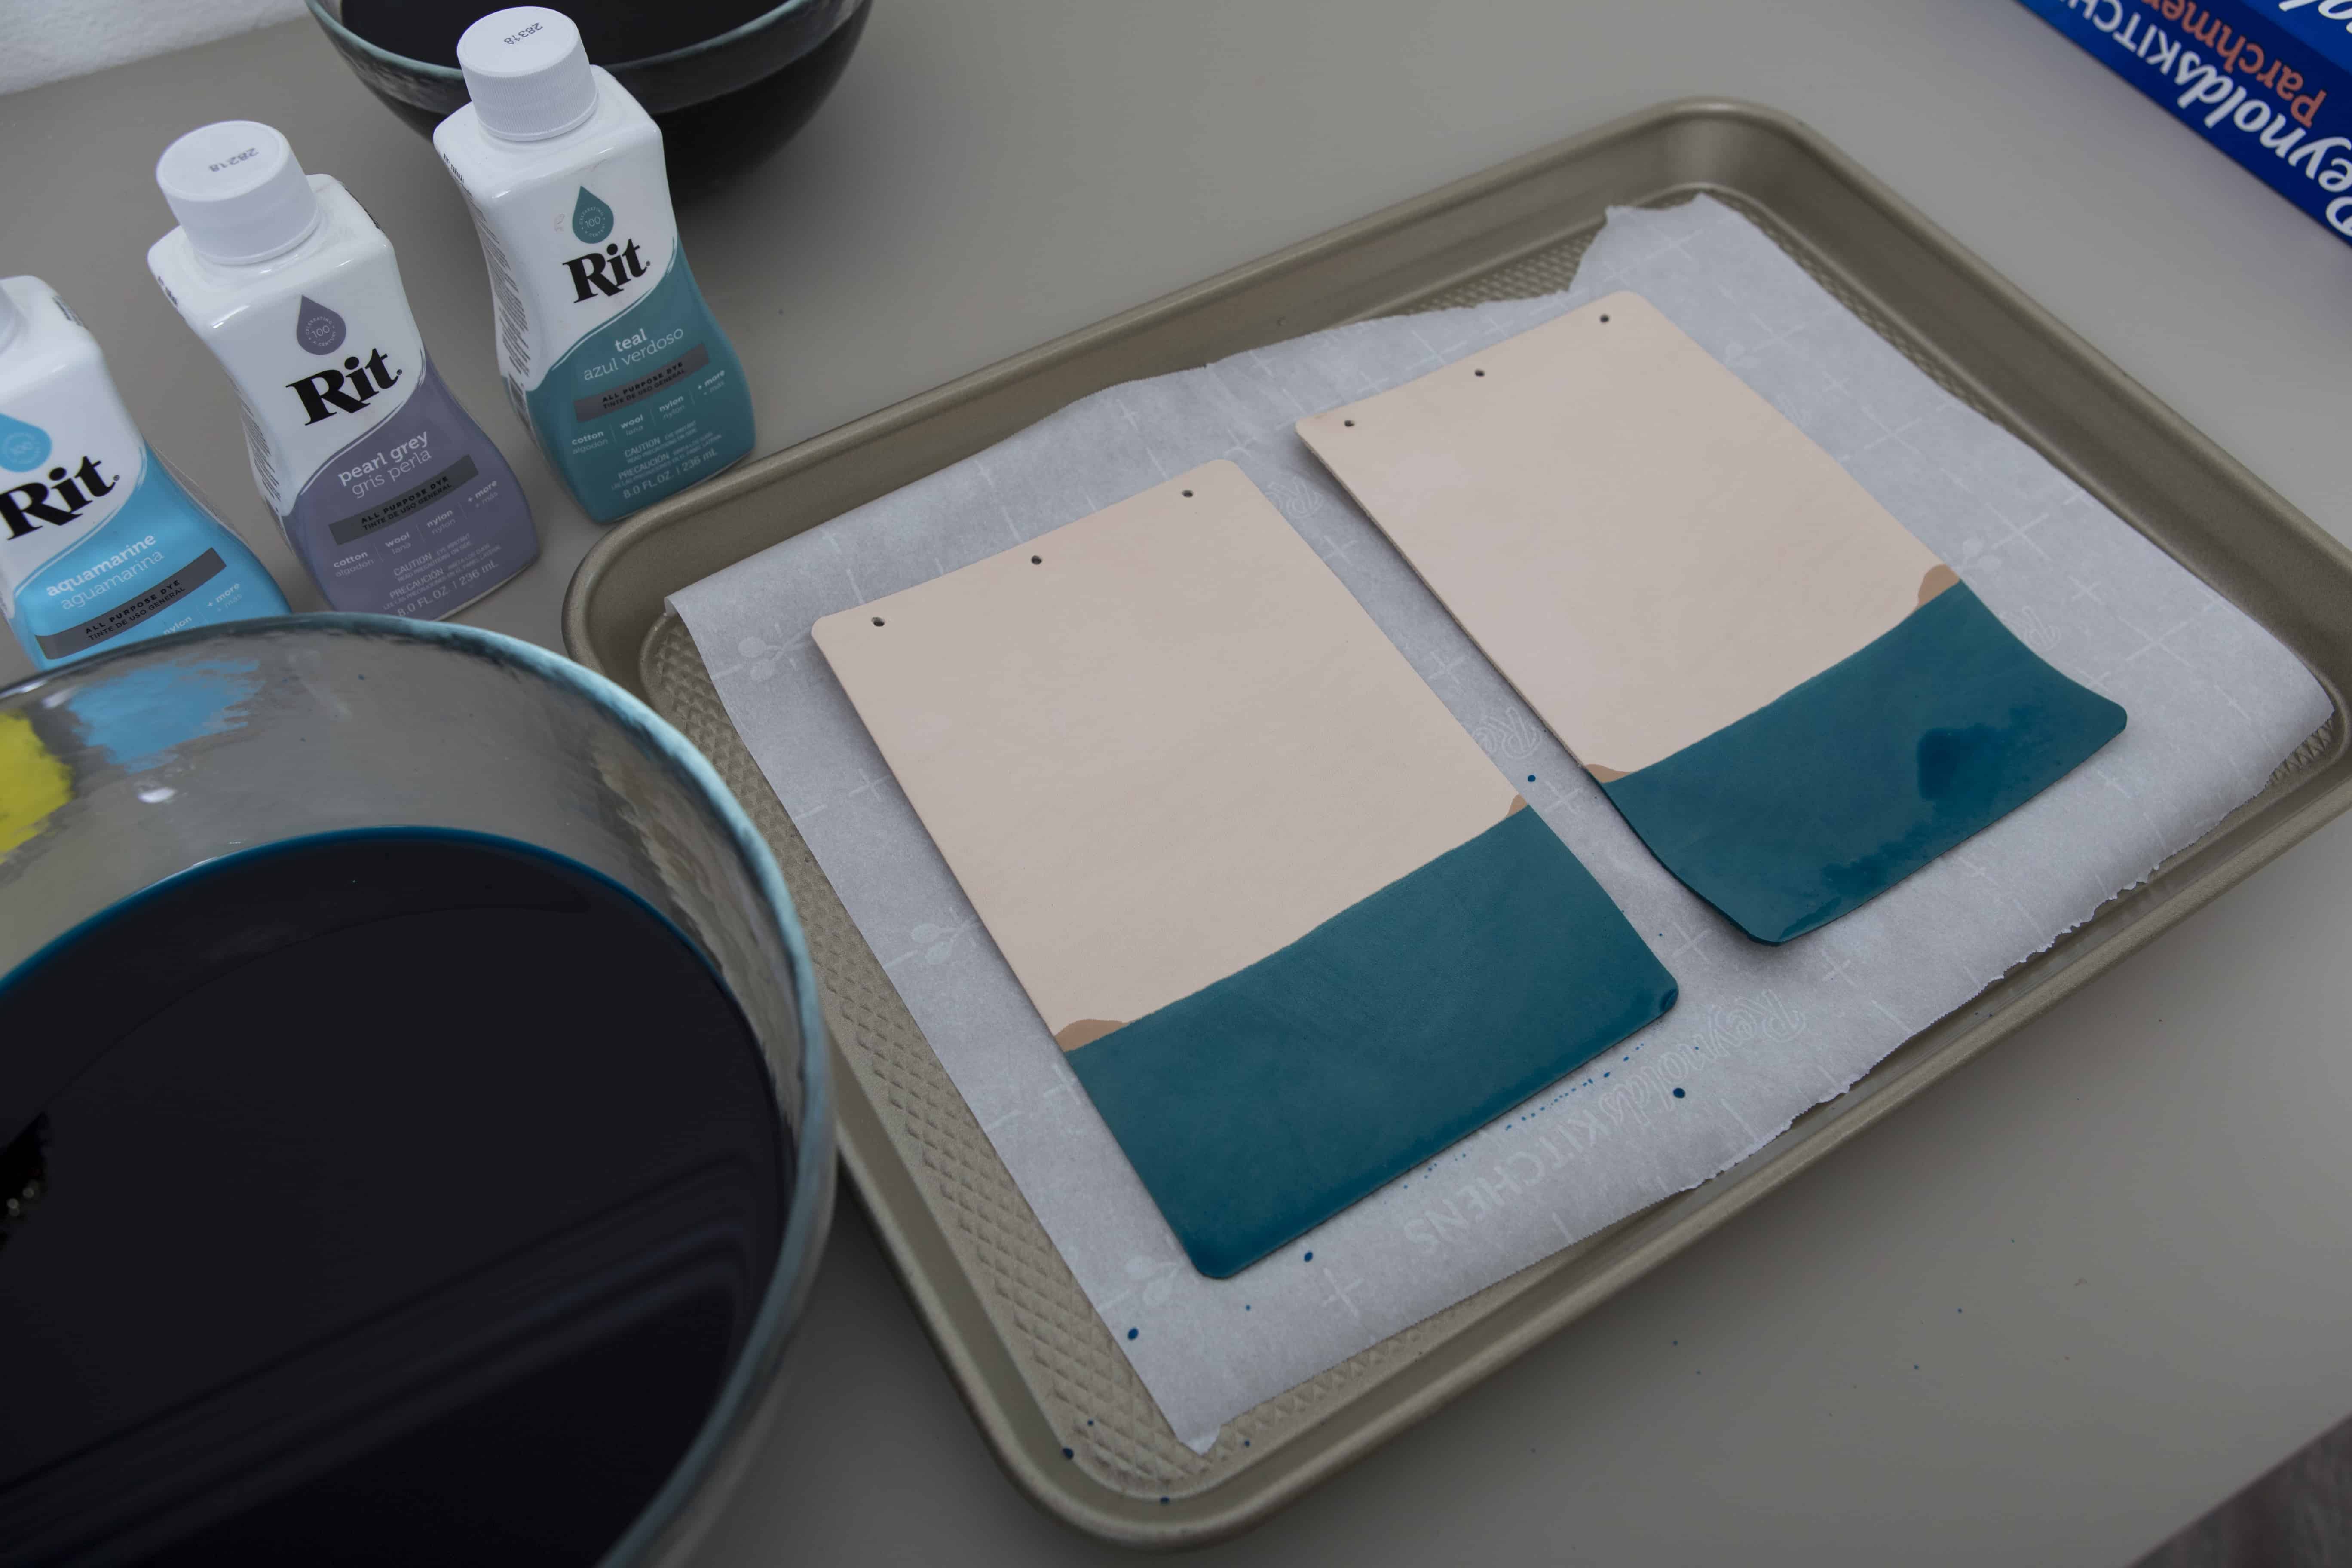
- For the wipe method, using a small piece of microfiber cloth, dip in the dyebath and wipe it repeatedly across the edges of the leather. The same process was applied to the paper.
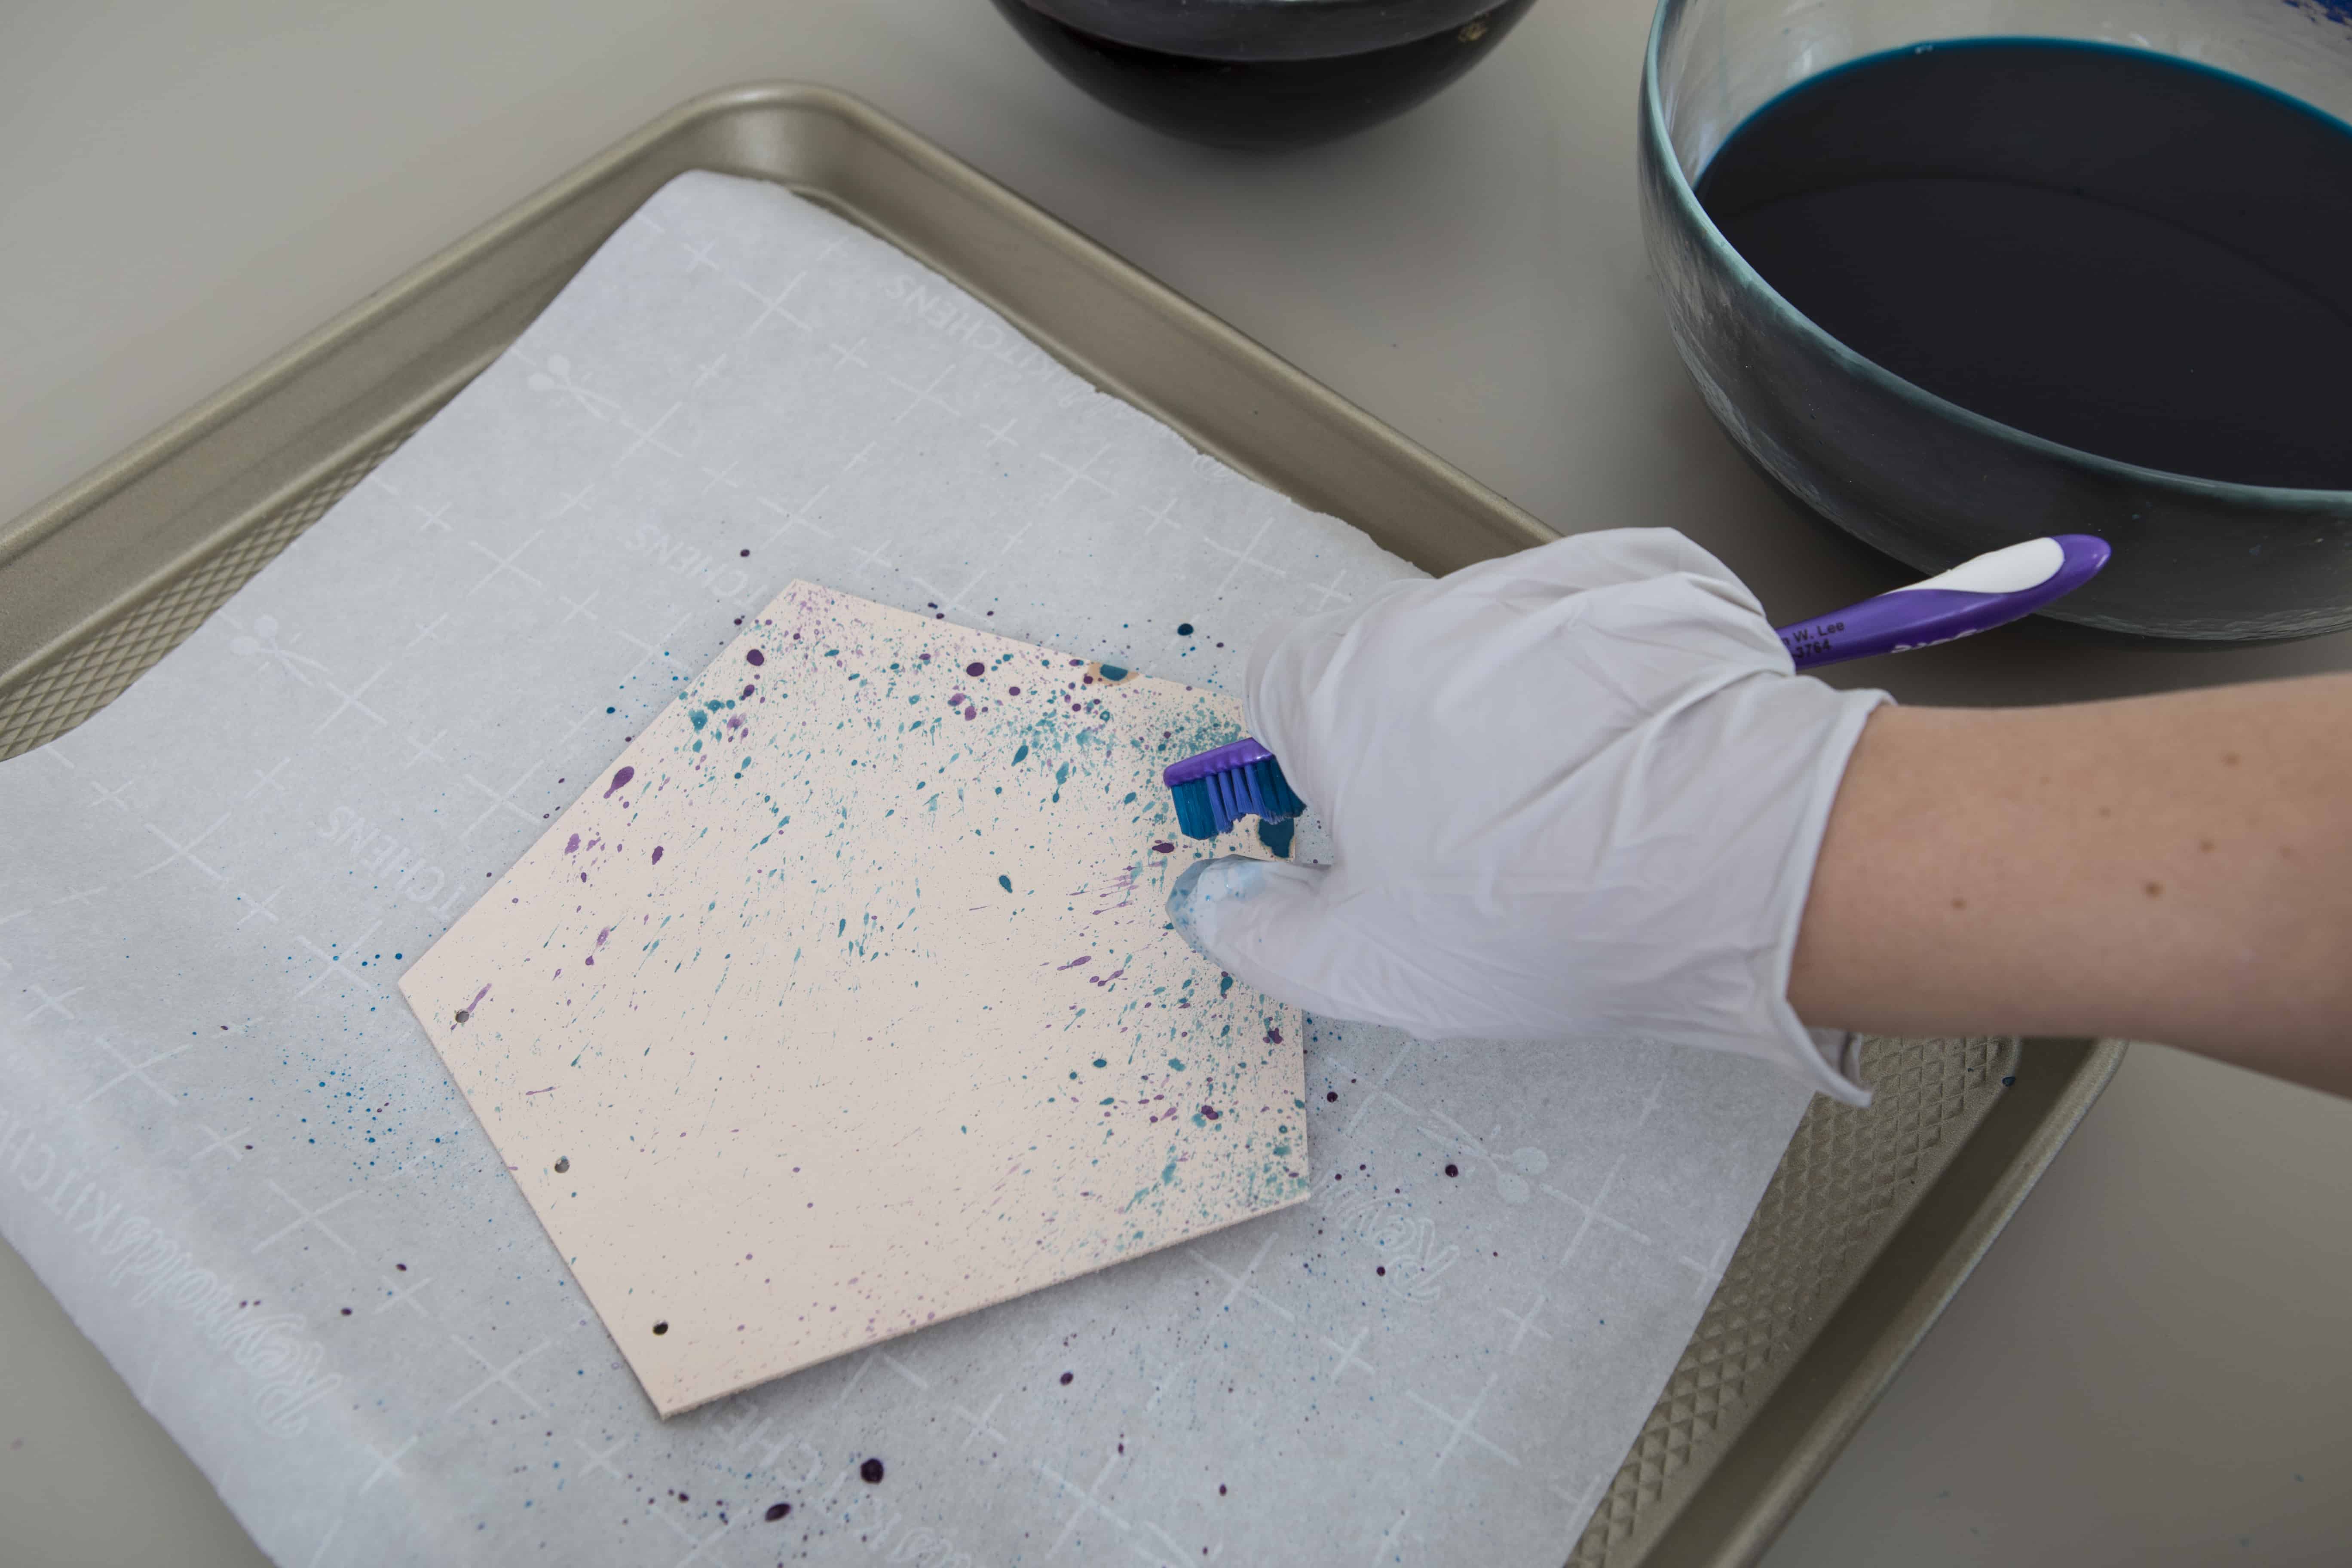
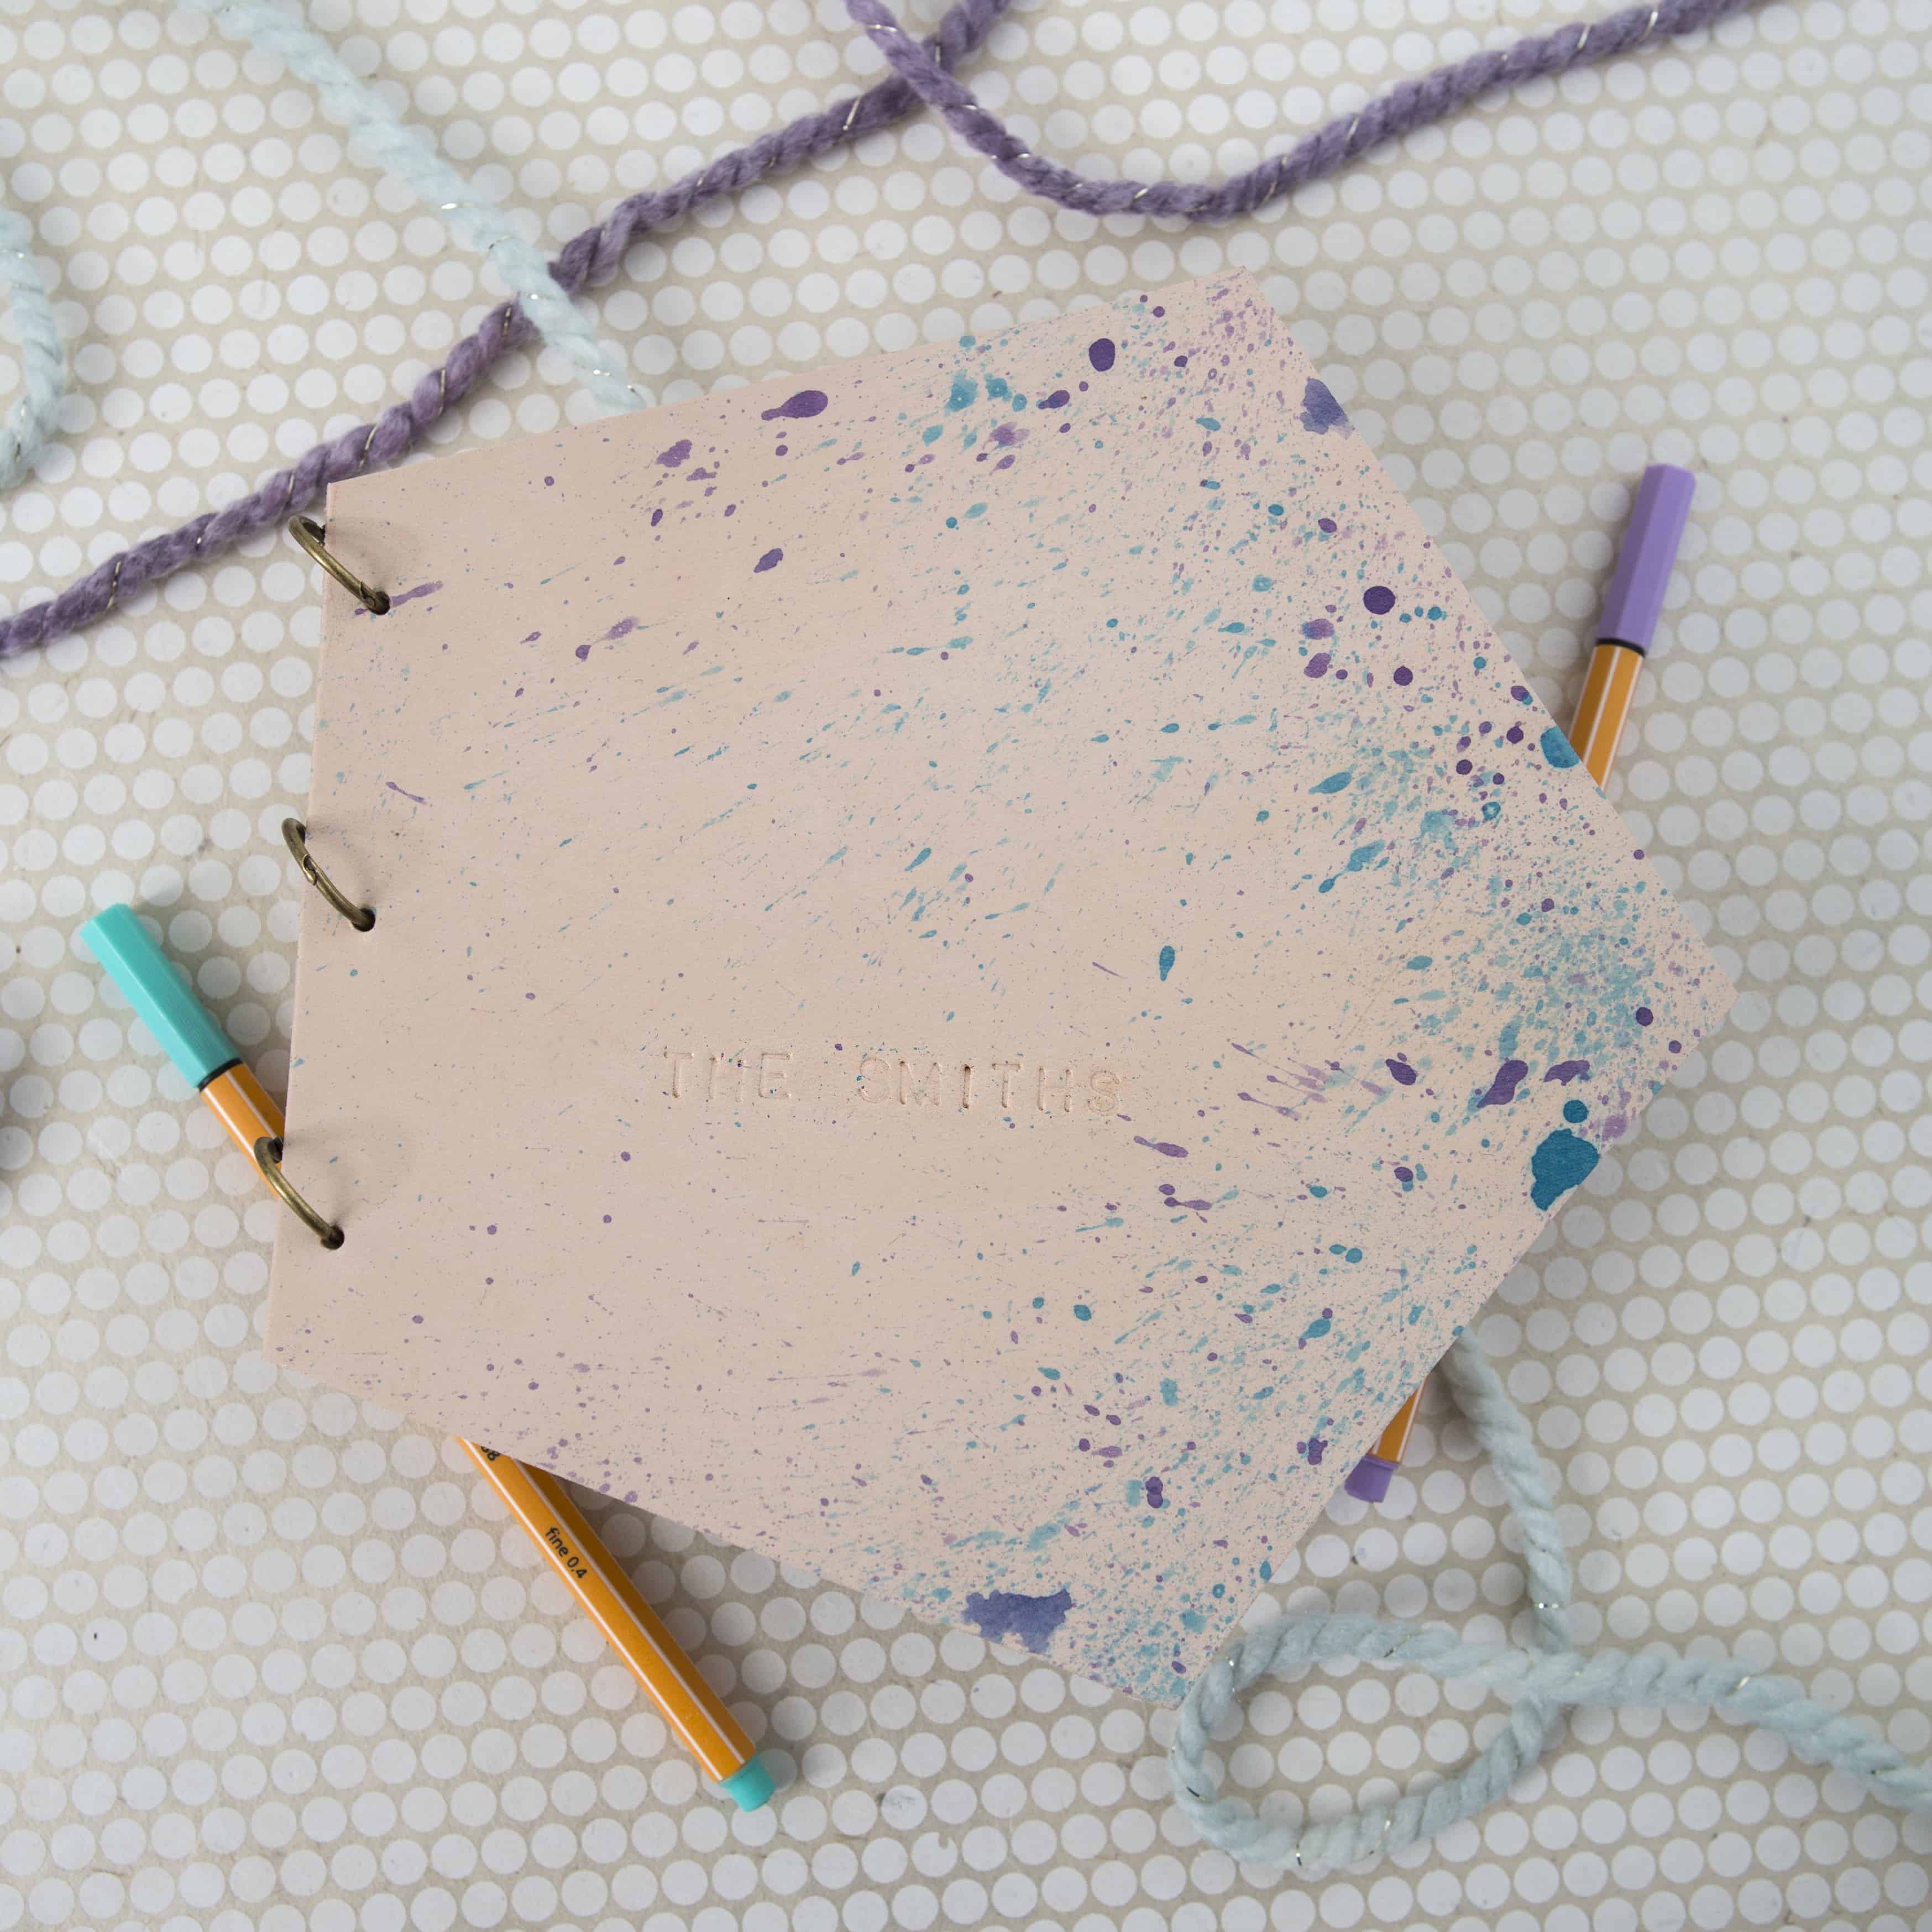
- For the splatter method, a toothbrush was used. Dip the toothbrush bristles in the dyebath and run your finger along the bristles to create spaltter marks across the leather. This was not applied to the signing papers.
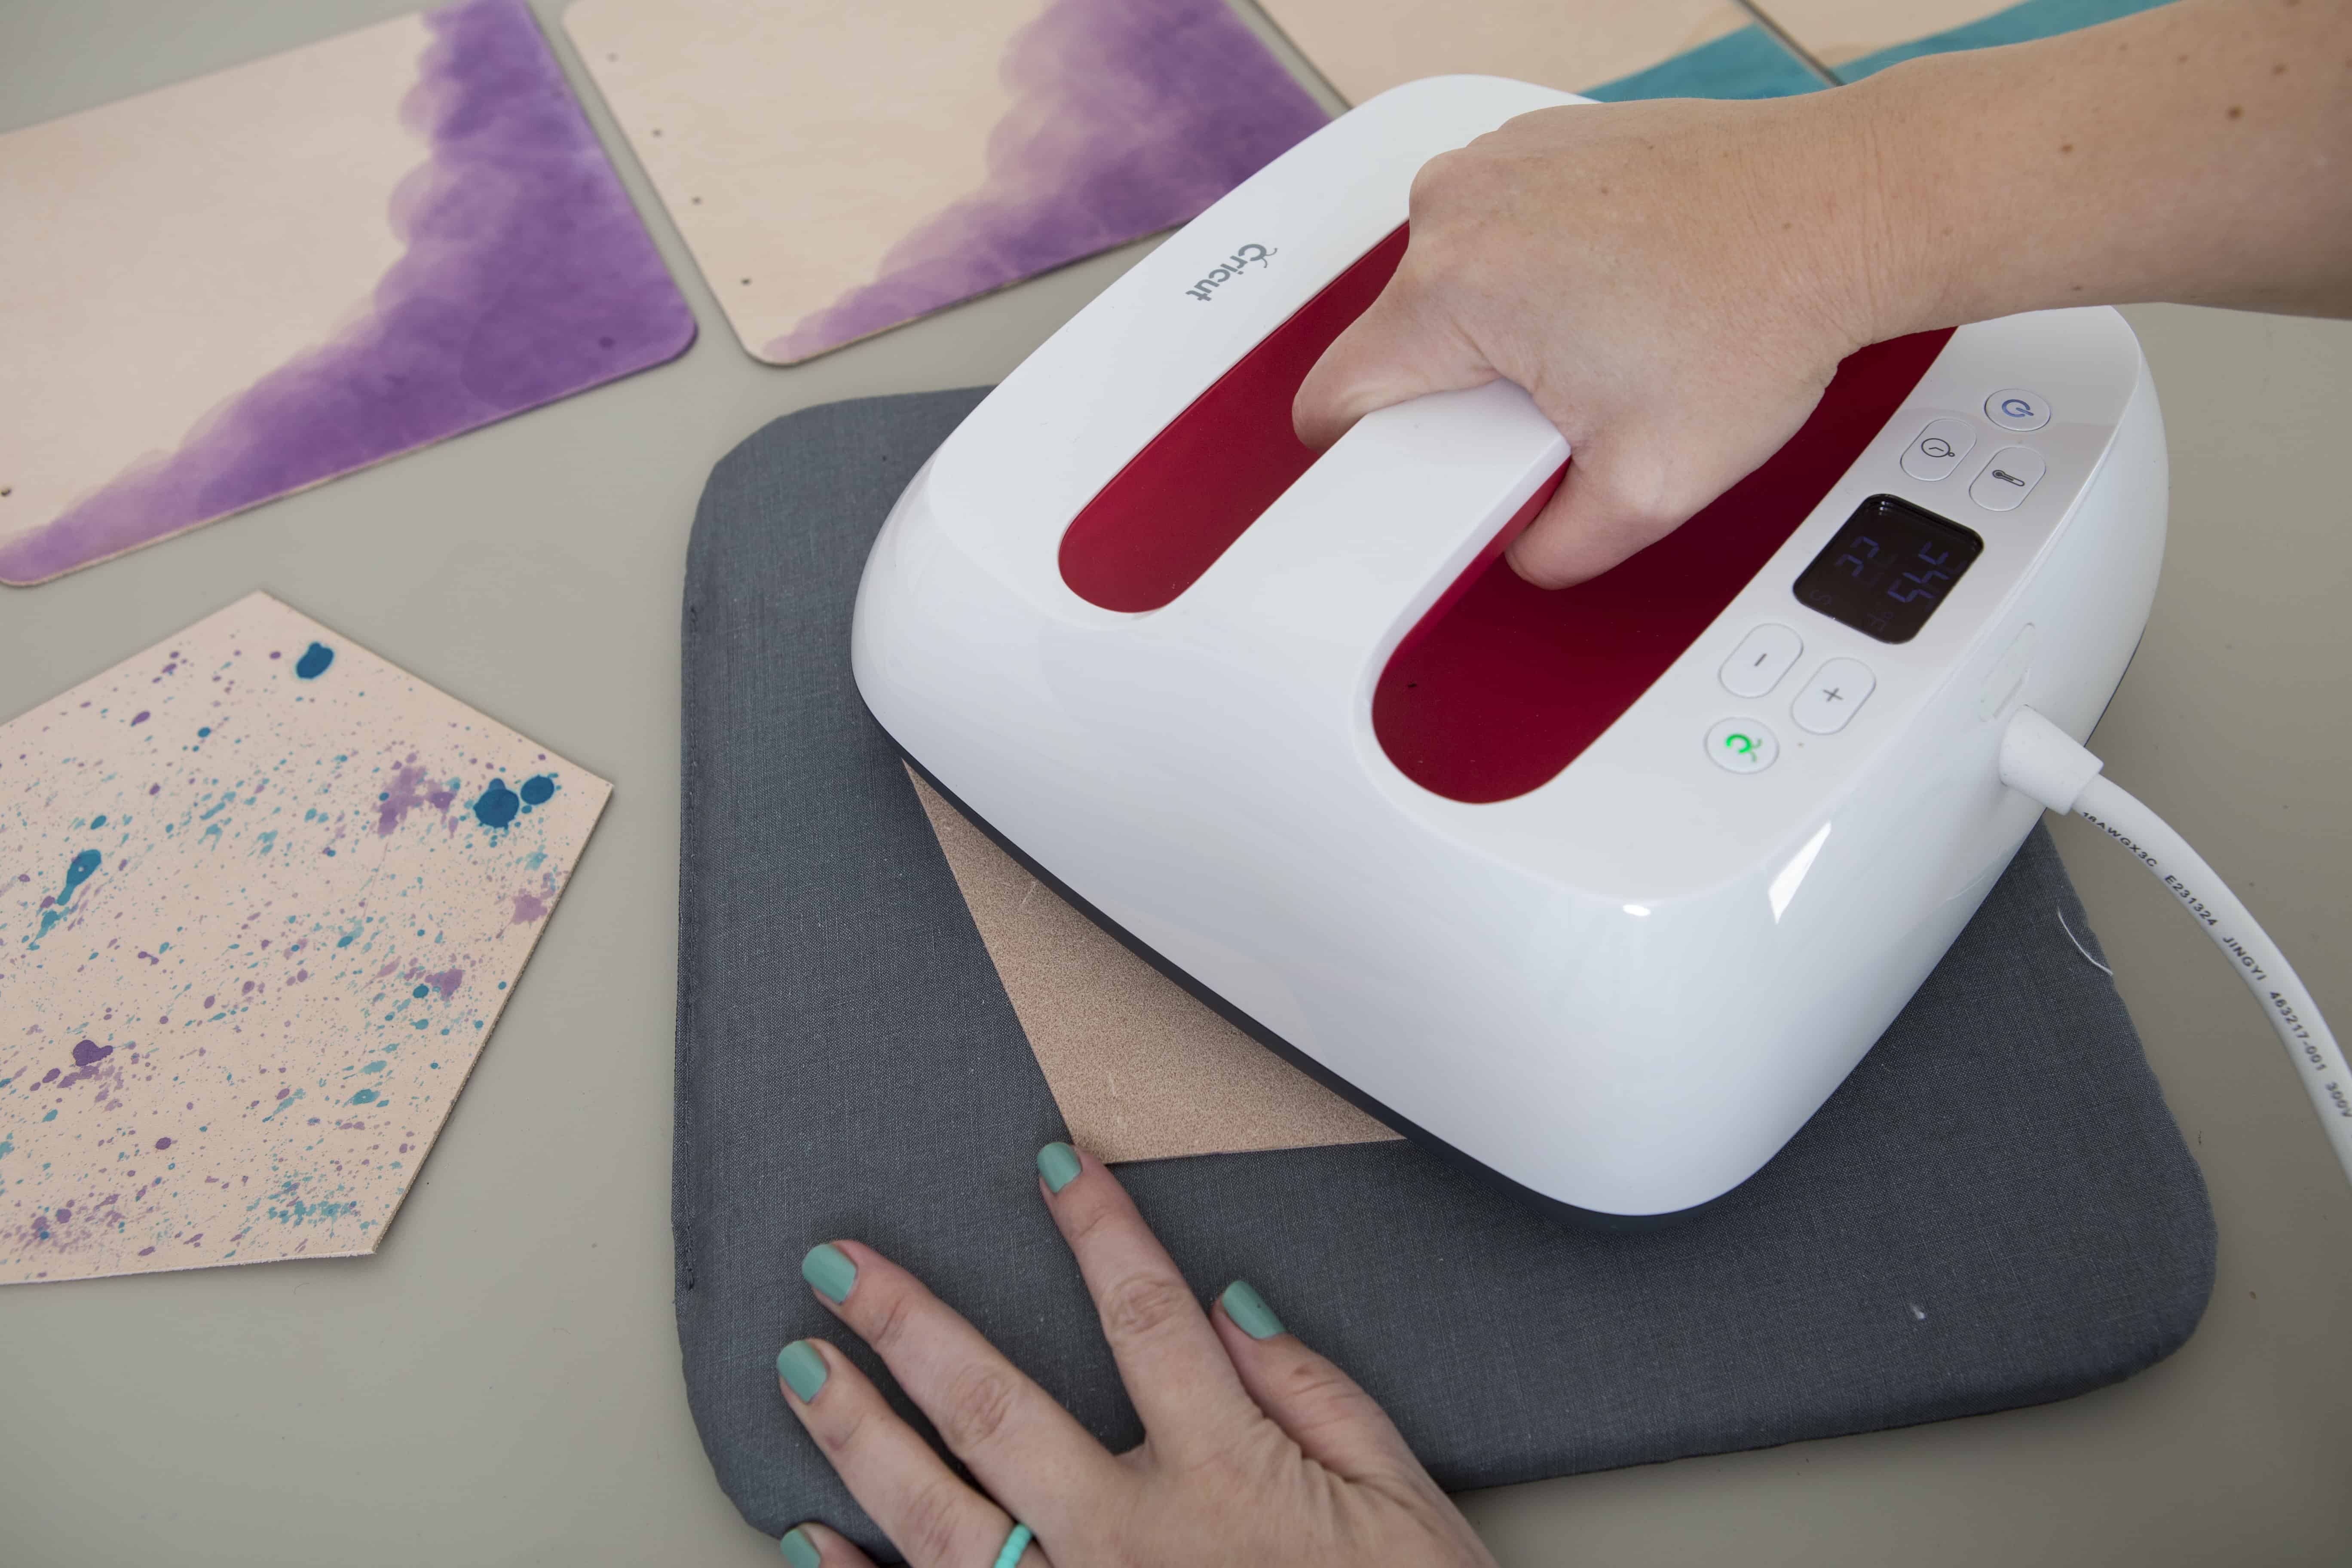
- Note: If your leather starts curling from the liquid, you can iron it flat again. Ironing the rough side and letting it stay that way until it cooled yielded the best results. You can also try to put your leather under really heavy books overnight to flatten out.
- Once the leather is dyed, it is time to dye the paper. Dip the paper into the dyebath for 30-45 seconds, holding all the sheets together at the same time. Make sure to move the paper around and swirl it in the water.
- Remove paper from the dyebath and clip it together. Hang to dry. If you use regular paper or cardstock and not watercolor paper, you won’t be able to submerge the paper as long as it will warp and/or fall apart. For non-watercolor paper, we recommend submerging for only a few seconds.
- Leather-stamping alphabets were used to create the personalization on the leather. This needs to be done on top of a piece of wood. Tape off the leather before hand with washi tape to keep the stamping in a straight line.
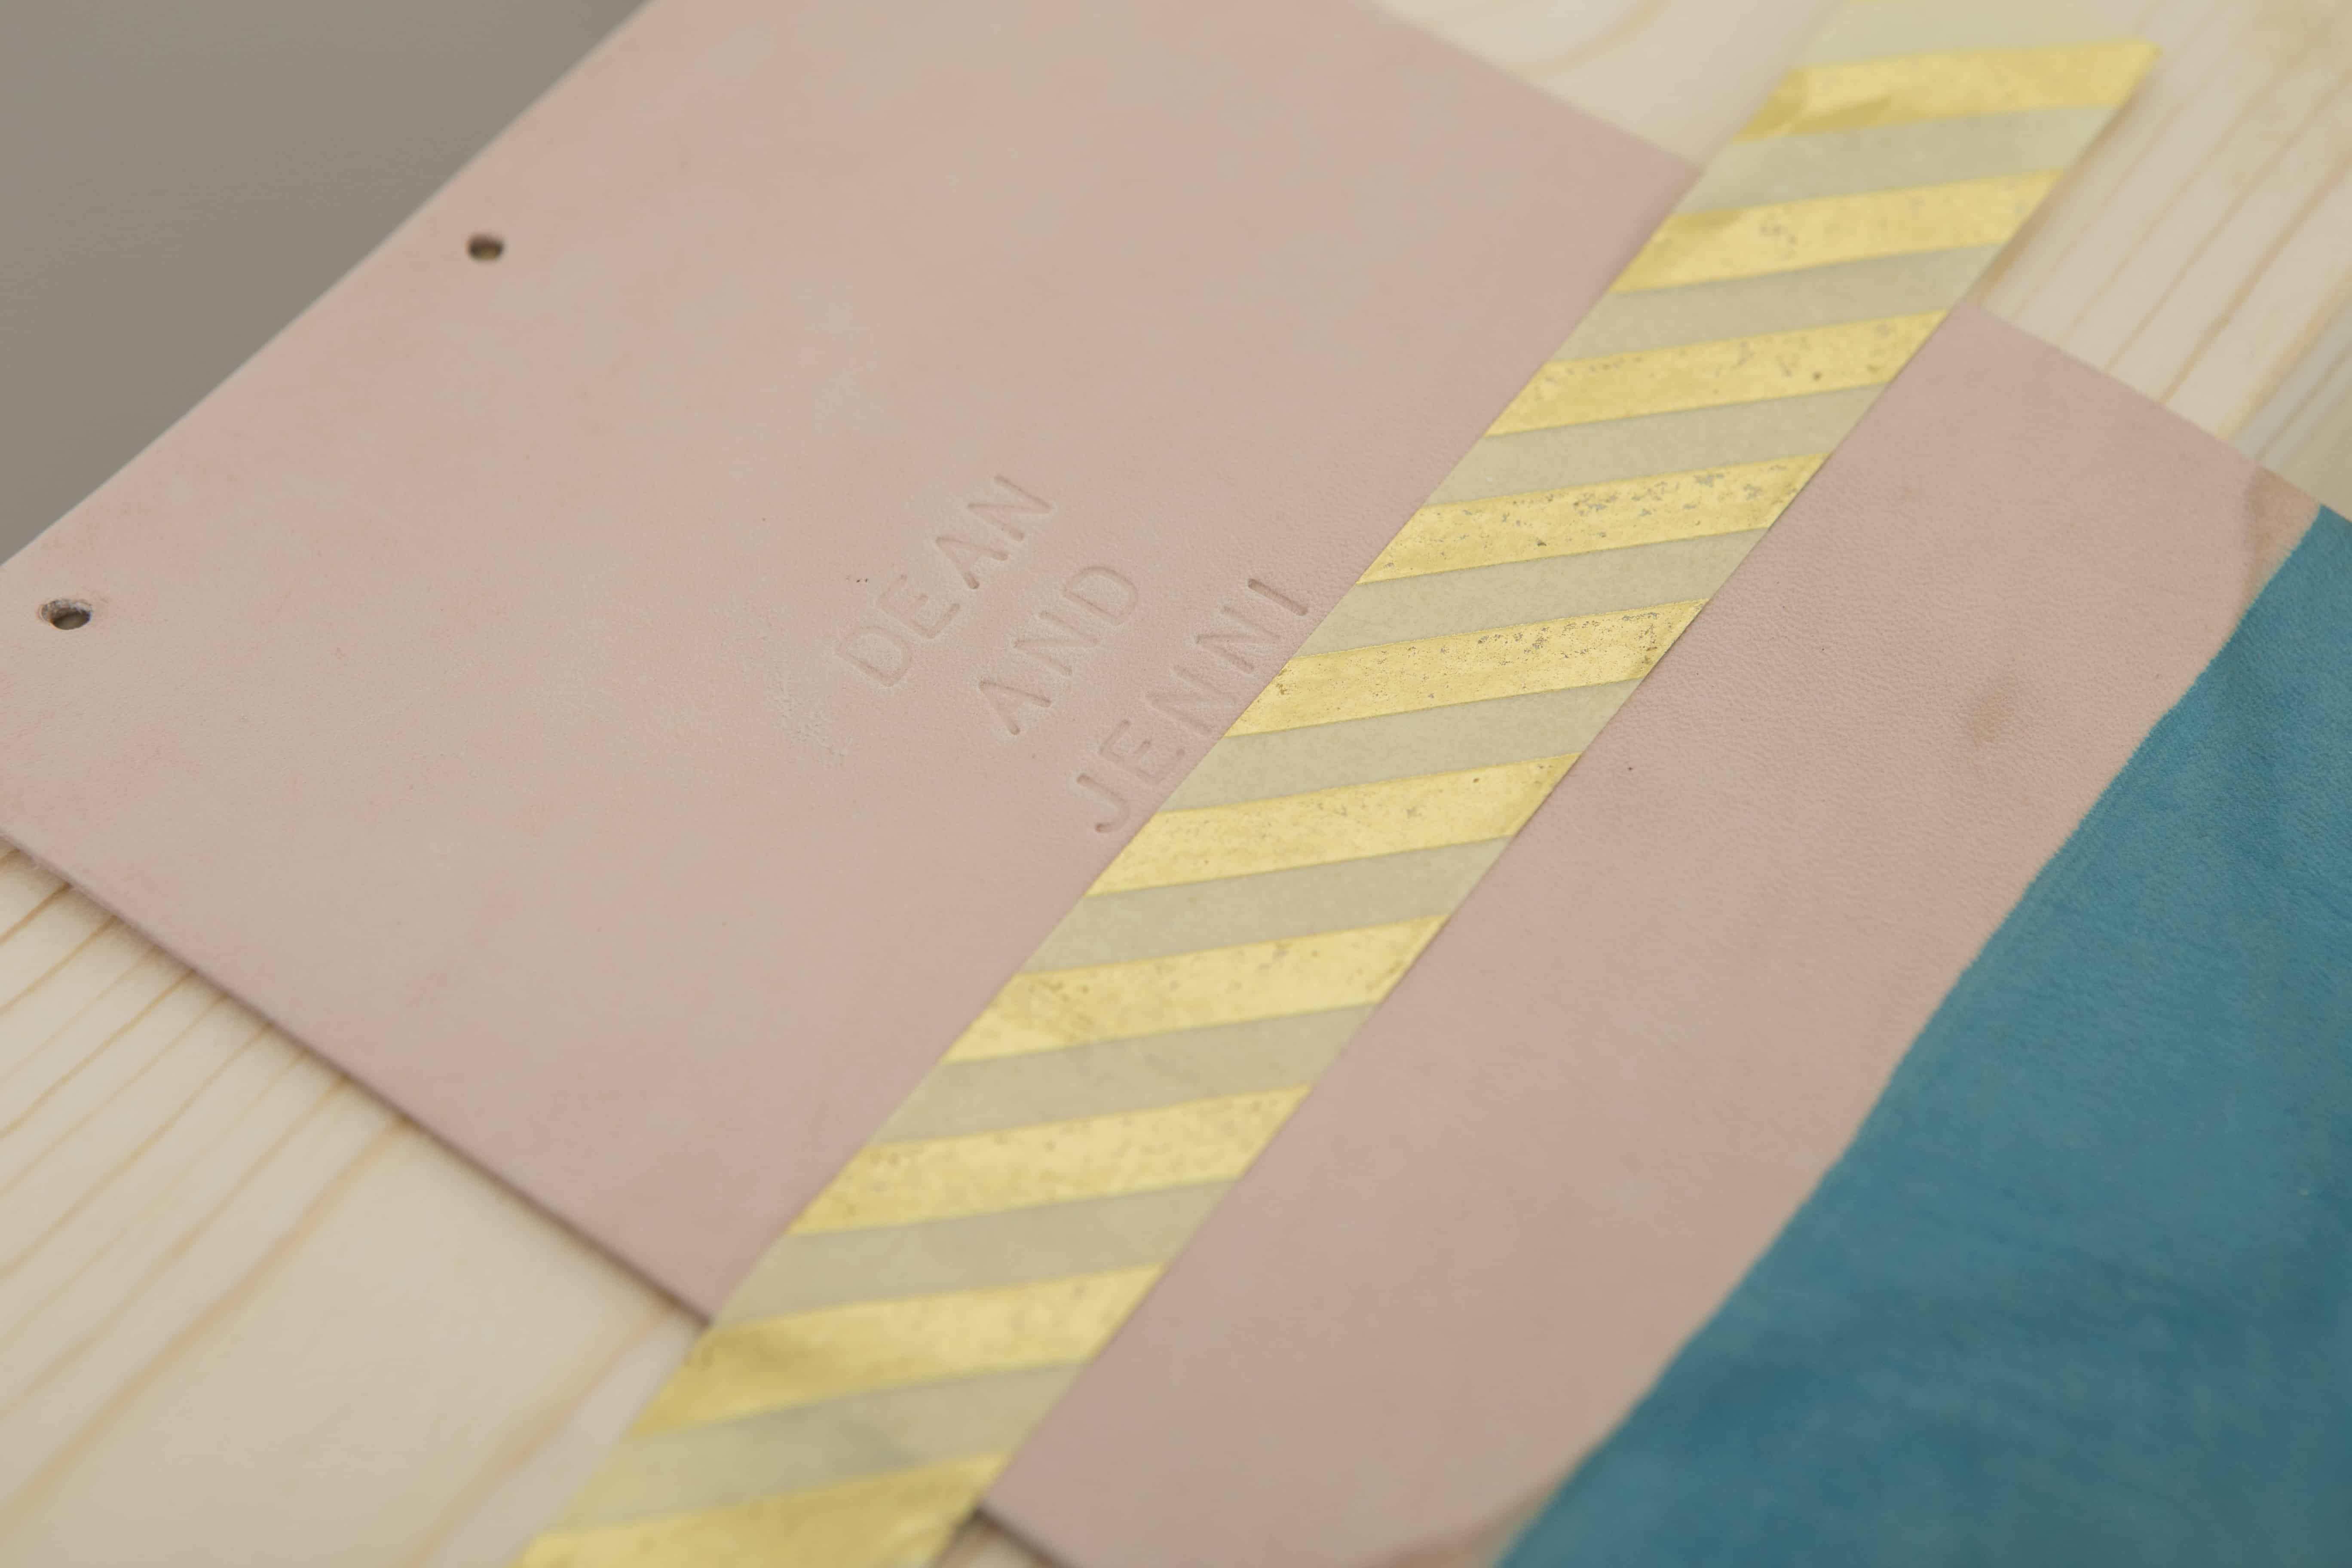
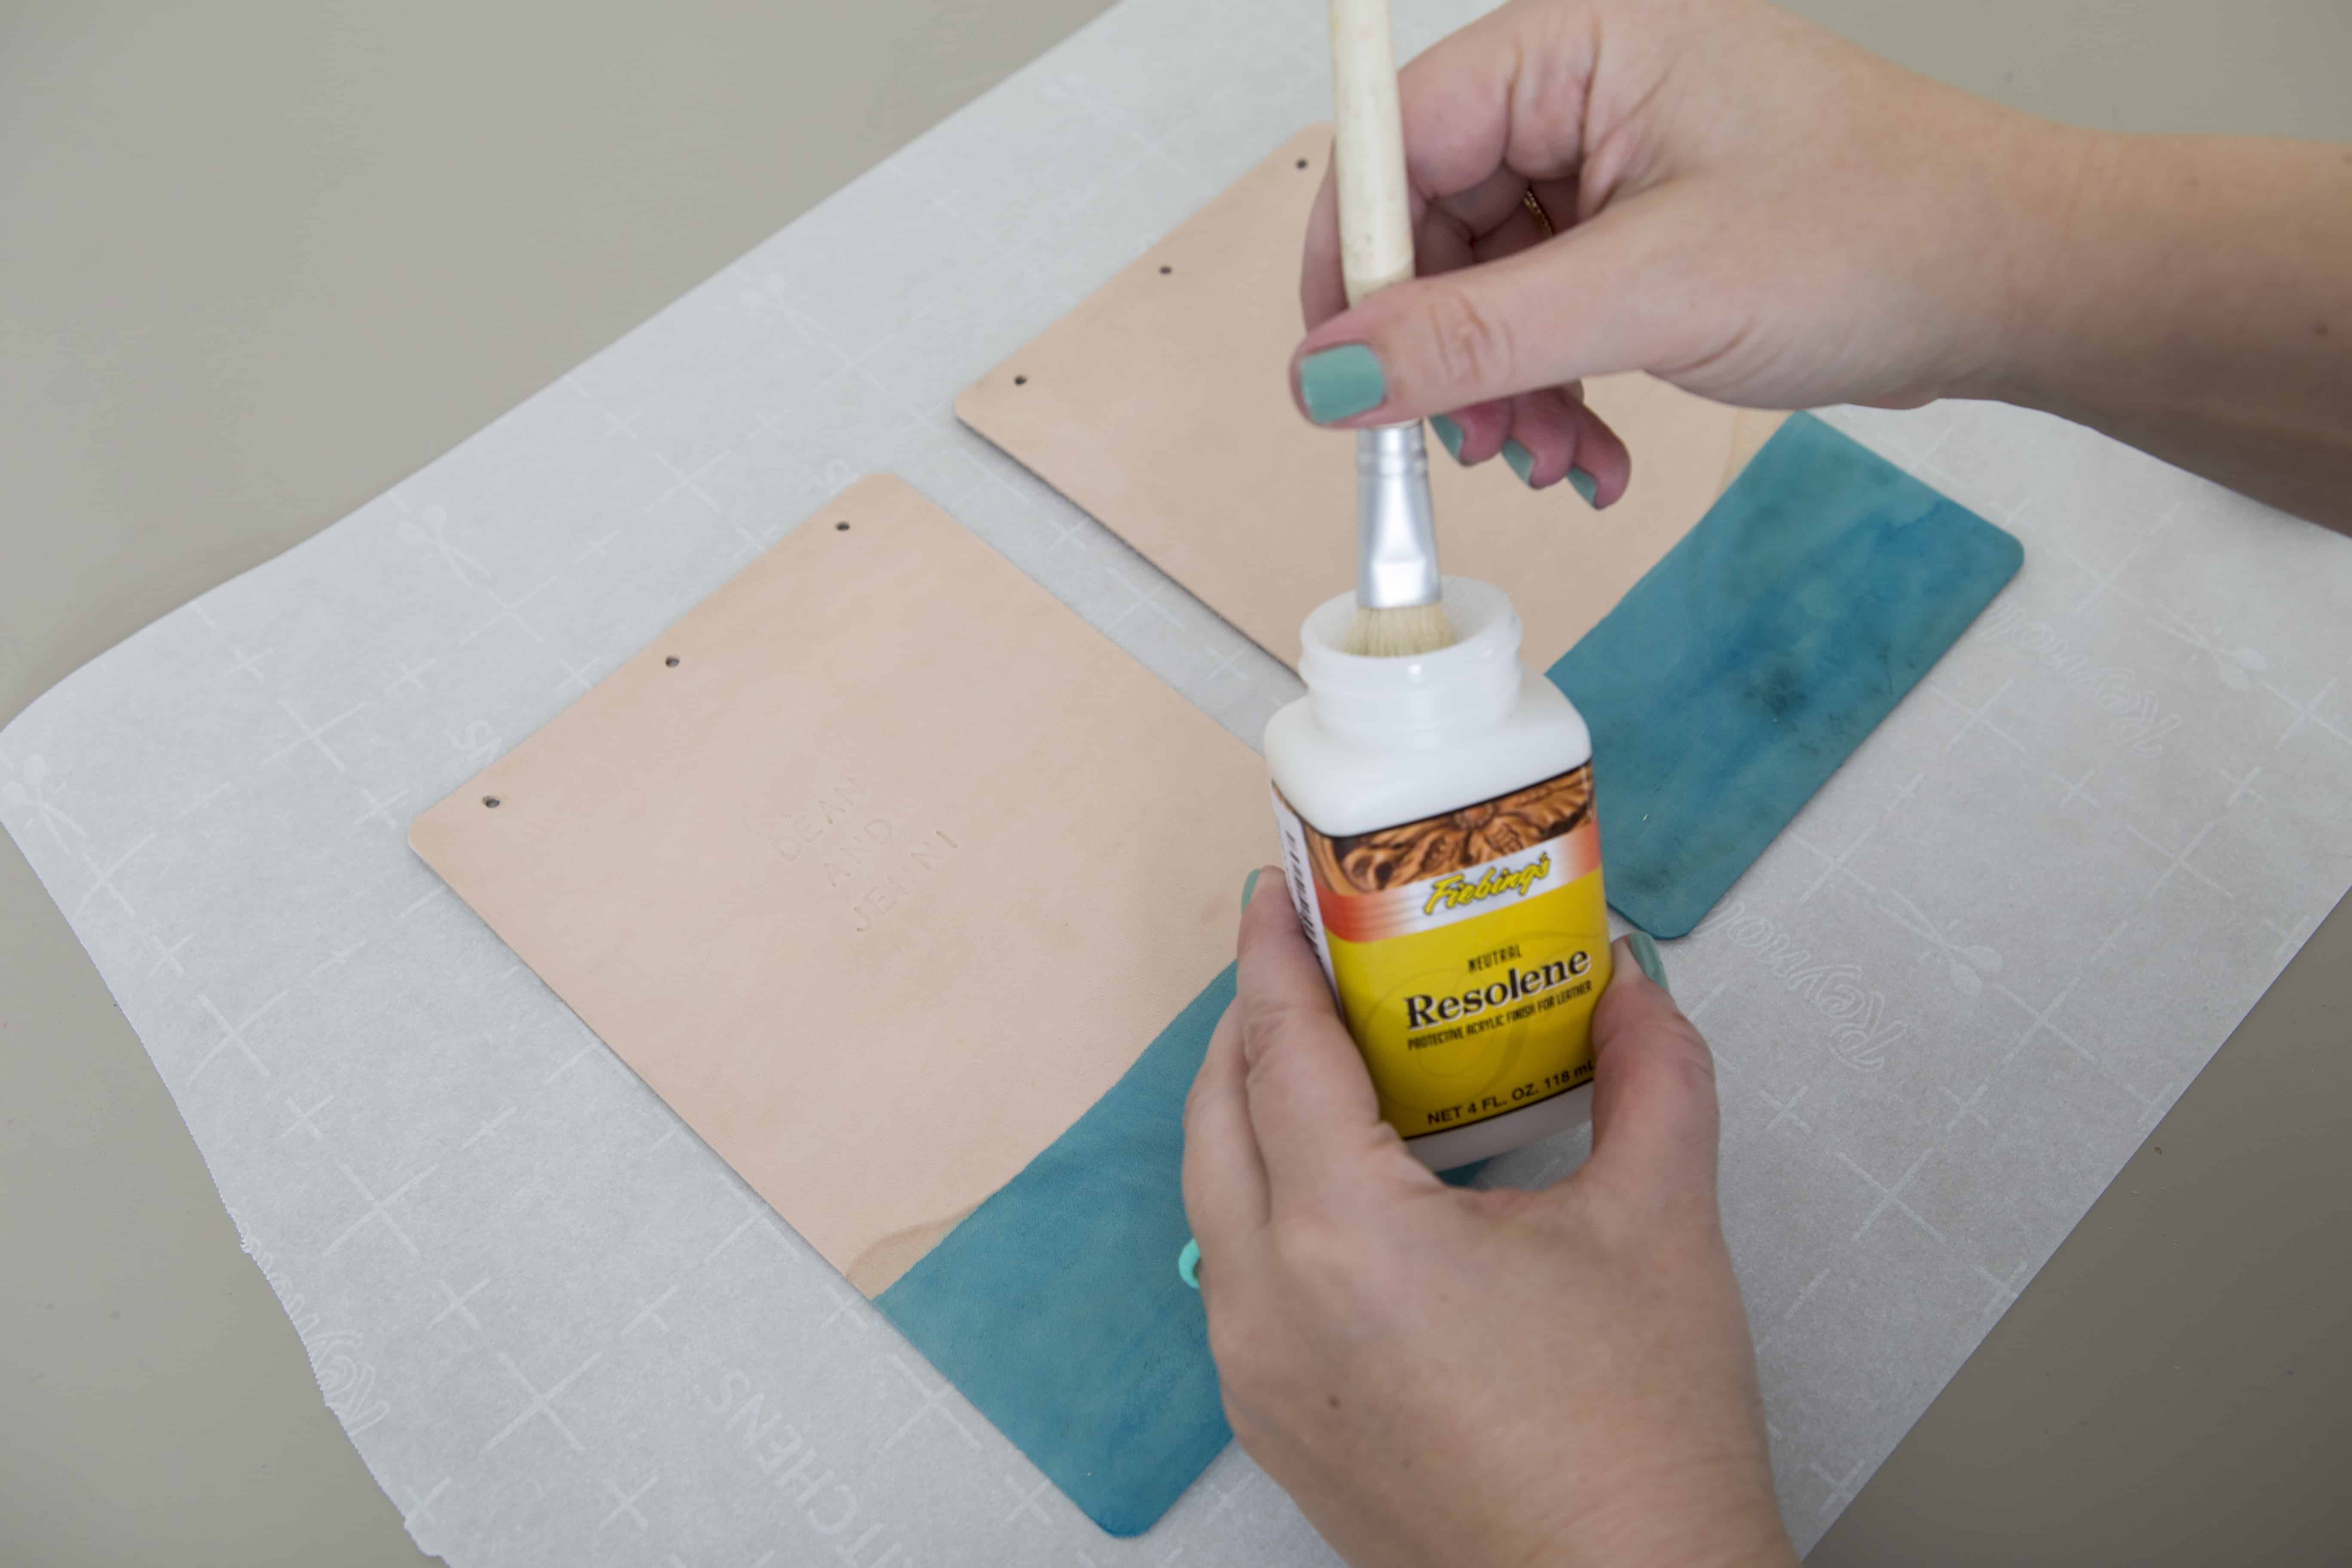
- Add a thin coat of Resolene to the front and back of the leather to seal the dye. Otherwise, the dye could rub off on clothing or tabletops.
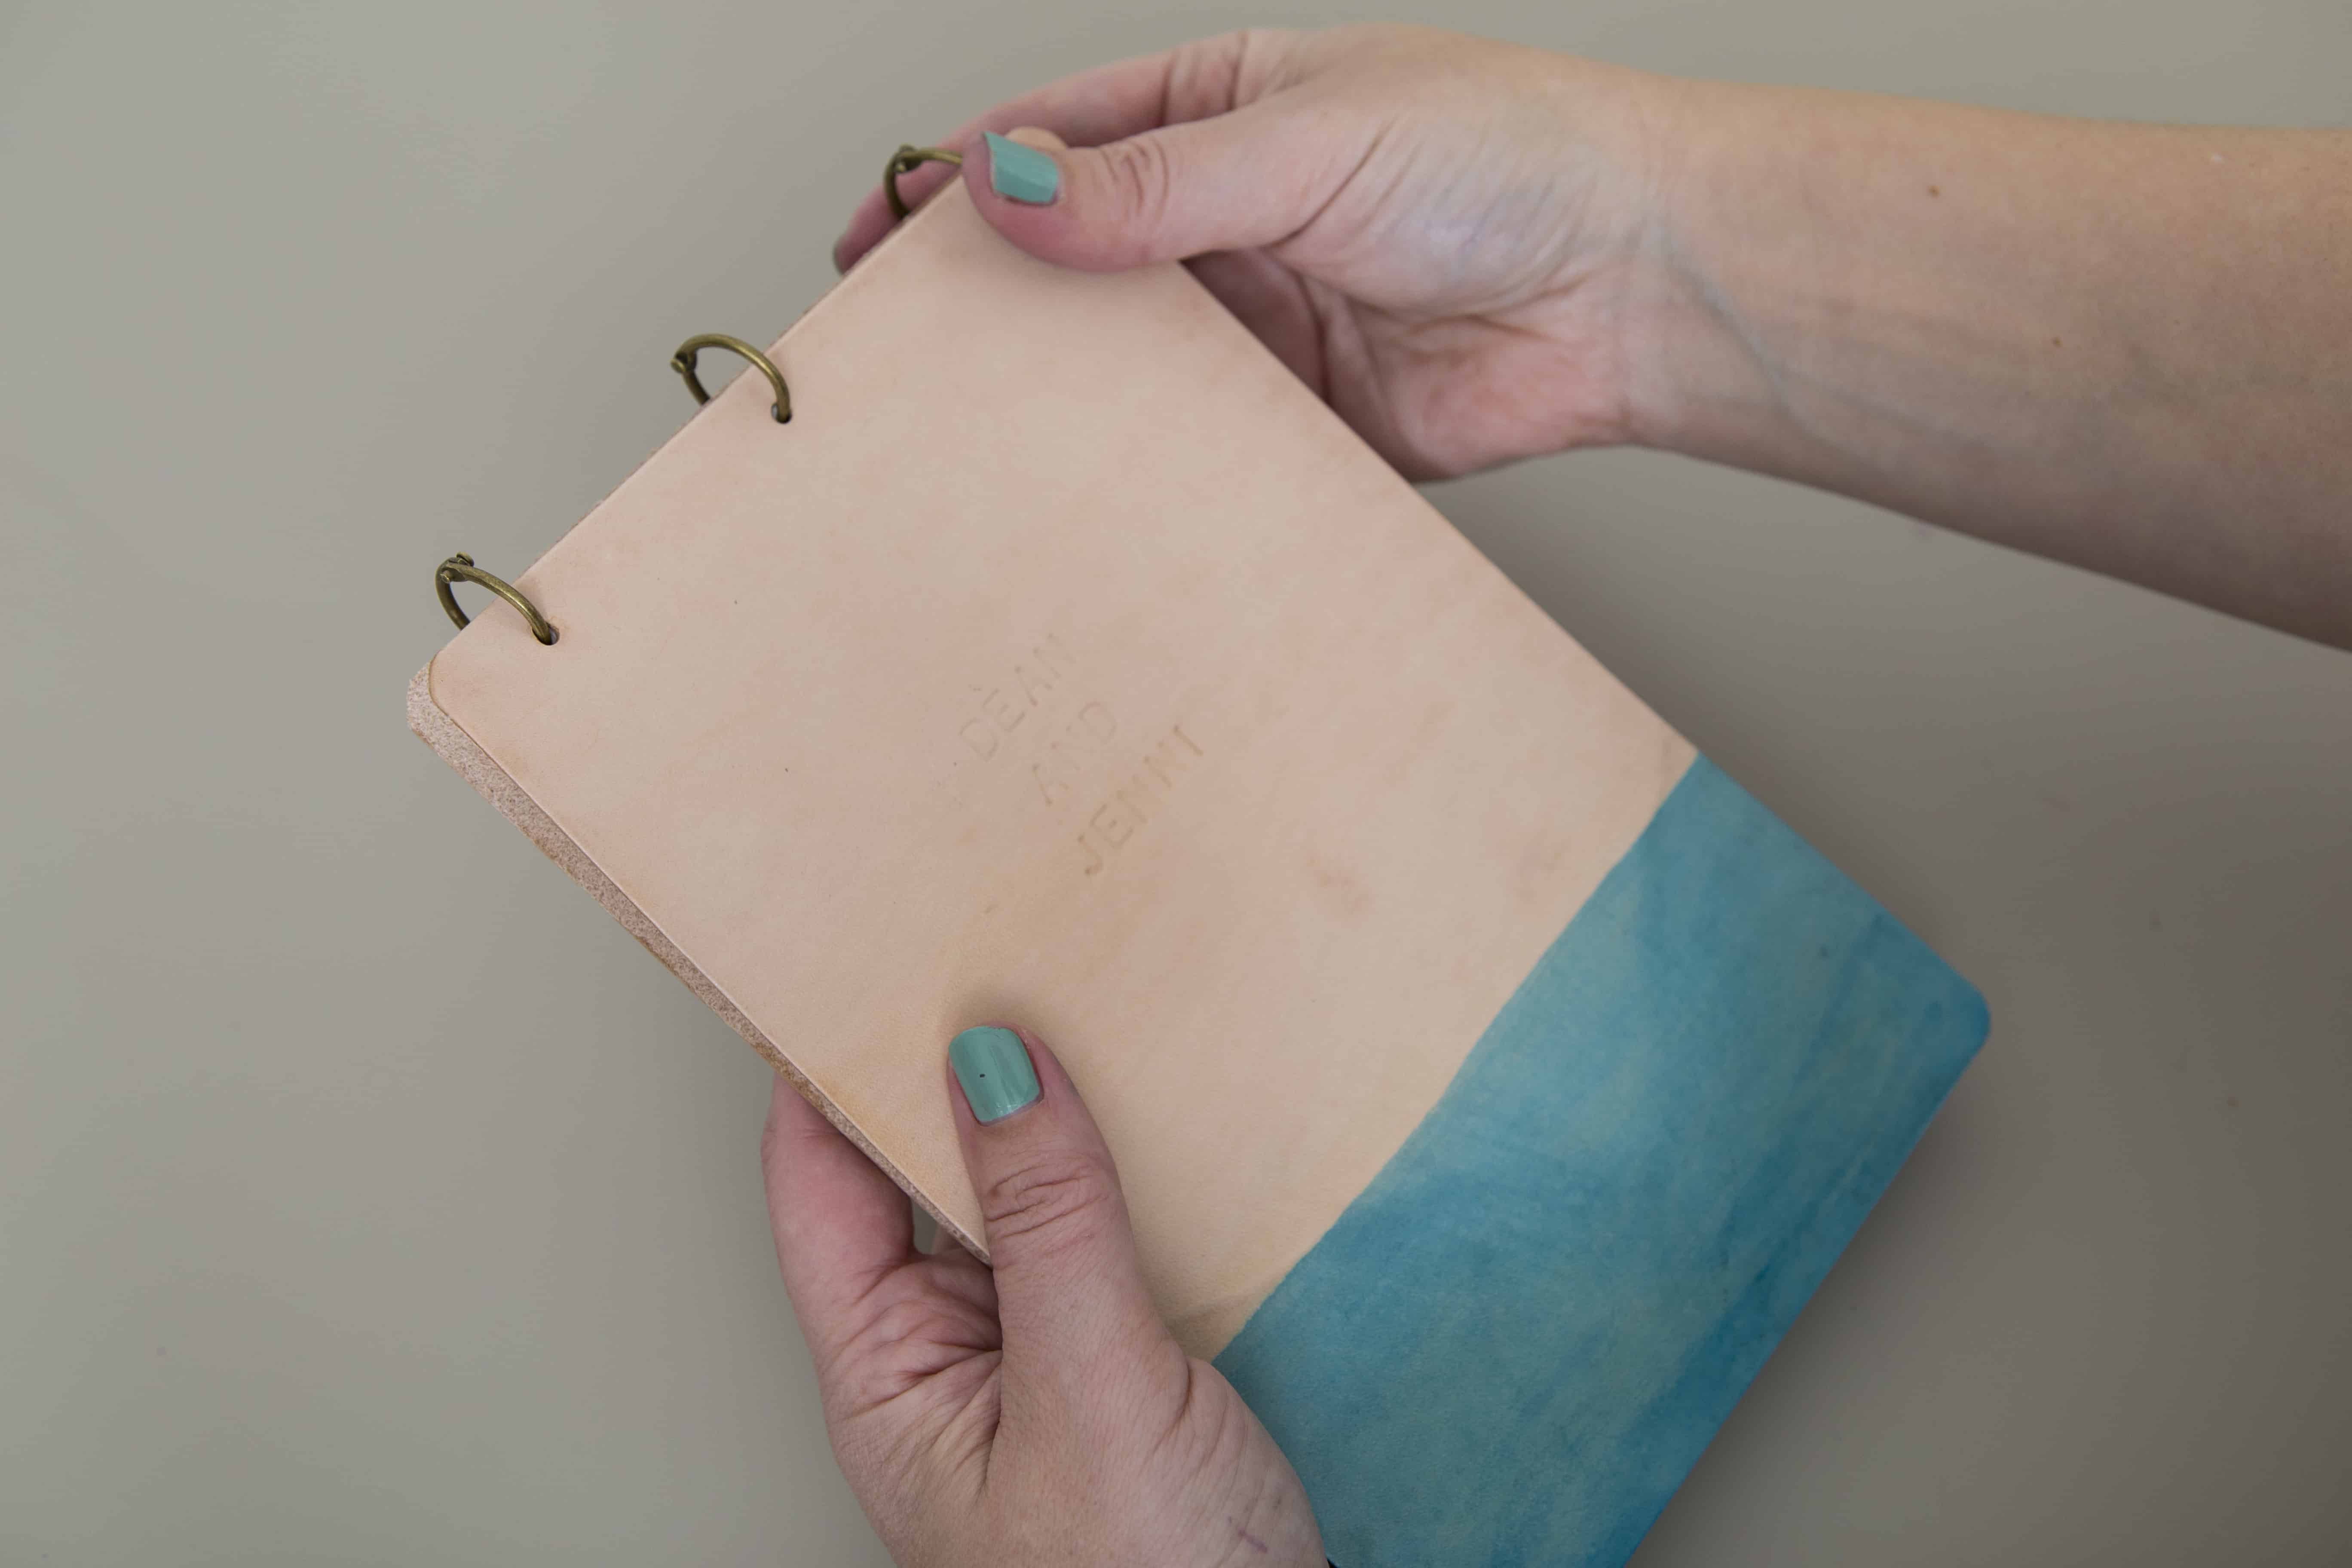
- The final step is to join the leather and paper with binder clips.


Posts You May Like
