
Supplies
- Rit All-Purpose Liquid Dye: Scarlet Used Here
- Rit ColorStay Dye Fixative (Recommended)
- Cotton Rope
- Dowel Rod
- Plastic Container
- Salt
- Liquid Dish Soap
- Rubber Gloves
- Plastic Table Cover
Time
1 Hour Total: {{ partial.t9N6.total }}
Difficulty
Beginner Total: {{ partial.tJLQ.total }}
Instructions
- Cover table with plastic. Gather supplies.
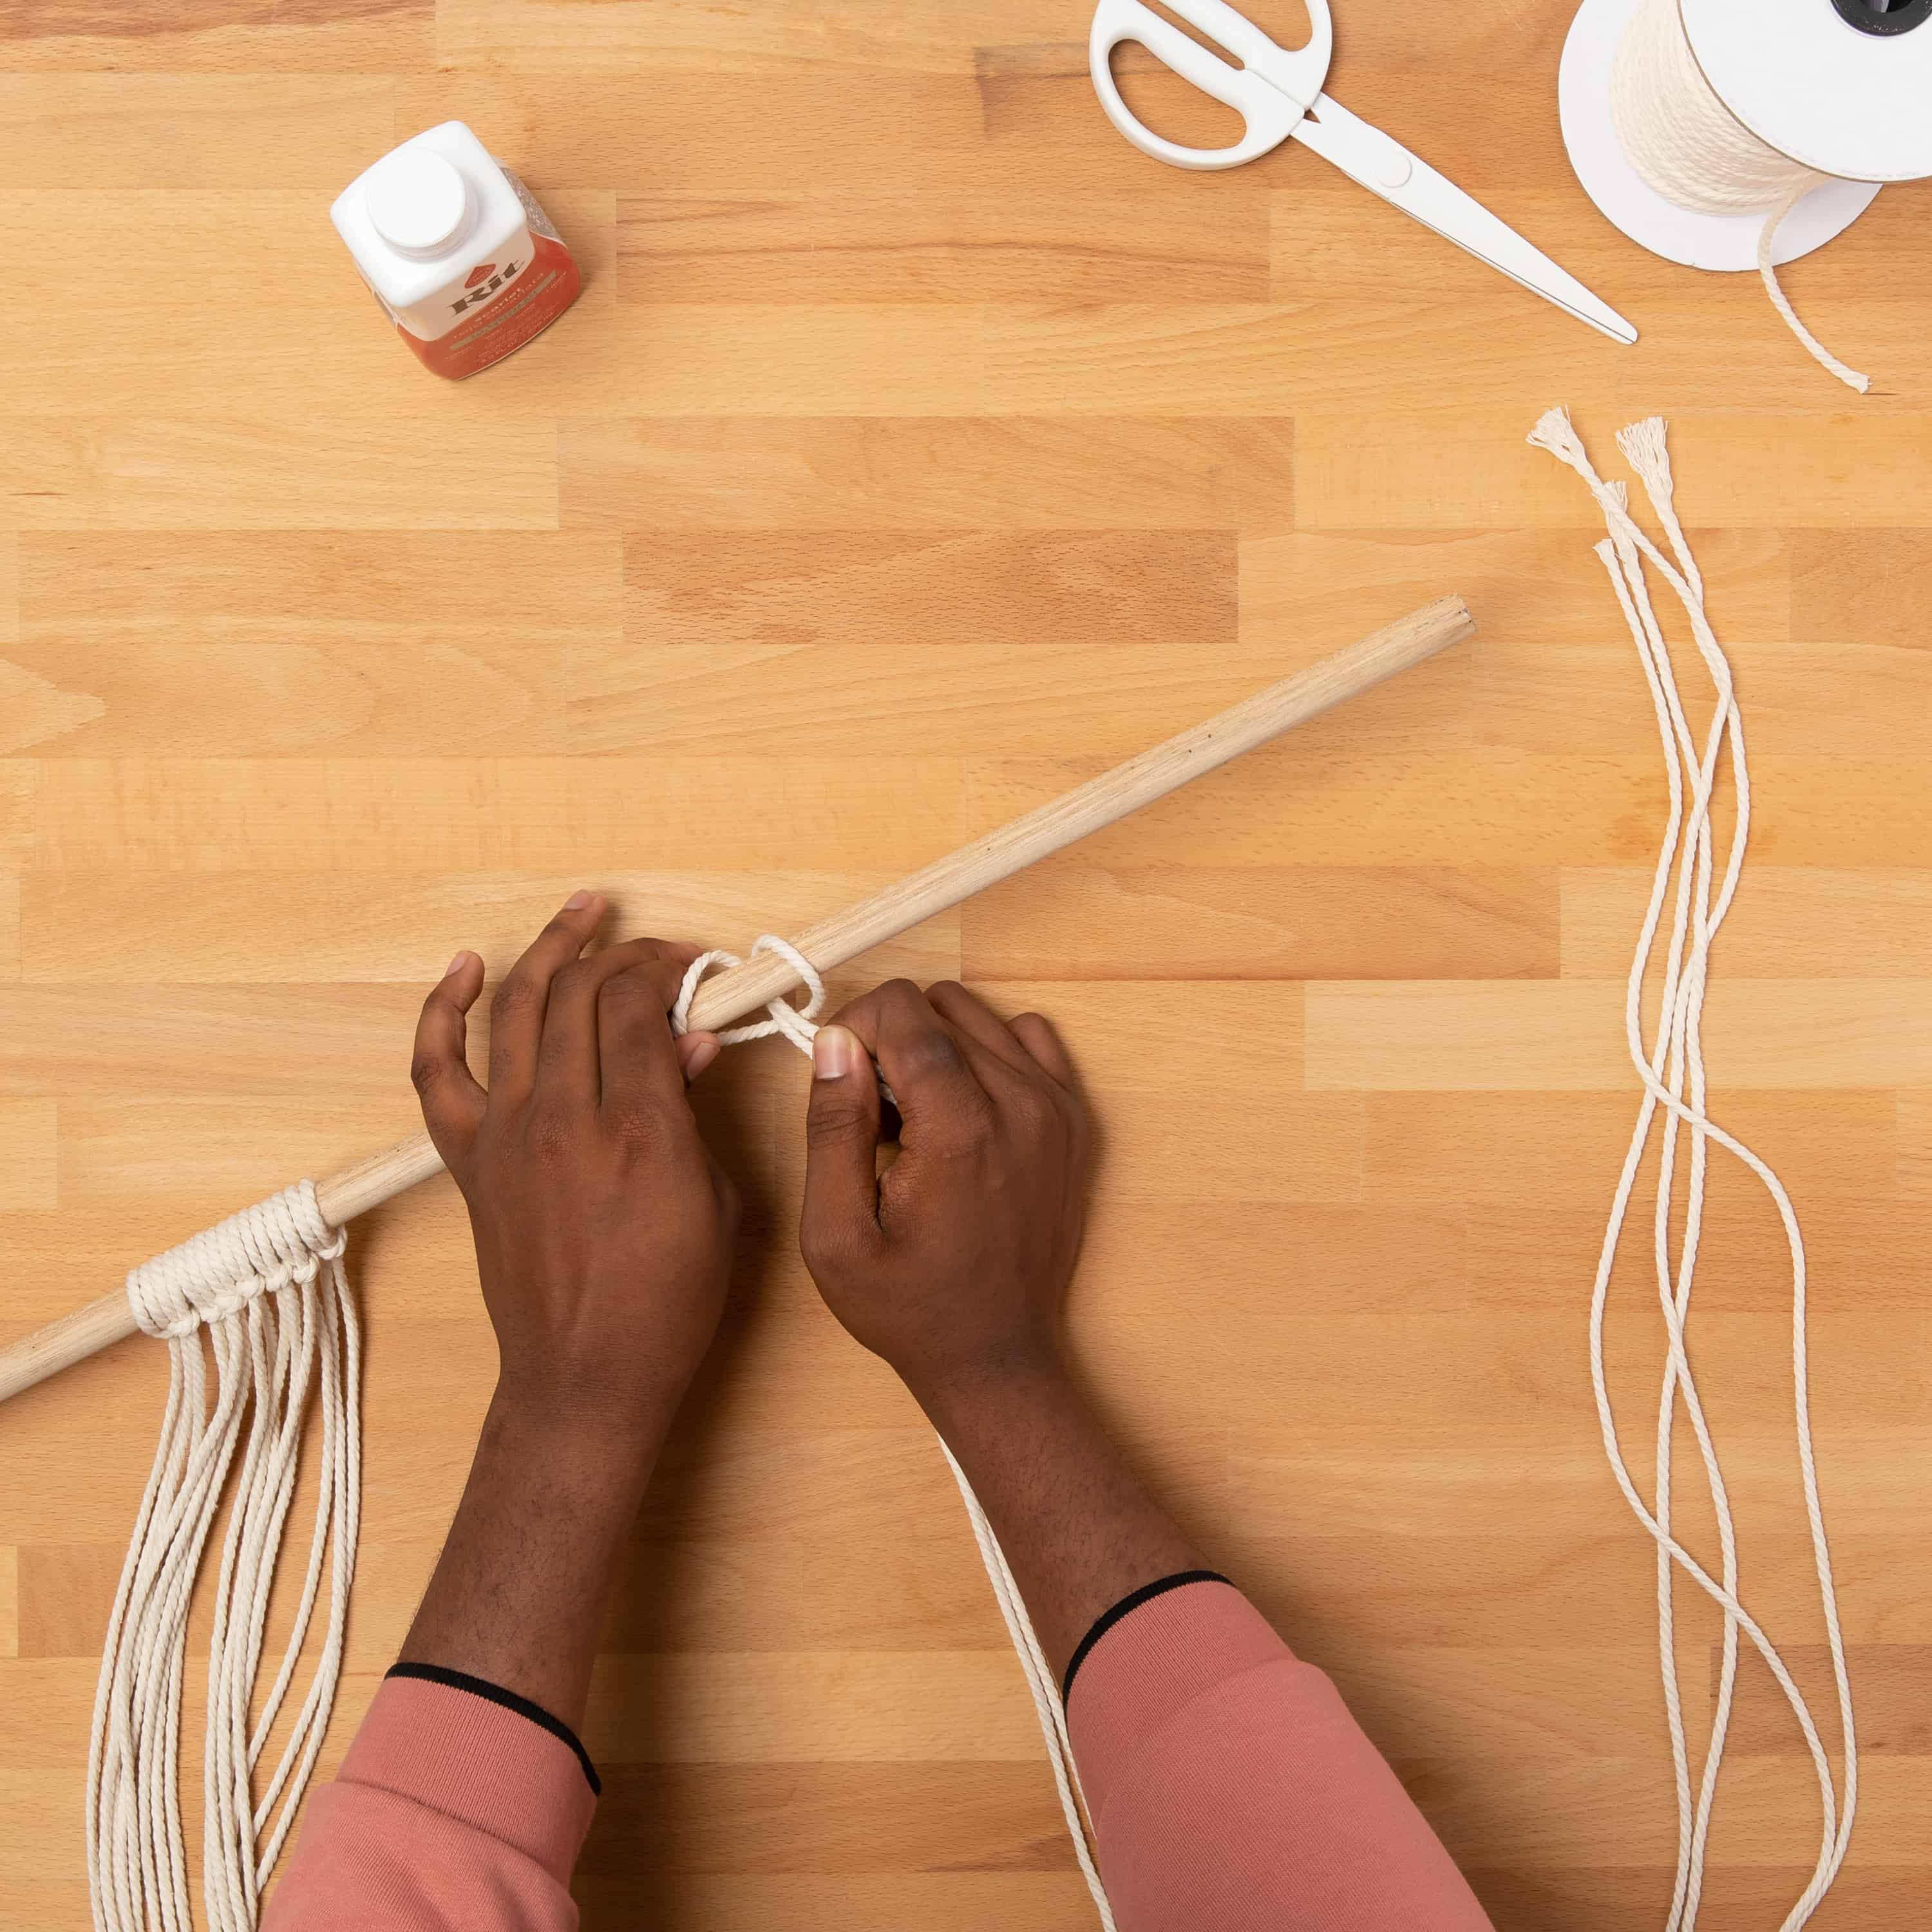
- Measure out cotton rope to the desired length and cut.

- Secure the rope to a dowel rod using a larks head knot. Here is a 45 second video tutorial on the larks head knot.
- Once rope is secured to the dowel rod, it’s time to create the dyebath.
- Wearing rubber gloves, fill a large container or stainless-steel sink with 1.5 gallons of very hot water. The water should ideally be 140ºF. If tap water is not hot enough, heat water on the stove and add to the dyebath. Pour 1/4 bottle of dye into the dyebath. We used Scarlet.
- To enhance the color, add one cup of salt. Add 1 teaspoon of liquid dish detergent to help promote level dyeing. Stir well.
- Test color by dipping a paper towel into the dyebath. If color is too light, add more dye. If color is too dark, add more water.
- Holding the rope by the dowel rod, dip the rope into the dyebath. To create the wave effect featured here, we dipped the rope at a diagonal angle. Let the rope sit in the dyebath for several minutes or until desired color is achieved.
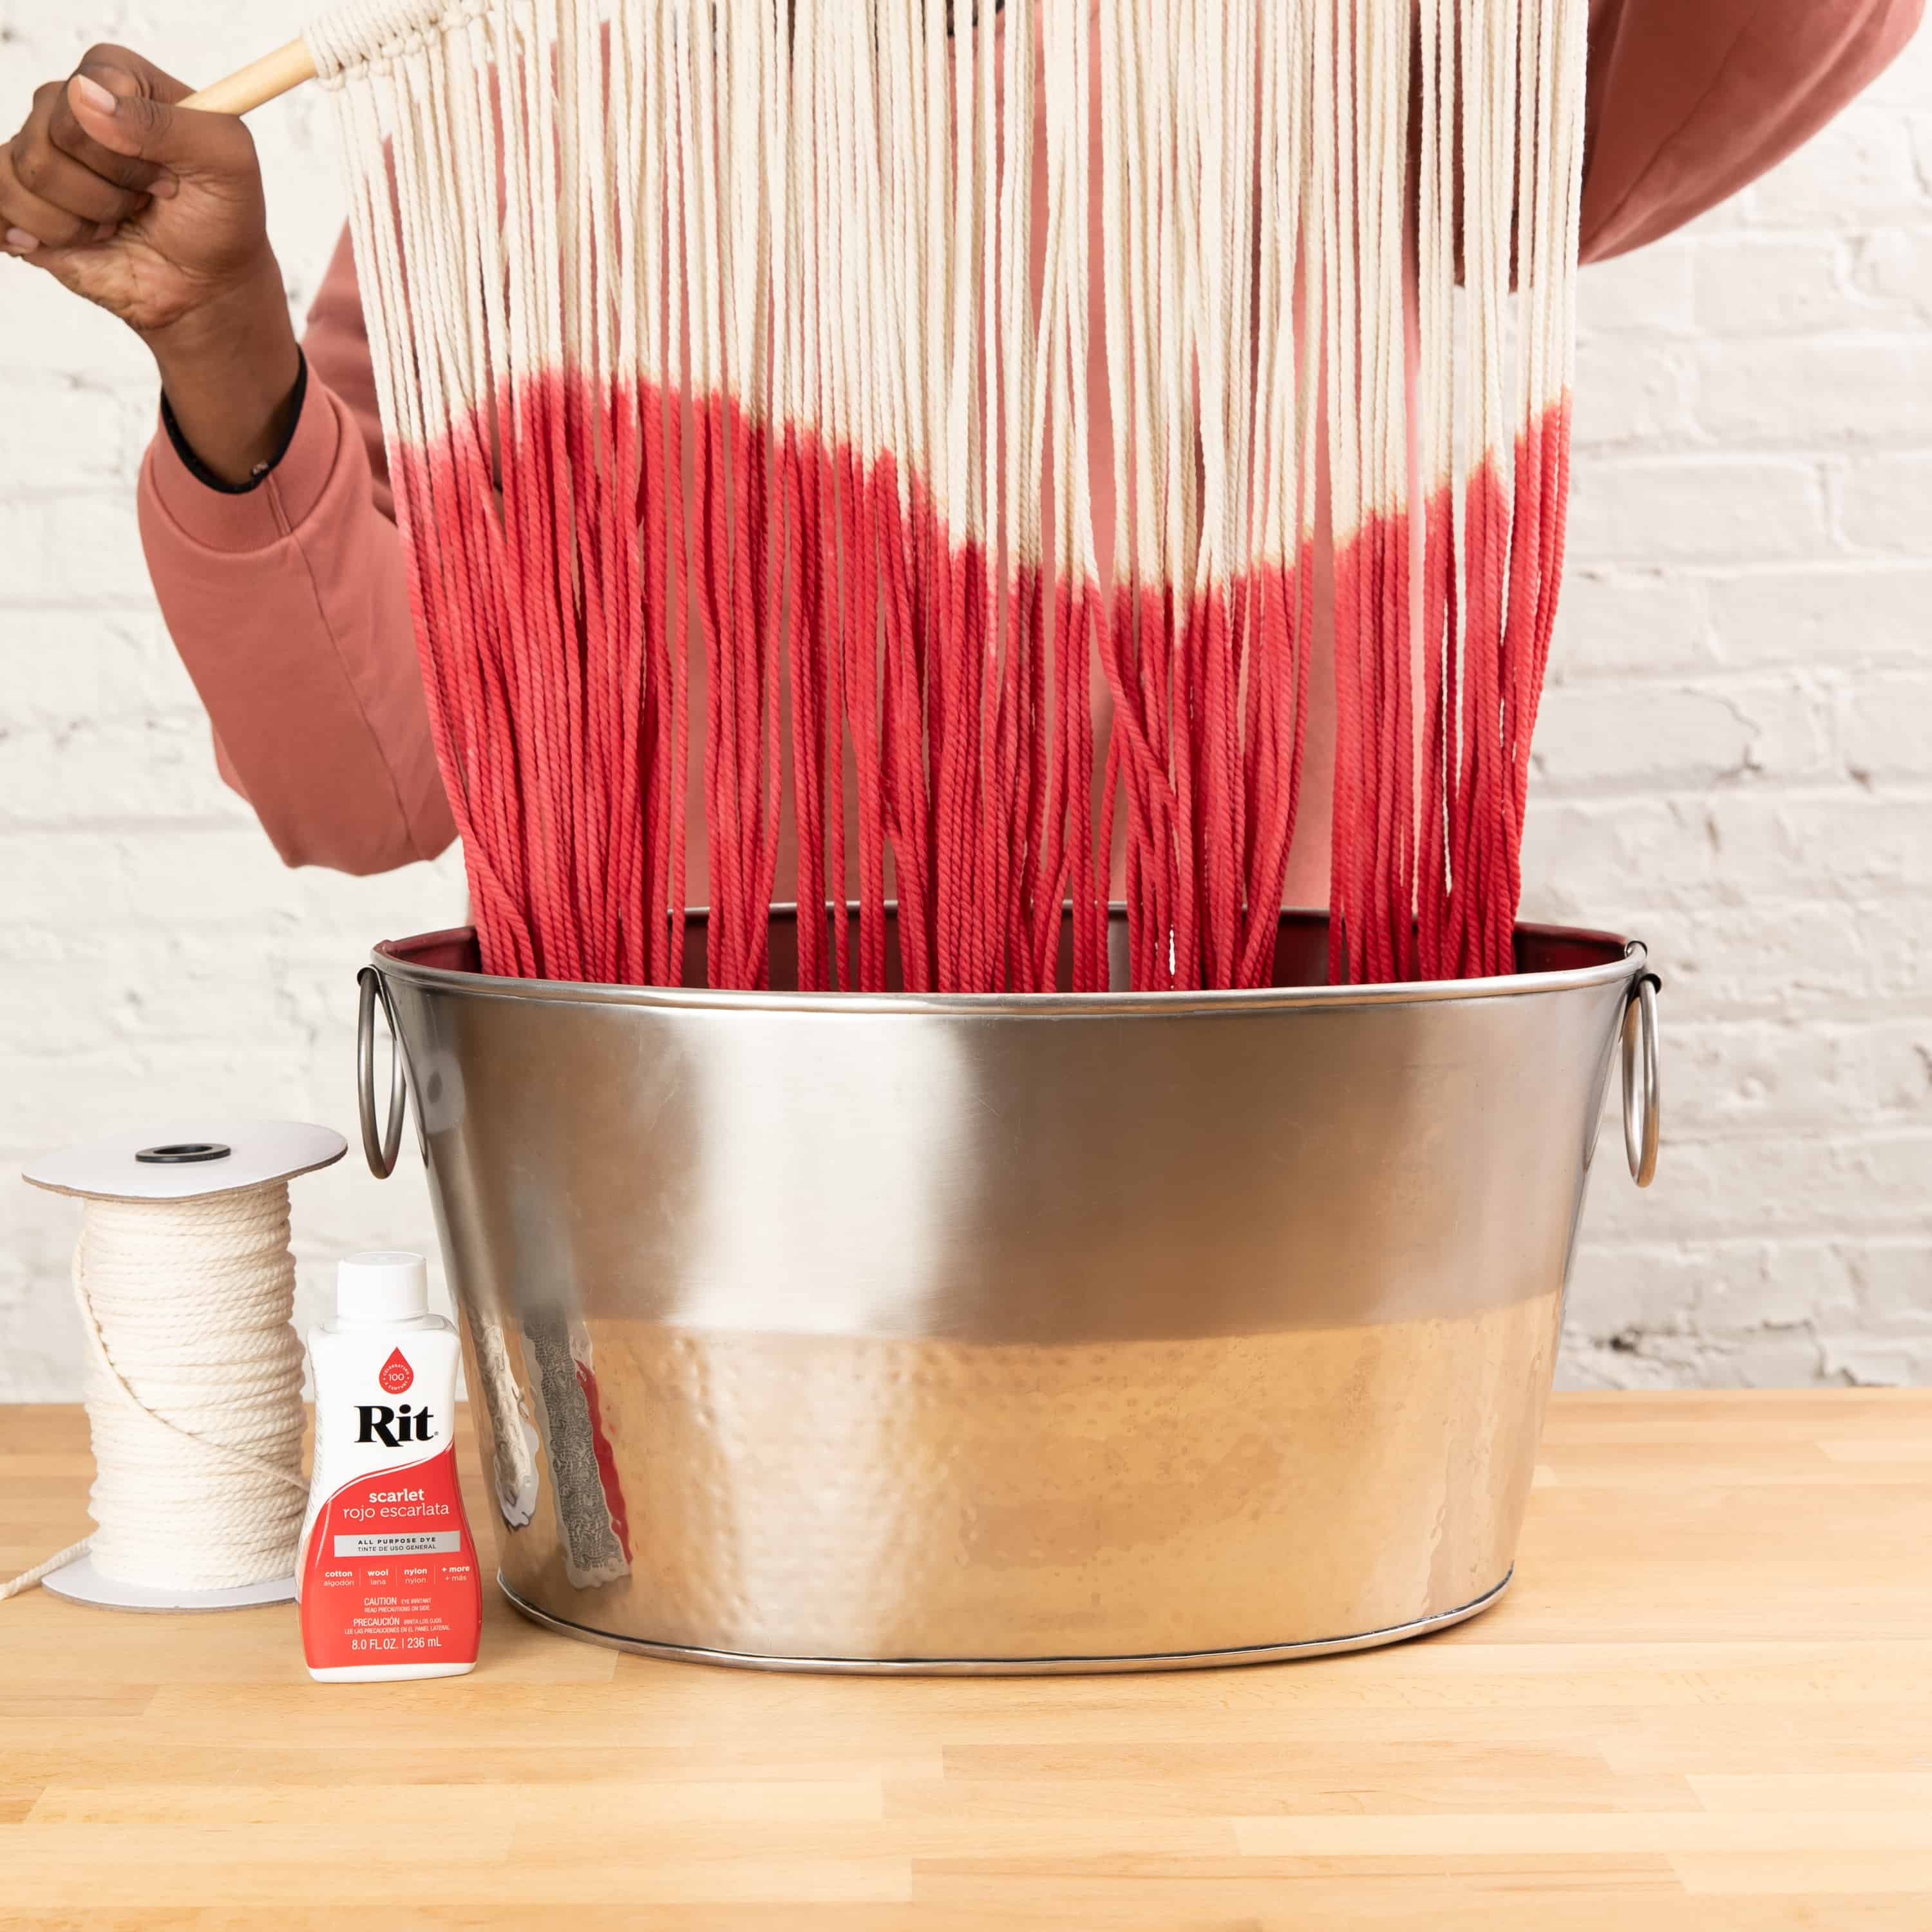
- Optional: Use a paint brush to clean up the lines and to add more dye if needed.
- Recommended: Use Rit ColorStay Fixative immediately after dyeing to enhance color, increase color retention and prevent dye from bleeding. Follow package instructions.
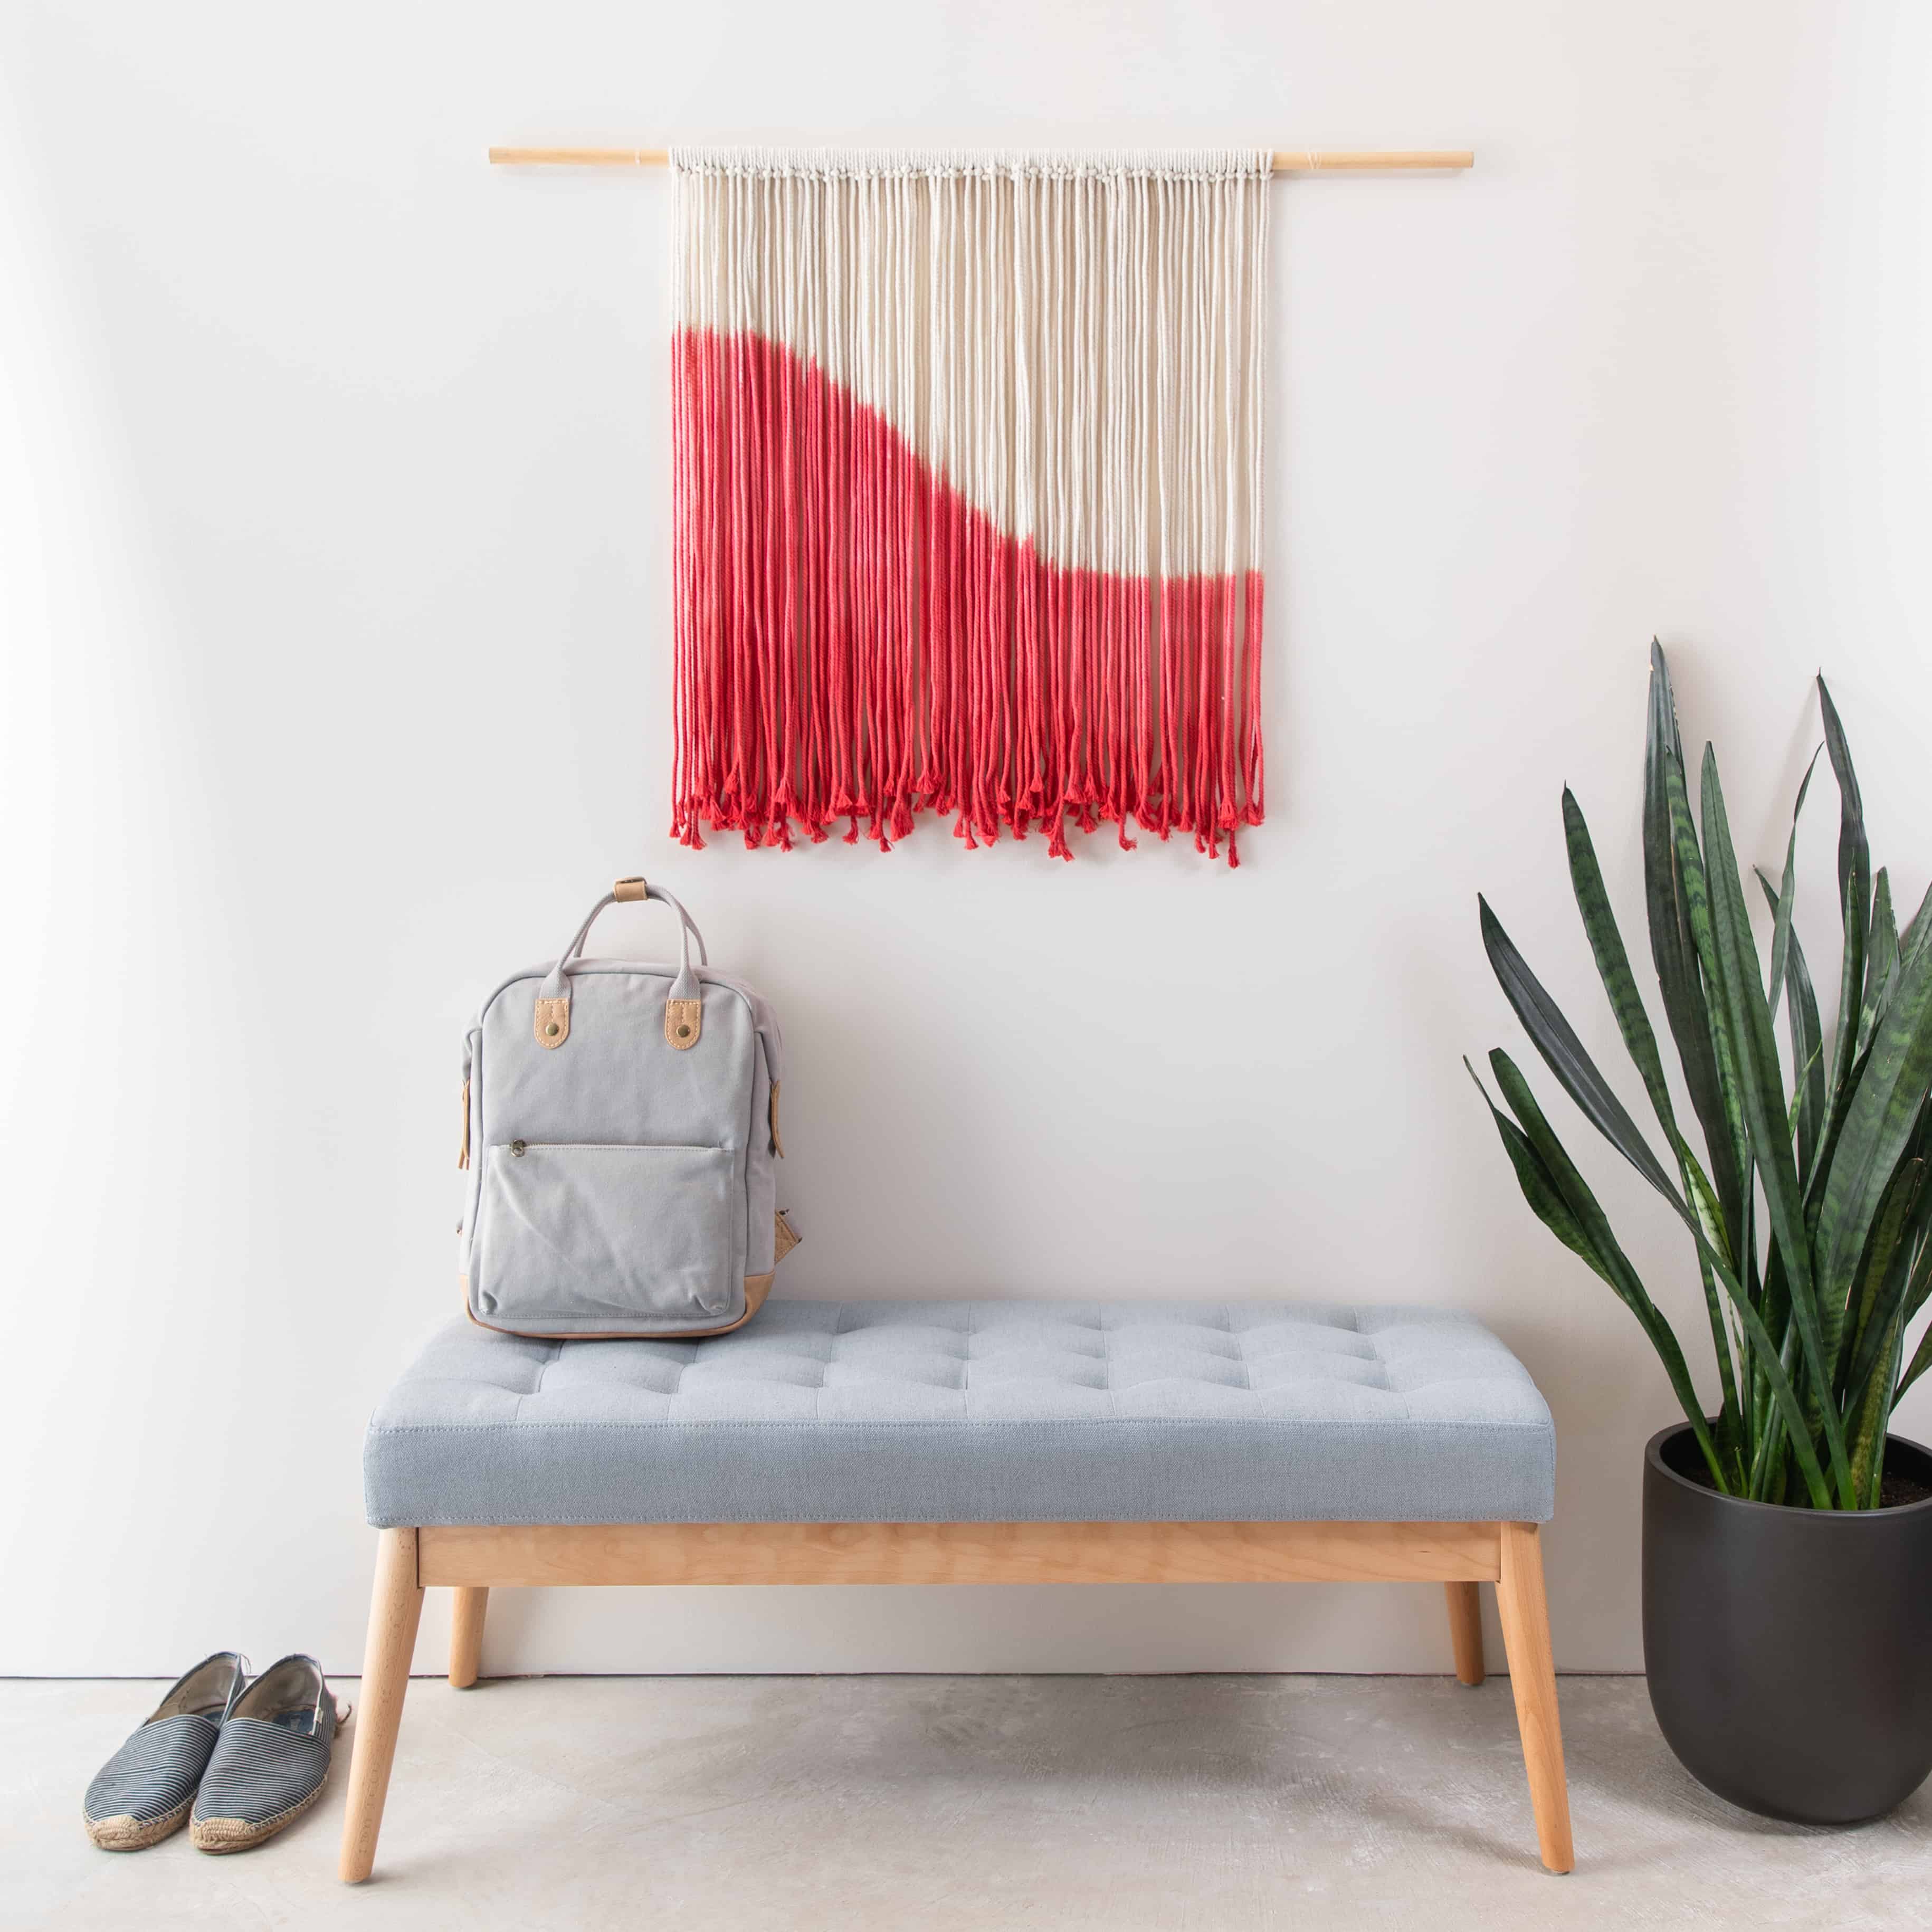
- Hang your macramé in a safe place to dry. If it’s still dripping just take a paper towel and blot it to remove excess dye.
- Dry for several hours.
- Hang and enjoy!


Posts You May Like
