
Supplies
- Rit All-Purpose Dye
- Rit ColorStay Dye Fixative
- Squeeze Bottle or Medicine Dropper
- Shaving Cream
- Stirring Stick
- Spatula
- Pan Sheet
- Measuring Spoons
- Measuring Cup
- Rubber Gloves
- Plastic Table Cover
Time
1 Hour Total: {{ partial.t6EX.total }}
Difficulty
Beginner Total: {{ partial.tBKB.total }}
Instructions
- Cover work area with plastic table cover and have paper towels handy to protect against any possible spills. Gather supplies.
- Prewash tea towels, rinse and leave damp.
- If you are dyeing something that is double-sided (i.e. a t-shirt or pillowcase) and want to prevent the dye from bleeding through to the back, place a piece of cardboard in between the front and back.
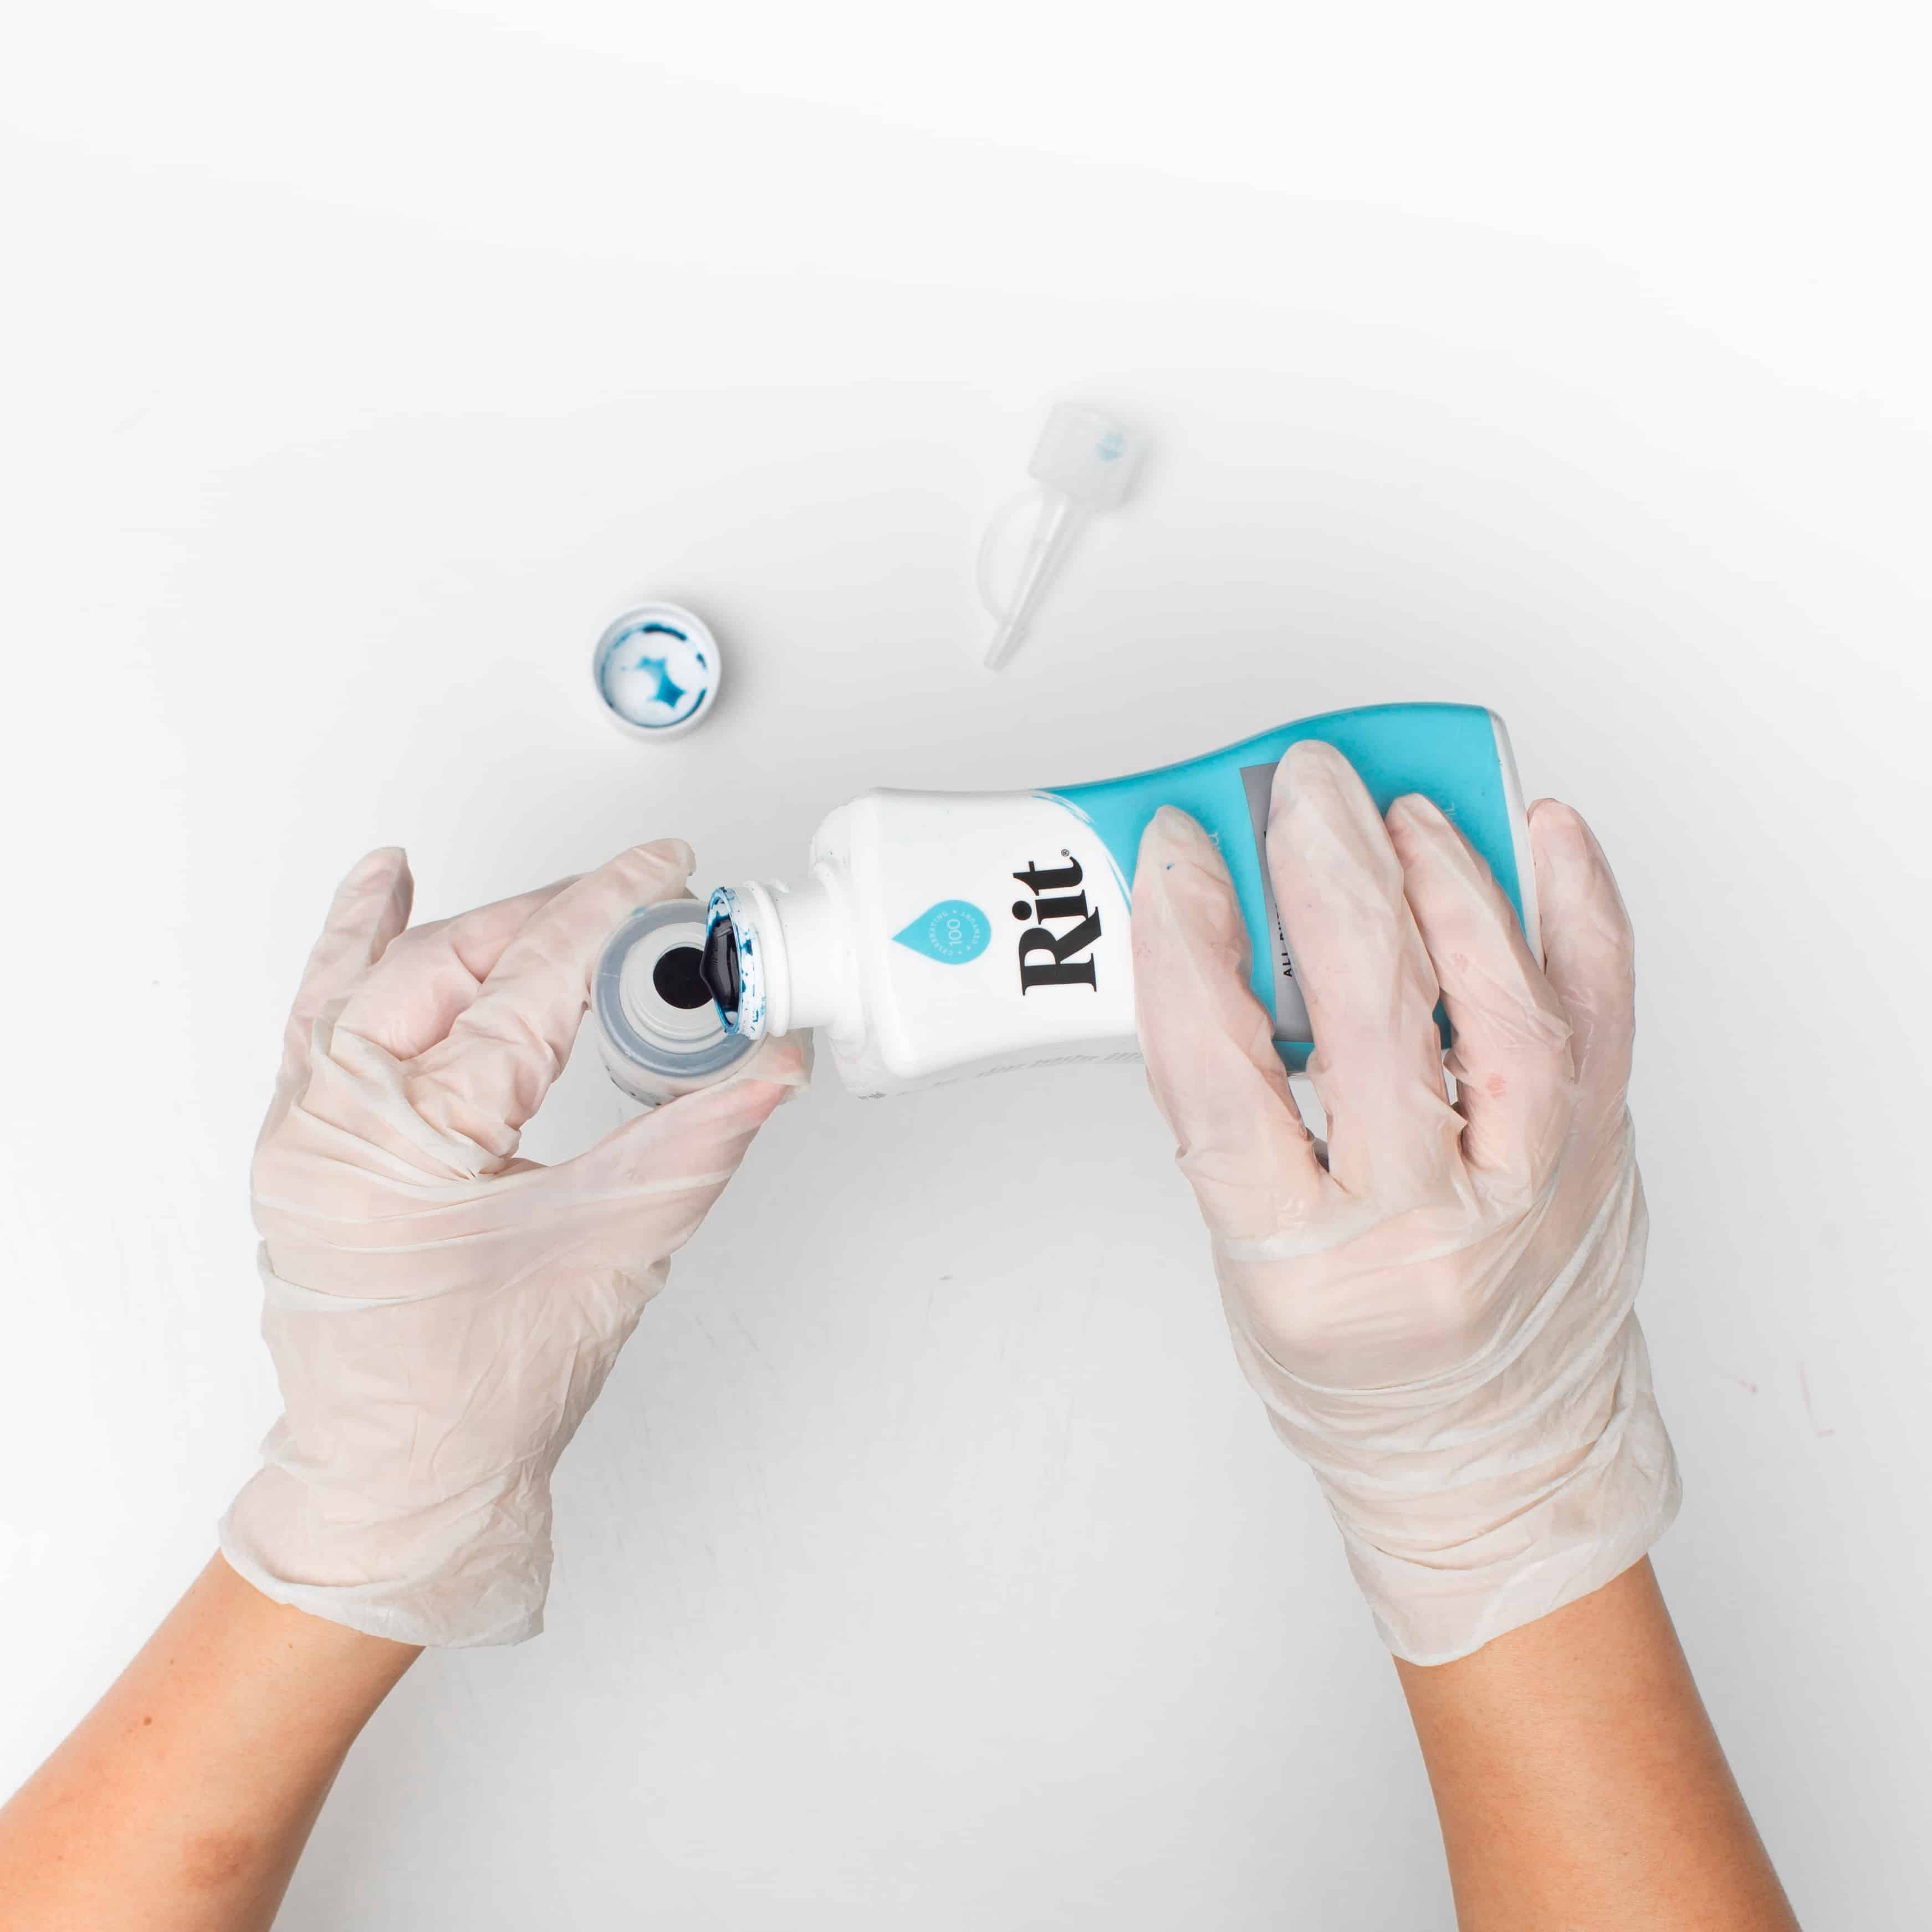
- Wearing rubber gloves, mix four tablespoons of Rit All-Purpose Liquid Dye with one cup of very hot water. Pour solution in a small squeeze bottle. Repeat with complementary colors.
- Fill a baking tray with shaving cream.
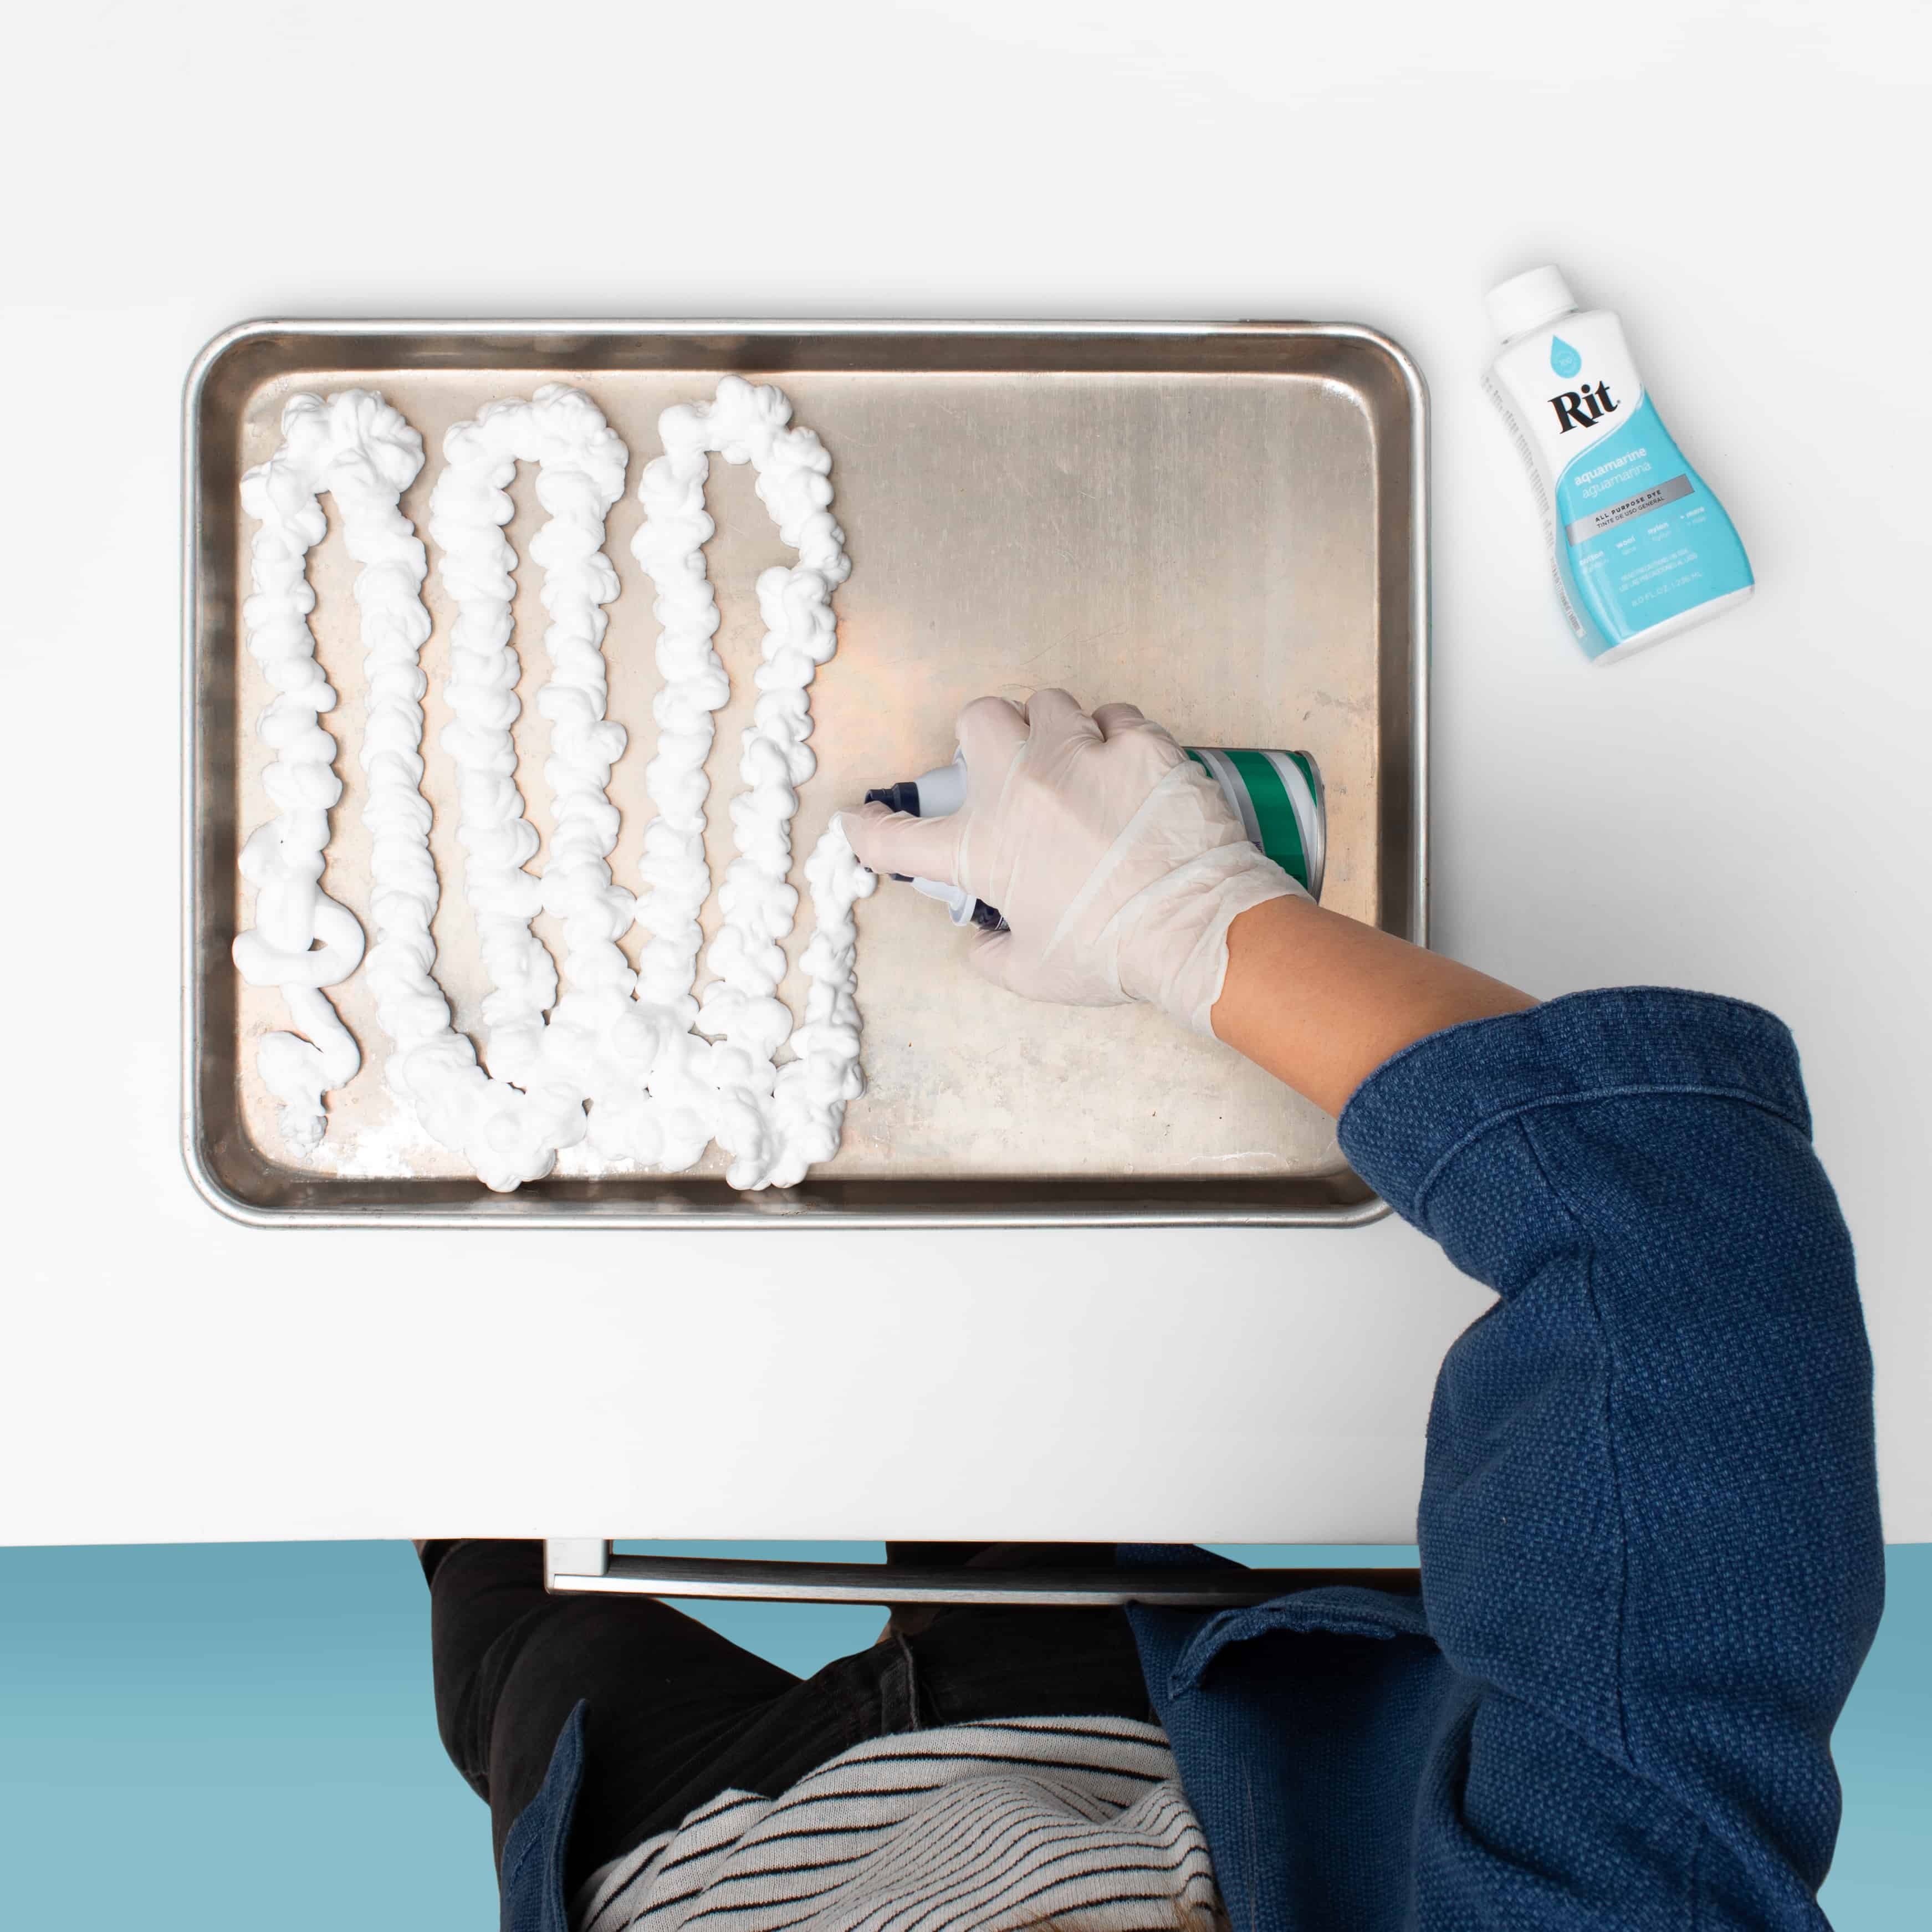
- Smooth by hand or with a spatula.

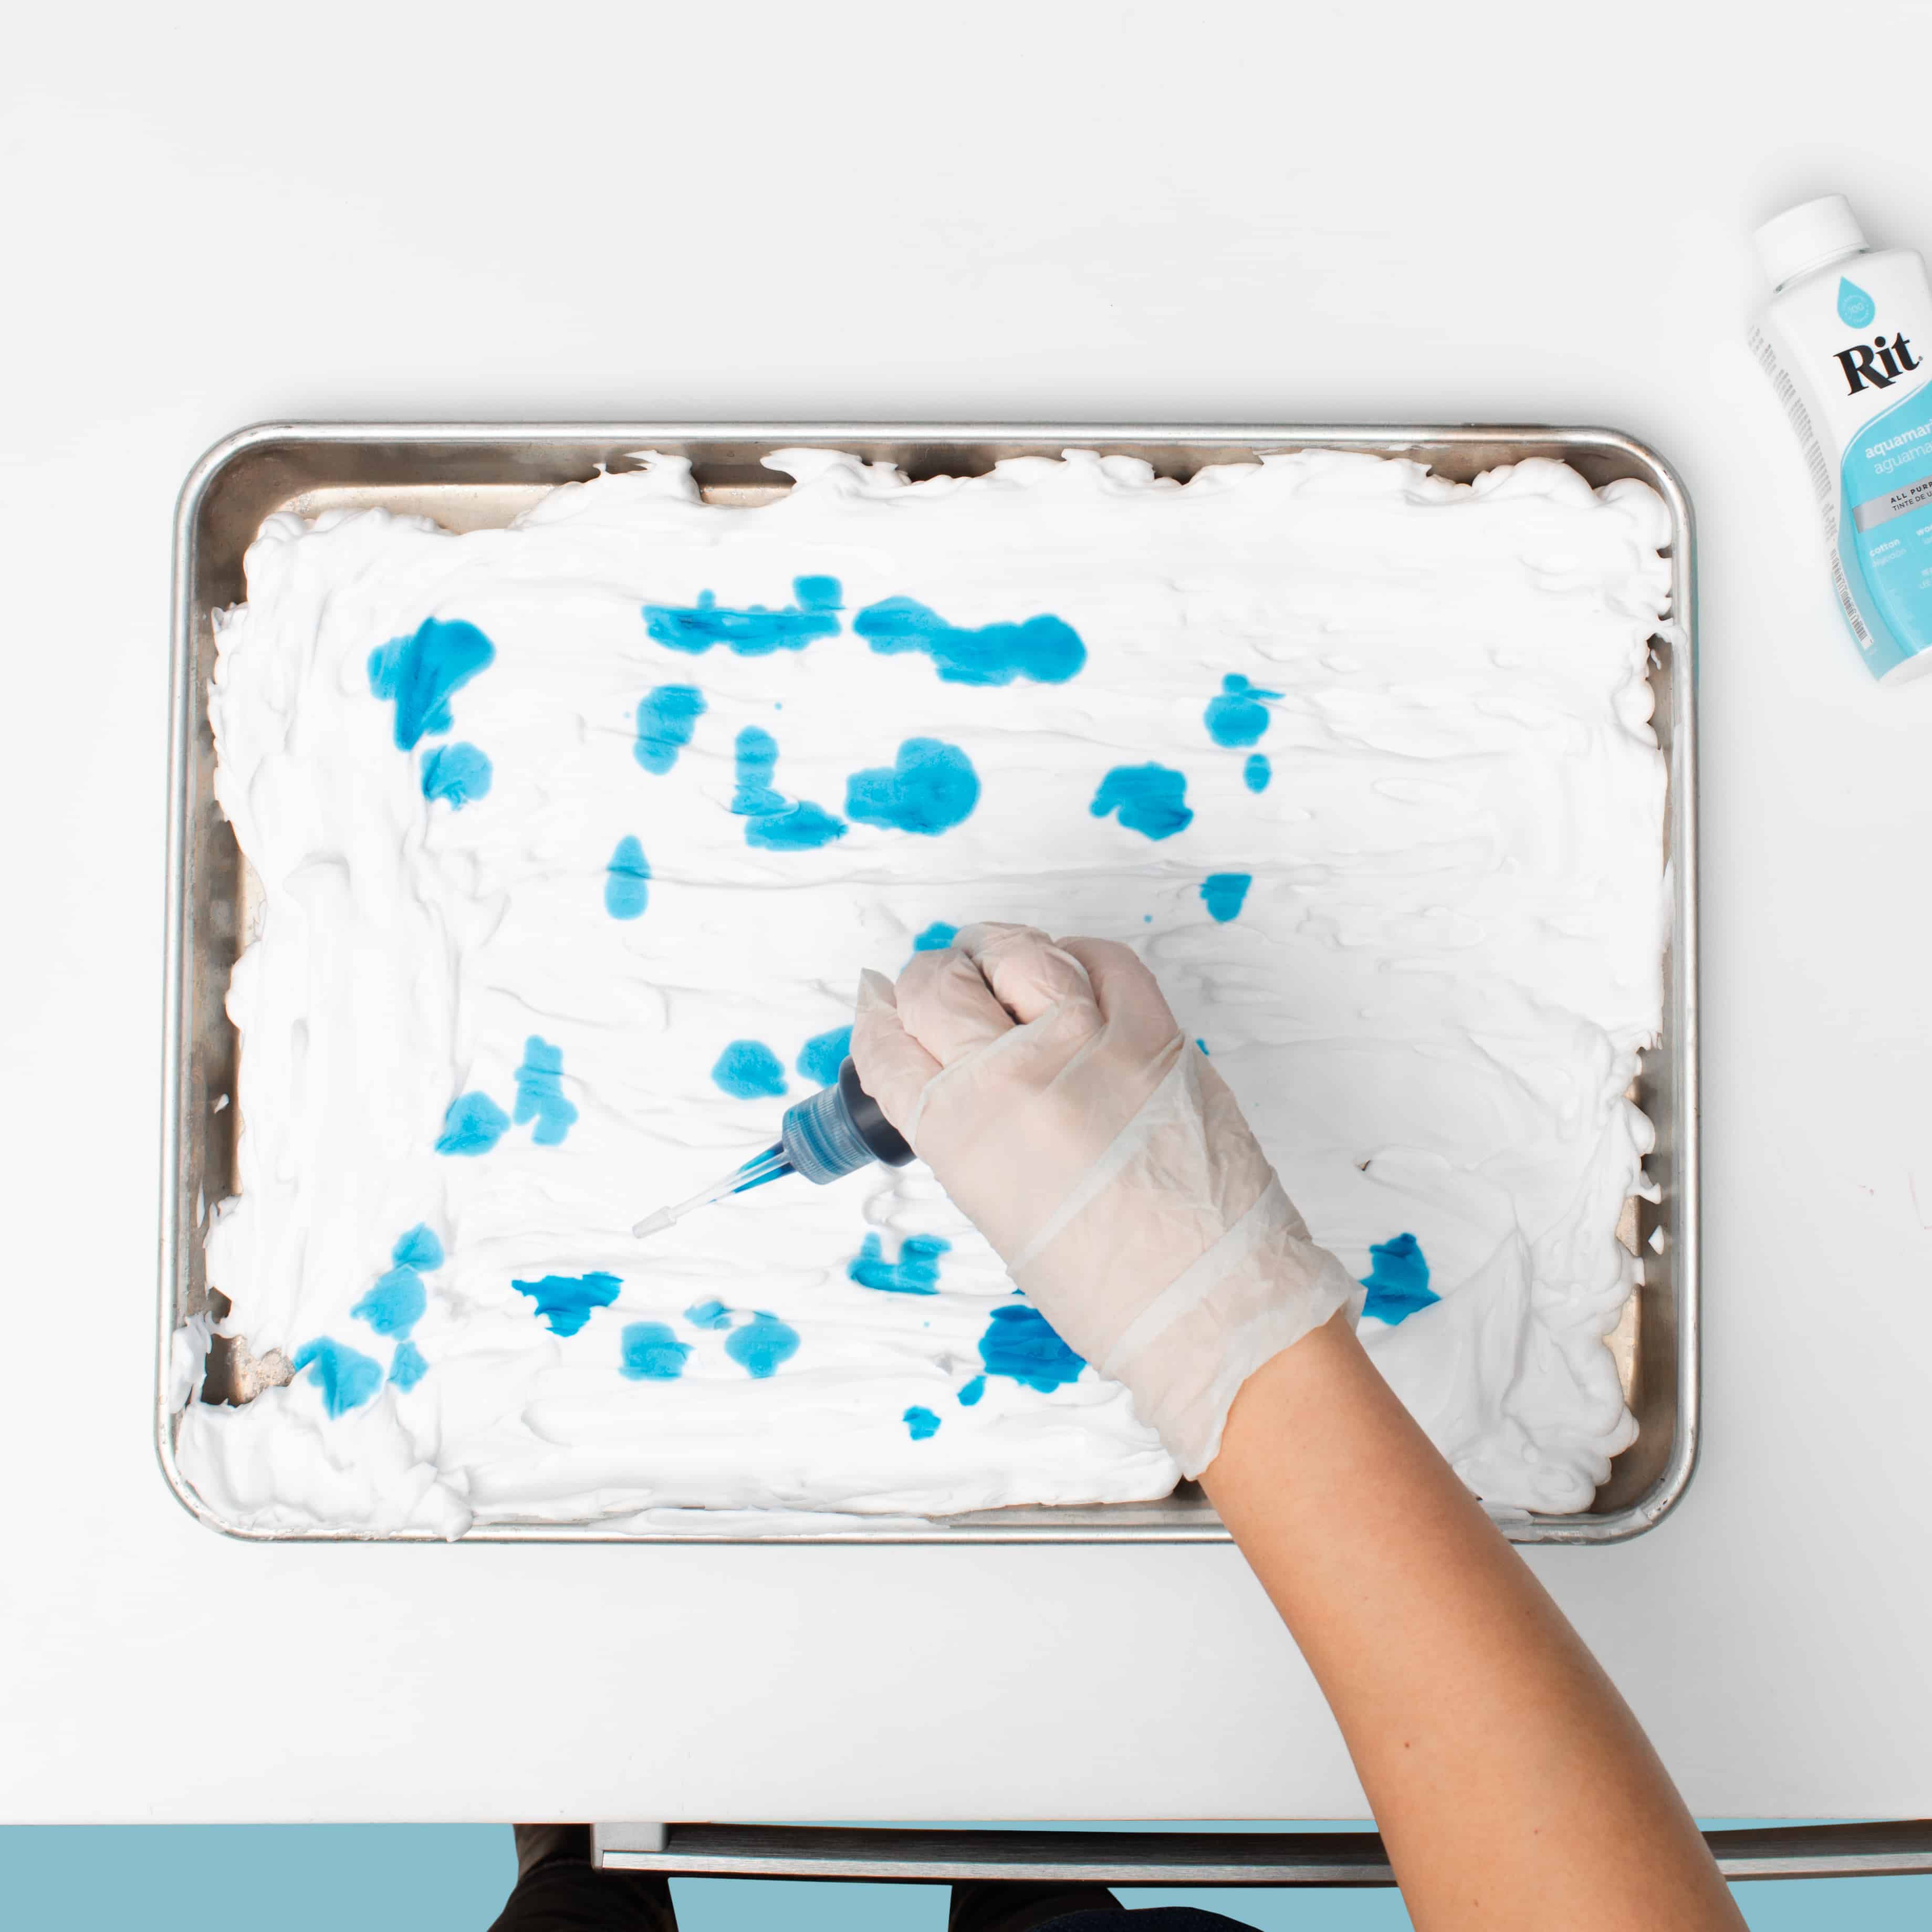
- Drip dye colors all over.
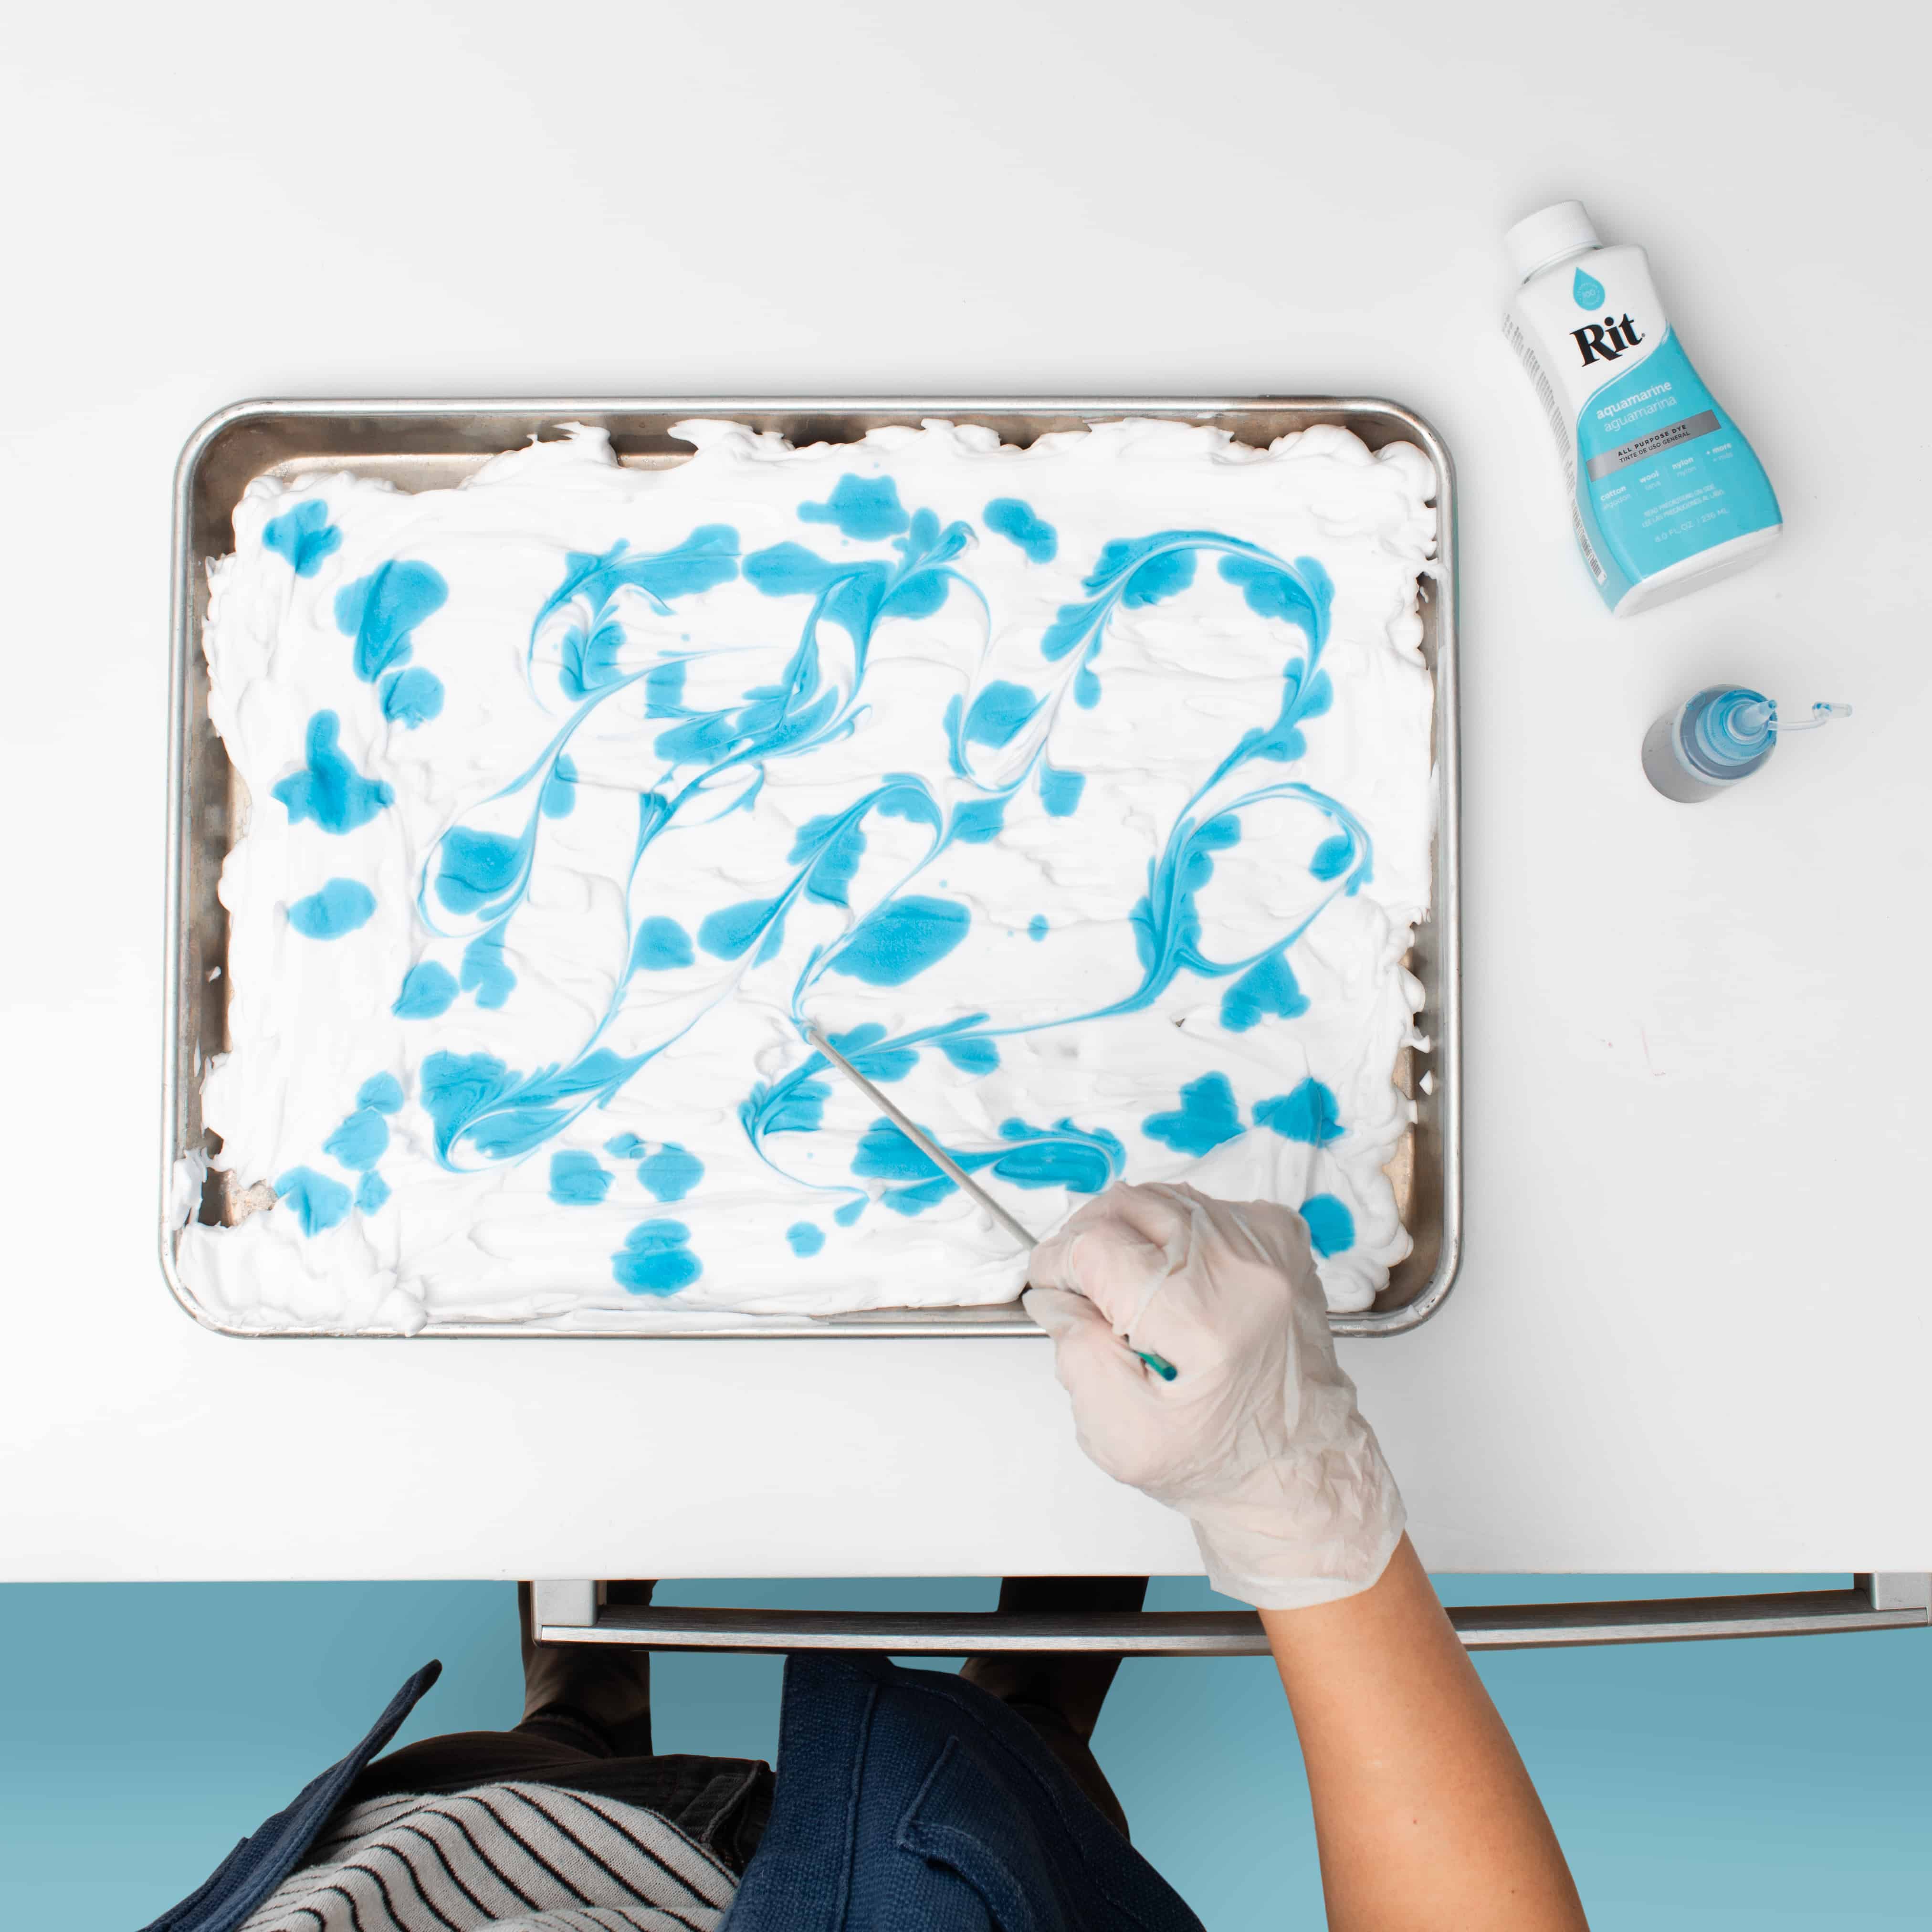
- Swirl the drops with a stick.
- Place tea towel/fabric gently on the pan.
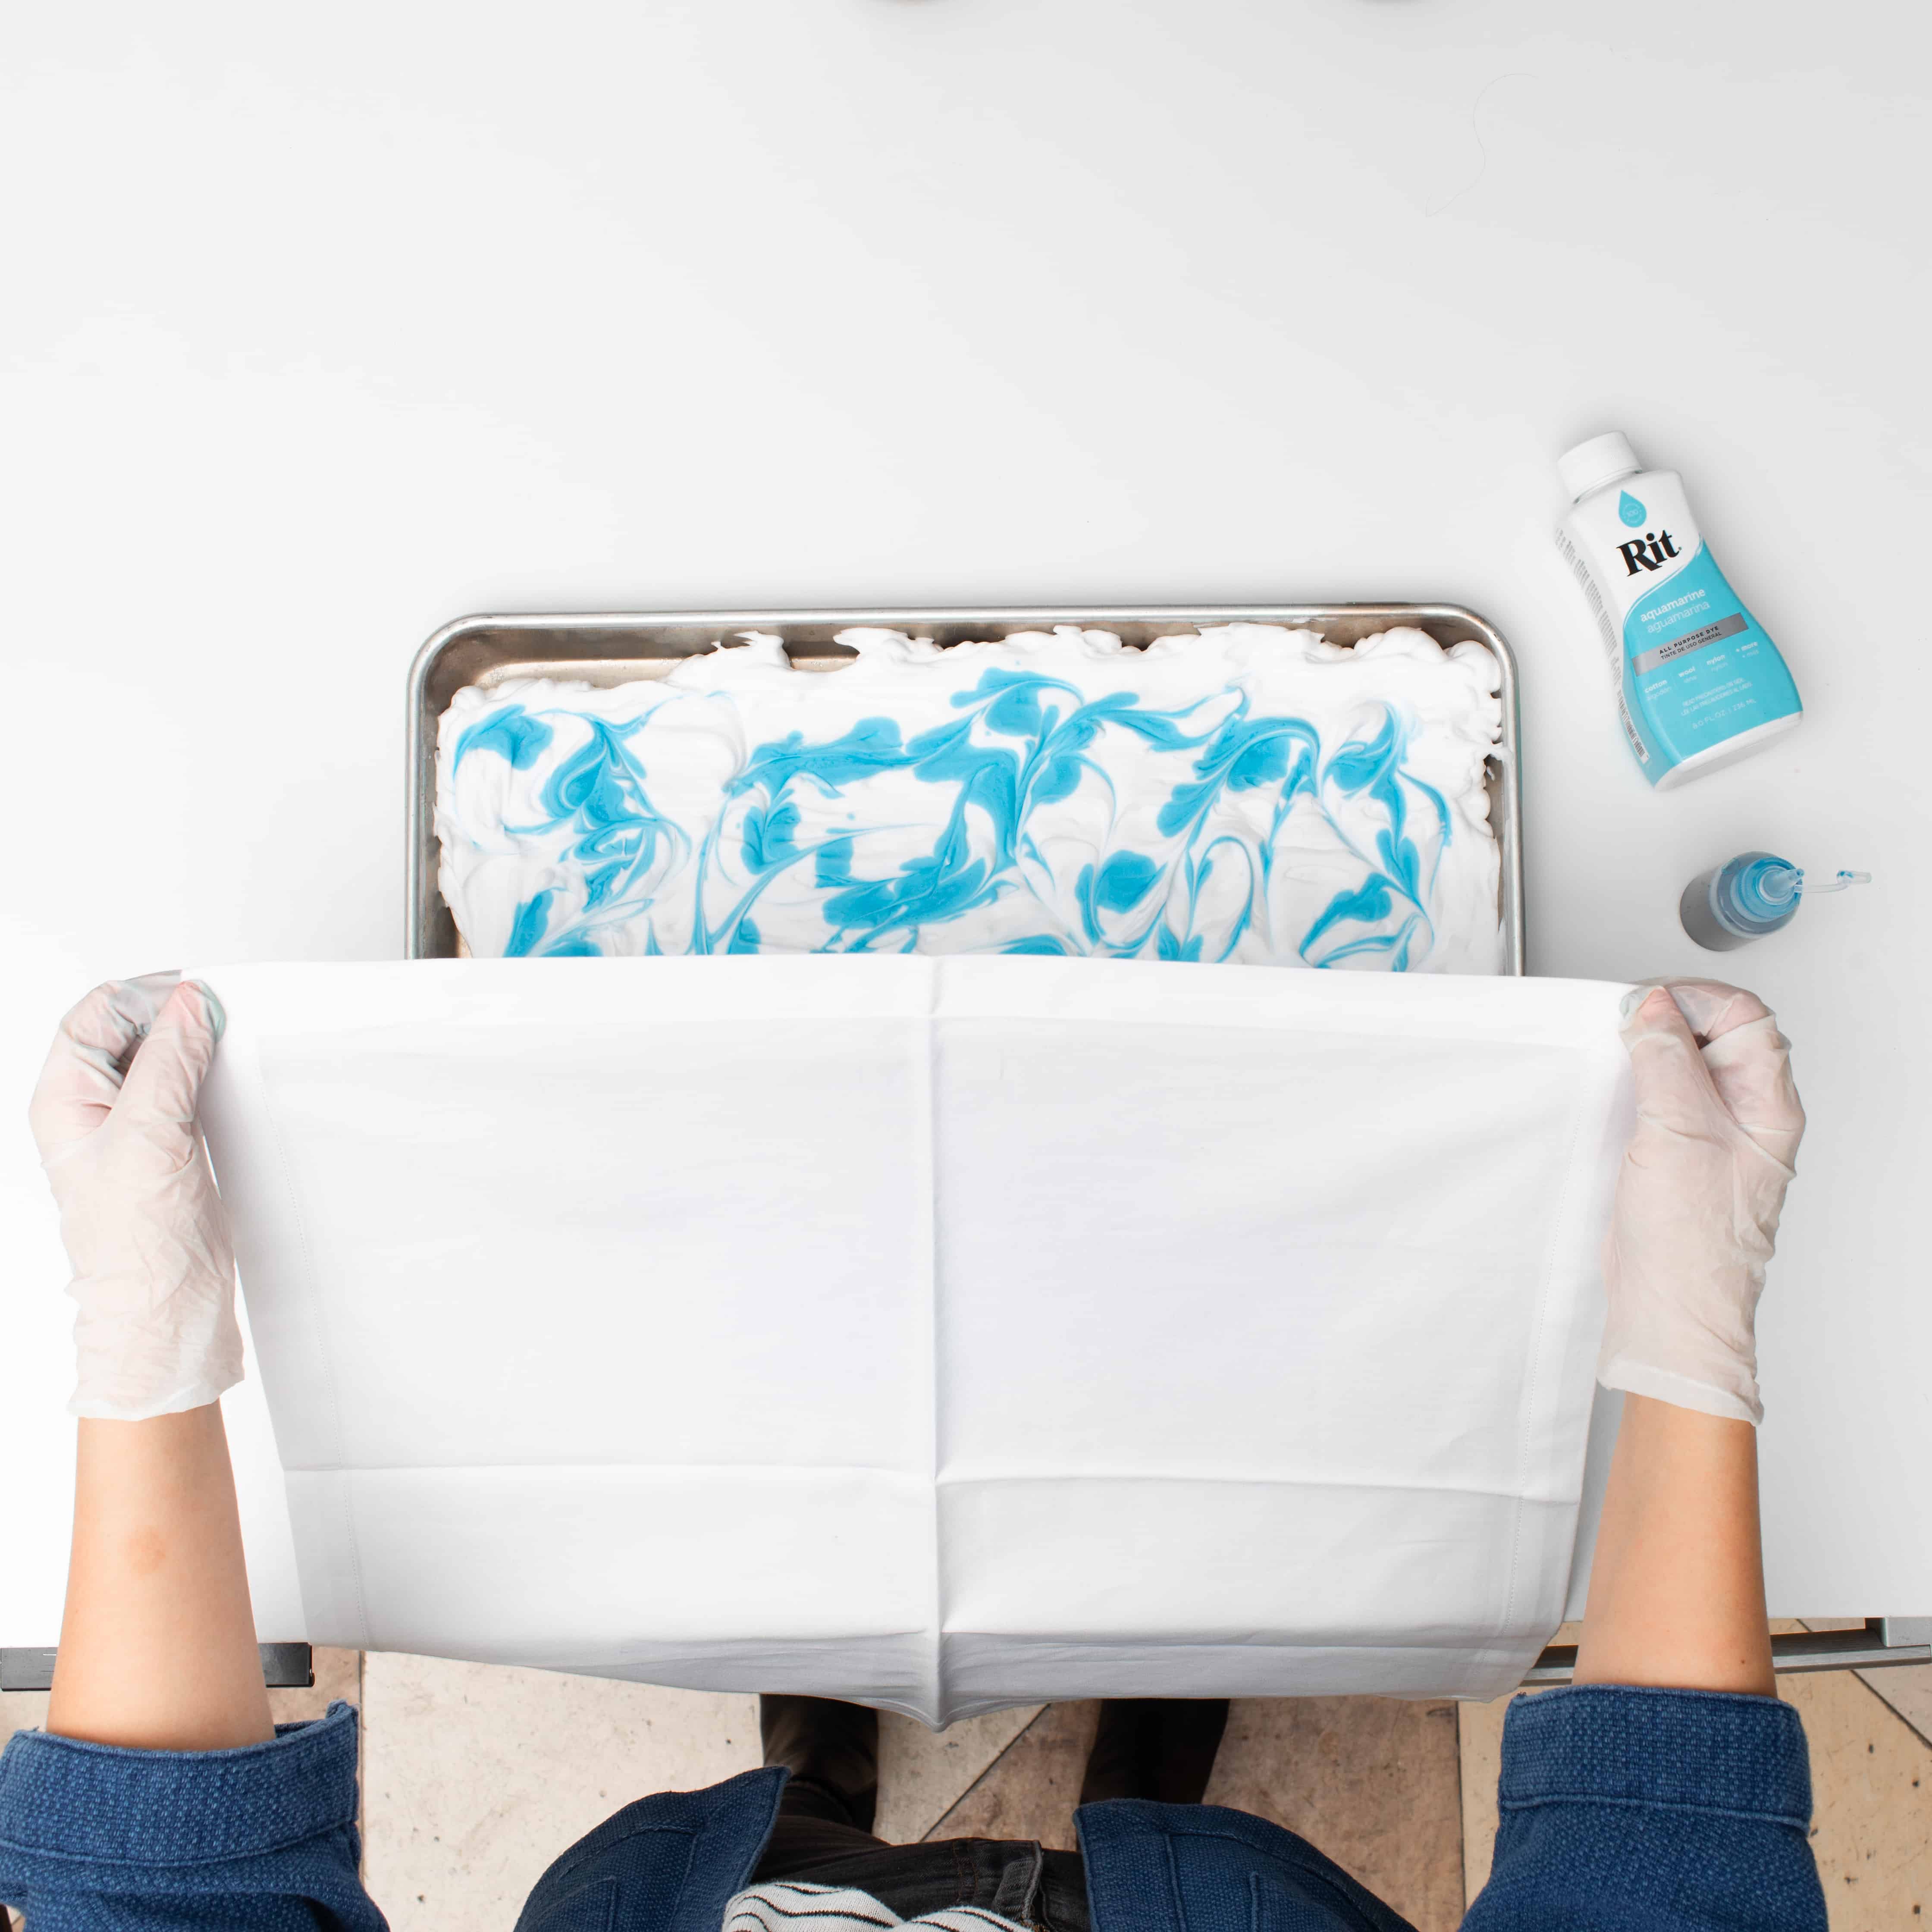
- Apply light pressure to smooth.
- Let the tea towel sit on the pan for one to two minutes.
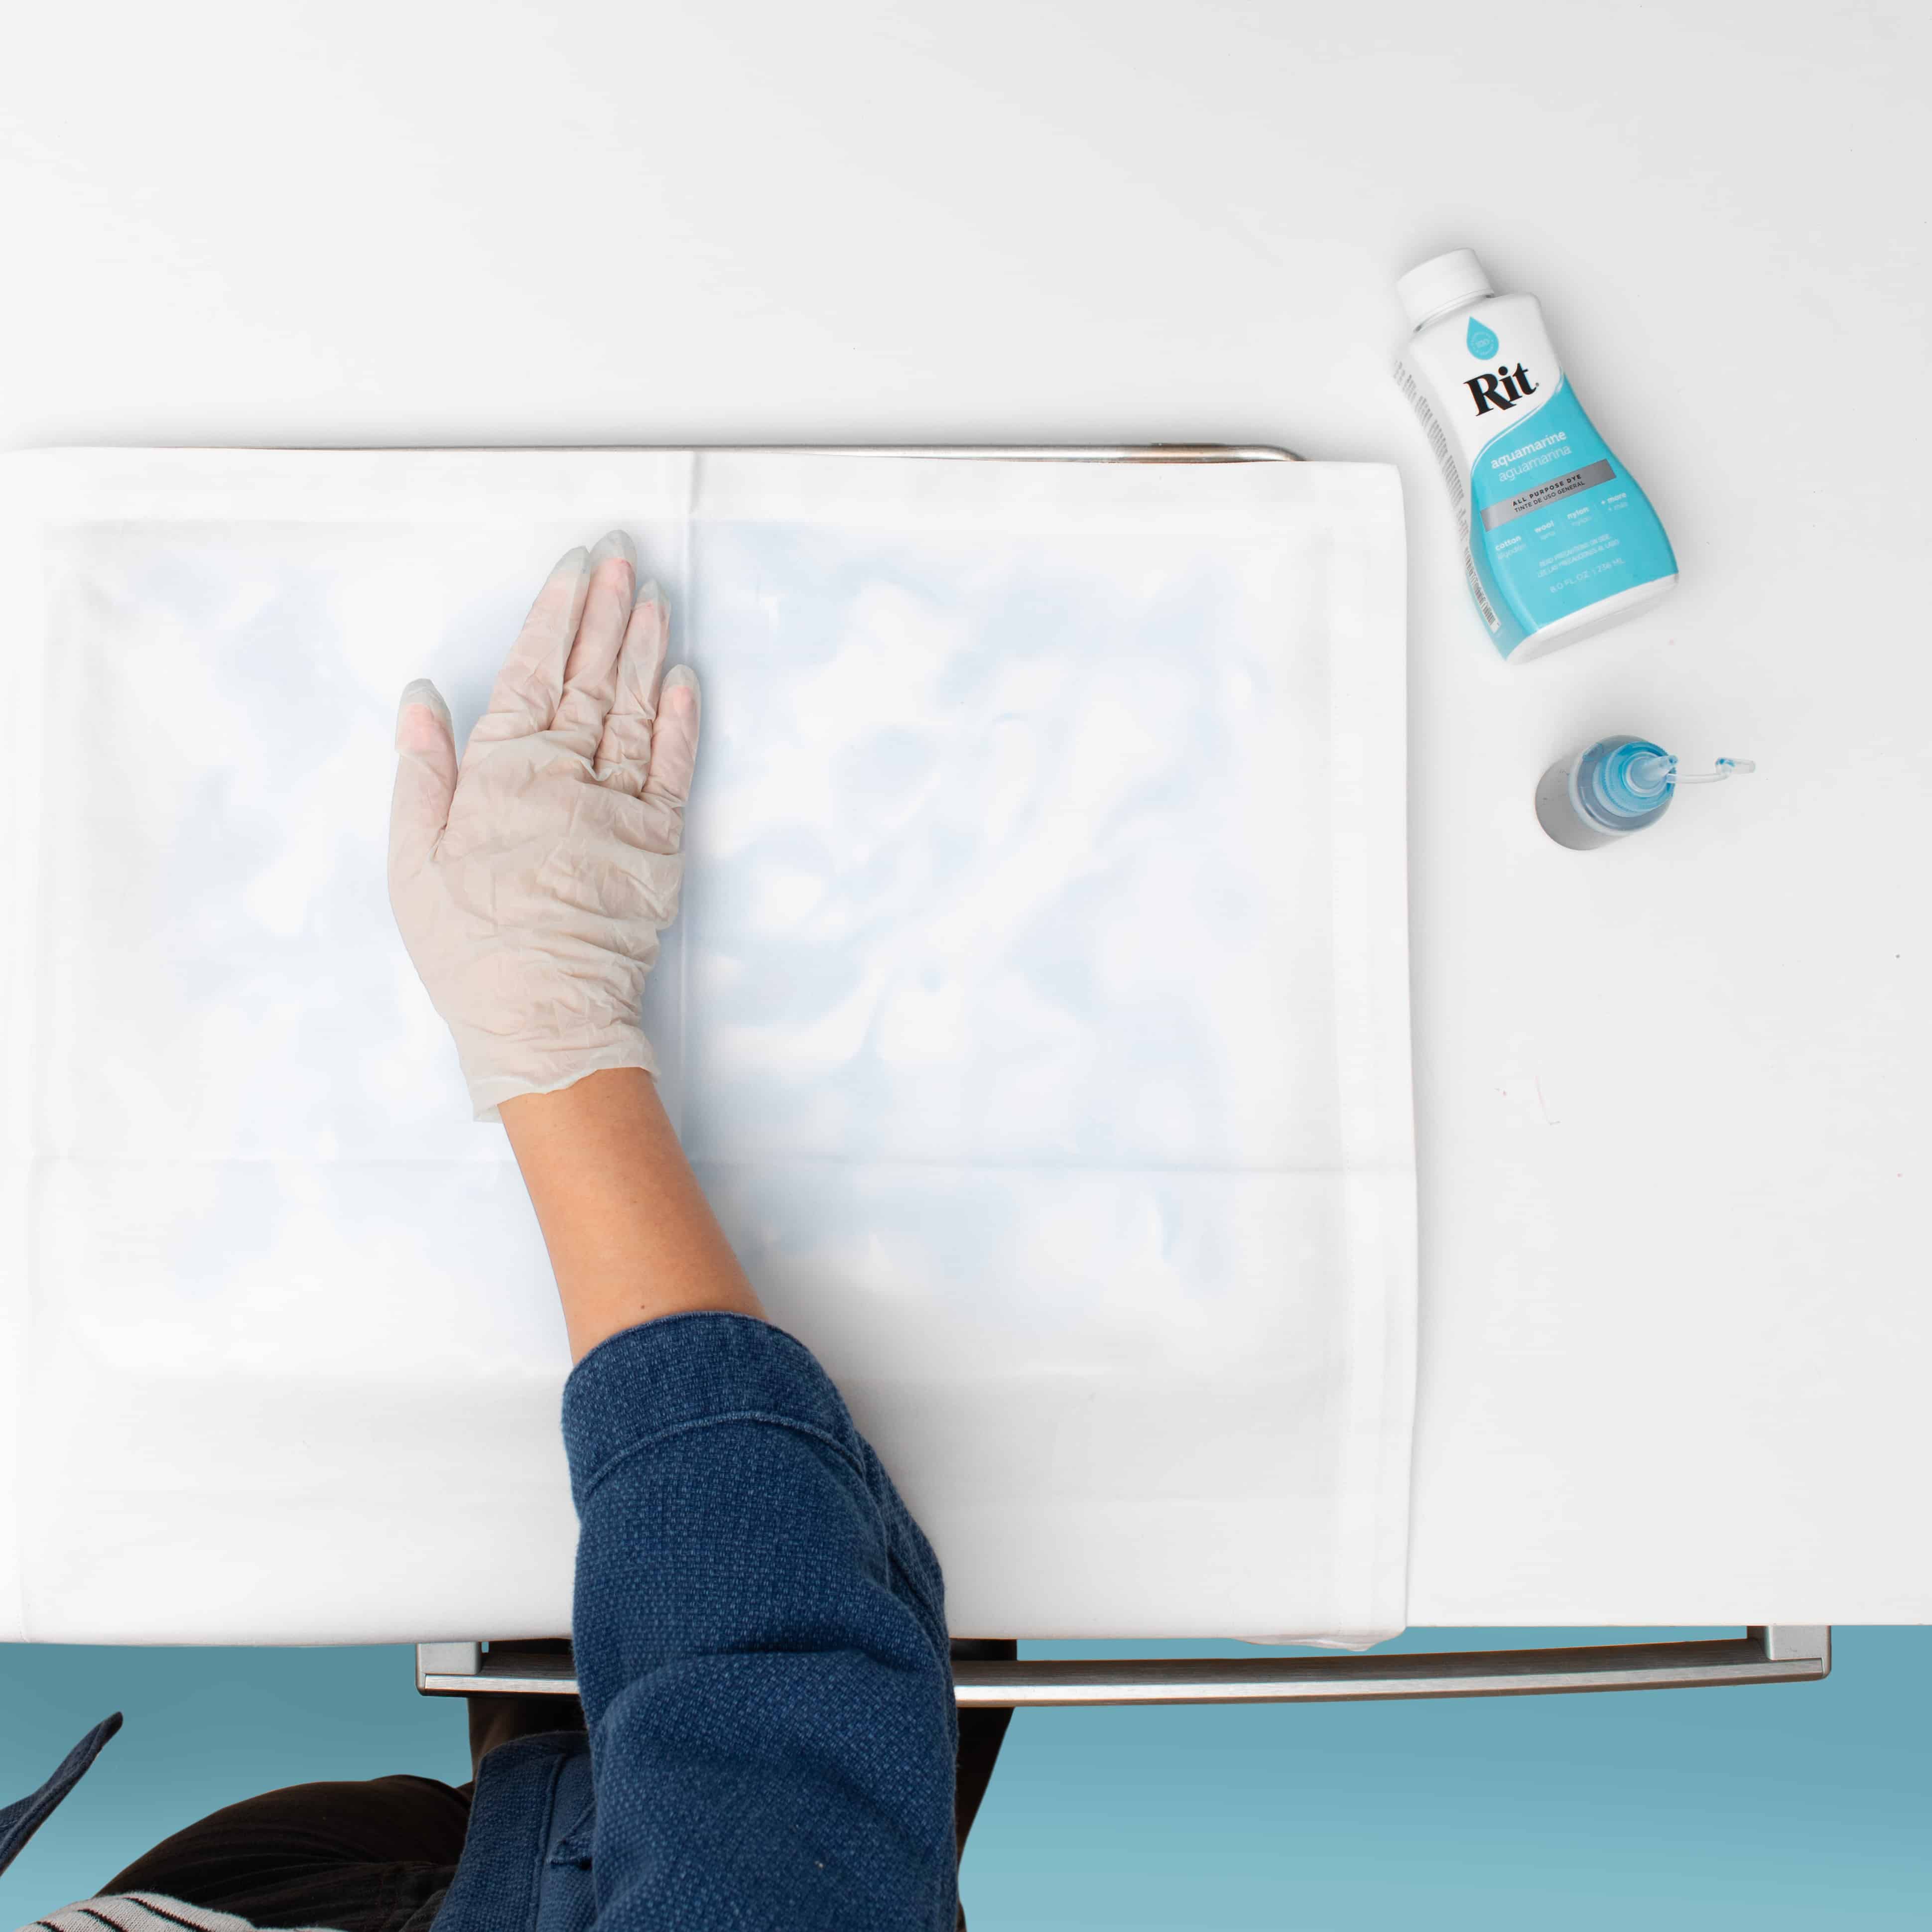
- Slowly lift the fabric from the pan.
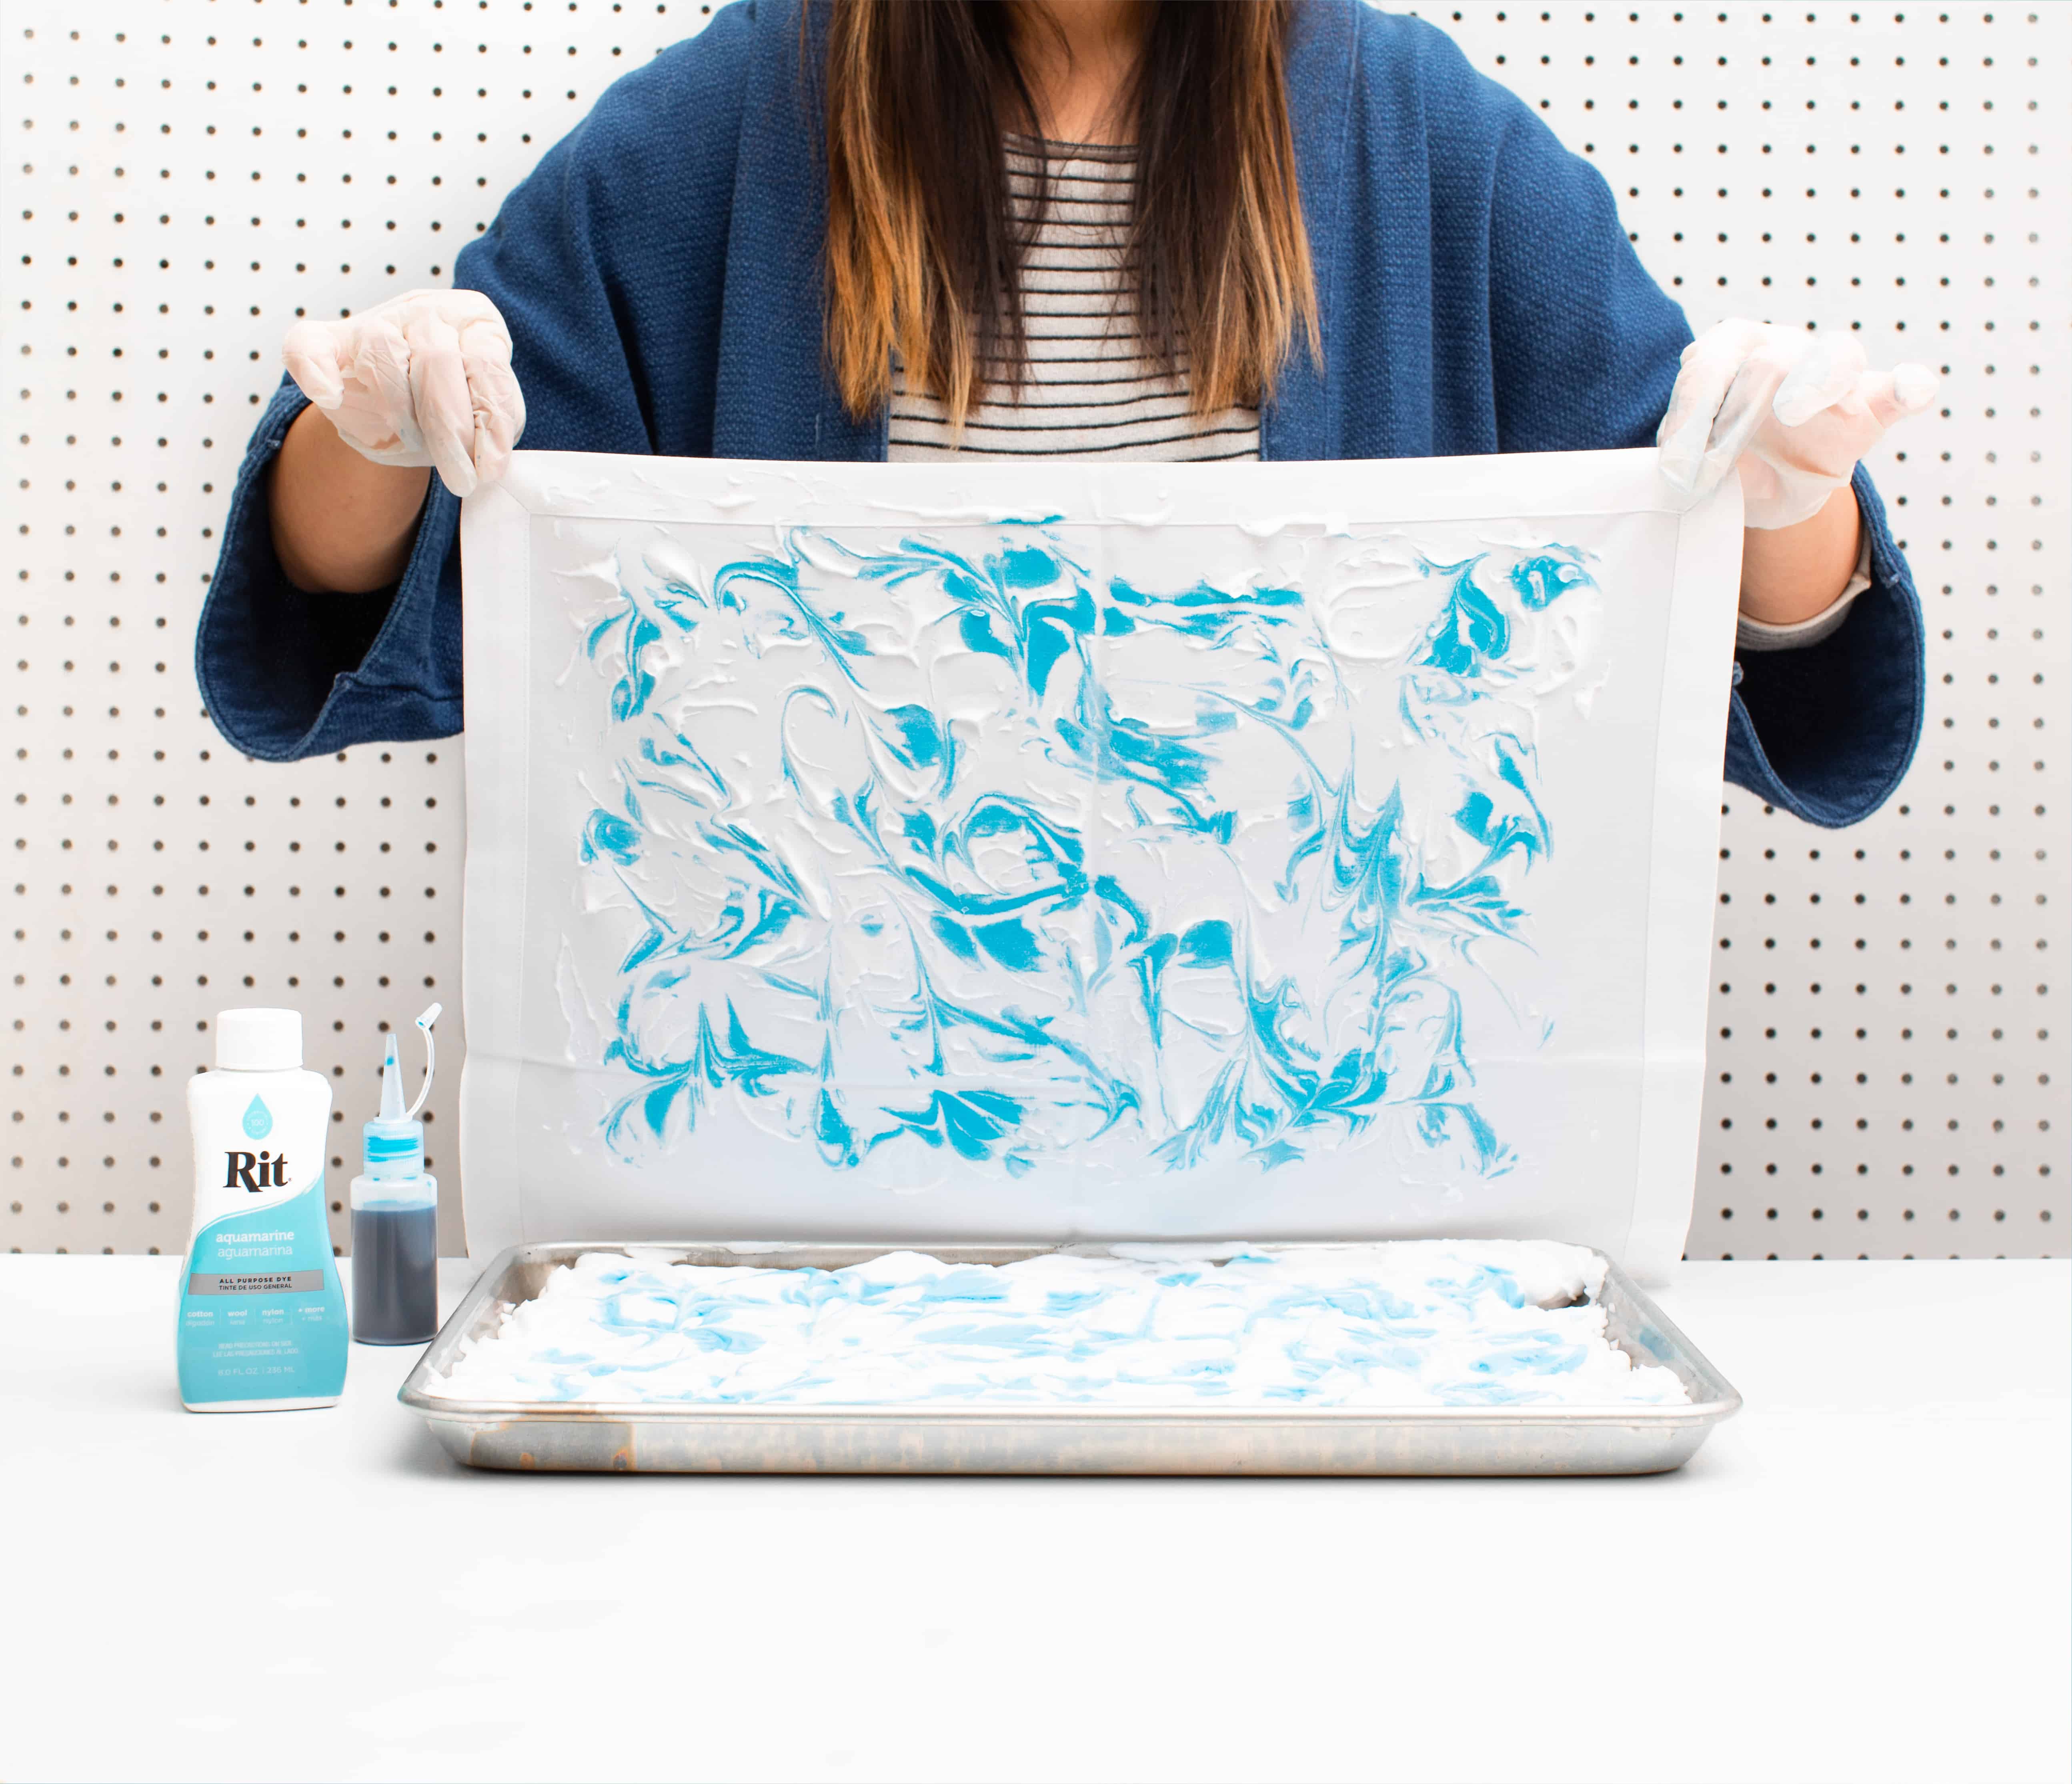
- Scrape off excess foam.
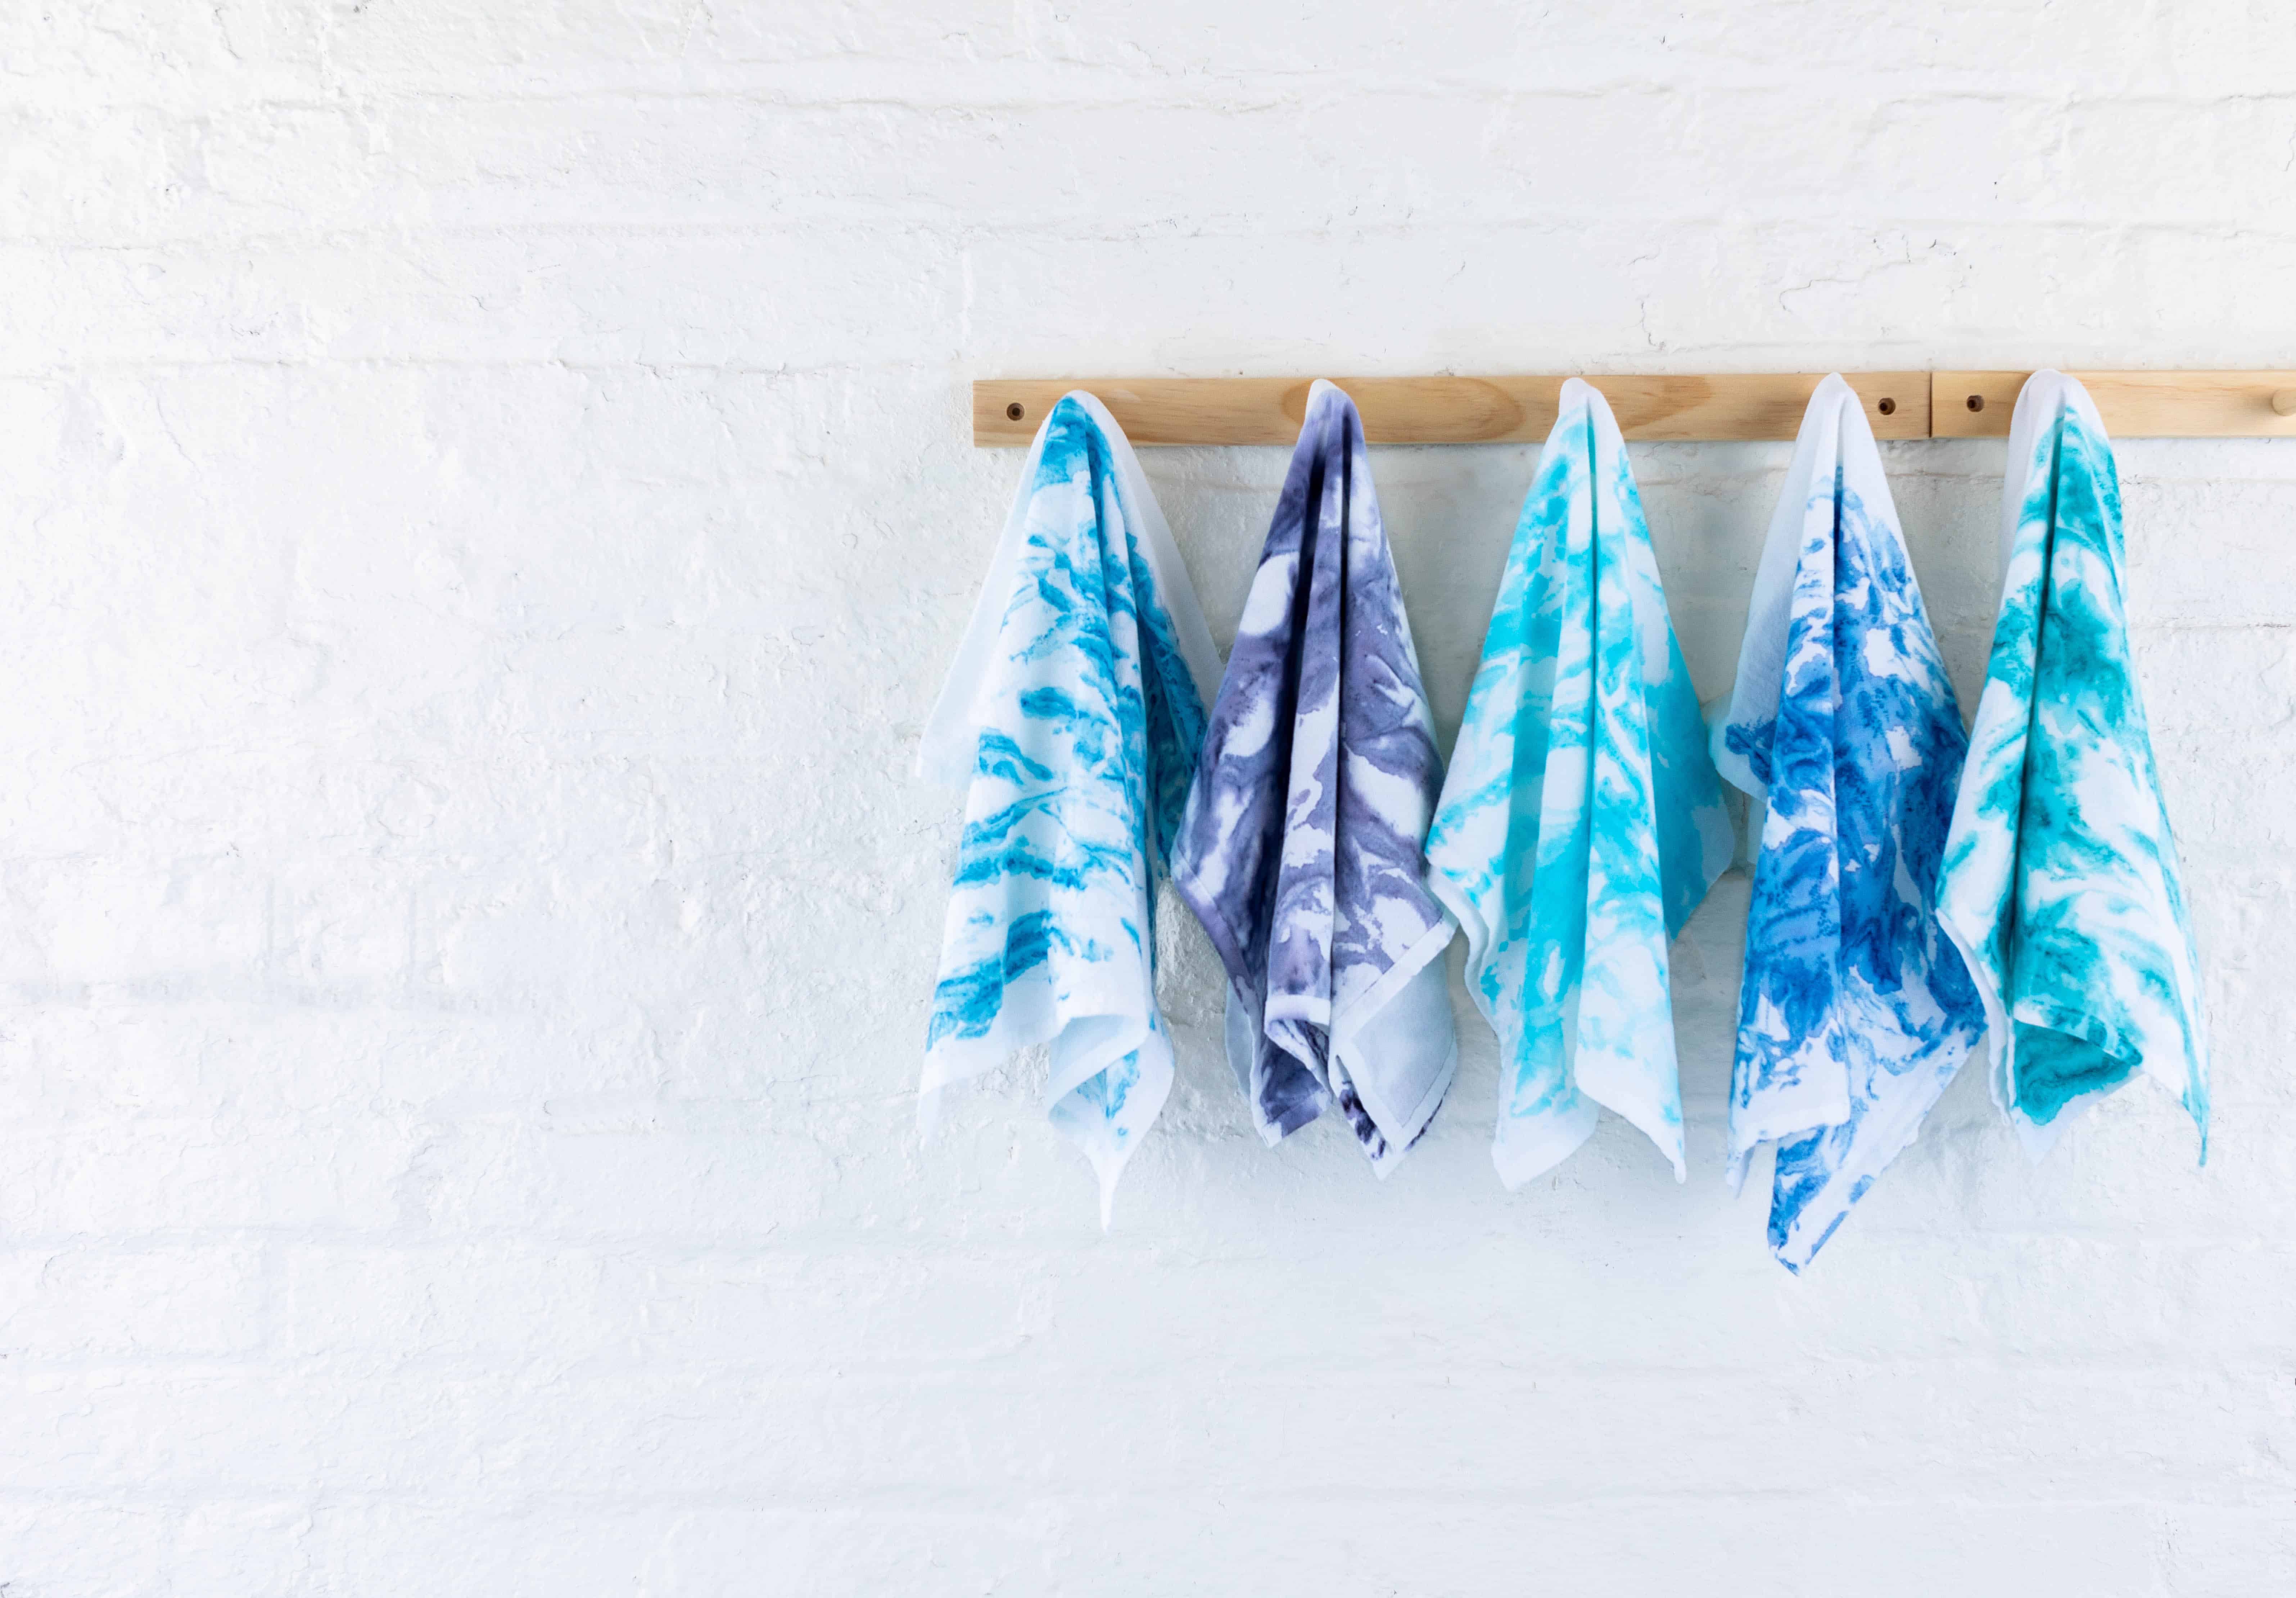
- We strongly recommend transferring the dyed fabric to a container with Rit ColorStay Dye Fixative. It enhances the color, increases color retention and prevents dye from bleeding into the white areas. Follow these instructions.
- Rinse tea towels in cool water until water runs clear.


Posts You May Like
