Furoshiki Fabric Gift Wrapping
Furoshiki is a traditional type of Japanese gift wrapping that uses cloth fabric. Since we love repurposing and upcycling old fabric, we thought this would be a perfect fit for the holidays. It’s sustainable, reusable and so fun to make. We got so excited about this idea that in addition to creating our own wrapping, we asked our good pal Sweet Paul to create some too! Which do you like more!?!

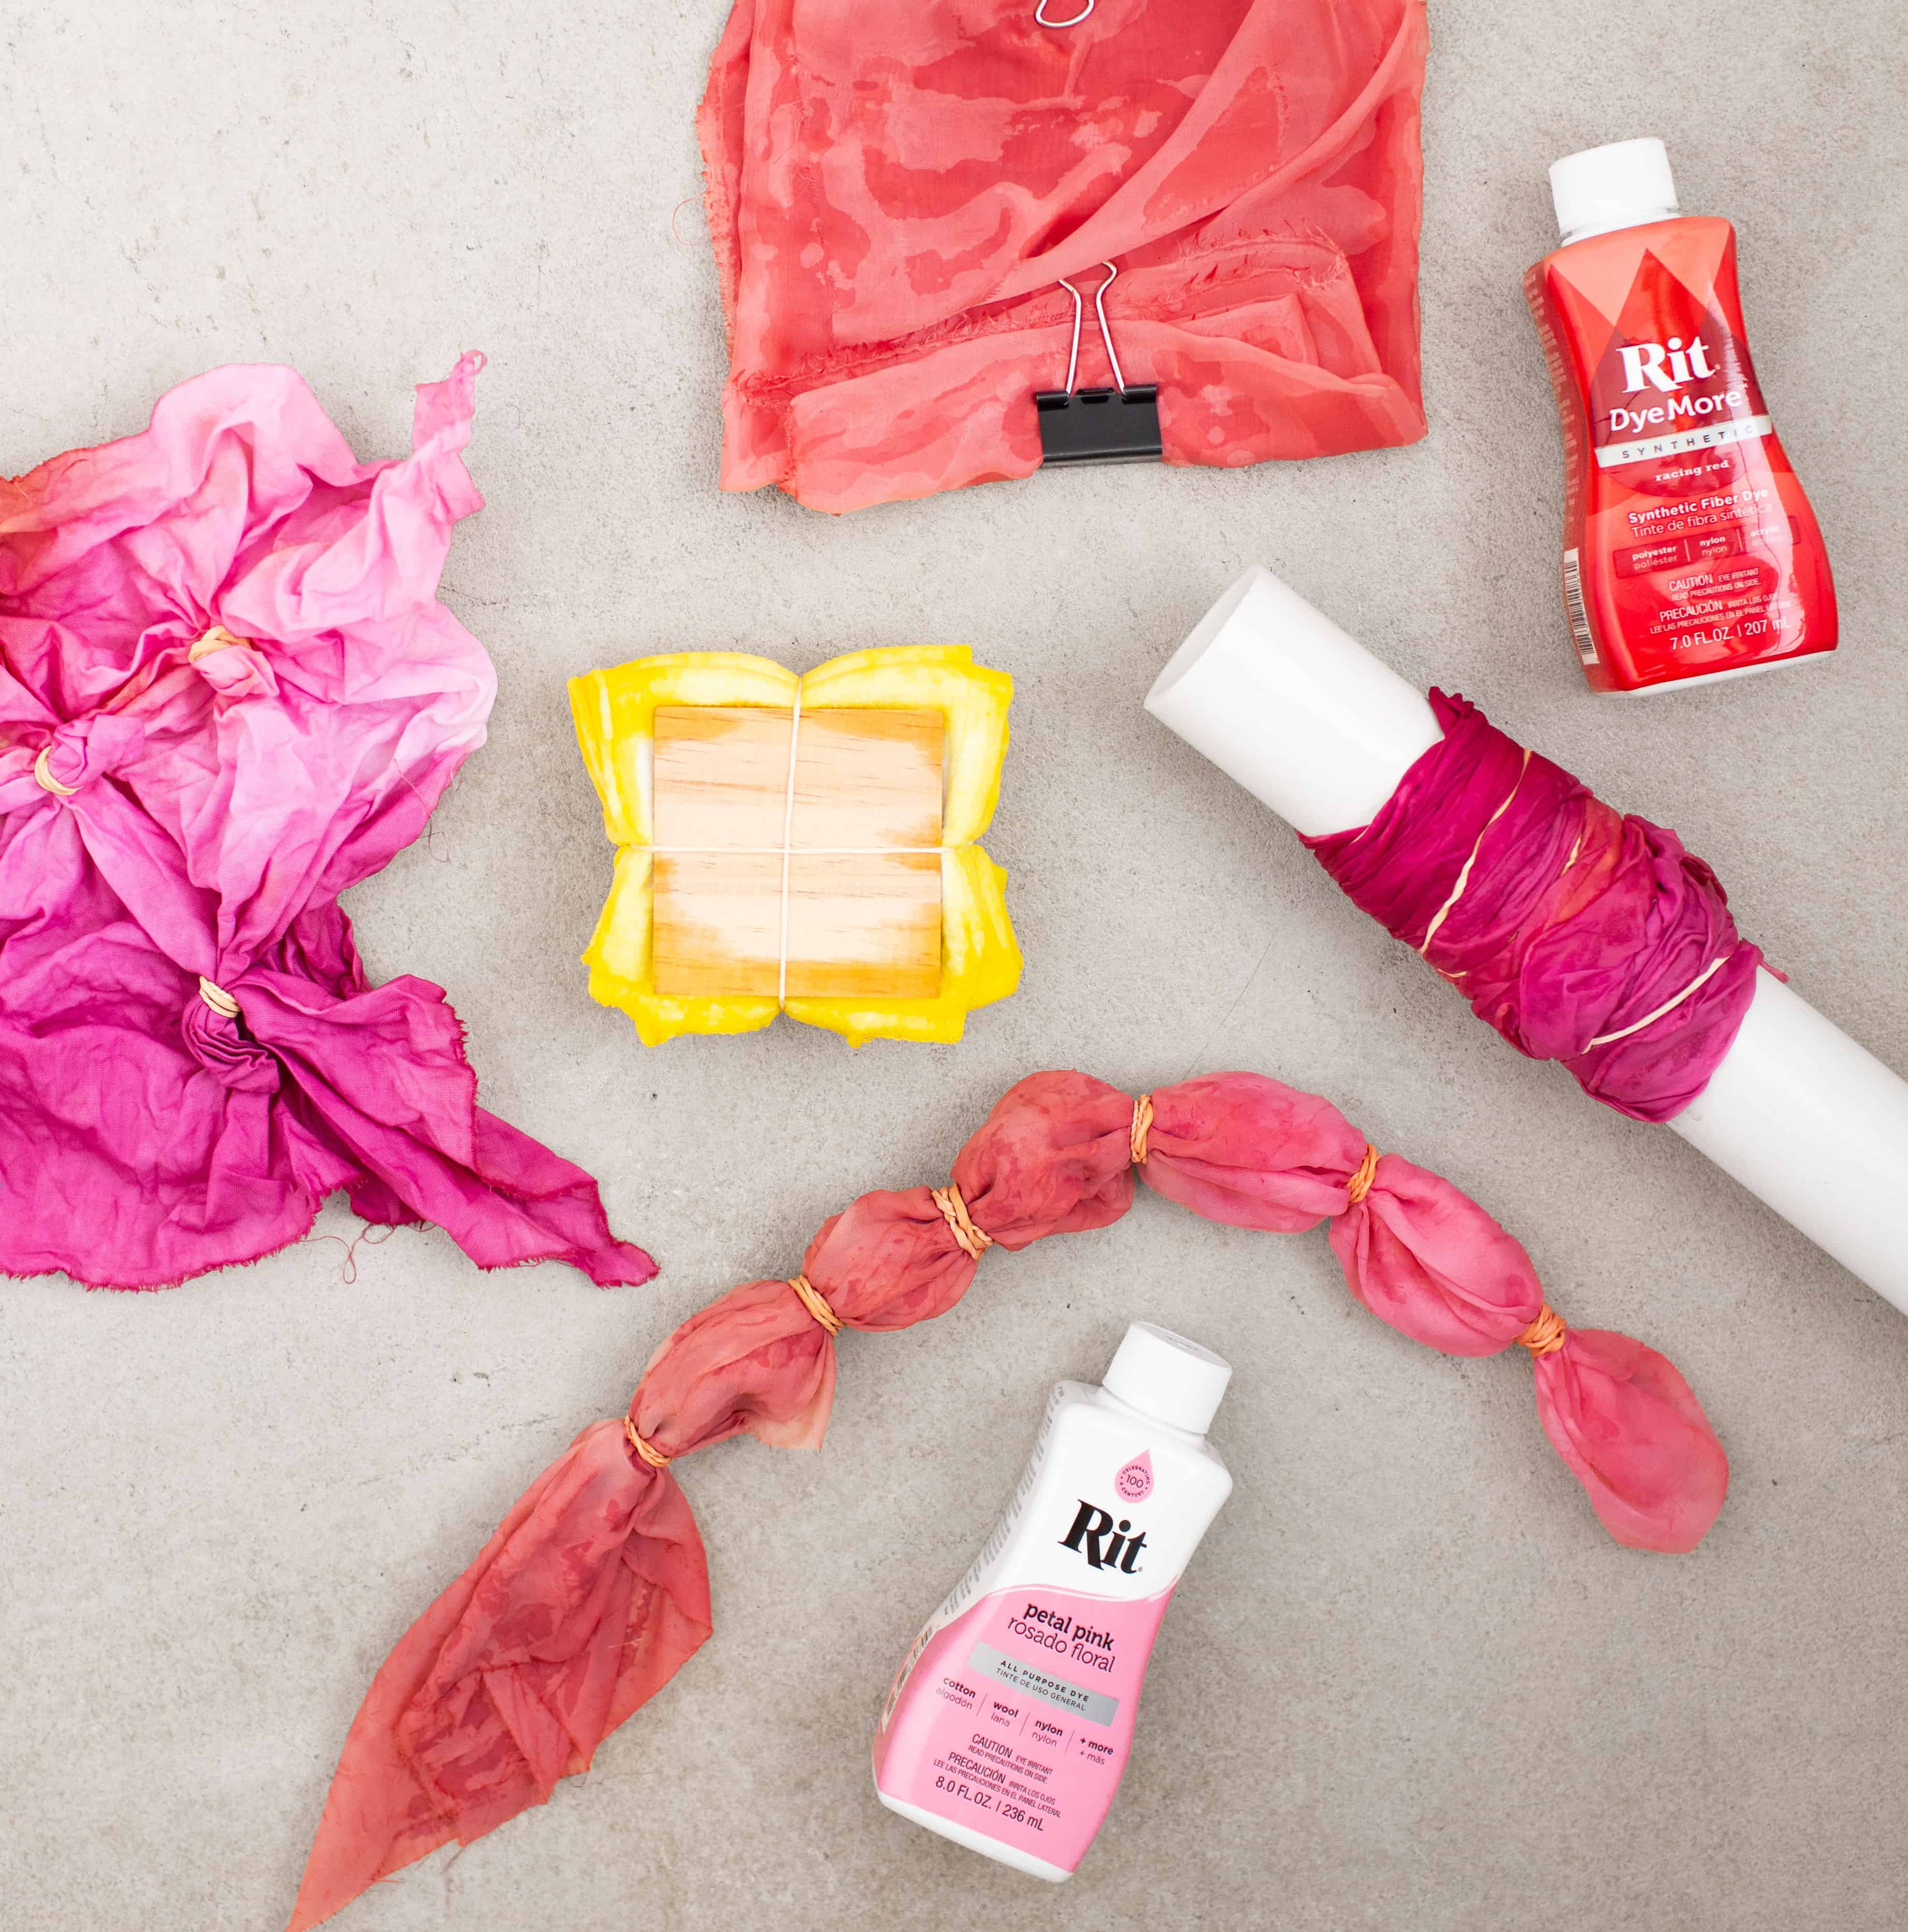
- 36" x 36" Fabric (We used Silk, Crinkled Chiffon, Chiffon, Cotton and Gauze)
- Rit All-Purpose Liquid Dye (If Dyeing Silk, Cotton or Gauze): We Used a Combination of Scarlet, Wine, Lemon Yellow and Petal Pink
- Rit DyeMore (If Dyeing Chiffon): We Used a Combination of Apricot Orange and Racing Red
- Plastic Container for All-Purpose Dye
- Metal Pot for Rit DyeMore
- Measuring Cup
- Plastic Gloves
- Plastic Table Cover
- Paper Towels
- Rit ColorStay Dye Fixative (Recommended)
What makes this project so fun are the various colors and techniques you can use. If you want to use our shibori or tie-dye techniques, follow the instructions below. If you want to try marbling (like Sweet Paul), follow our tutorial on how to marble dye. If you want to try ice dyeing, follow this tutorial. There are so many options to choose from!
- Pre-wash fabric to remove any finishes that may interfere with dye absorption.
- Cover work area with plastic table cover and have paper towels handy to protect against possible spills. Gather supplies.
- Prepare fabric with your favorite technique. Sweet Paul used the kanoko shibori technique. We used the itajime and arashi shibori methods.
- Wear rubber gloves to protect hands.
- If dyeing with Rit All-Purpose Dye, fill a plastic container with four cups of hot water. If dyeing with Rit DyeMore Synthetic Fiber Dye, fill a pot with four cups of water and heat to almost boiling.
- Pour dye into bath. Test color by dipping a paper towel into the dyebath. If color is too light, add more dye. If color is too dark, add more water.
- Add fabric to the dyebath. If using Rit DyeMore, leave burner on to keep water at almost boiling temperature. Leave in the dyebath for 10 to 30 minutes, depending on how dark of a color you are looking for. When desired color is achieved, remove from dyebath. Fabric will look darker when wet and will dry lighter.
- We strongly recommend using Rit ColorStay Dye Fixative immediately after dyeing and before removing the binding. It enhances the color, increases color retention and prevents dye from bleeding into white areas.
- Rinse in cool water until rinse water begins to run clear. Carefully remove fabric from binding.
- Wash in warm water with a mild detergent, rinse and dry.
- Now it is time to wrap your gifts! To learn the traditional tying techniques, watch one of our quick videos by Sweet Paul.

Basic Furoshiki Tying Method
Two-Knot Furoshiki Tying Method
