
Supplies
- White Flower Crown
- Rit DyeMore Super Pink
- Tongs
- Dishwashing Liquid
- Paper Towels
- Rubber Gloves
- Stove Pot
Time
Total: {{ partial.tPSJ.total }}
Difficulty
Beginner Total: {{ partial.t746.total }}
Instructions
- Gather Supplies.
- When dyeing synthetic fabrics, always use the Stove Top method of dyeing. This will ensure a high, steady temperature (about 180F or just below boiling), which is needed to dye synthetics. Fill cook pot with 3 gallons of hot tap water. Cover pot and heat water to almost boiling.

- When water begins to simmer, add 1/2 cup Rit DyeMore. Shake bottle before pouring.
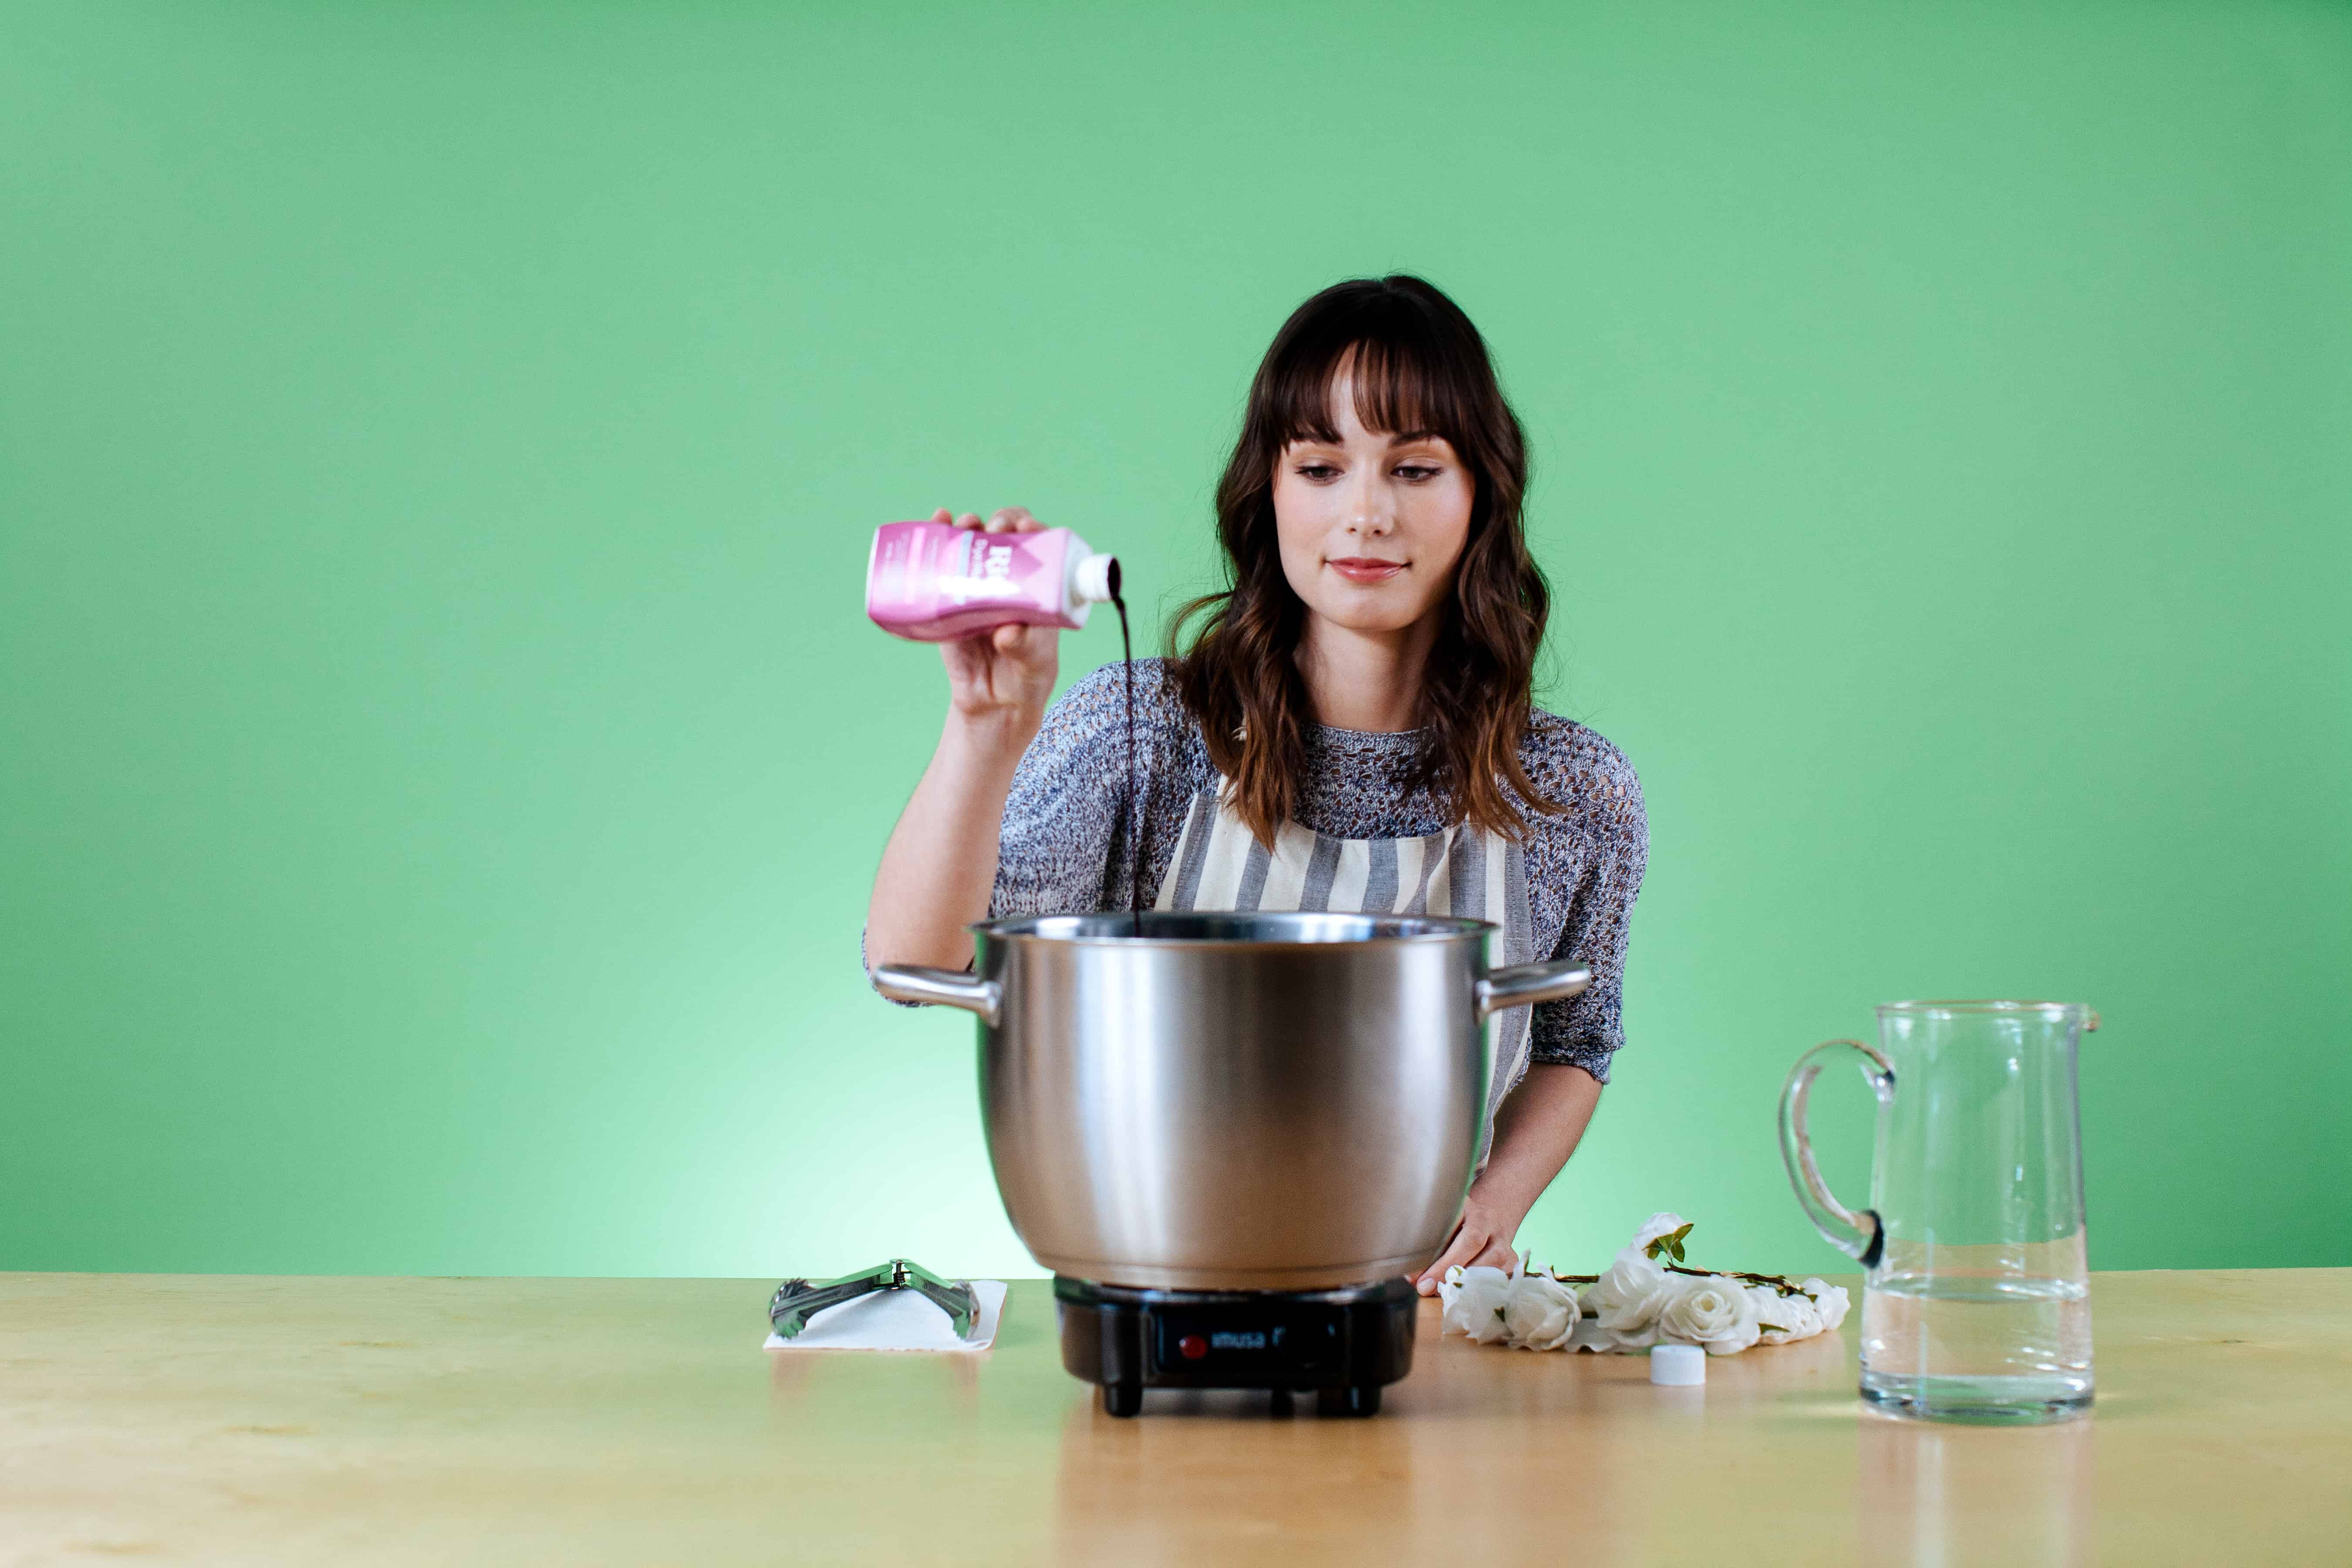
- Add a squirt of liquid dish detergent (about 1 teaspoon) and stir well. Test dye color by dipping paper towel in the dyebath. If color is too light, add more dye; if color is too dark, add more water.
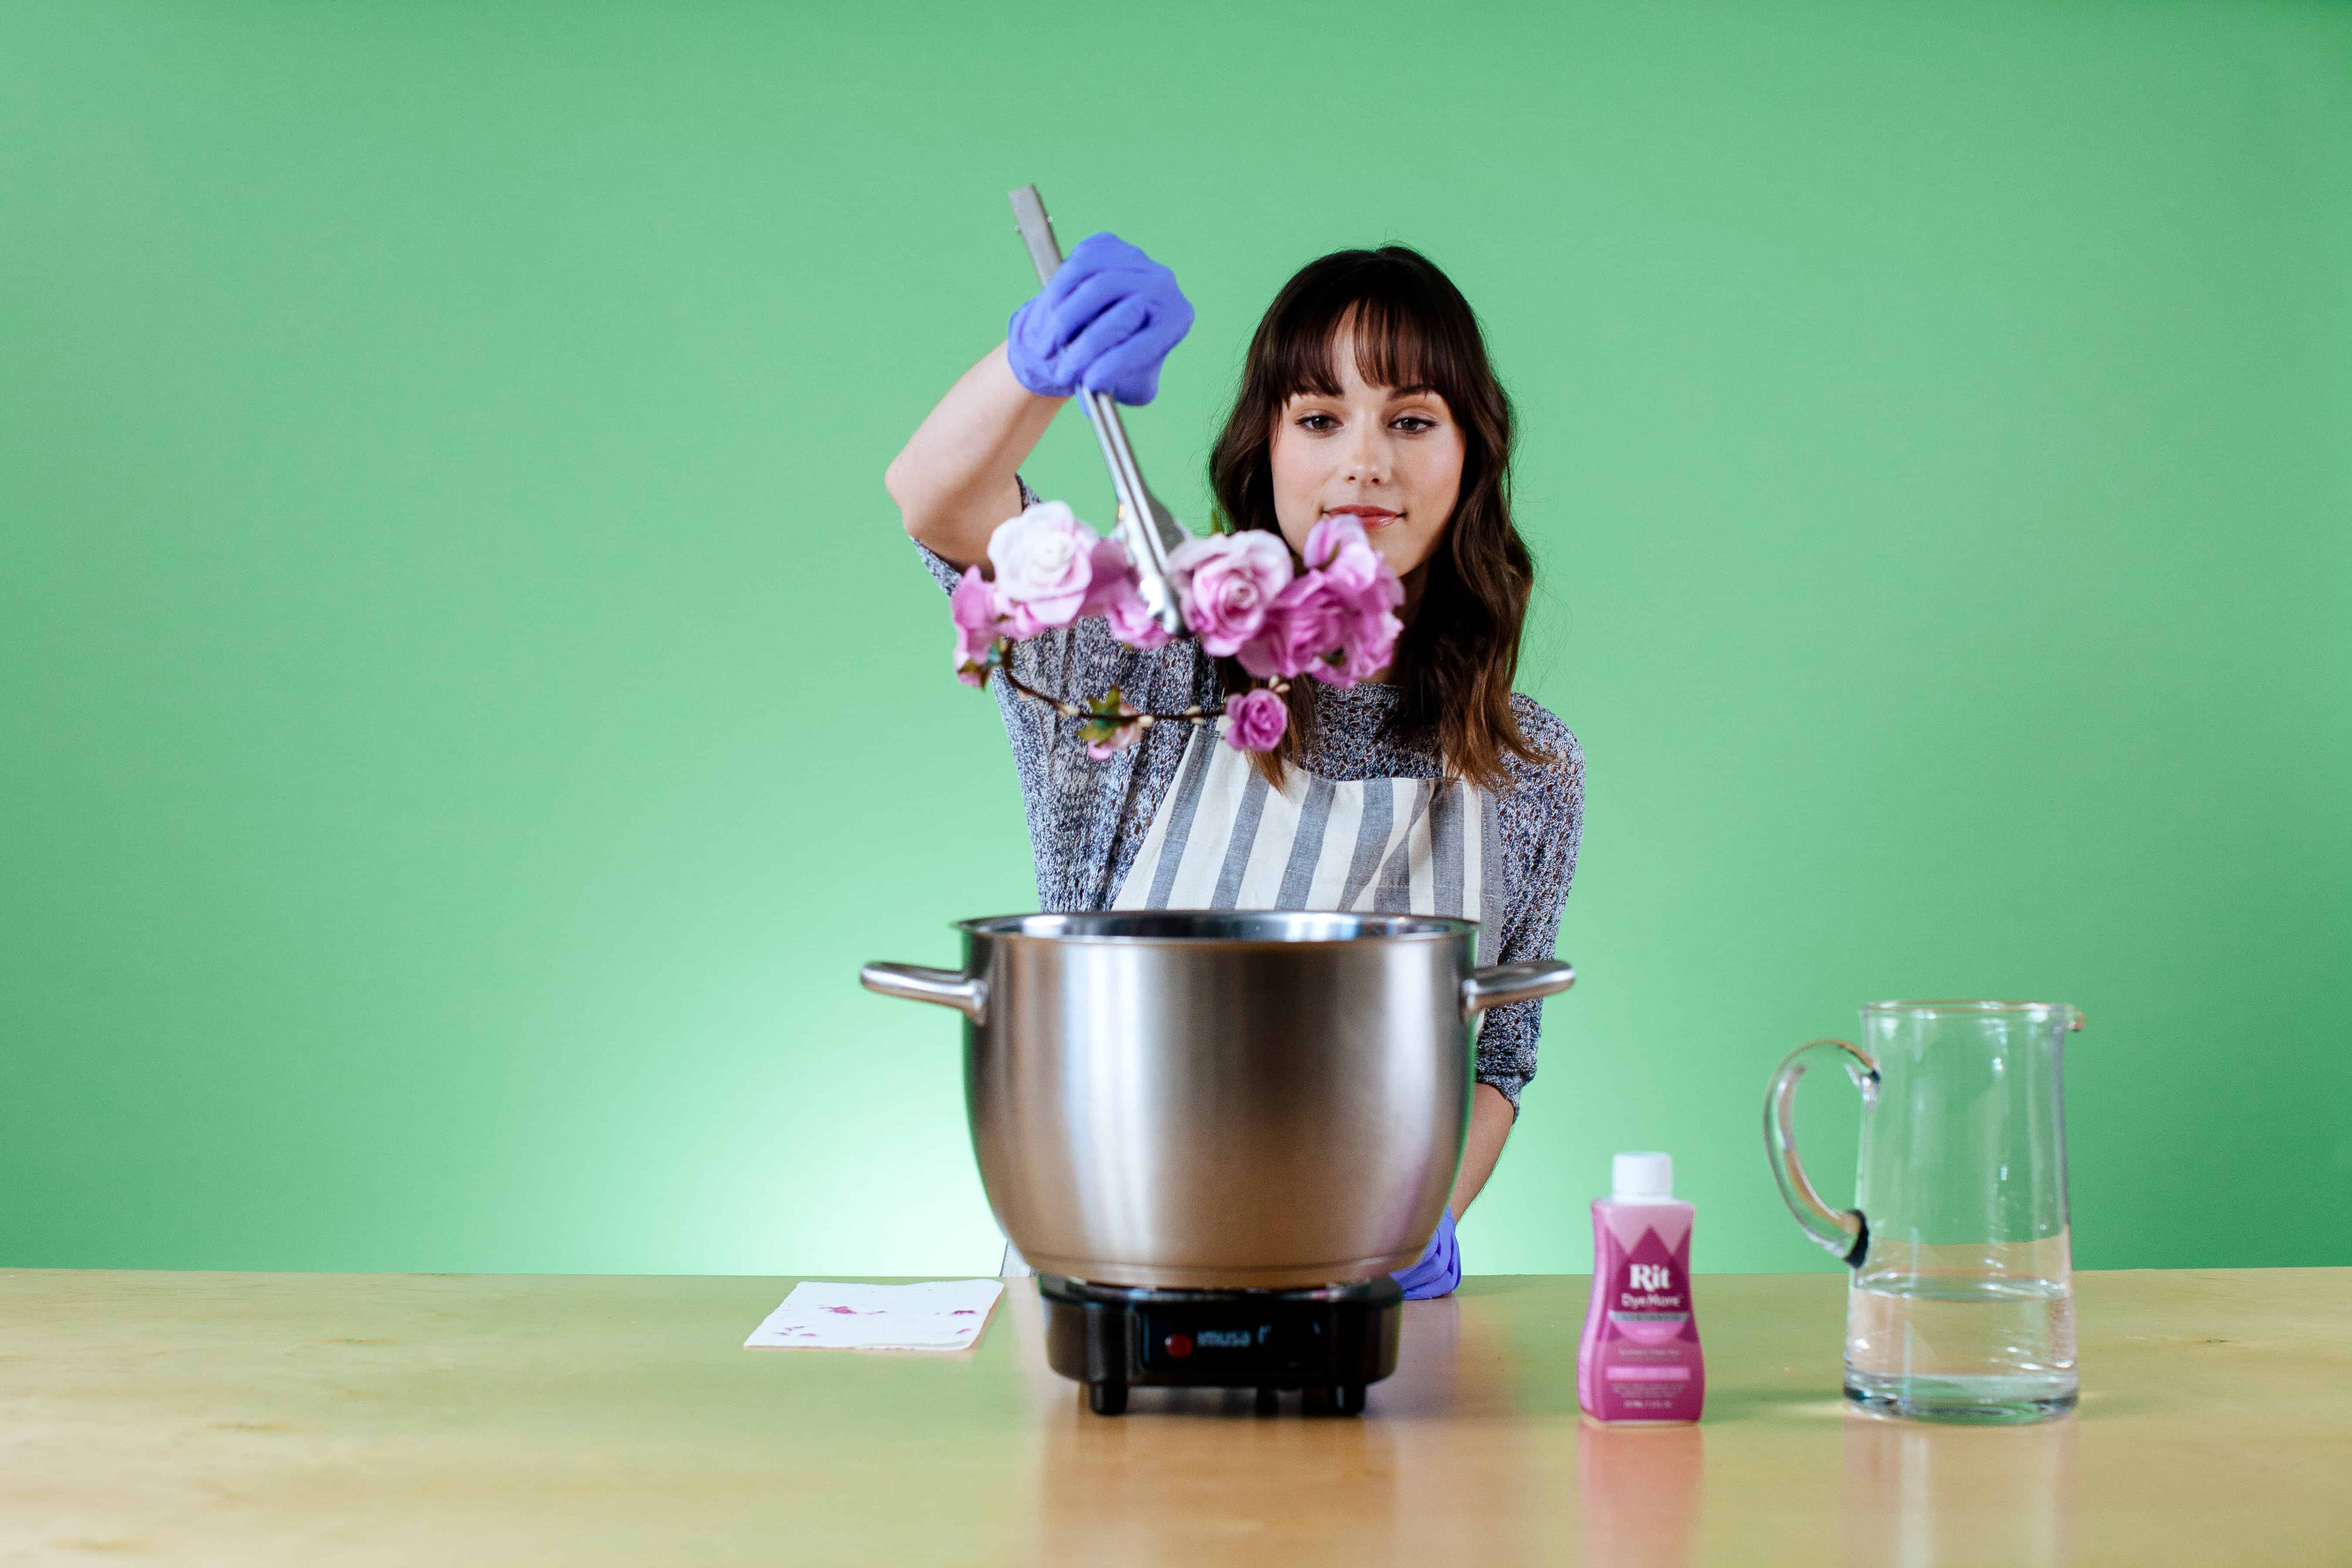
- Wearing rubber gloves, use the metal tongs to lower the flower crown directly into the dyebath. For a dip-dyed look, only lower the bottom half of the crown. Keep flower crown in dyebath until desired color is acheived. For color variations, experiment with dyeing different parts of the flower crown for different looks. Dye just the bottom, dye just the top or even tilt the flower crown for a diagonal effect. To acheive an ombre look, dip the whole flower crown in quickly and then pull it out slowly allowing the bottom portions of the flower crown to spend a few more seconds in the dye, creating a darker shaded effect.
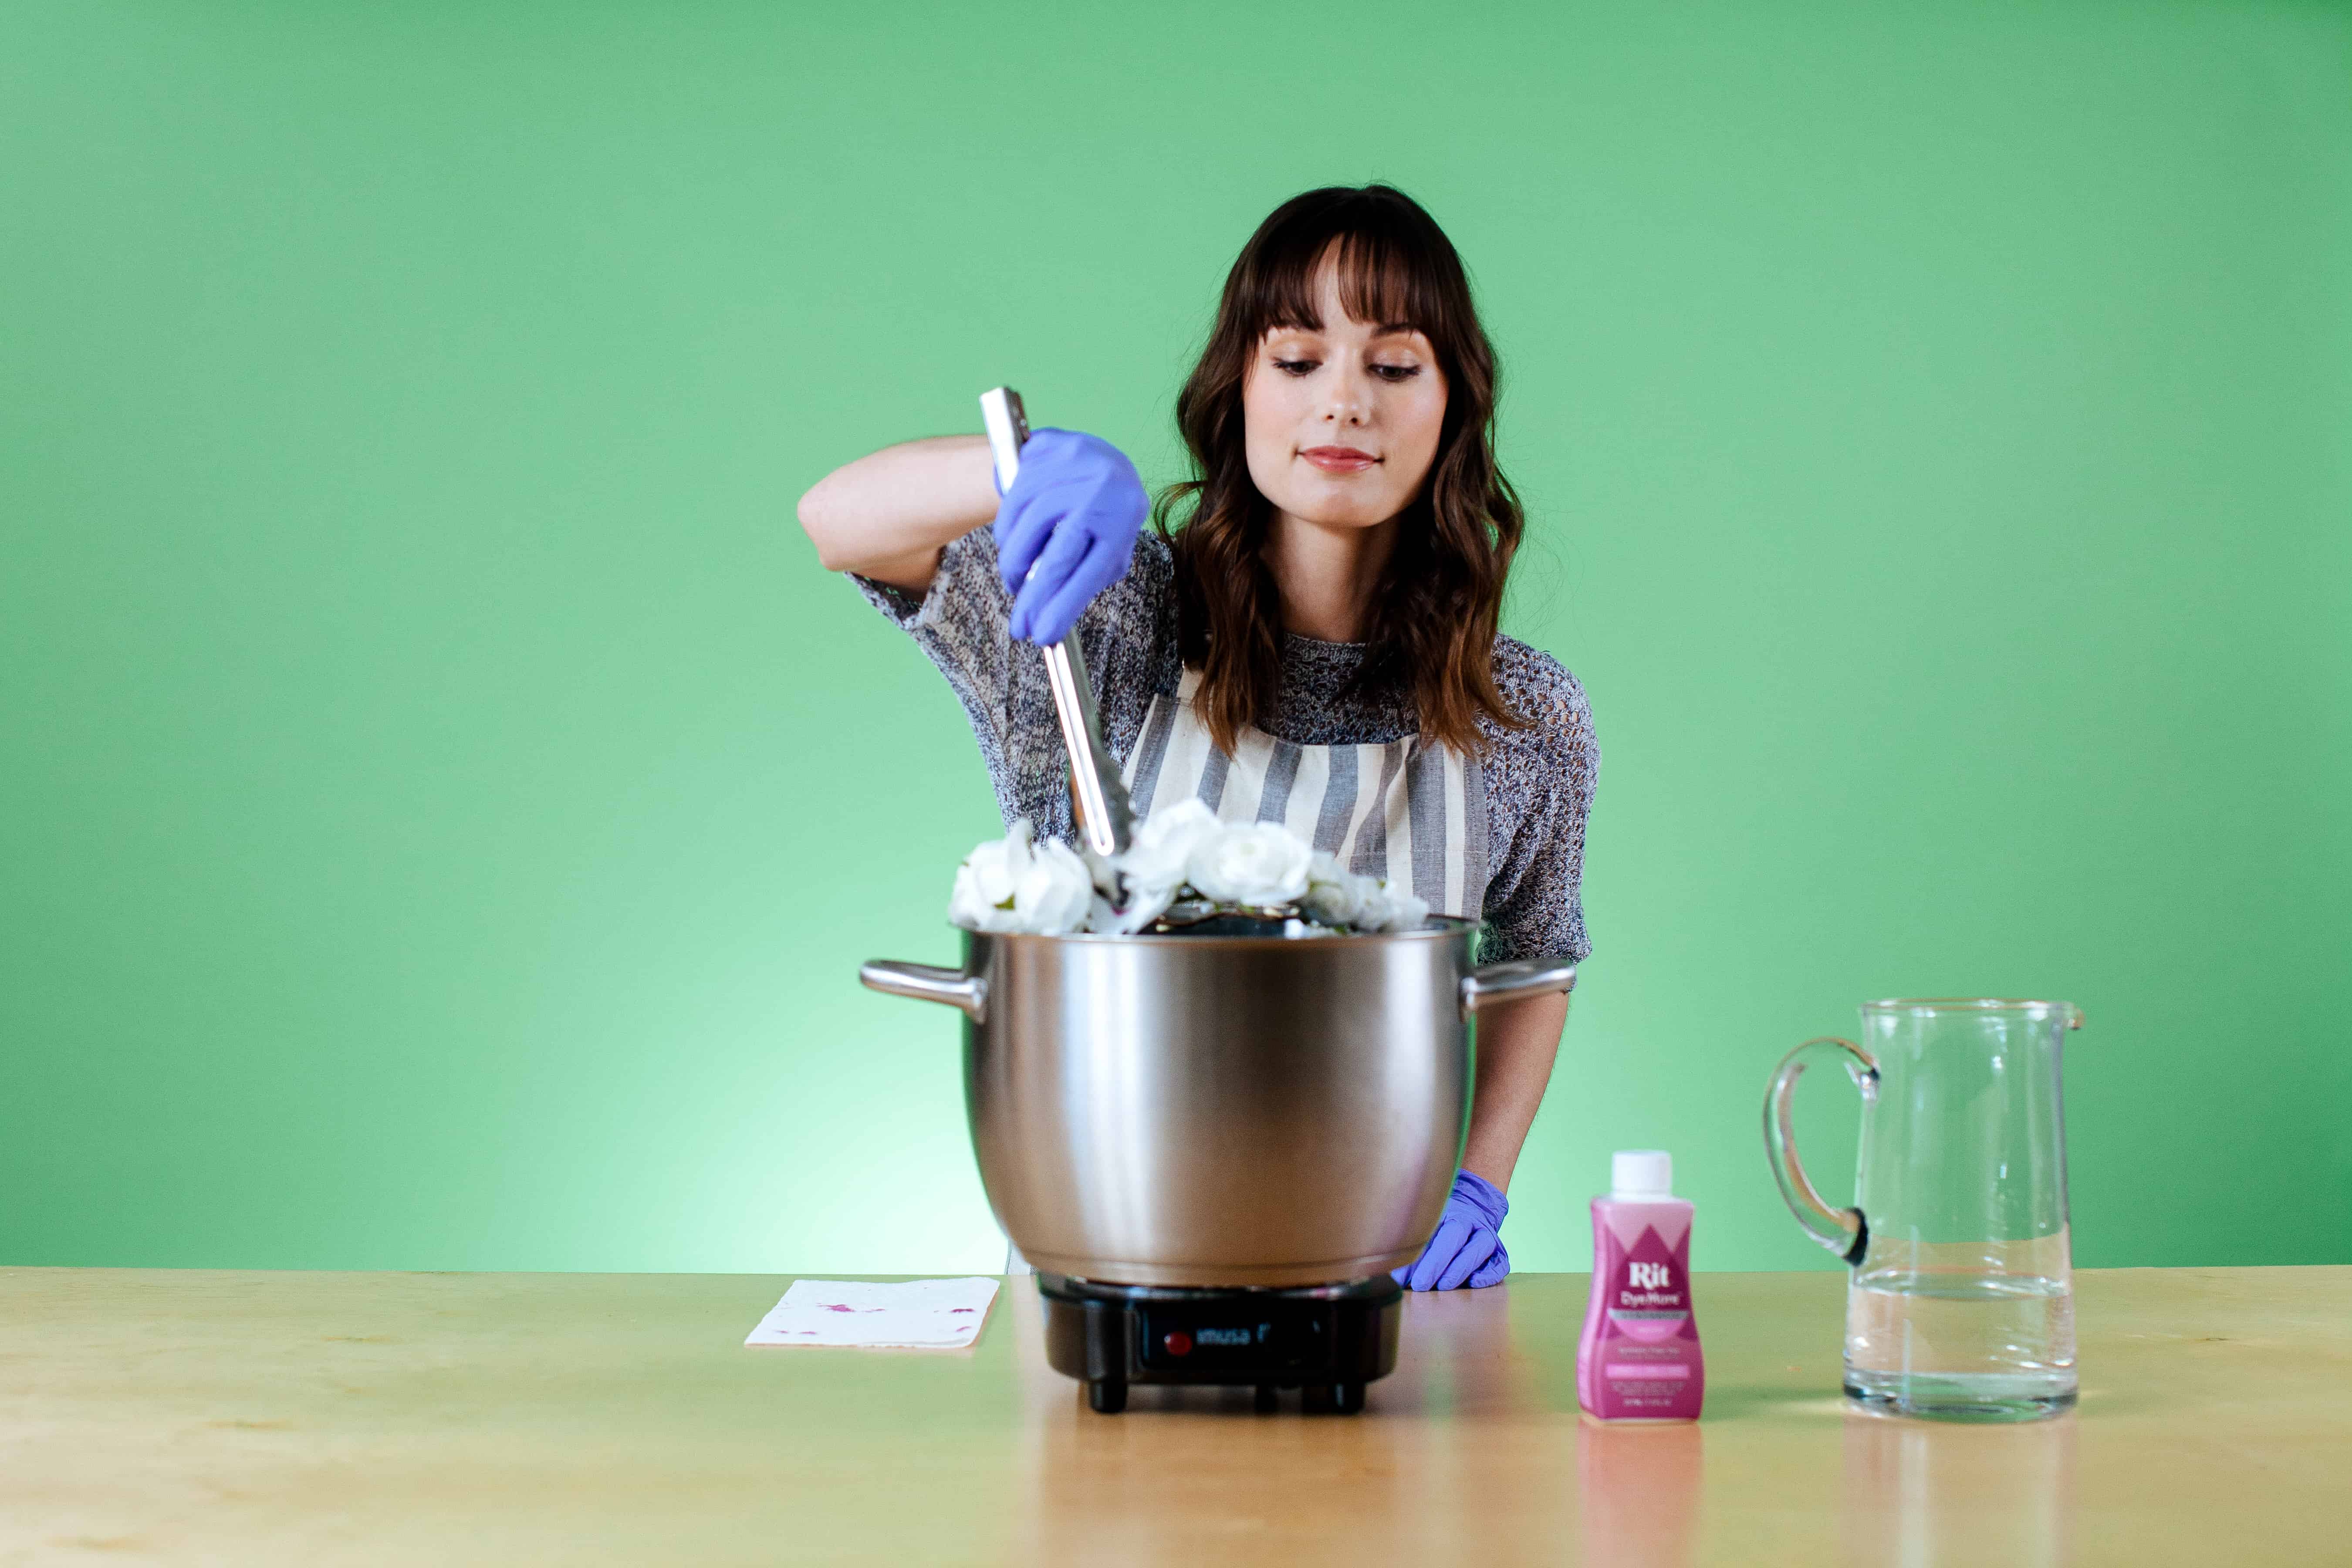
- Use caution: Always watch items dyed over constant heat carefully because heat-sensitive items can begin to melt.
- When satisfied with the color (5 to 10 minutes, up to 30 minutes), remove the item from the dyebath. Remember the color appears lighter when dry. Squeeze out excess dye.
- Rinse in warm water and then cool water until the water runs clear. Dry on paper towels.


Posts You May Like
