
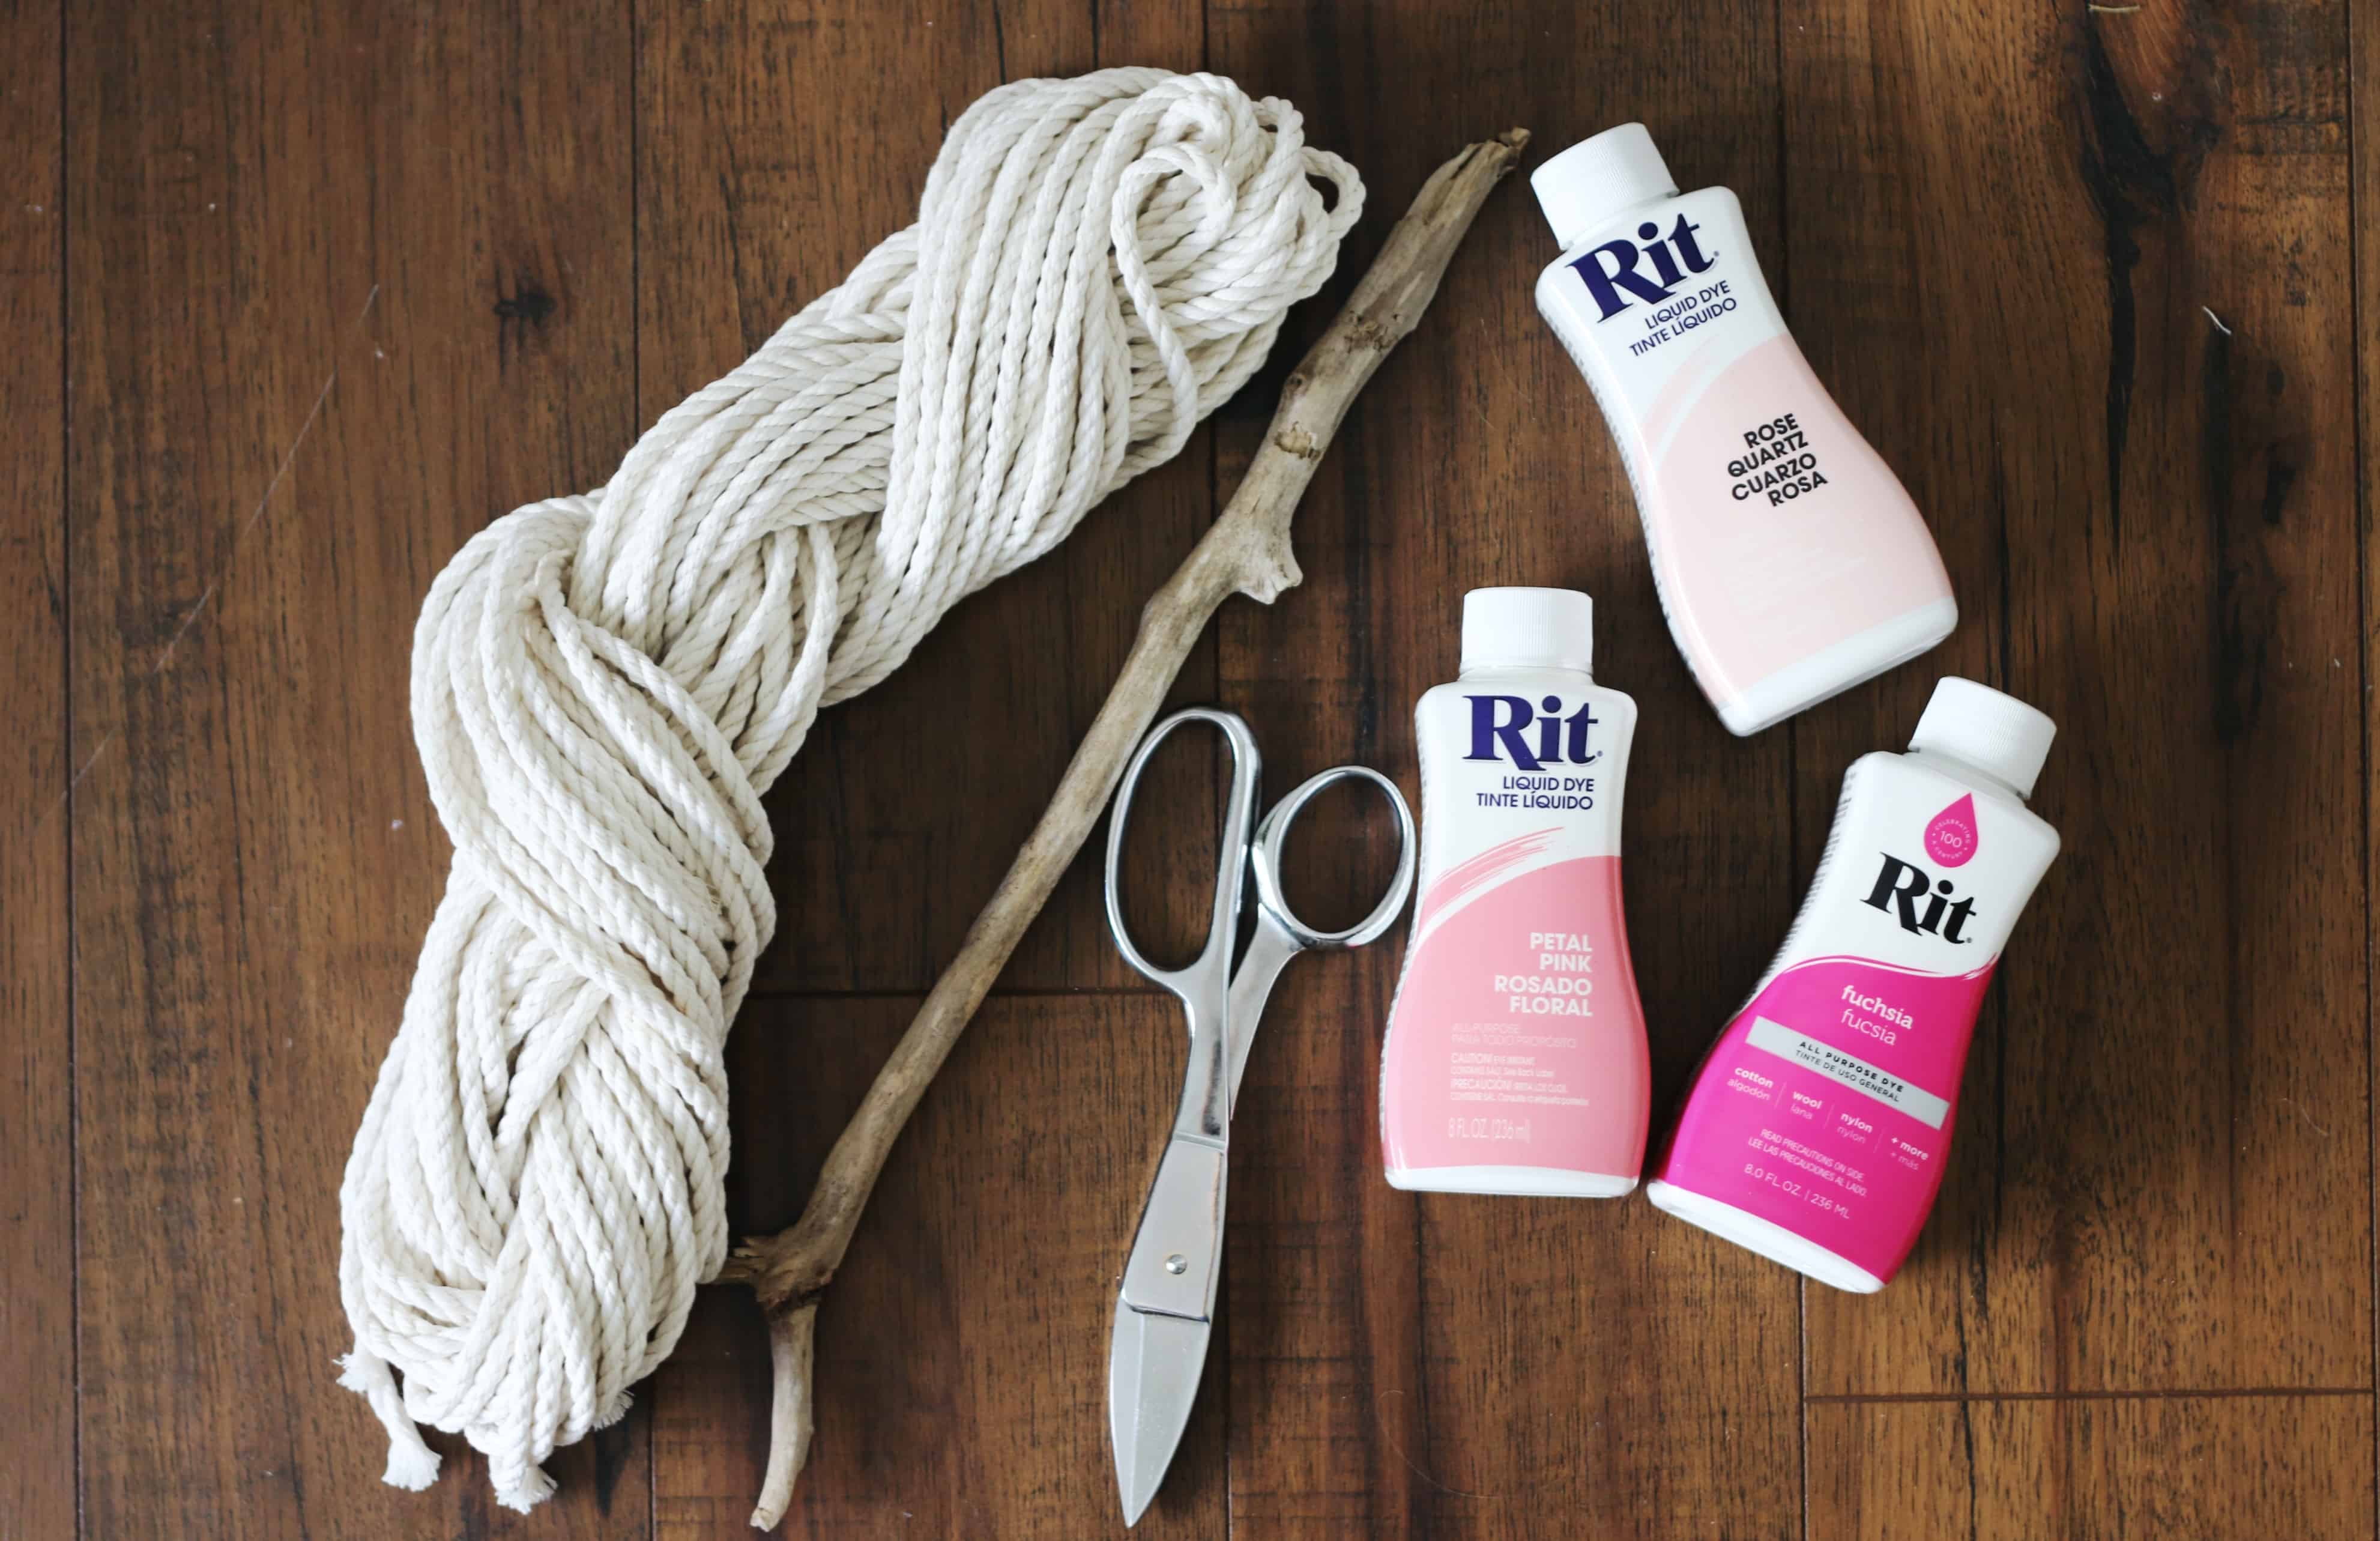
Supplies
- Rit All-Purpose Liquid Dye (Elizabeth Used Petal Pink, Rose Quartz, Fuchsia and Coral)
- 18-inch Wooden Dowel Rod or Branch
- 36 Yards of Cotton Rope Cut Into Twelve 3 Yard Pieces Plus One Piece of Rope 3 Feet Long
- Optional: S Hooks and Garment Rack (See Step 2)
- Large Glass Bowl
- Measuring Cup
- Large Metal Spoon
- Paper Towels
- Plastic Table Cover
- Rubber Gloves
- Scissors
Time
Total: {{ partial.tW5C.total }}
Difficulty
Intermediate Total: {{ partial.tXF8.total }}
Instructions
- Cover table with plastic. Gather supplies.
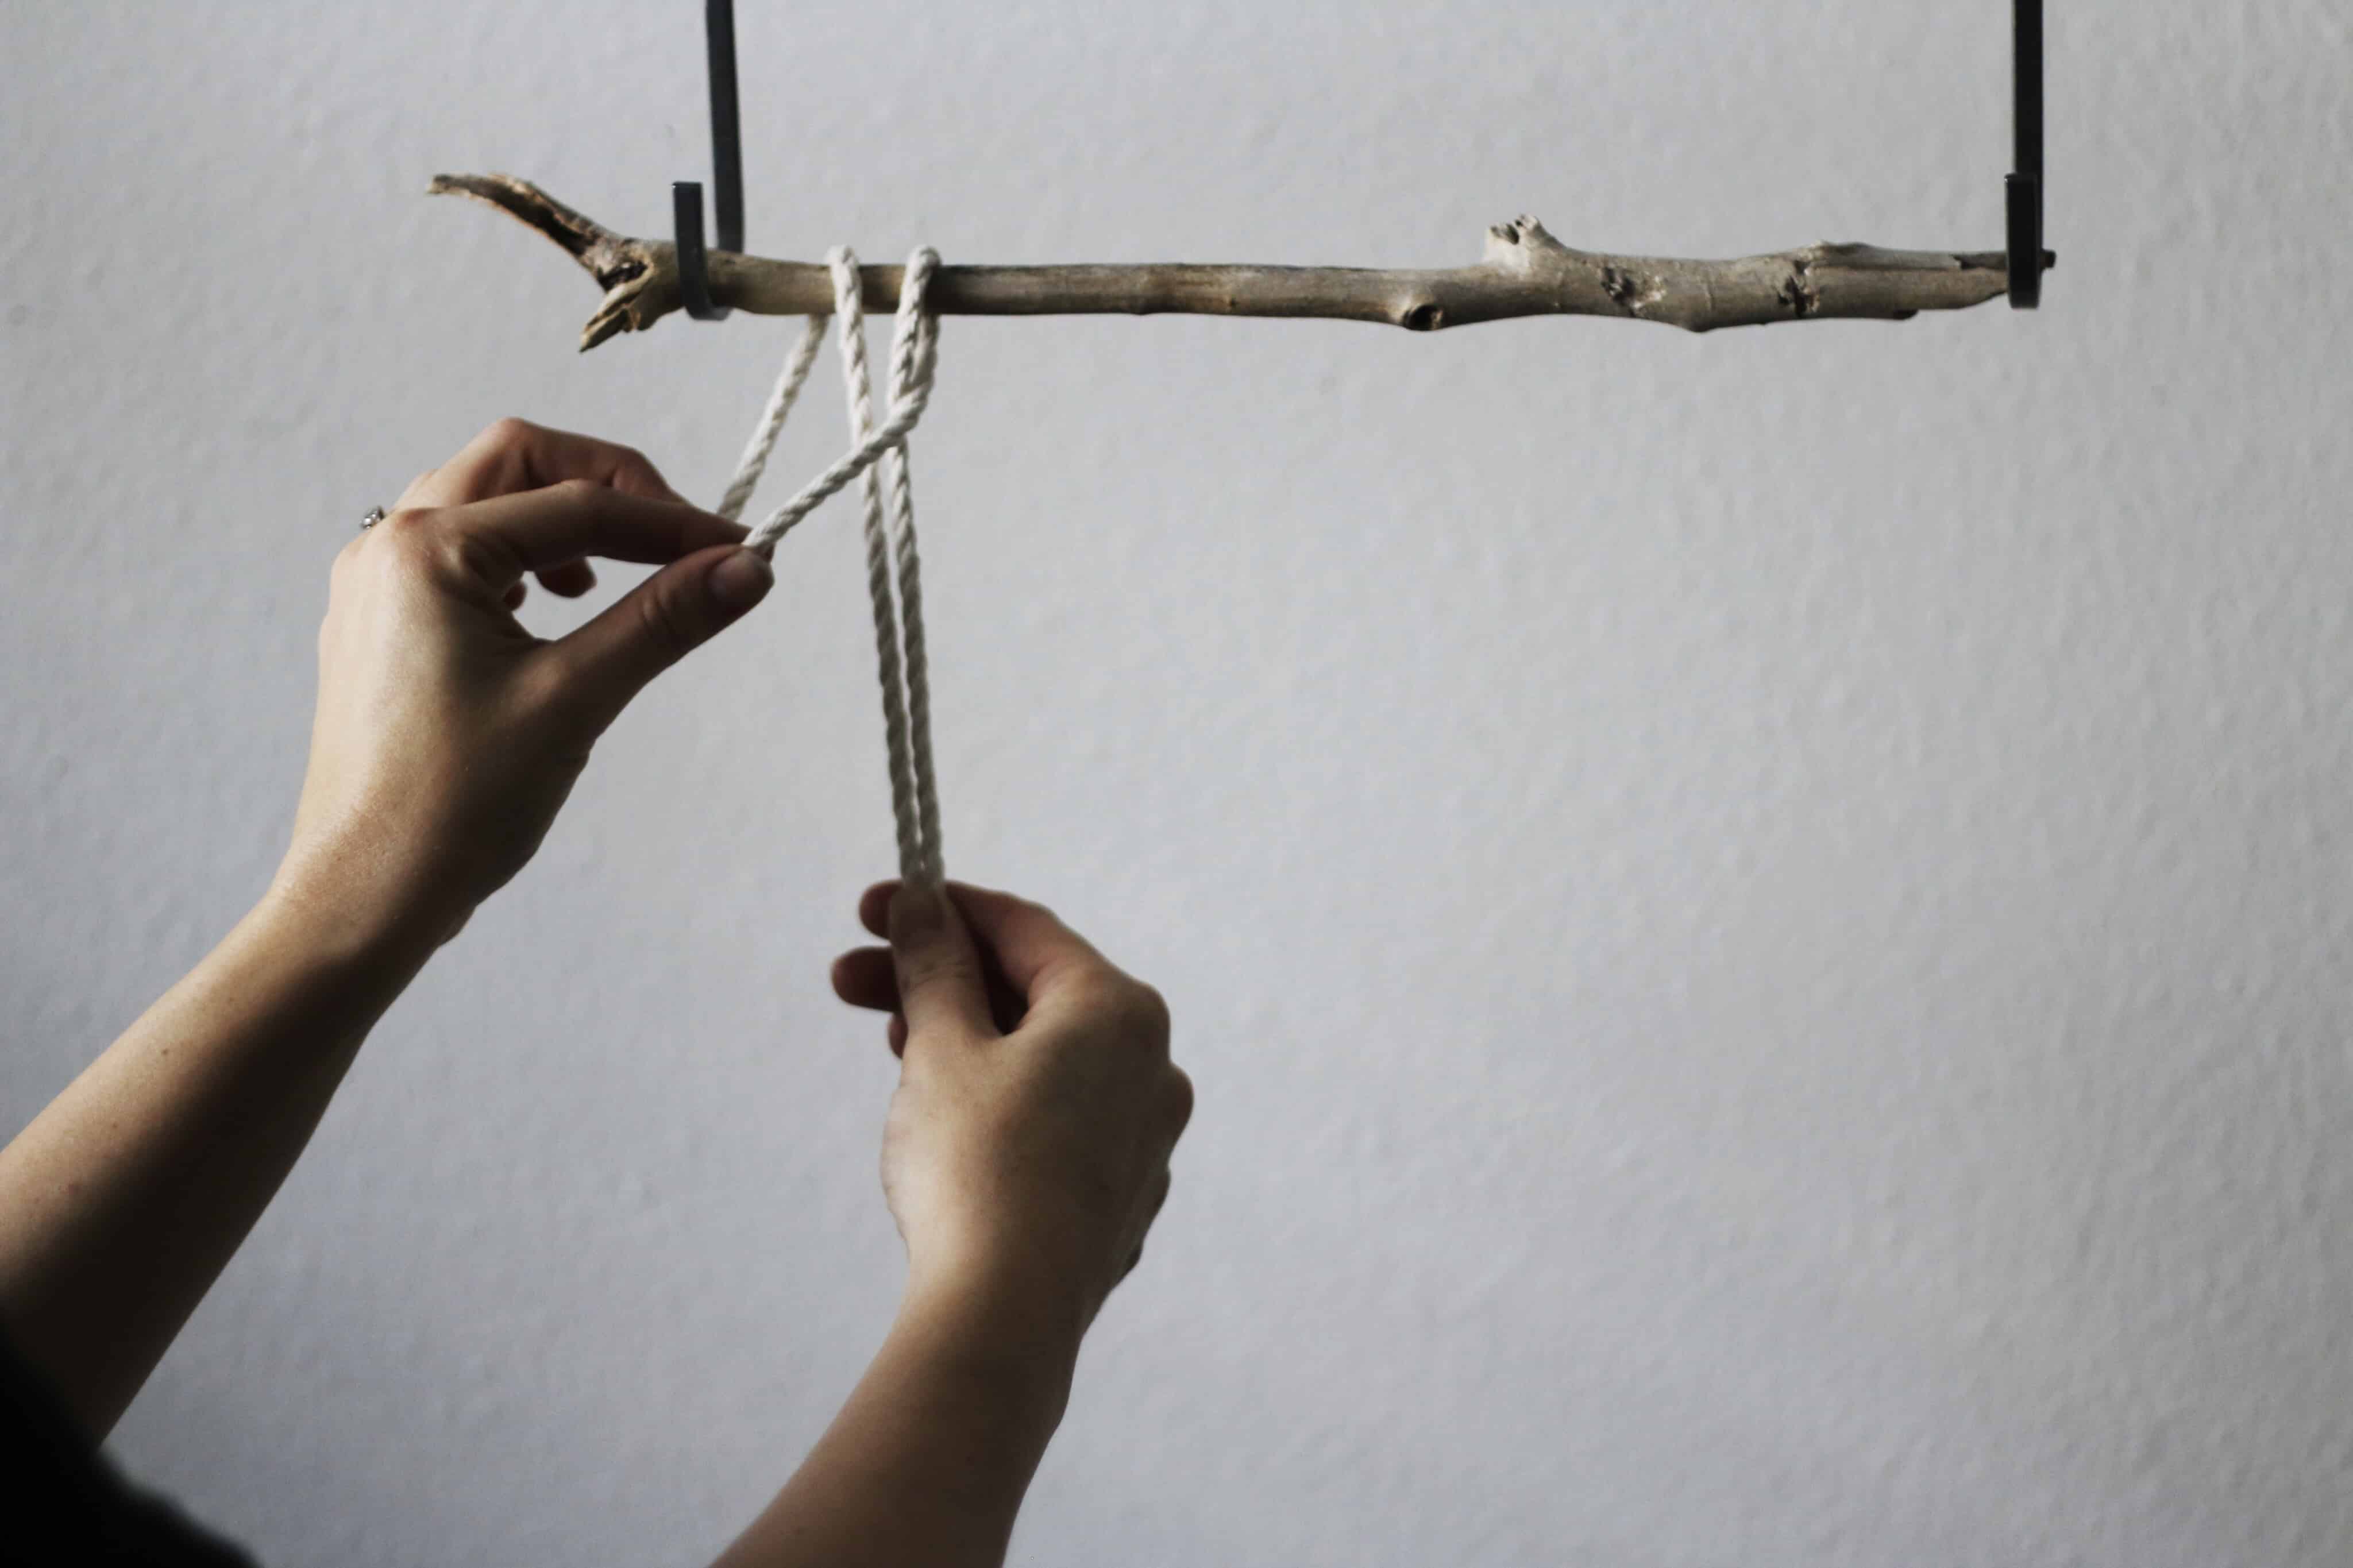
- Elizabeth used S hooks and a garment rack to hang the dowels when creating the macramé pieces. If you don’t have this available you can attach string to either end of your dowel (or branch) and hang it from the wall.
- Measure out 12 pieces of cotton rope 3 yards long each. Cut one extra yard of rope and set aside for later.
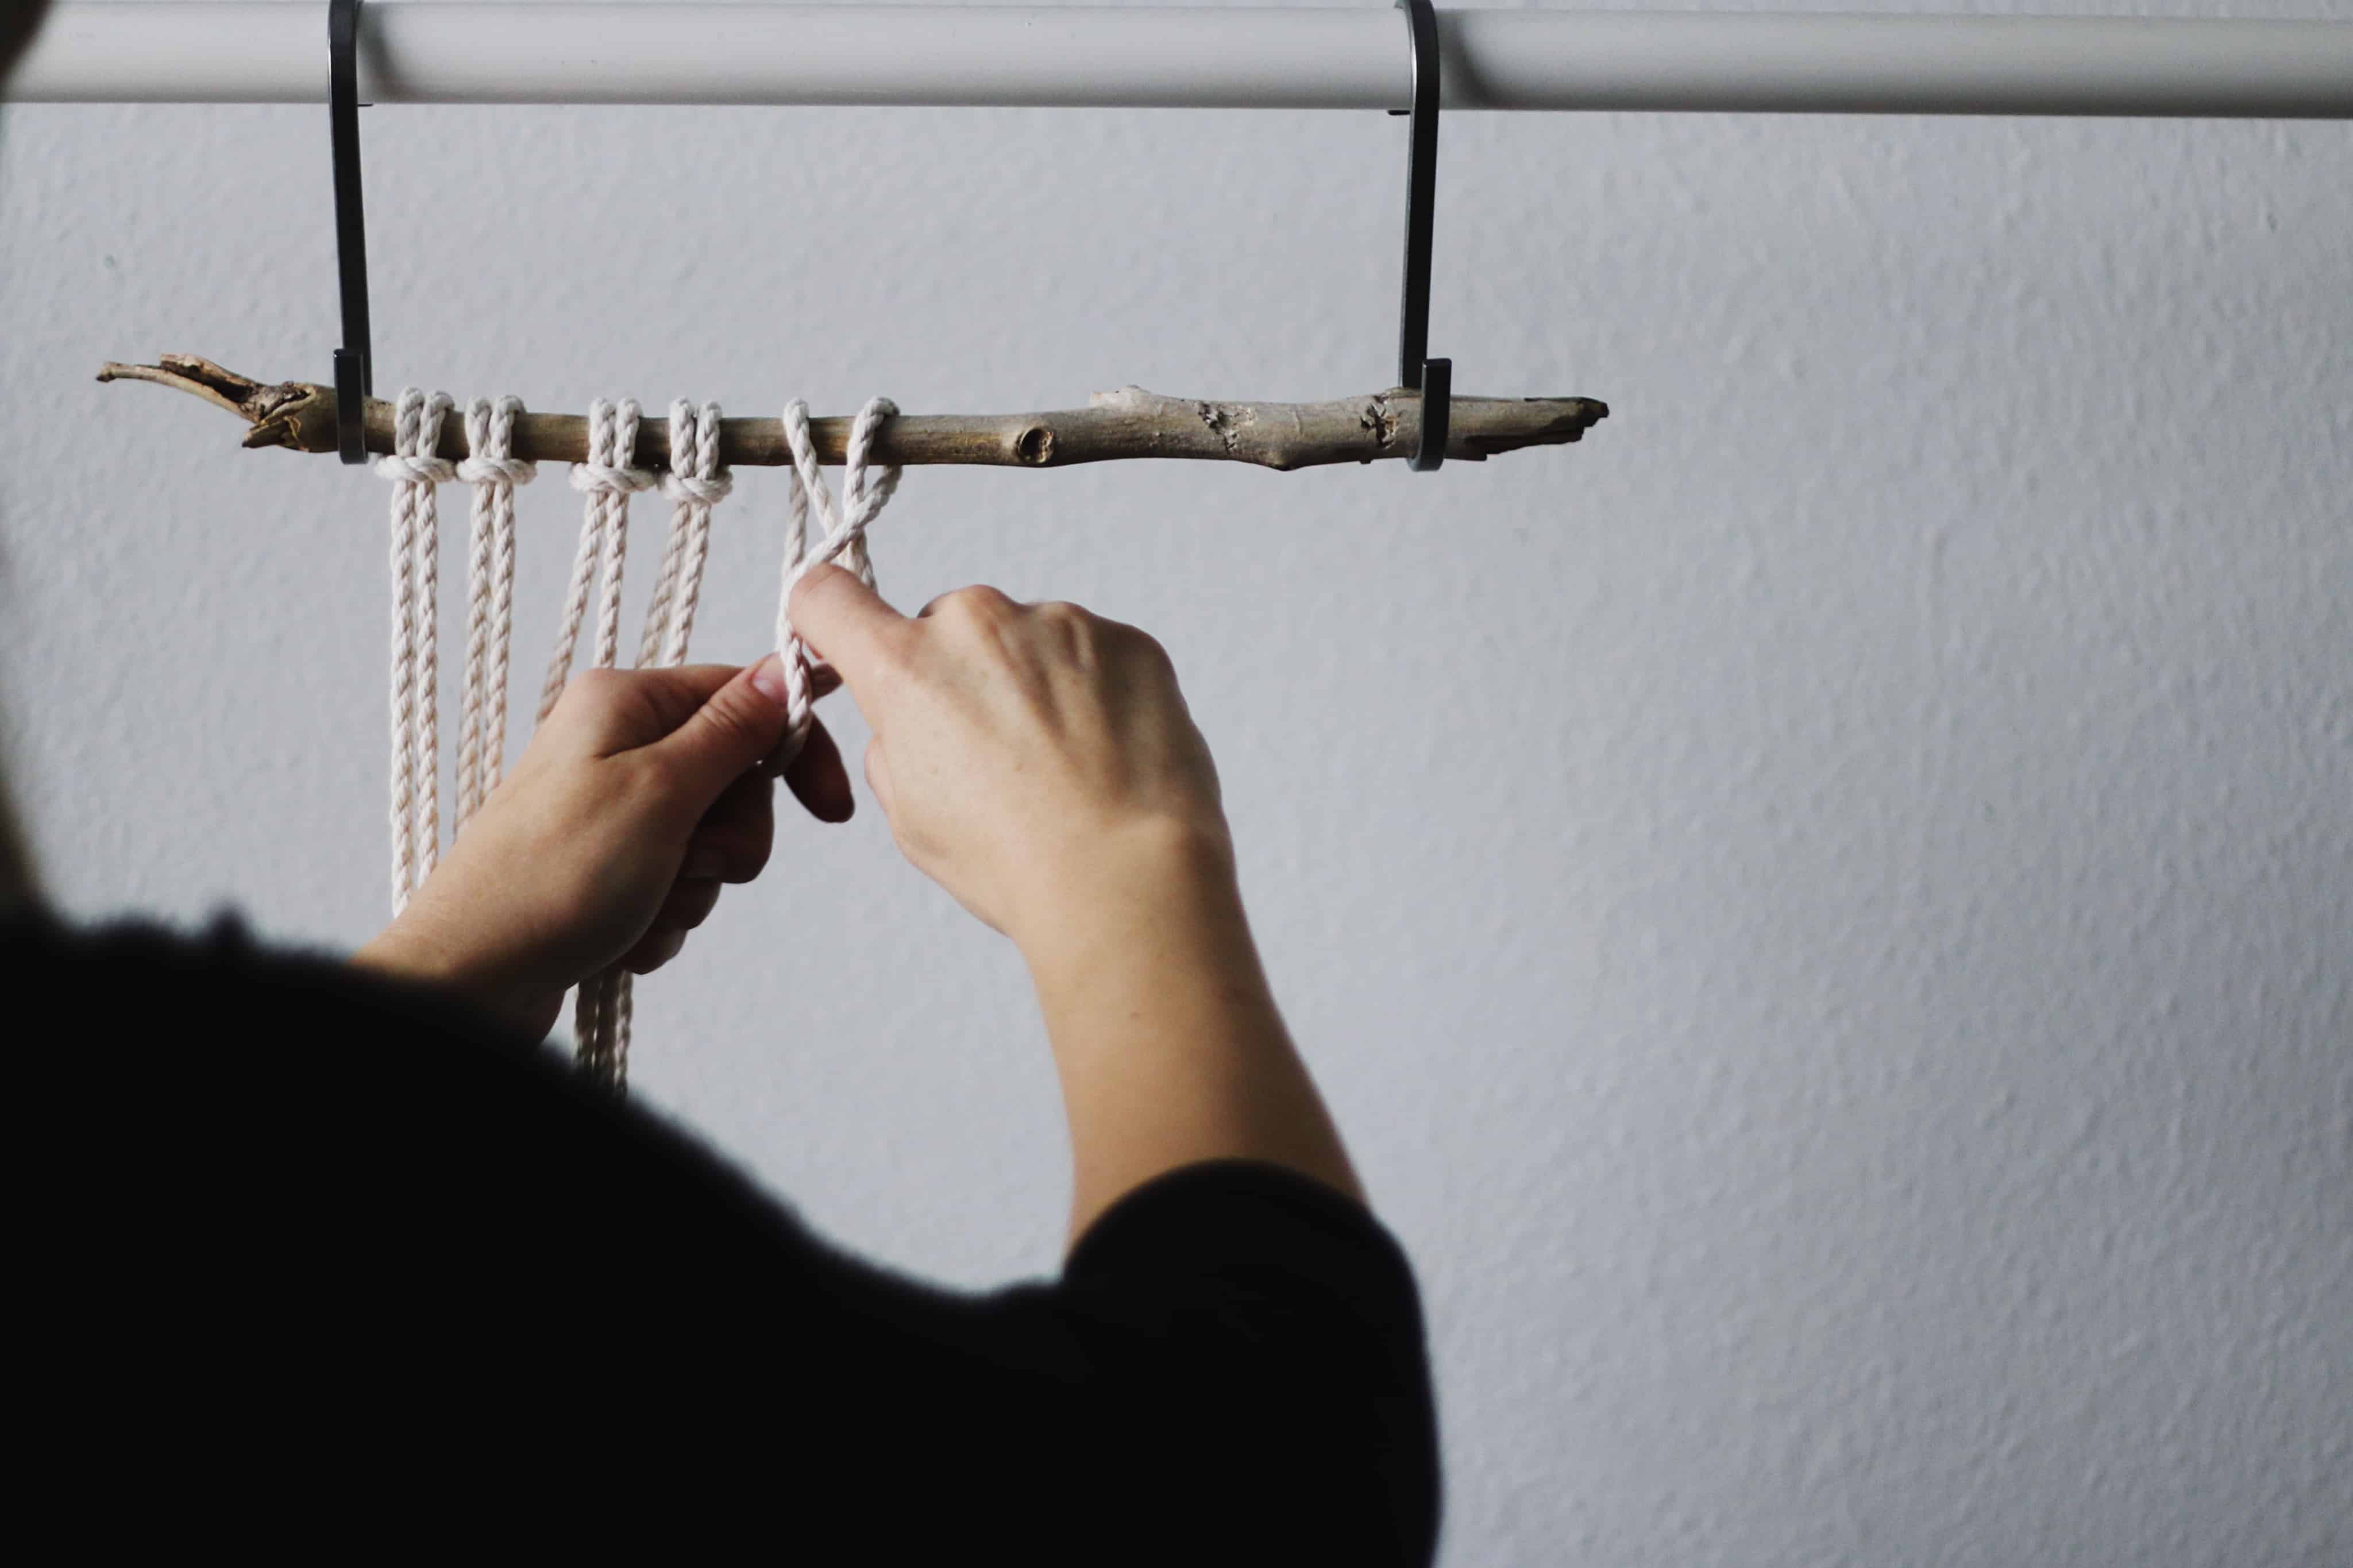
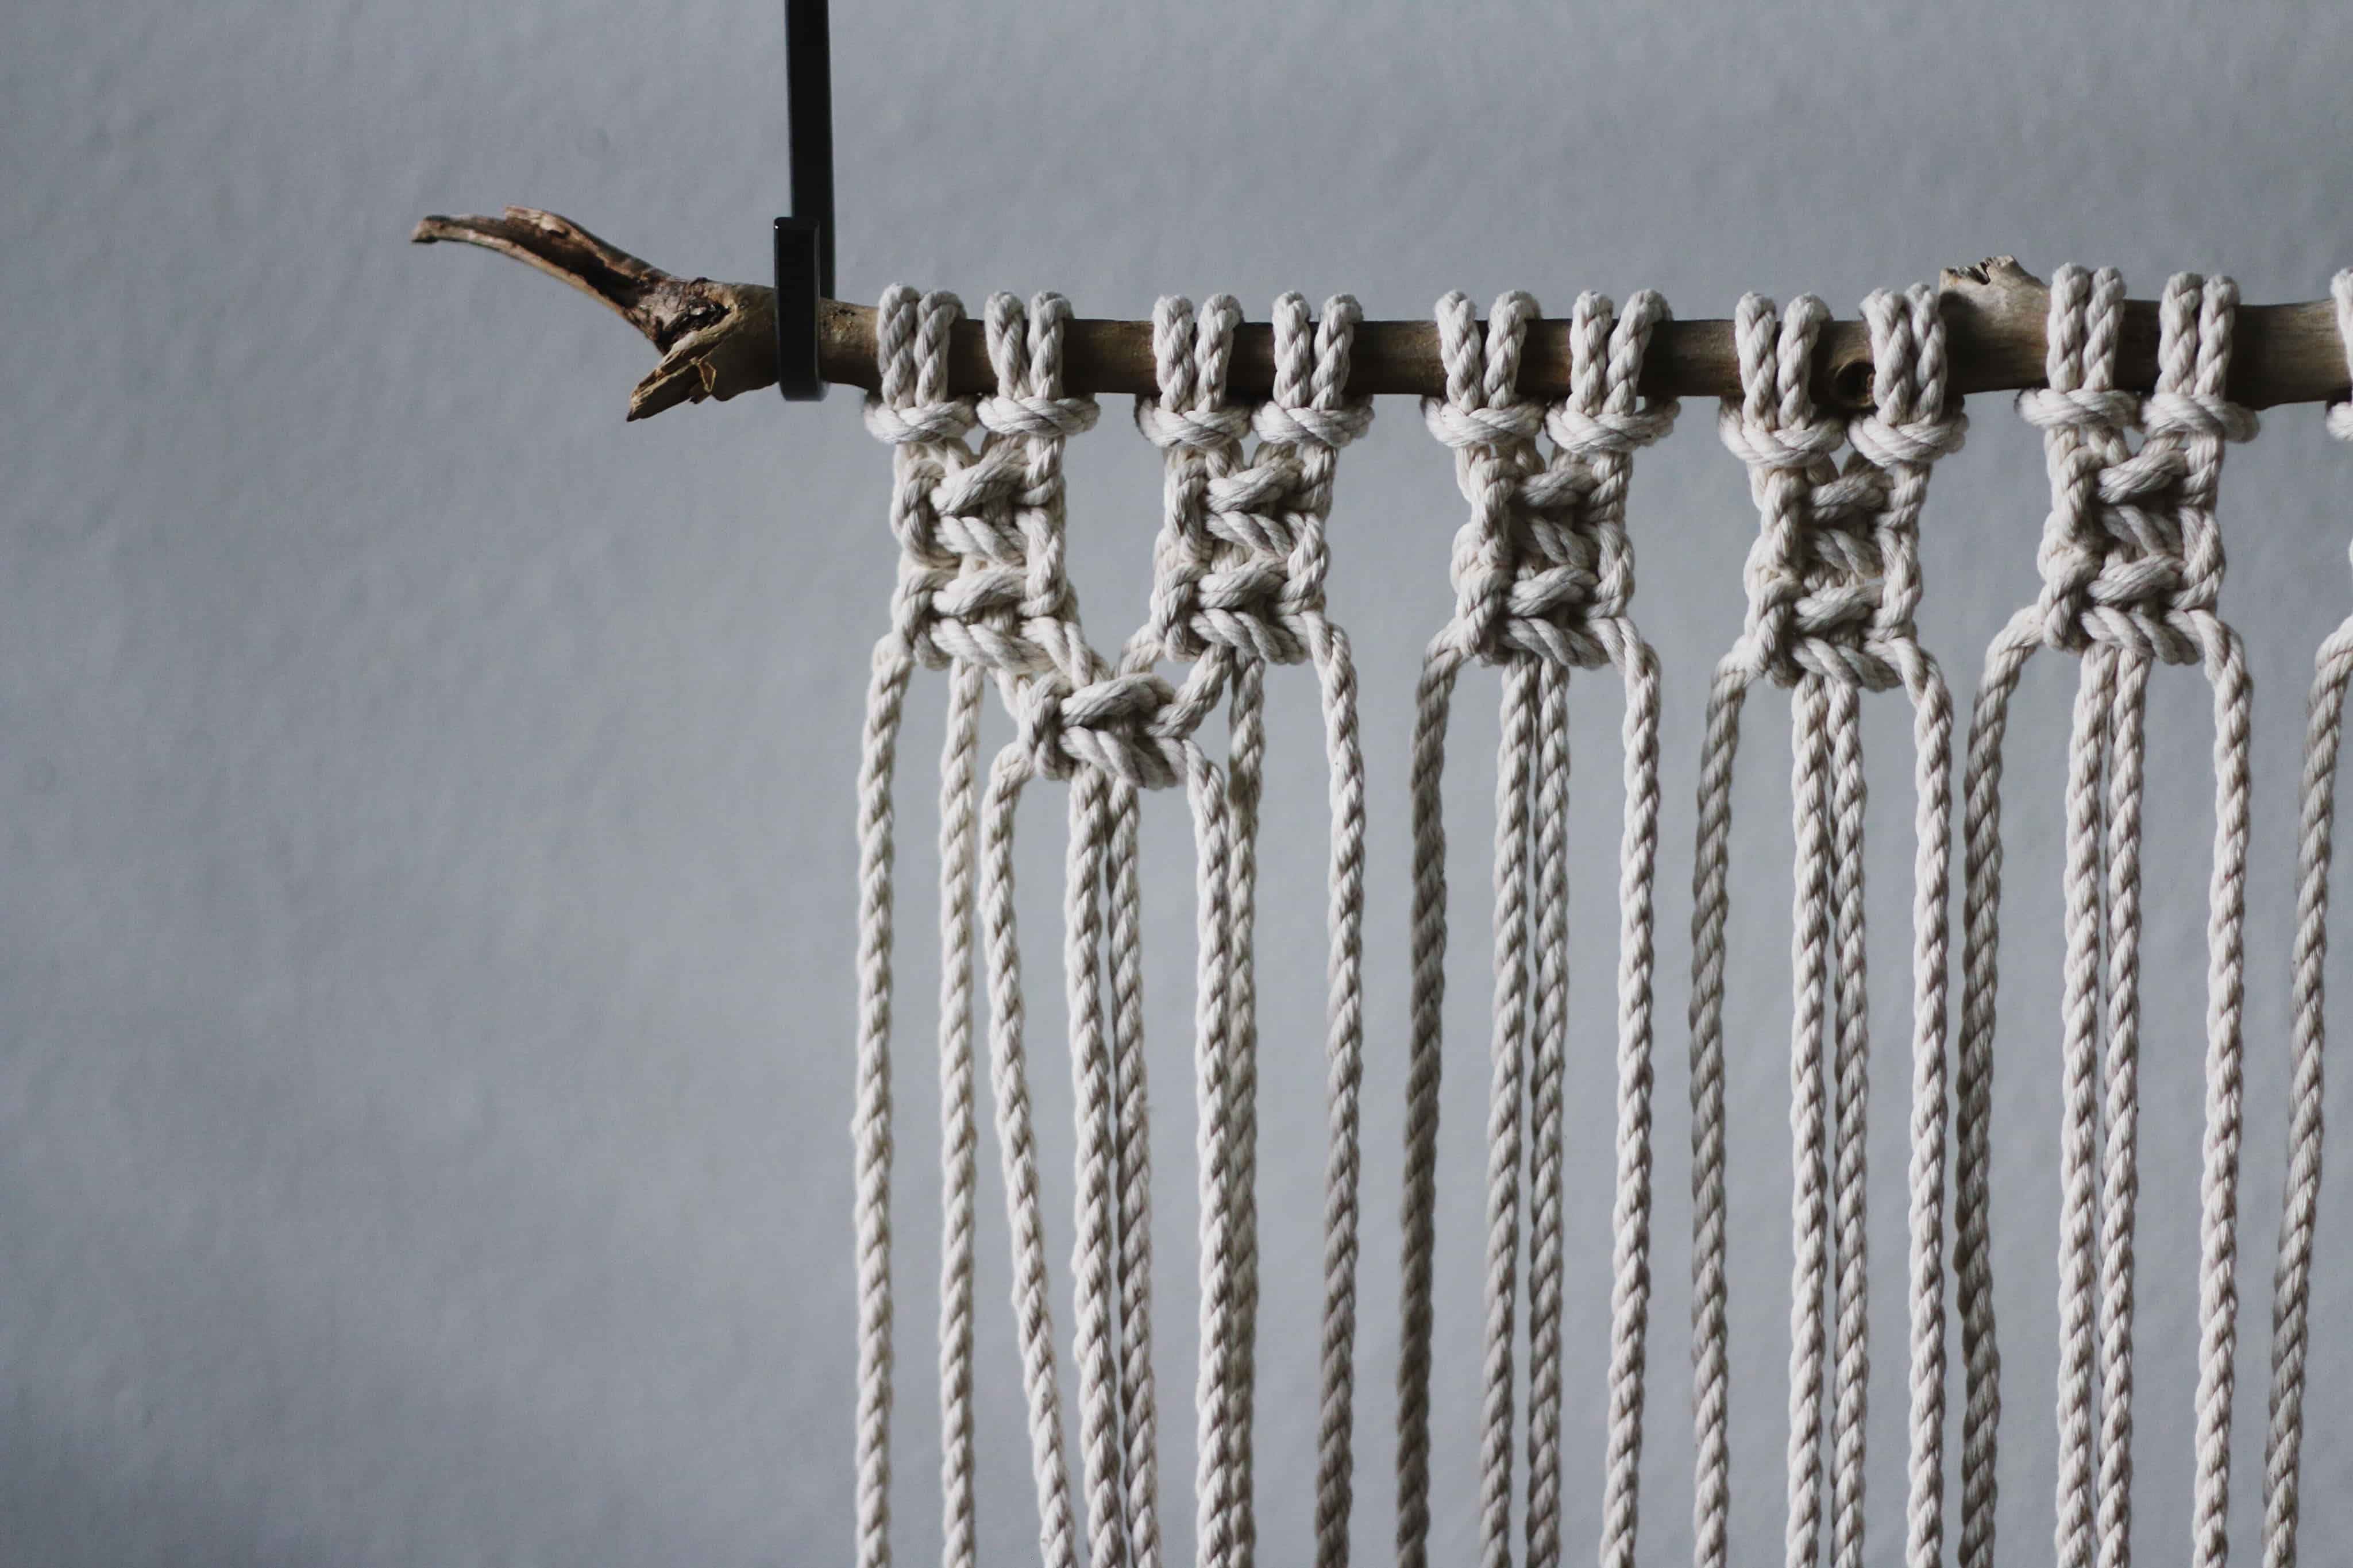
- Attach your rope to the branch using a lark’s head knot. To make this knot, fold one length of cord in half so you have a loop at one end. Place the loop behind the branch, then pull the rest of the rope through the loop from the front to the back. Tighten the knot as needed. (See photos for visual.)
- Repeat the last step until all of your lengths of rope are attached to the branch. You’ll want to space the knots in groups of two, as shown.
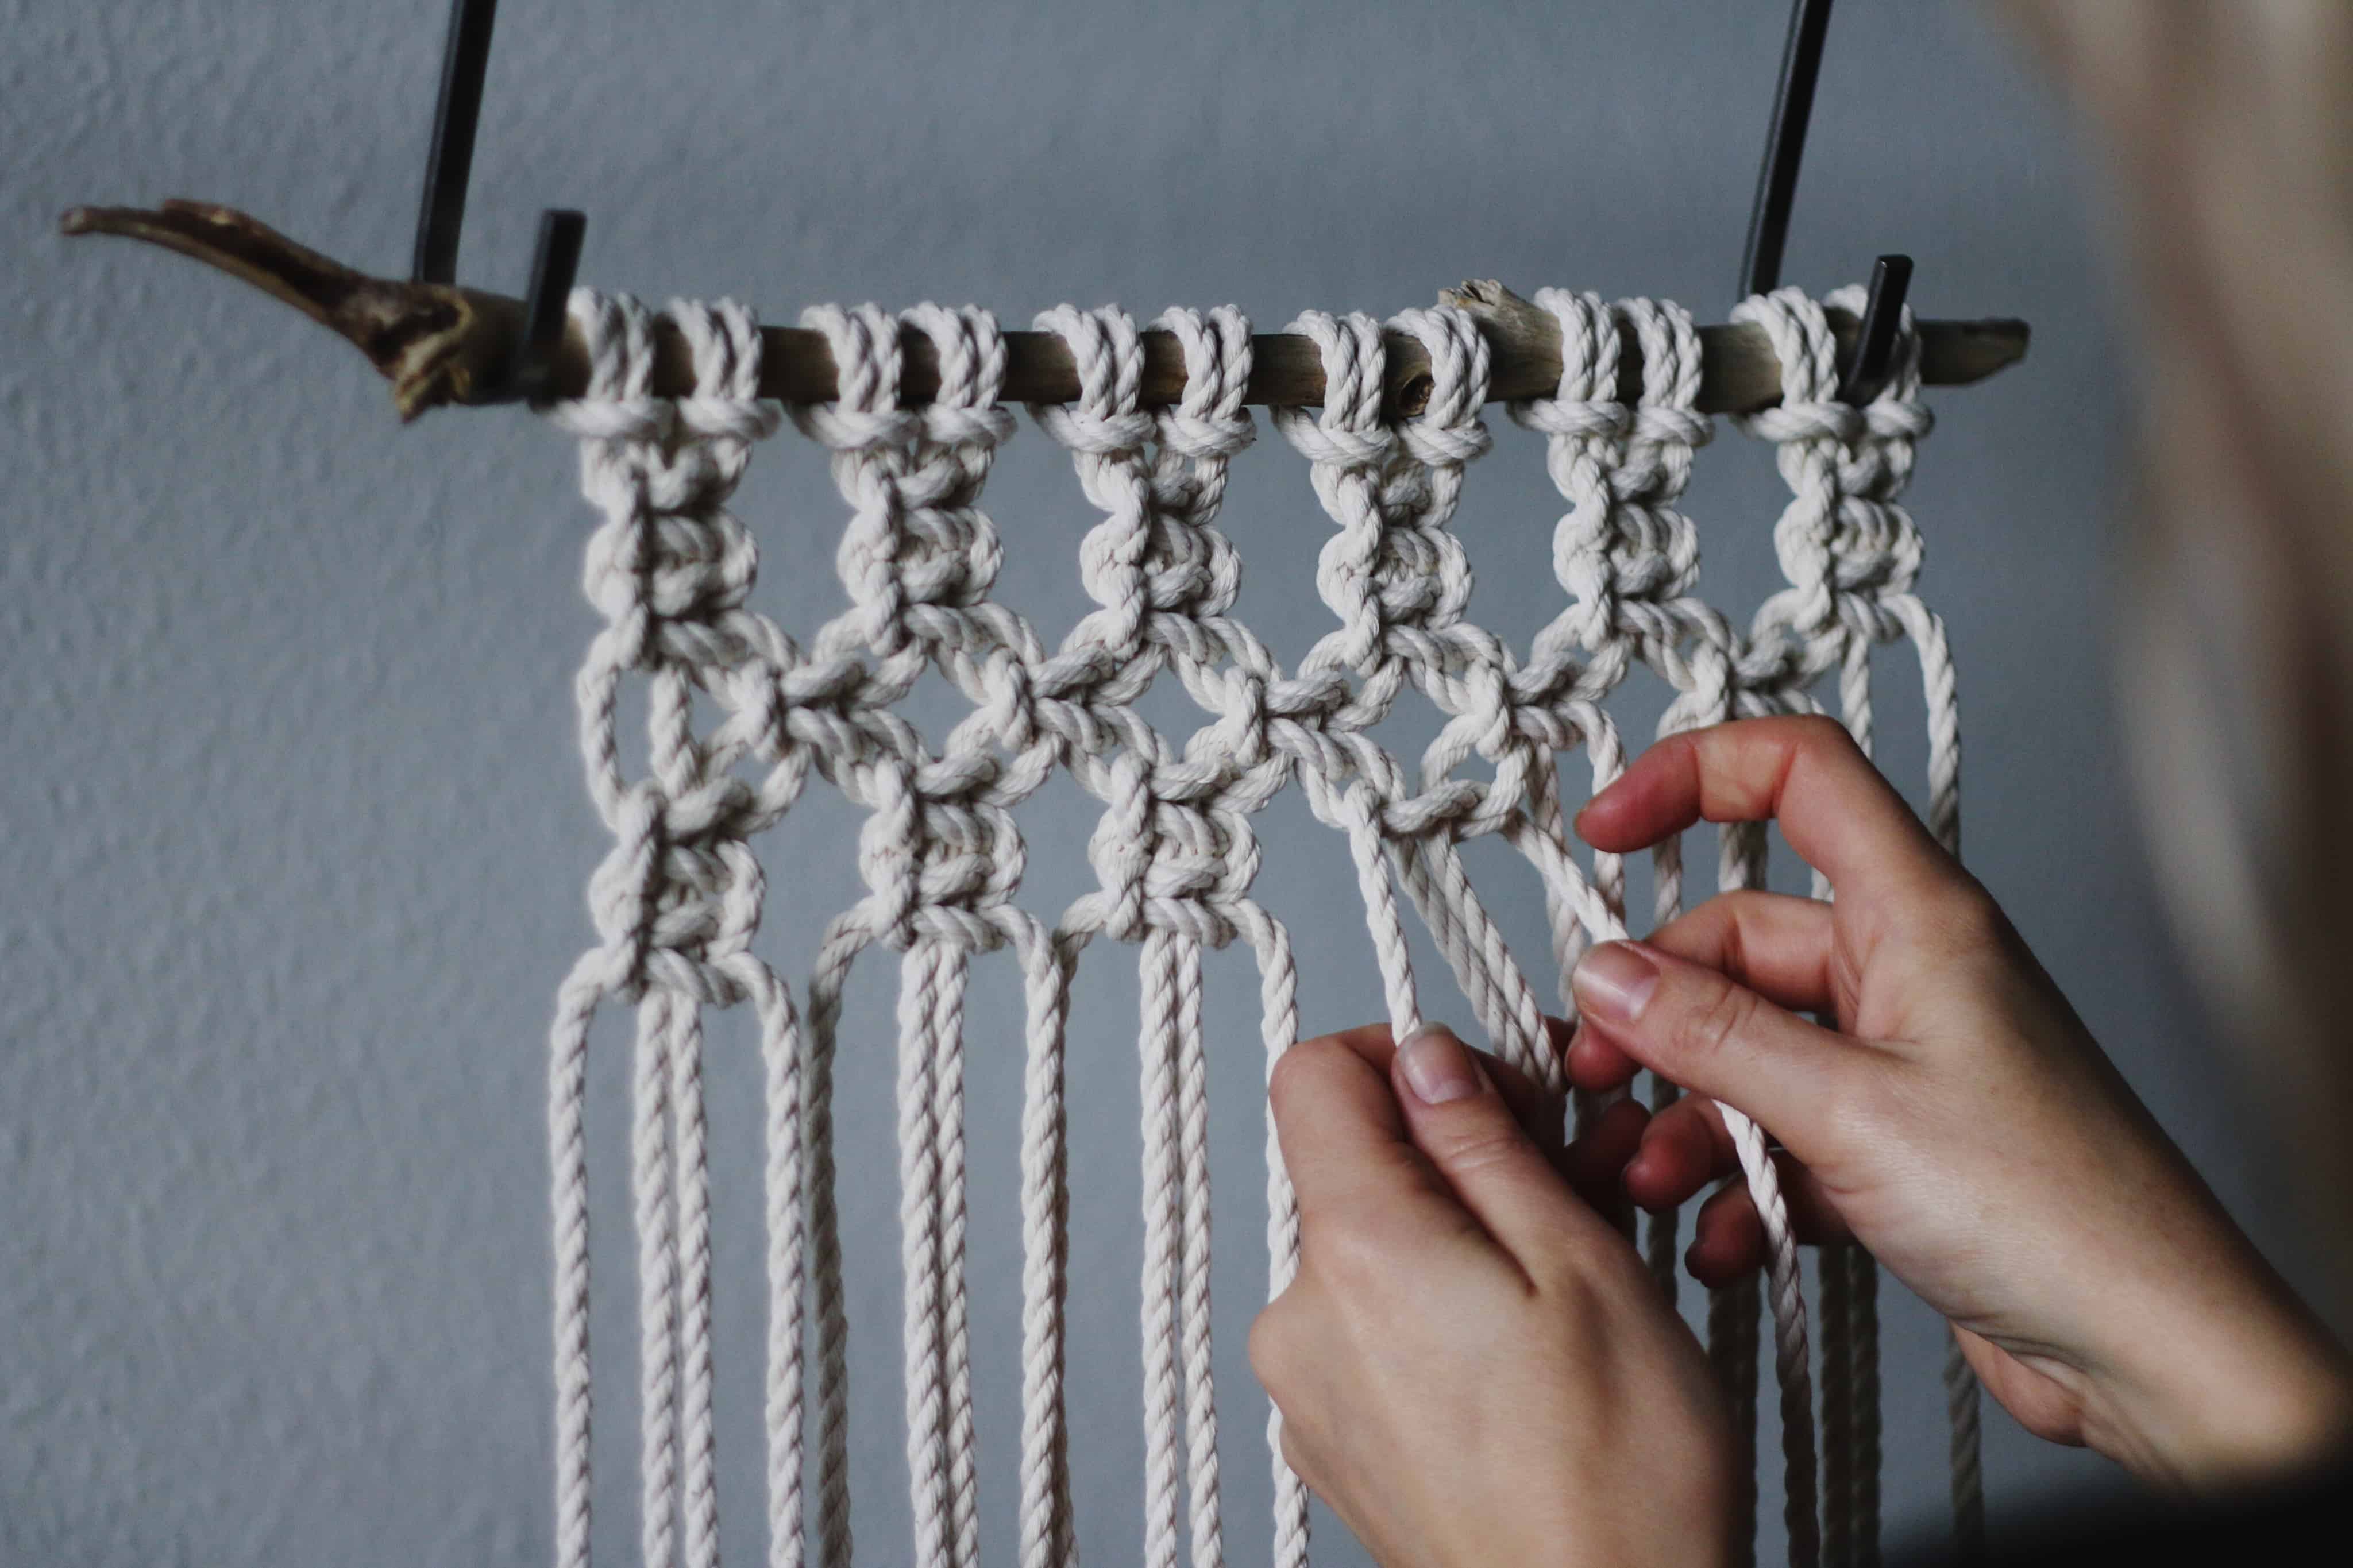
- Once all of your rope is on the branch, it’s time to start knotting. Elizabeth used a basic square knot for this project. To make a square knot you need four strands of rope. Number the strands left to right, 1 through 4. Pick up #1 and move it over #2 and #3 and UNDER #4. Holding 1 in place, pick up 4 and move it UNDER 2 and 3 and OVER 1. Tighten 1 and 4. To finish the square knot, you’re going to repeat the previous step except this time you’ll go the other way, right to left. Take 4 and carry it over 2 and 3 and under 1. Take 1 and carry it under 2 and 3 and over 4. Tighten 1 and 4. Now you know how to make a square knot!
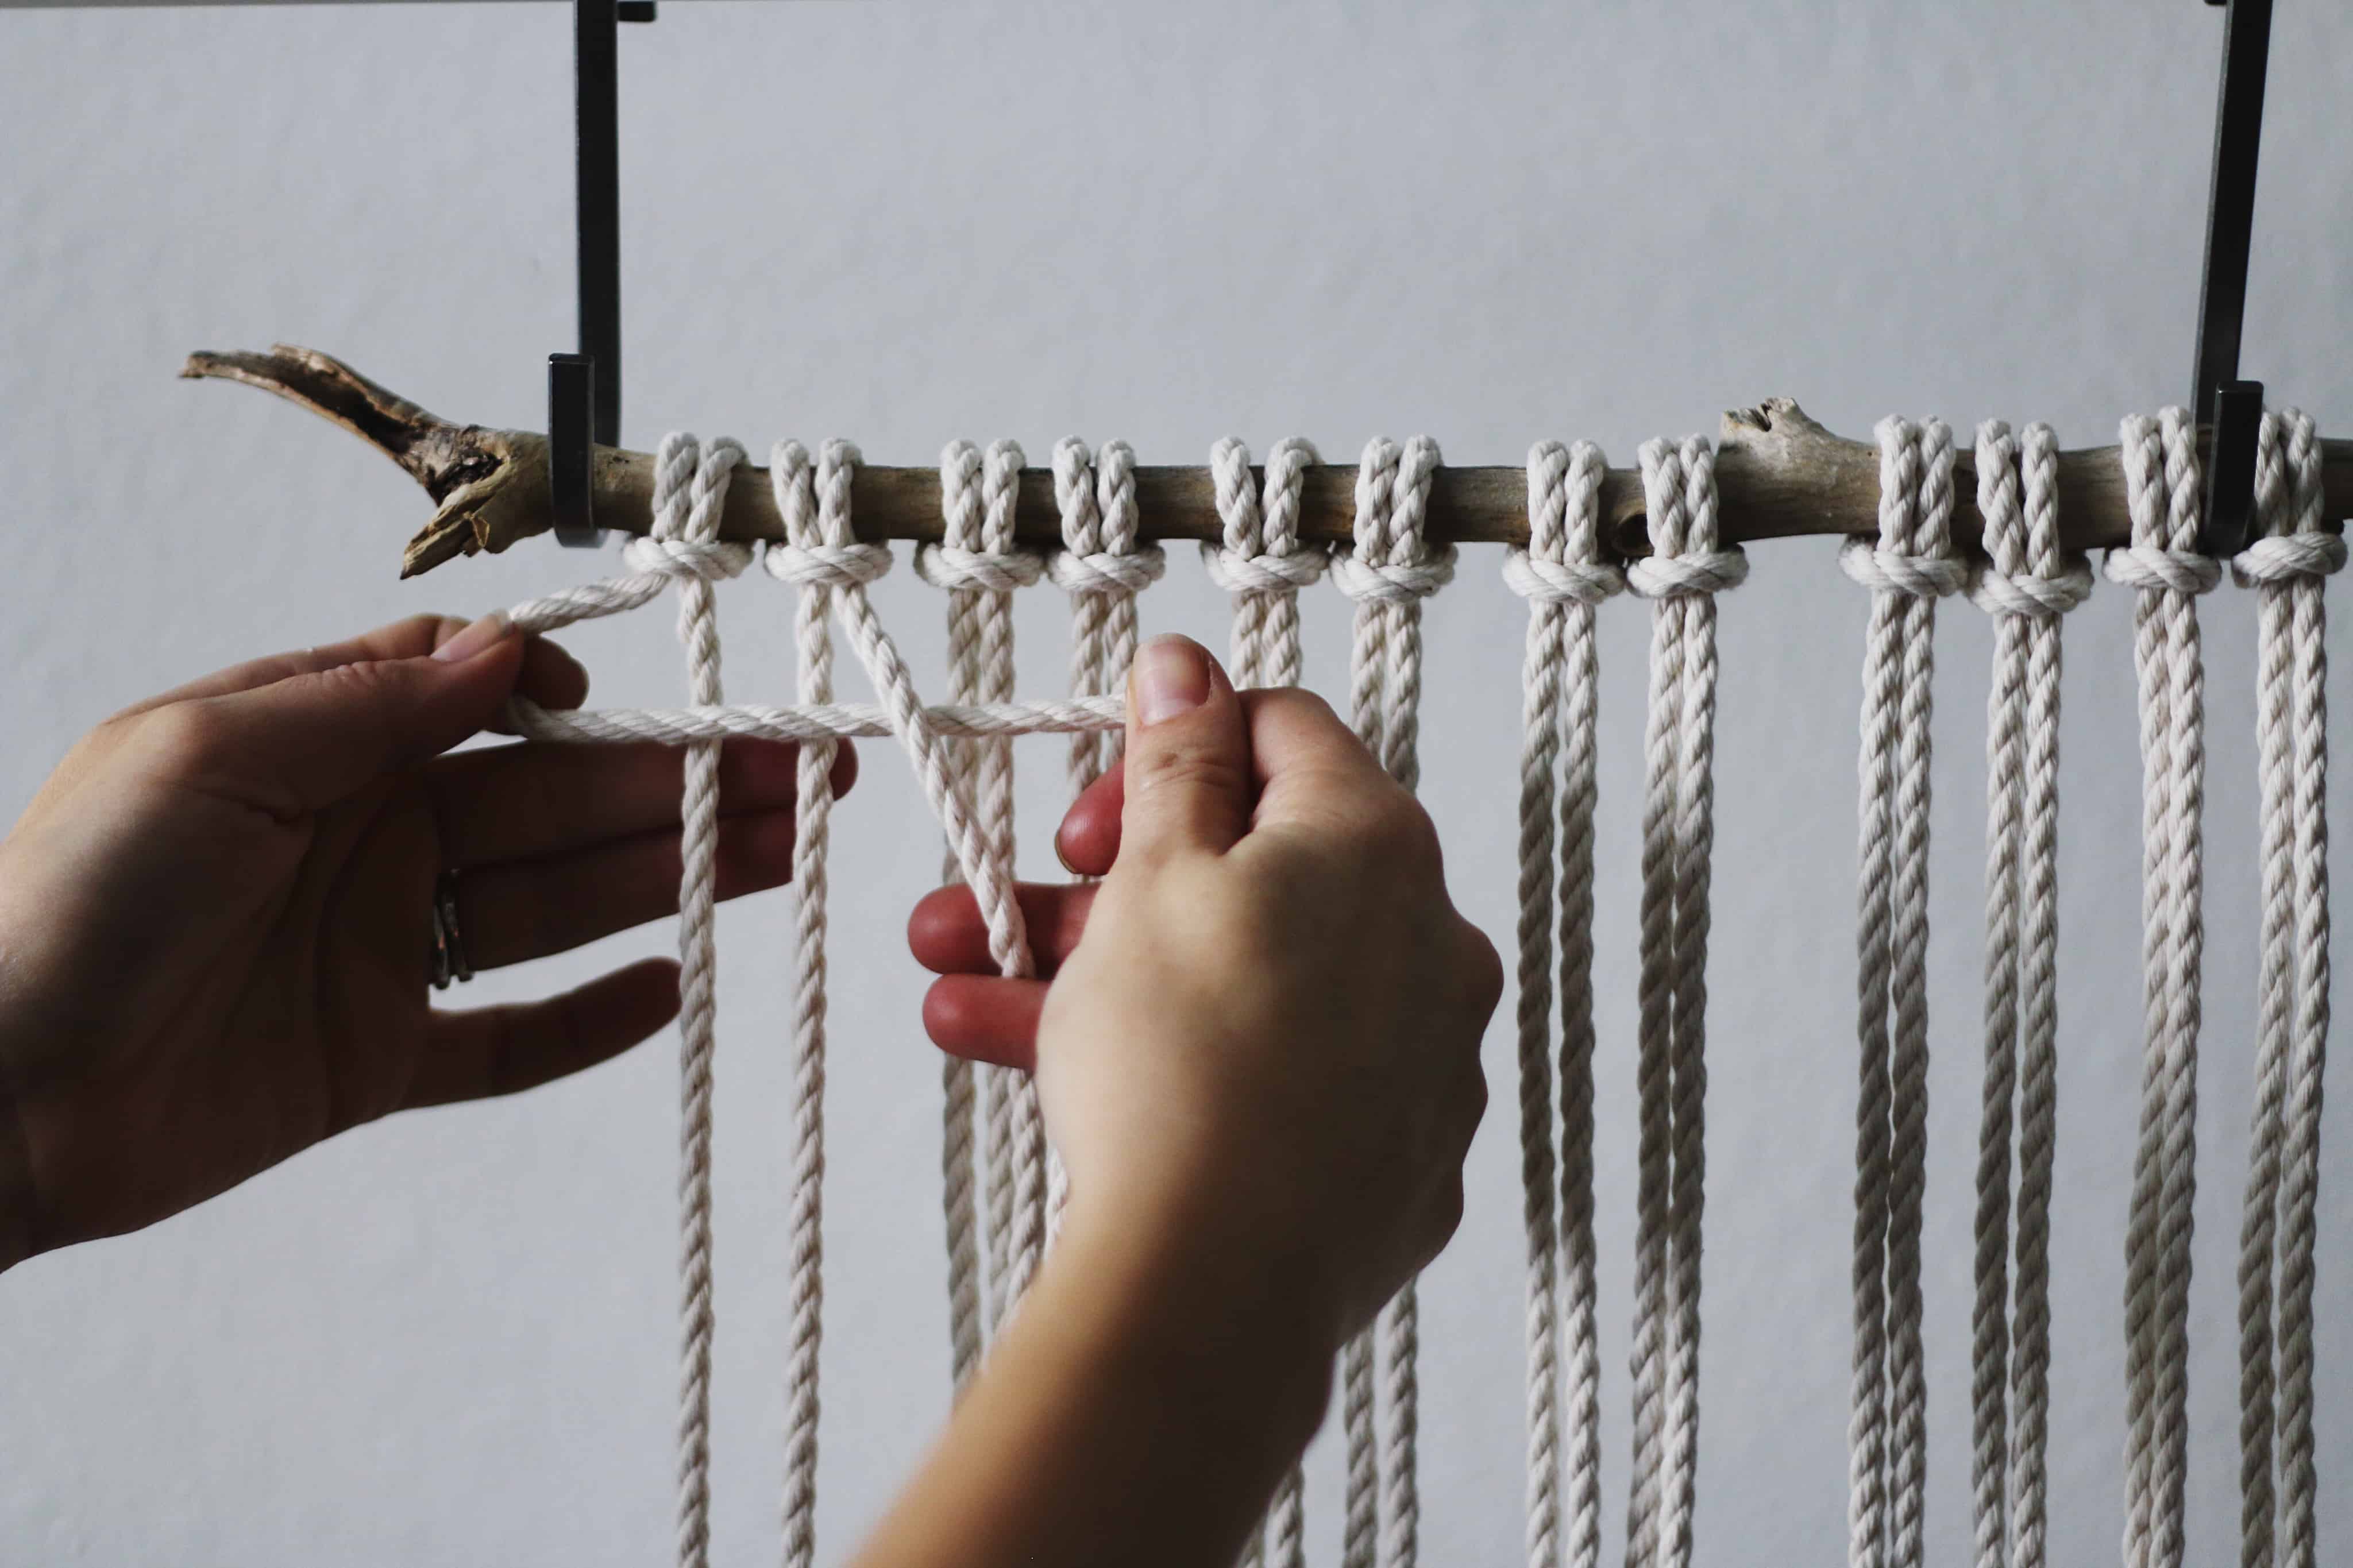
- Repeat the square knot once more with the first set of strands. You’ll then move down the branch using four strands at a time, 2 square knots in each section. You should have 6 sets of square knots when you are finished.
- To make the second row of knots, Elizabeth knotted in between each previous set. Using two strands from each knot, make a row of square knots across the branch. This row will have 5 single square knots. Repeat the pattern of sets of two followed by sets of one until you have 9 rows of knots on your branch.
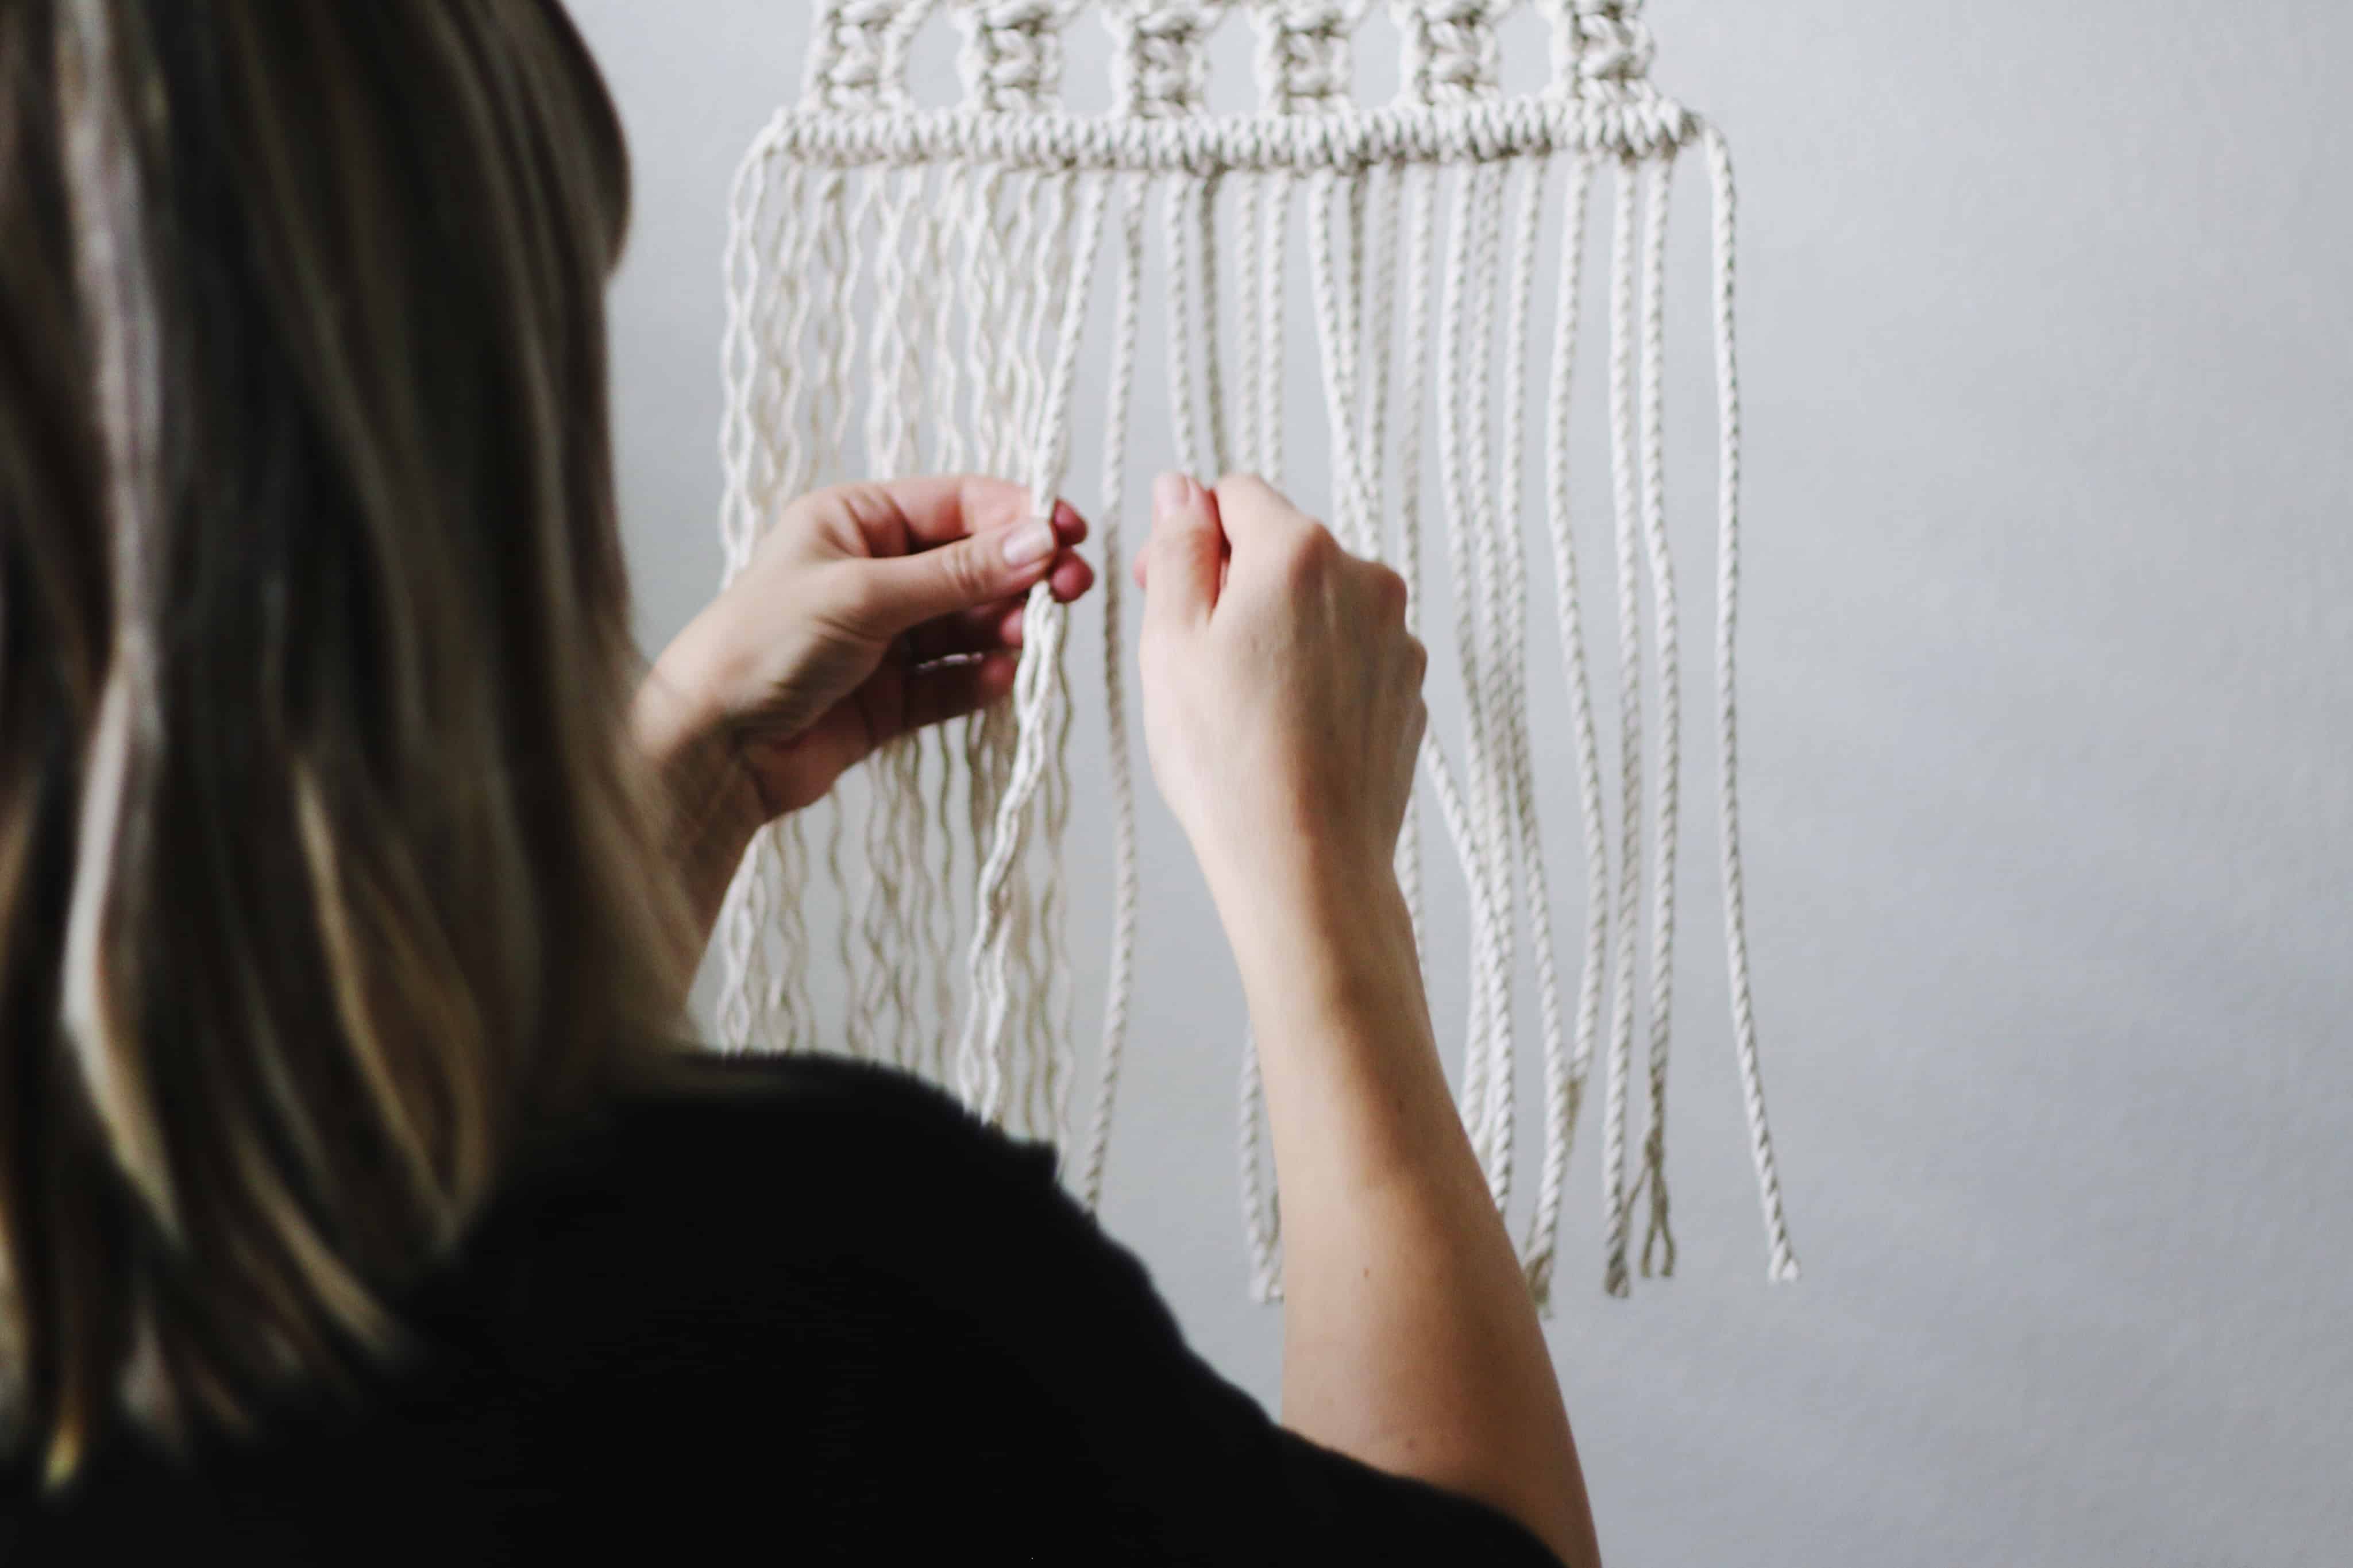
- Now that you have your square knots complete, you can finish the wall hanging by making a row of double half hitch knots. Take your single yard of cotton rope and hold it against the bottom row of knots. Make sure there is enough length of rope on each end. Starting where the first knot is on your piece, take the first strand of rope and bring it up and over the cord you’re holding. Repeat this one more time with the same strand except this time you’re going to bring the strand through the loop you created when you brought it over the holding cord. (See photos.) Tighten the knot.
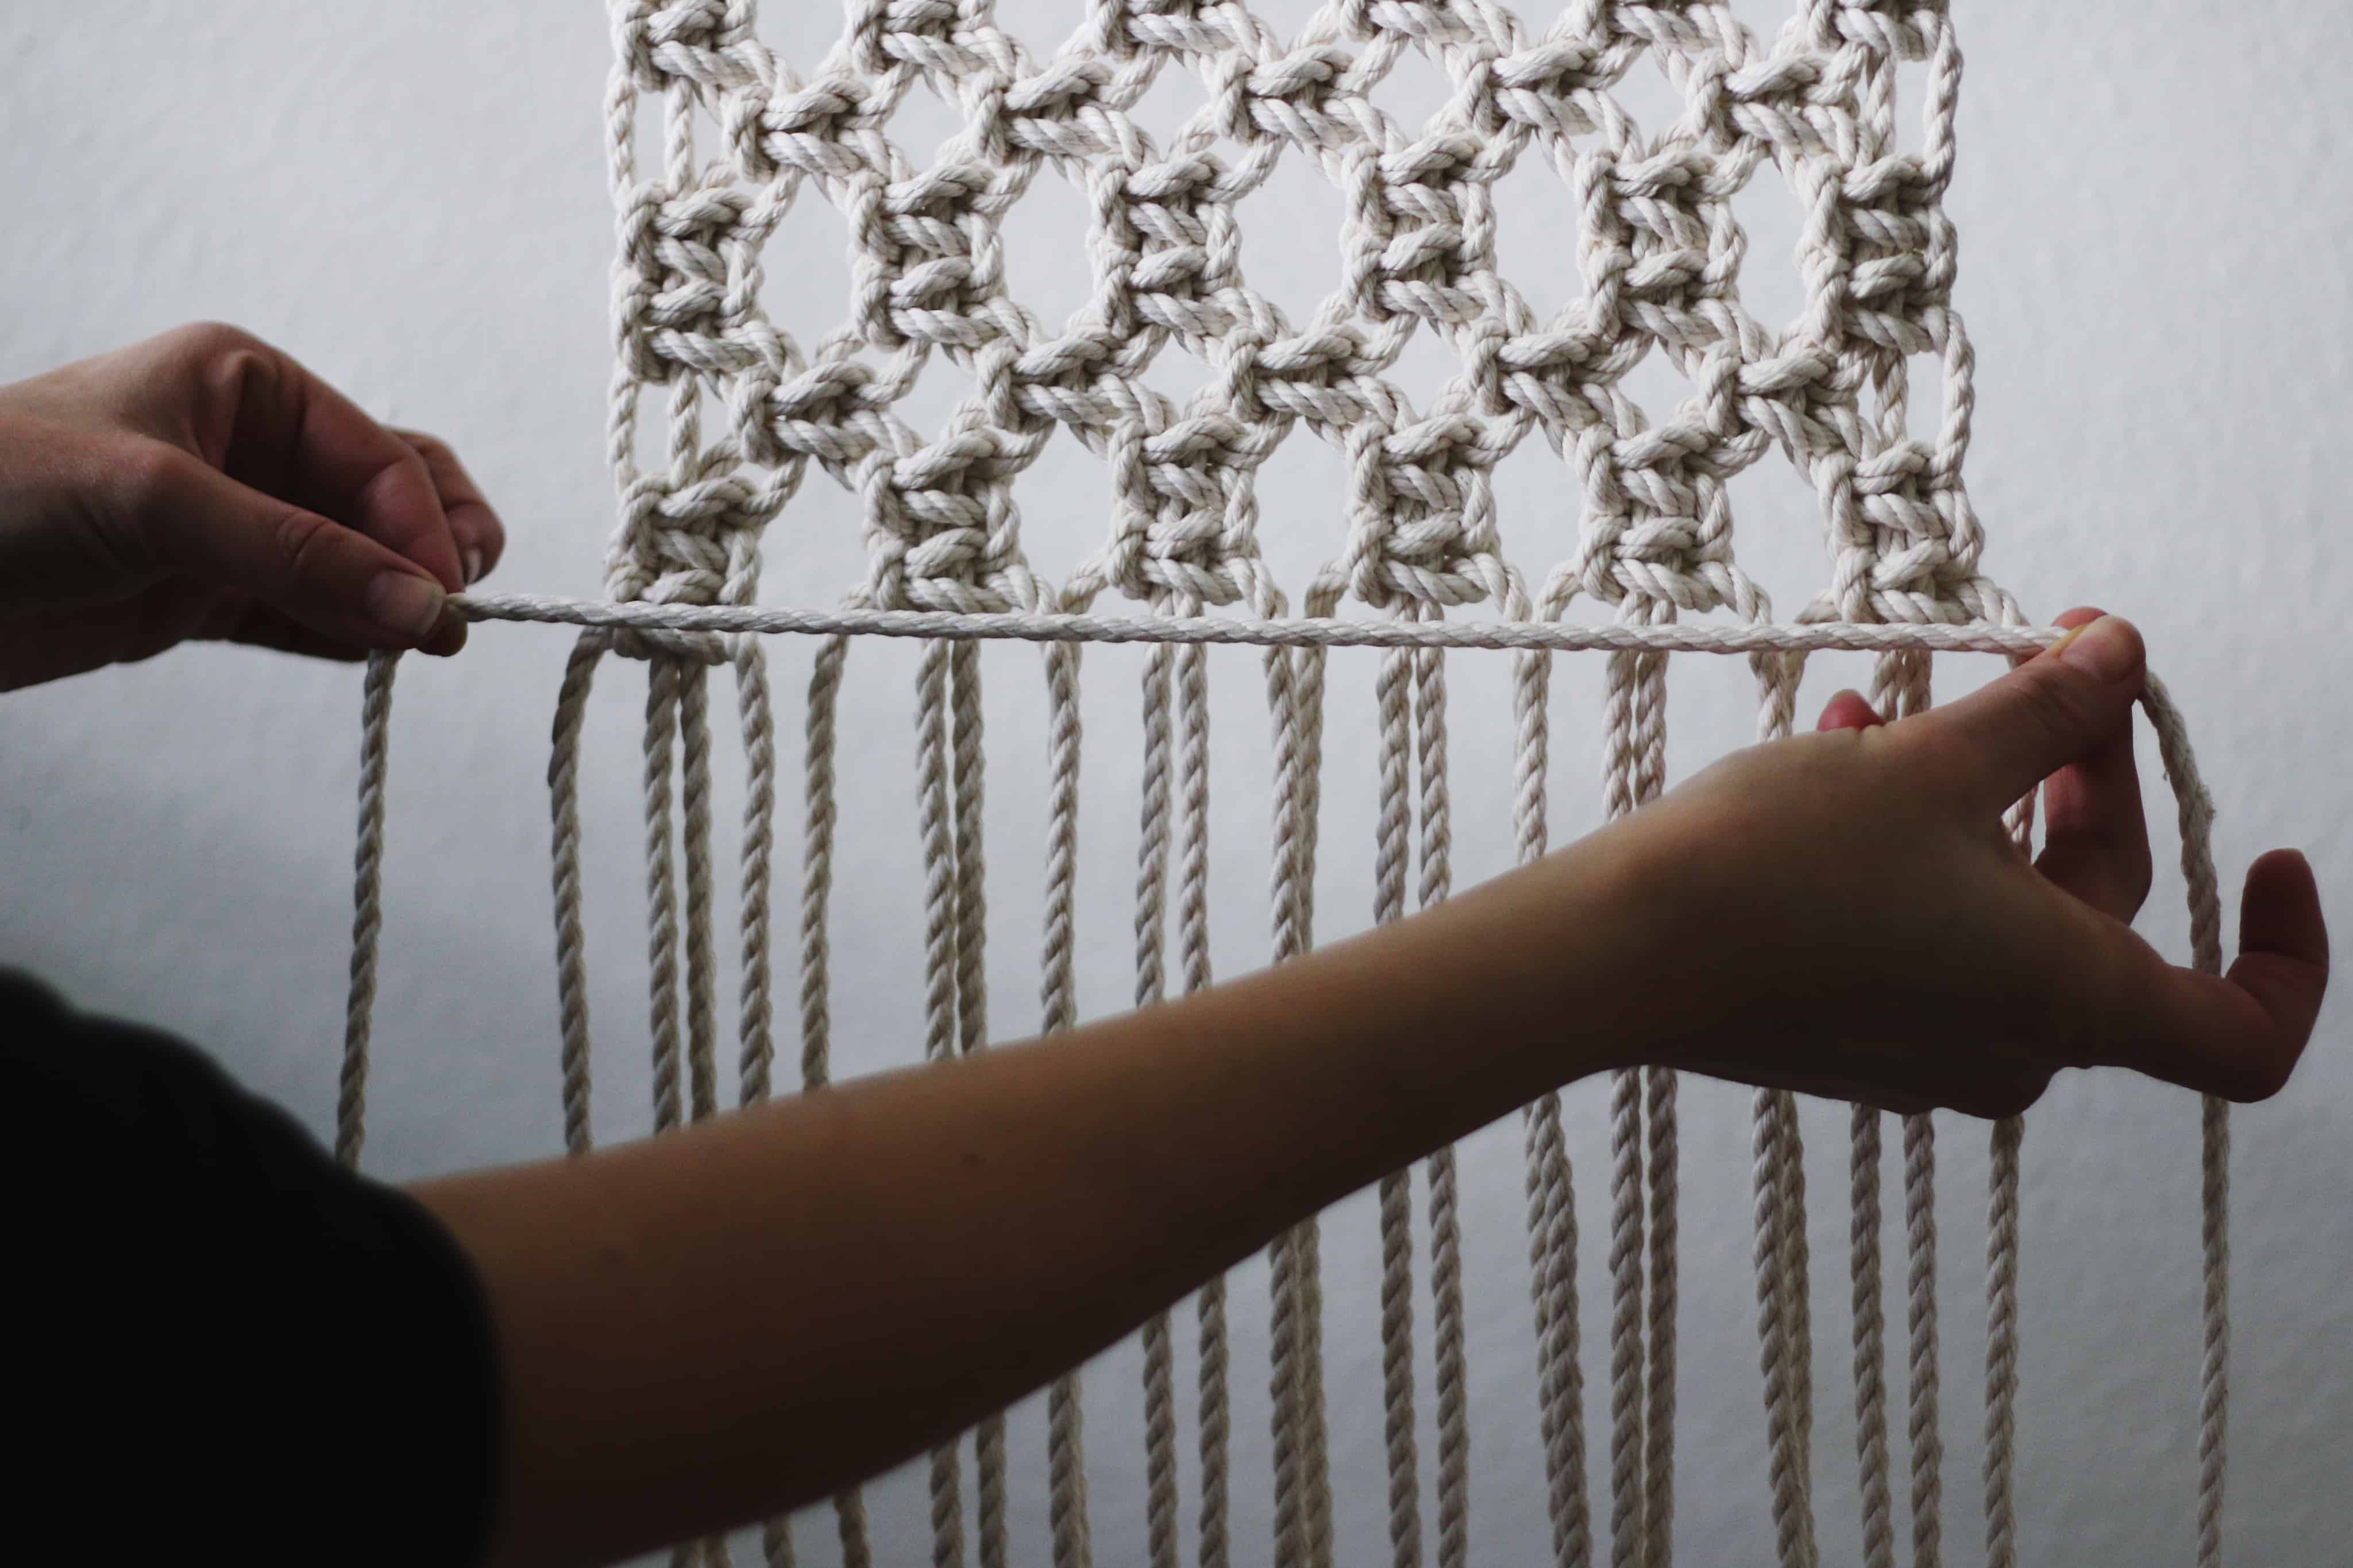
- Repeat this step with each strand of rope on your piece until you get to the end. Make sure you are keeping the half hitch knots tight and close together. When you are done you’ll have a little border along the bottom of your piece.
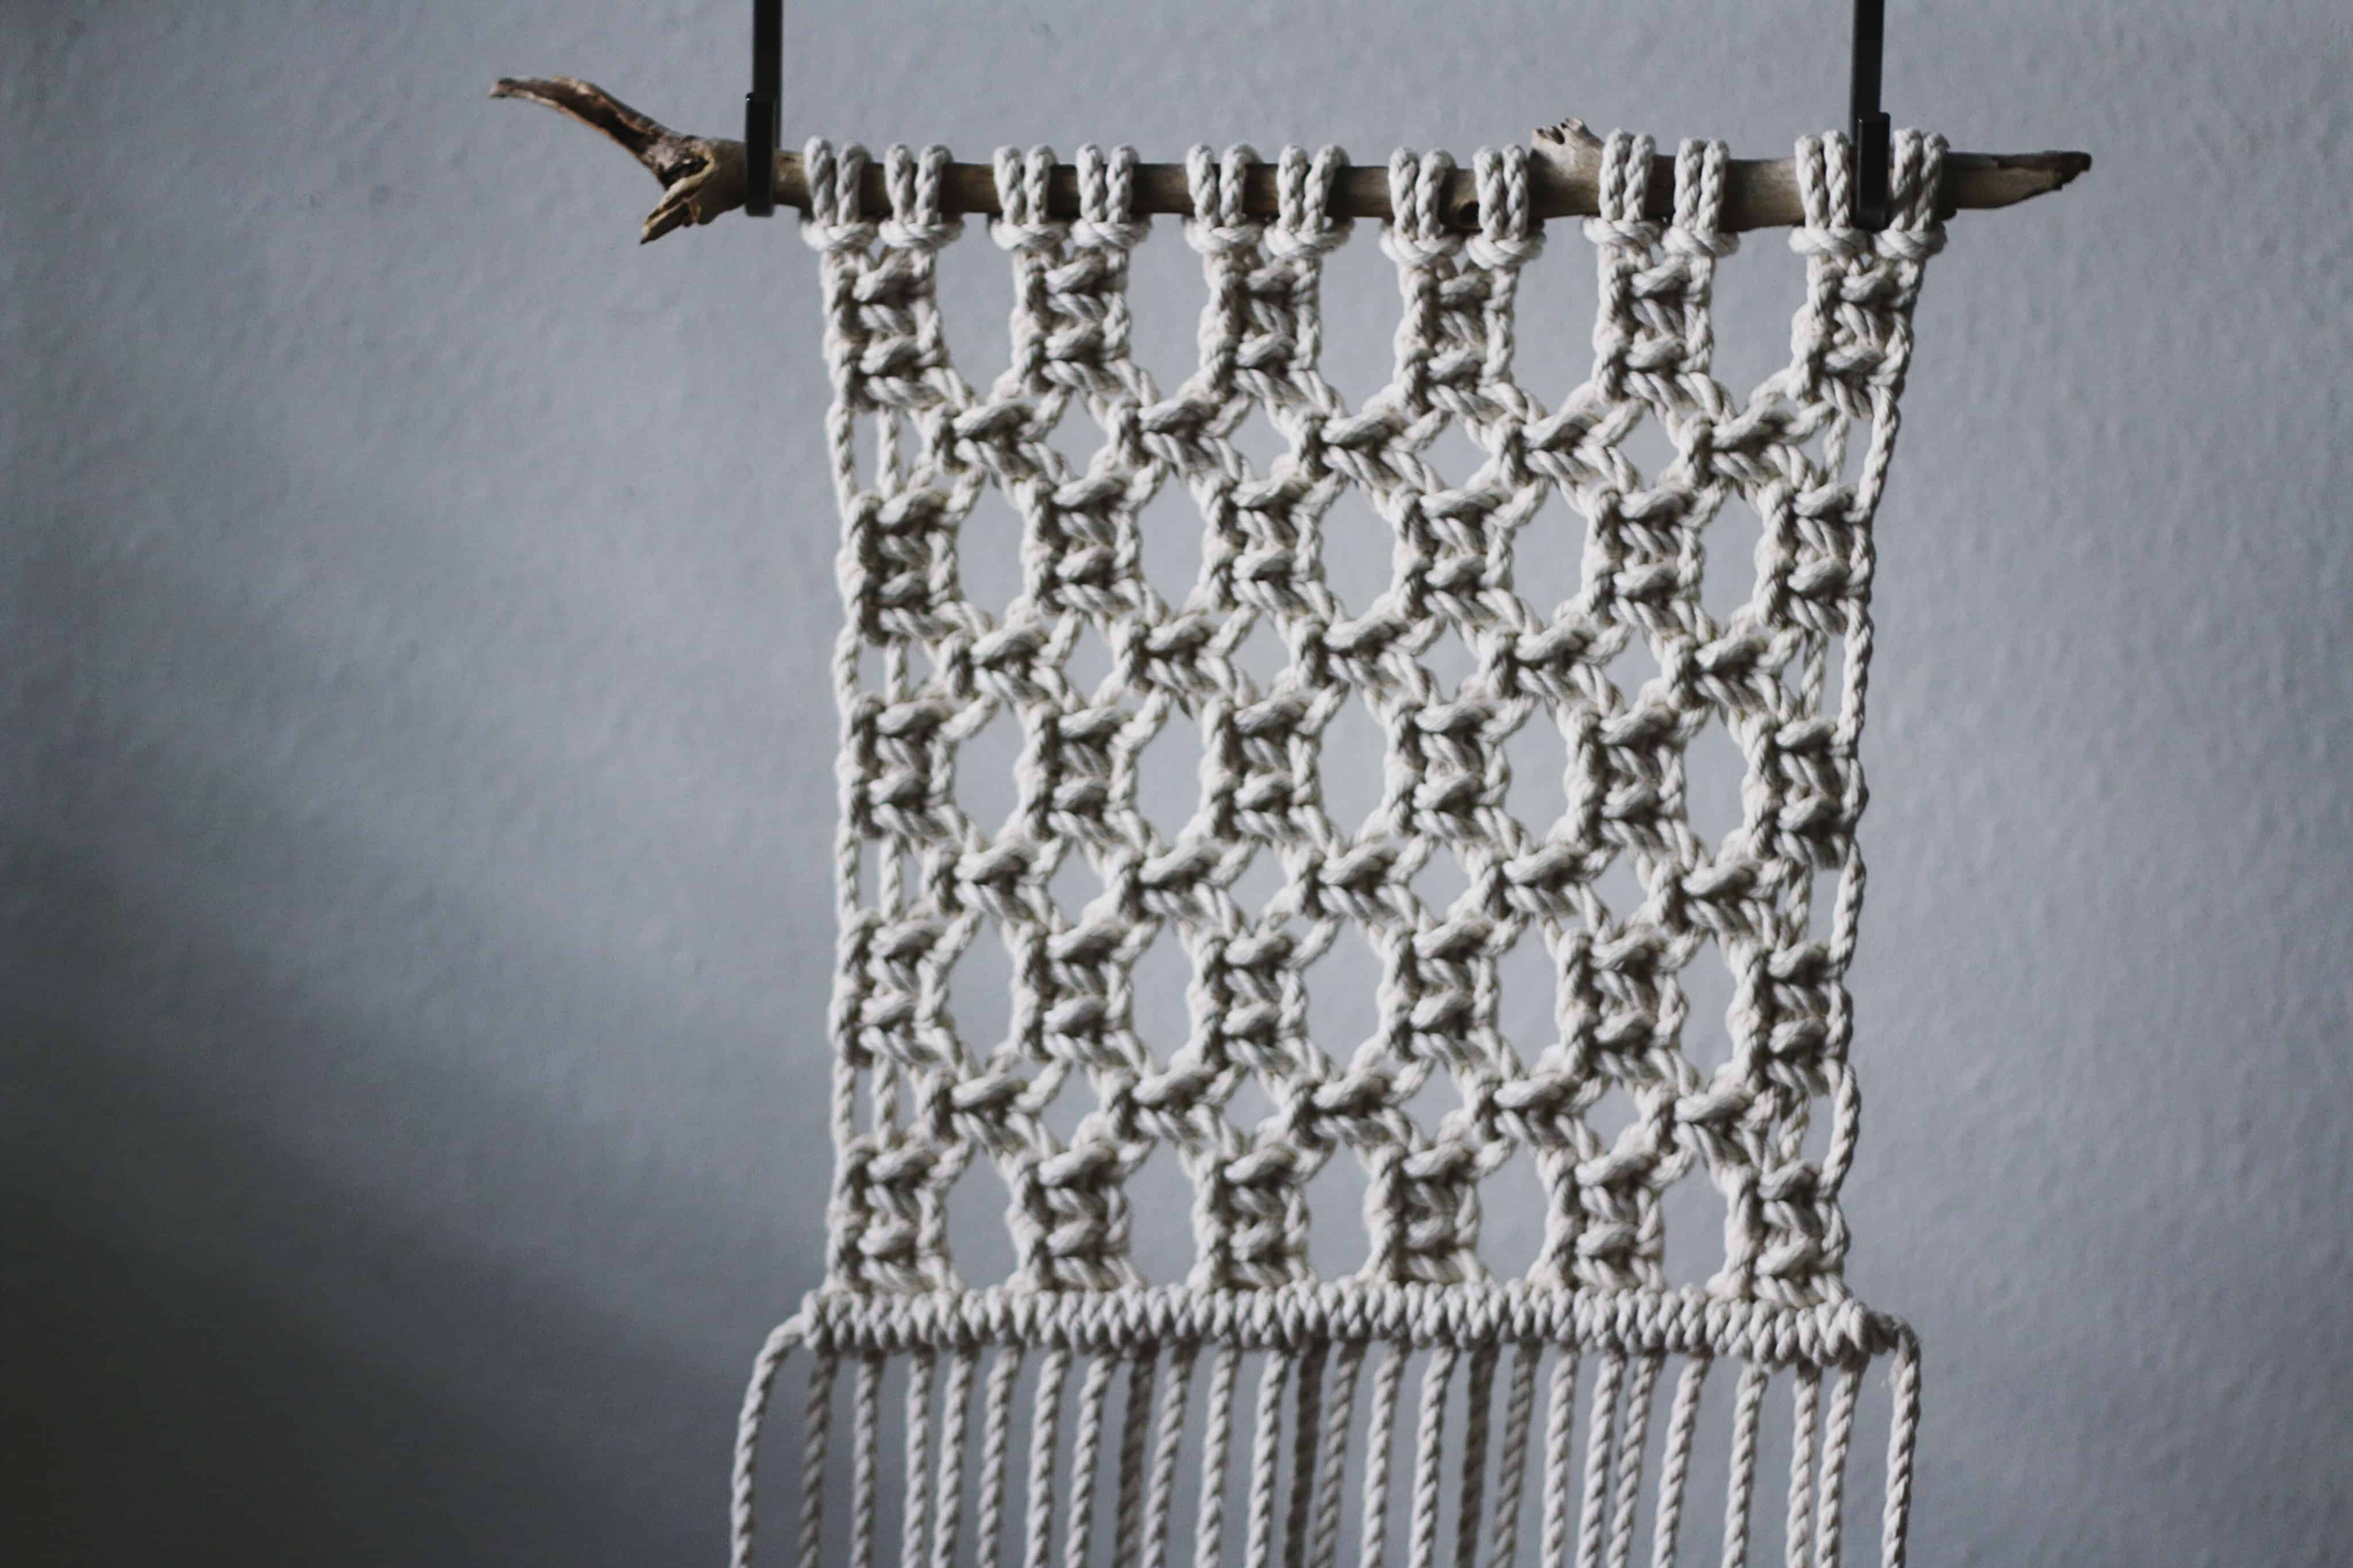
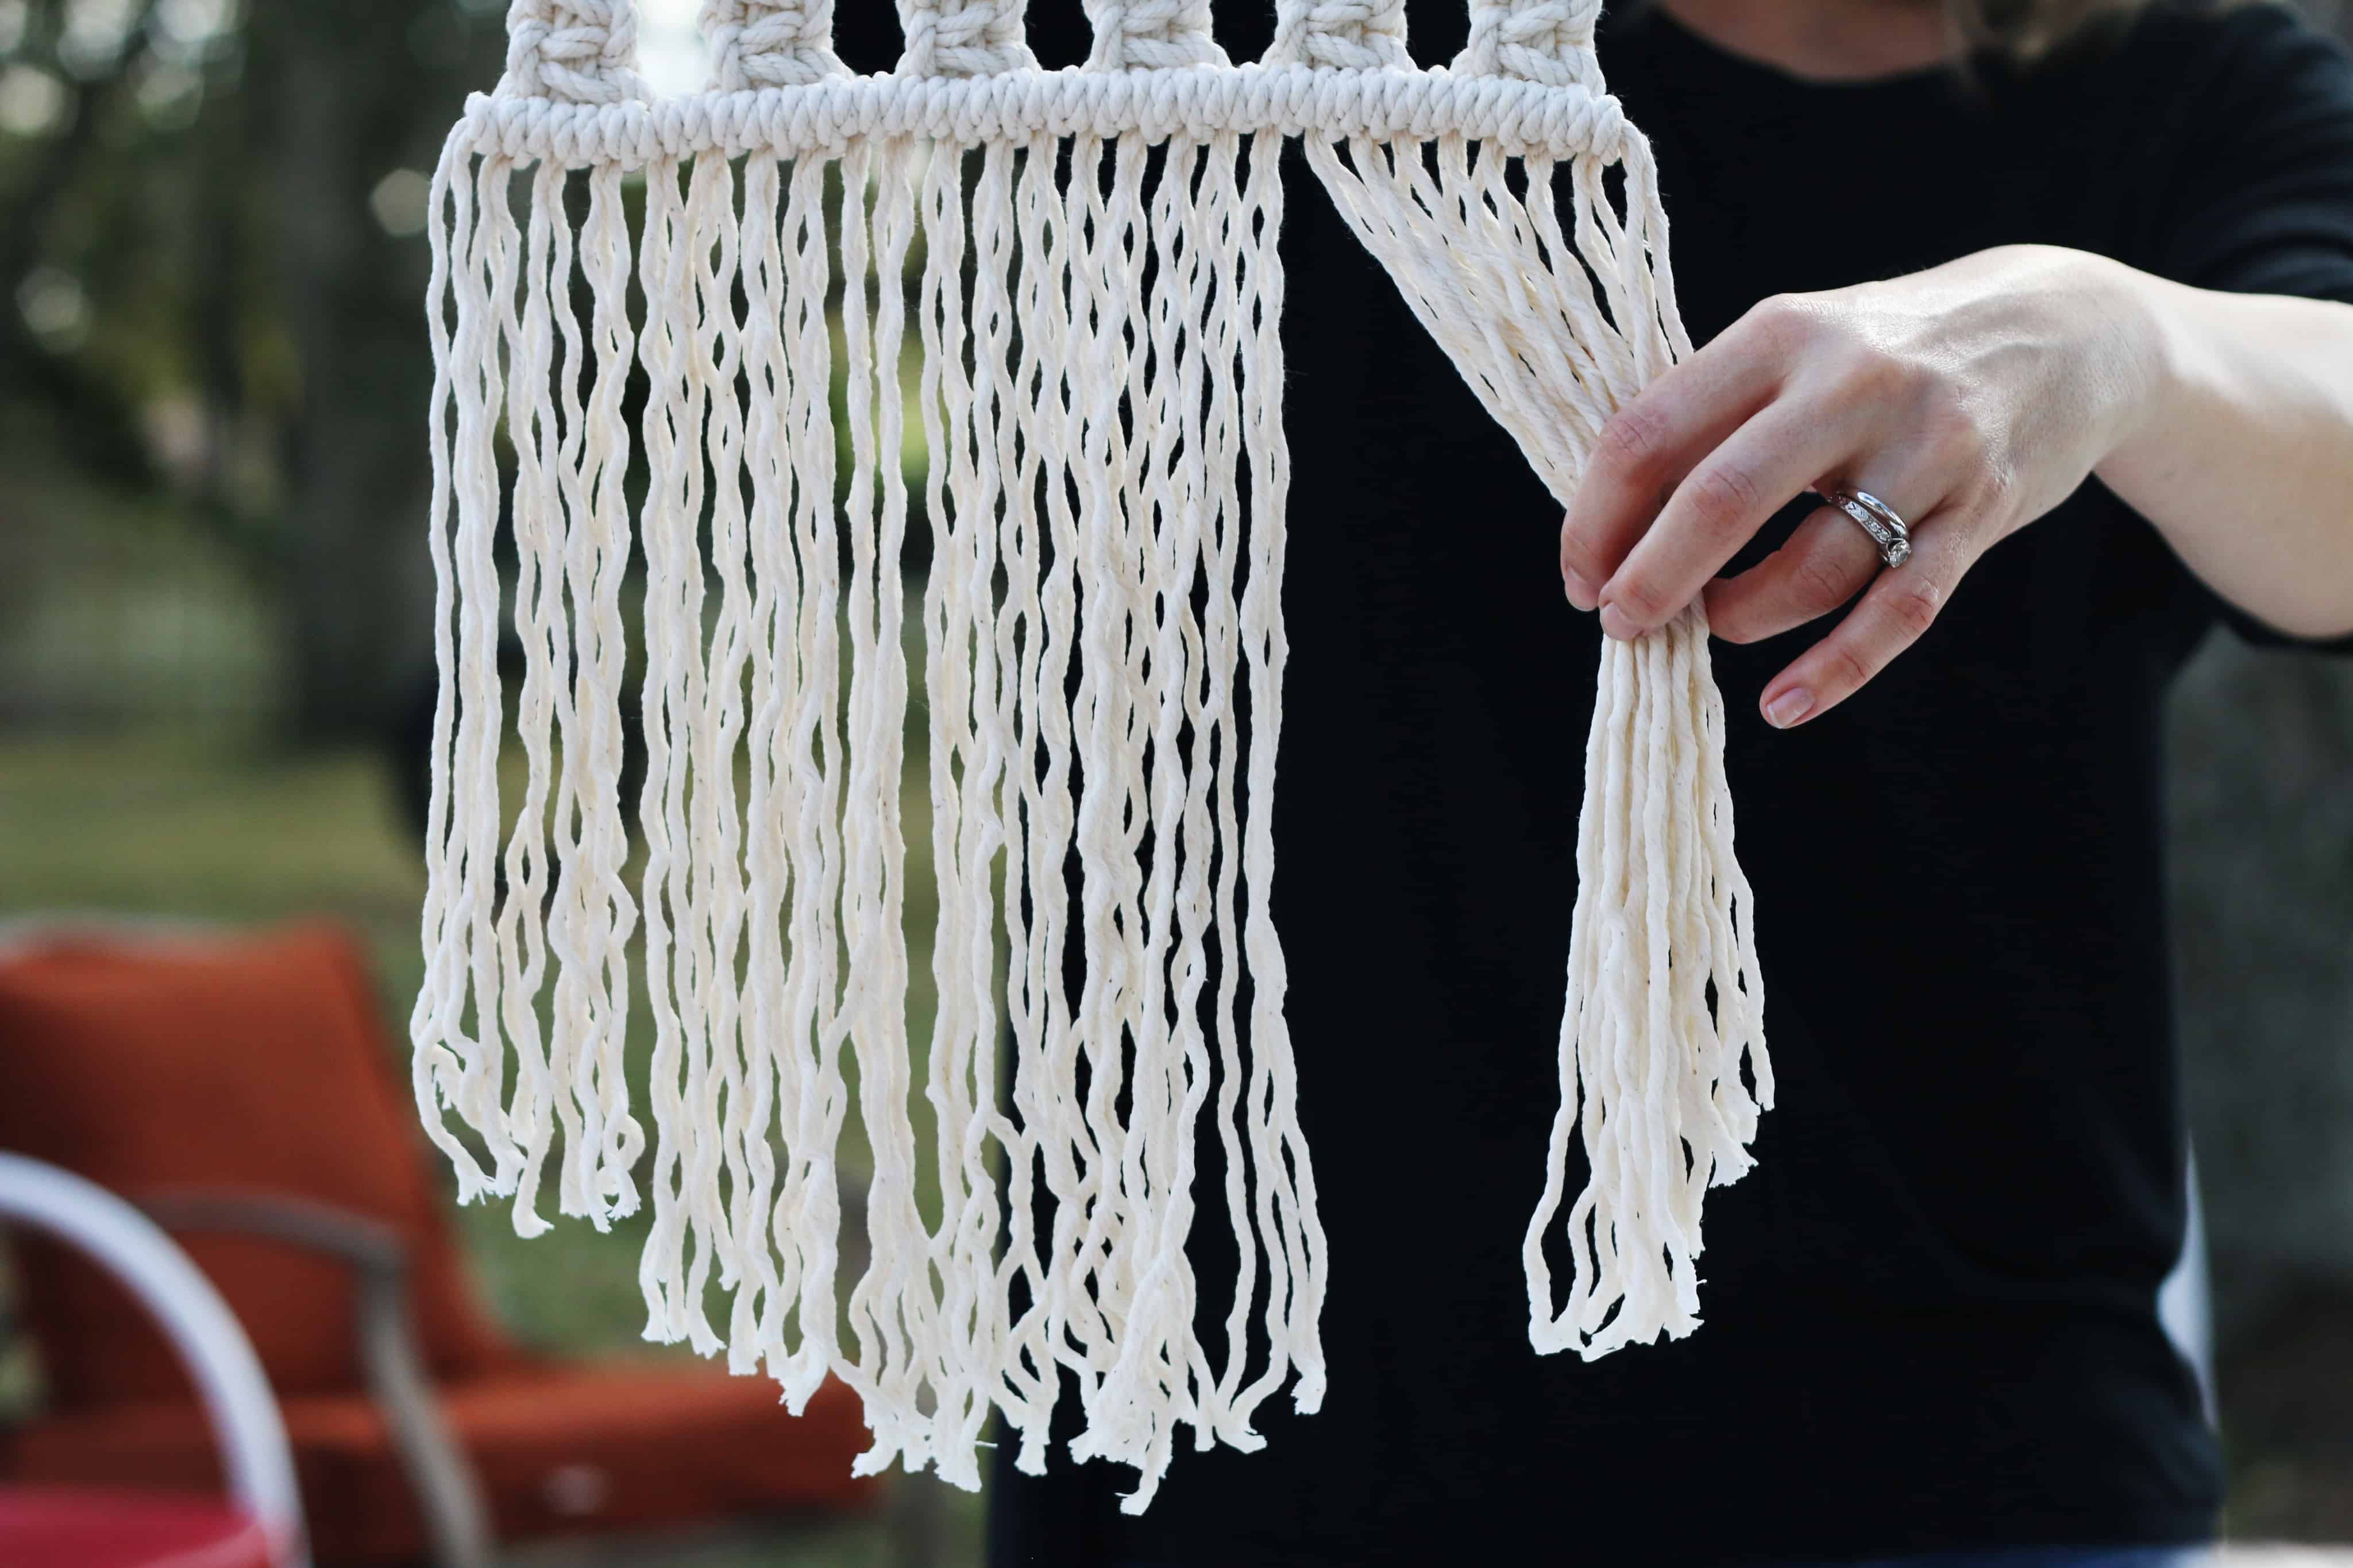
- You are finished knotting! Now, get your scissors and trim the bottom of your wall hanging. Elizabeth cut hers at a bit of an angle on each side. You can leave it as long or short as you want but you’ll want to leave enough rope to dye the bottom fringe. Once you are satisfied with the length of your piece, unravel each strand. This gives it more of a fringy, wavy look. Trim as needed after you unravel.
- Now that you are finished creating your wall hanging, it’s time to dip-dye!
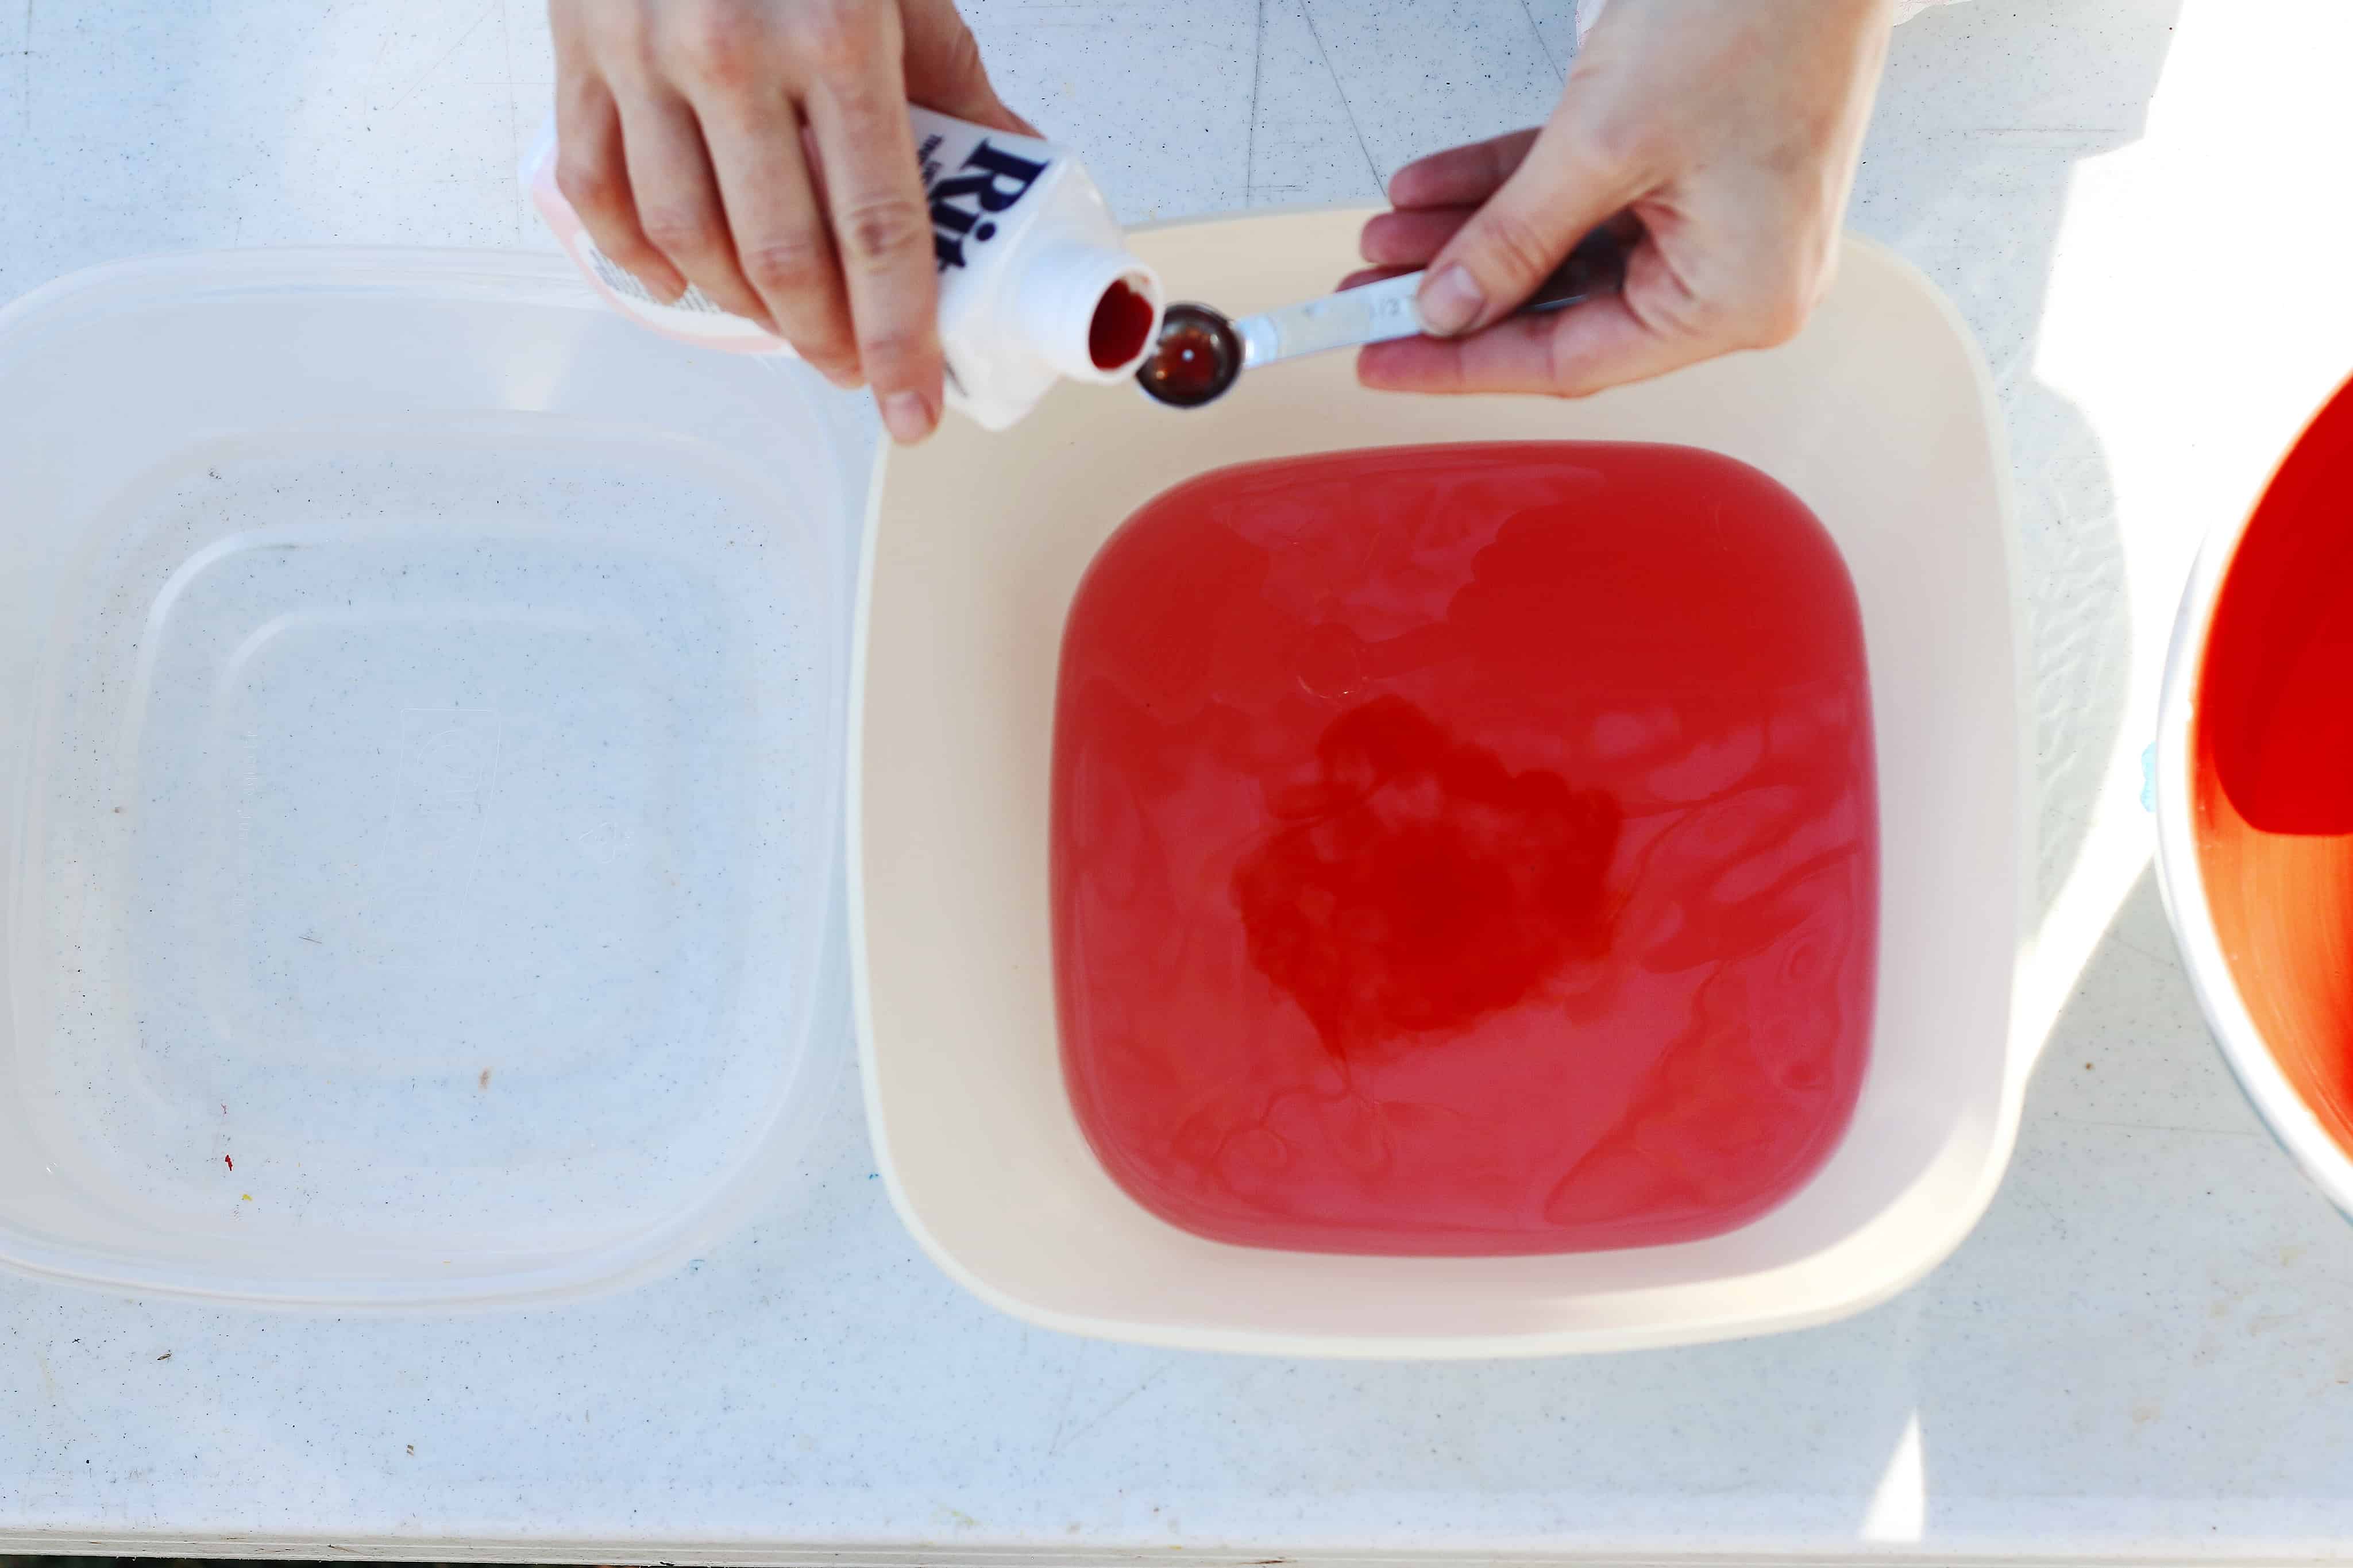
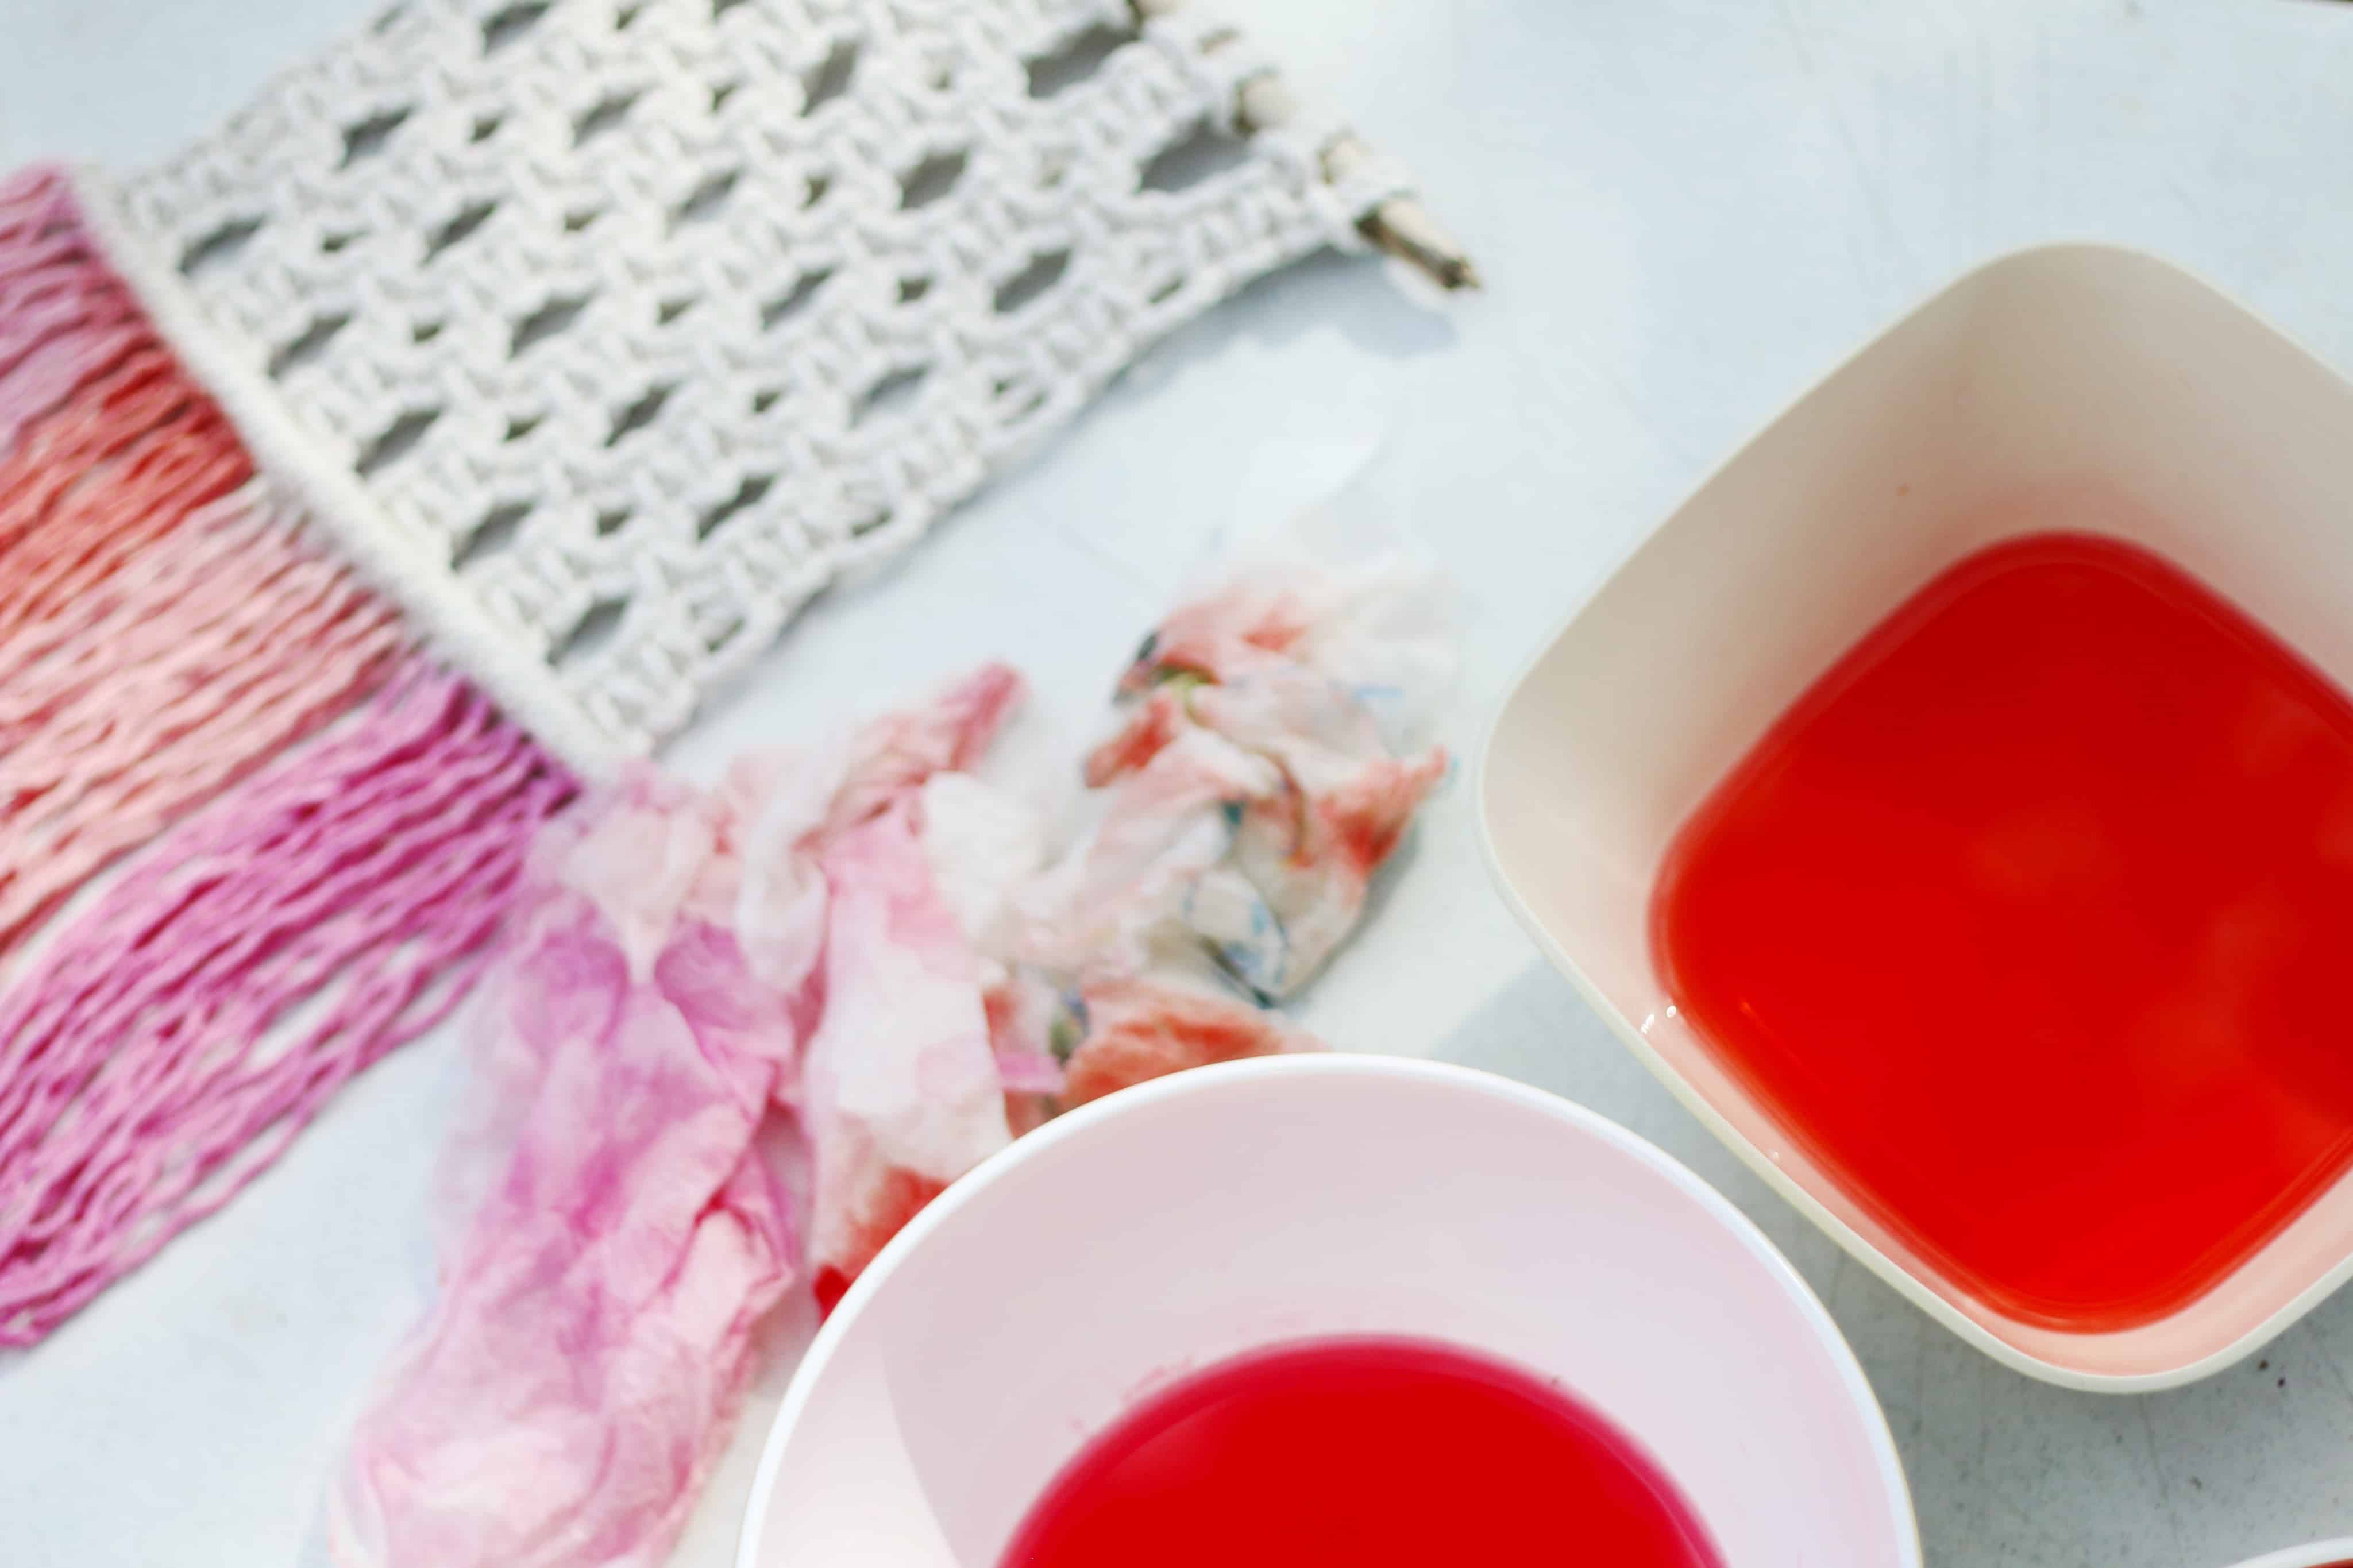
- Gather your dye supplies: bowls for each color, a measuring cup, teaspoon, hot water, and Rit All-Purpose Dye. Put on rubber gloves.
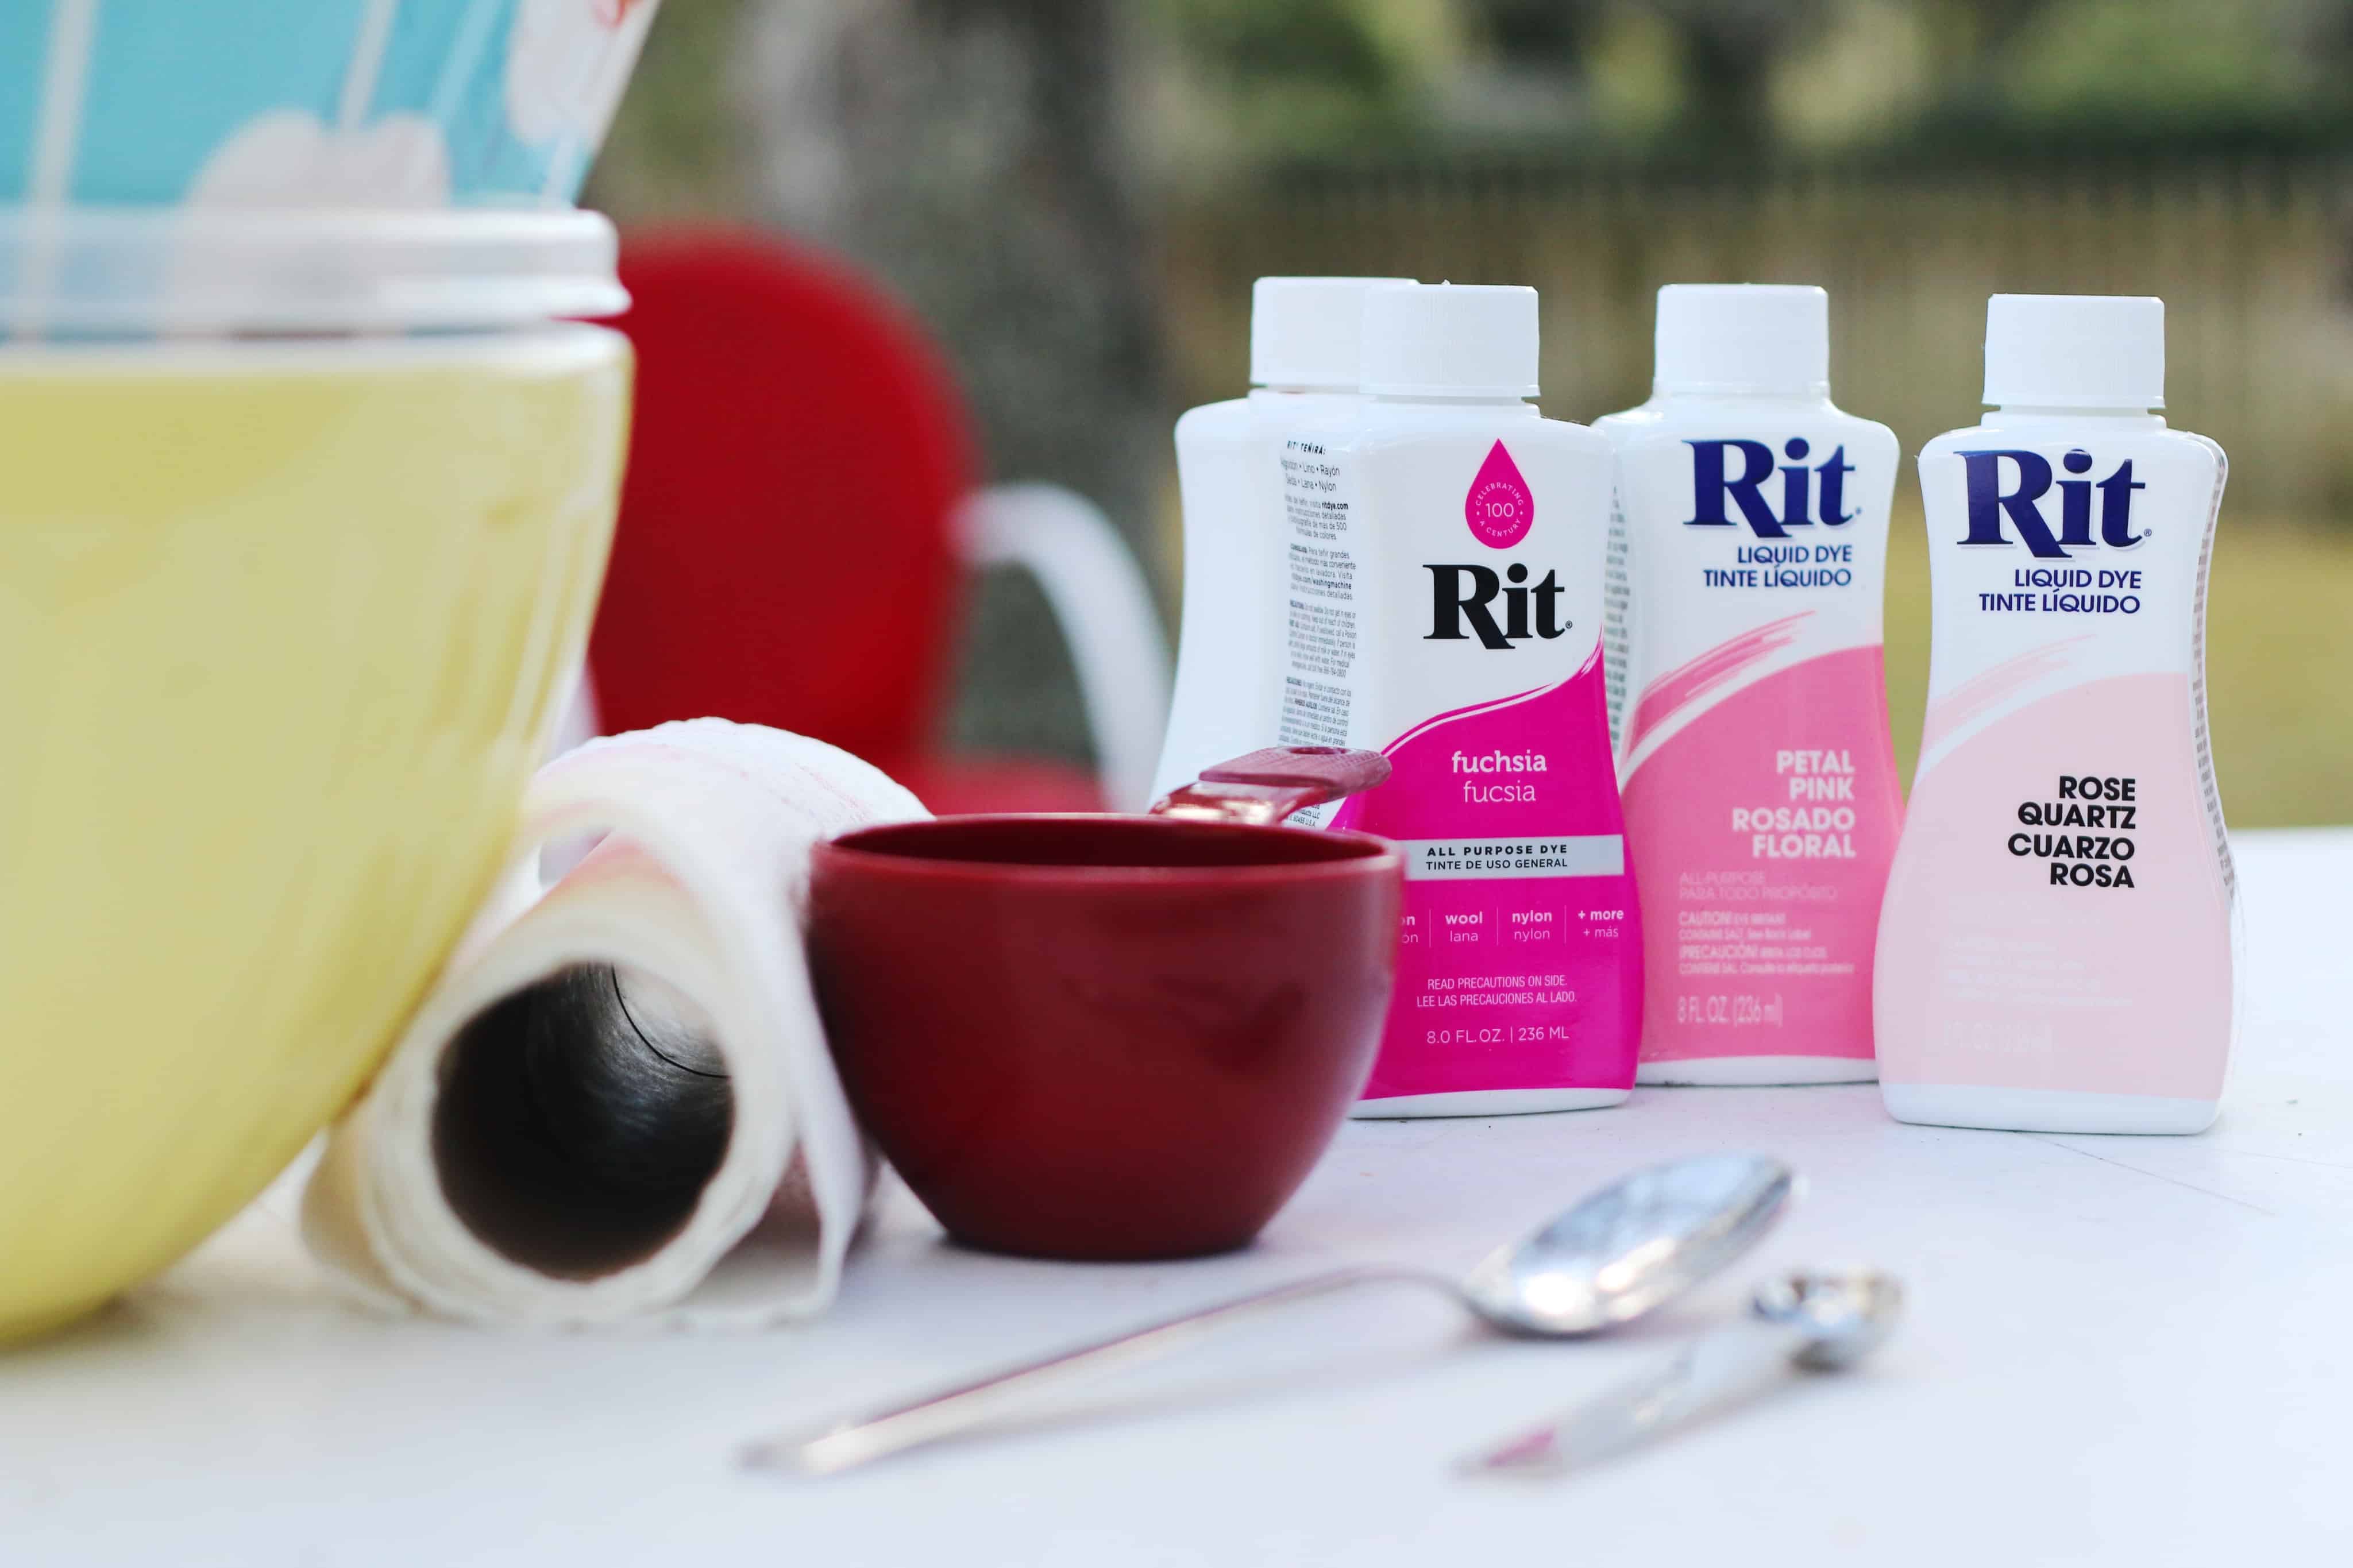
- Measure out 3 cups of hot water per bowl. Elizabeth did four different colors so she had four bowls of hot water. To get the shades of pink in the photos use this formula: Fuchsia—1 tsp, Petal Pink—1 tsp, Rose Quartz—3 tsp.
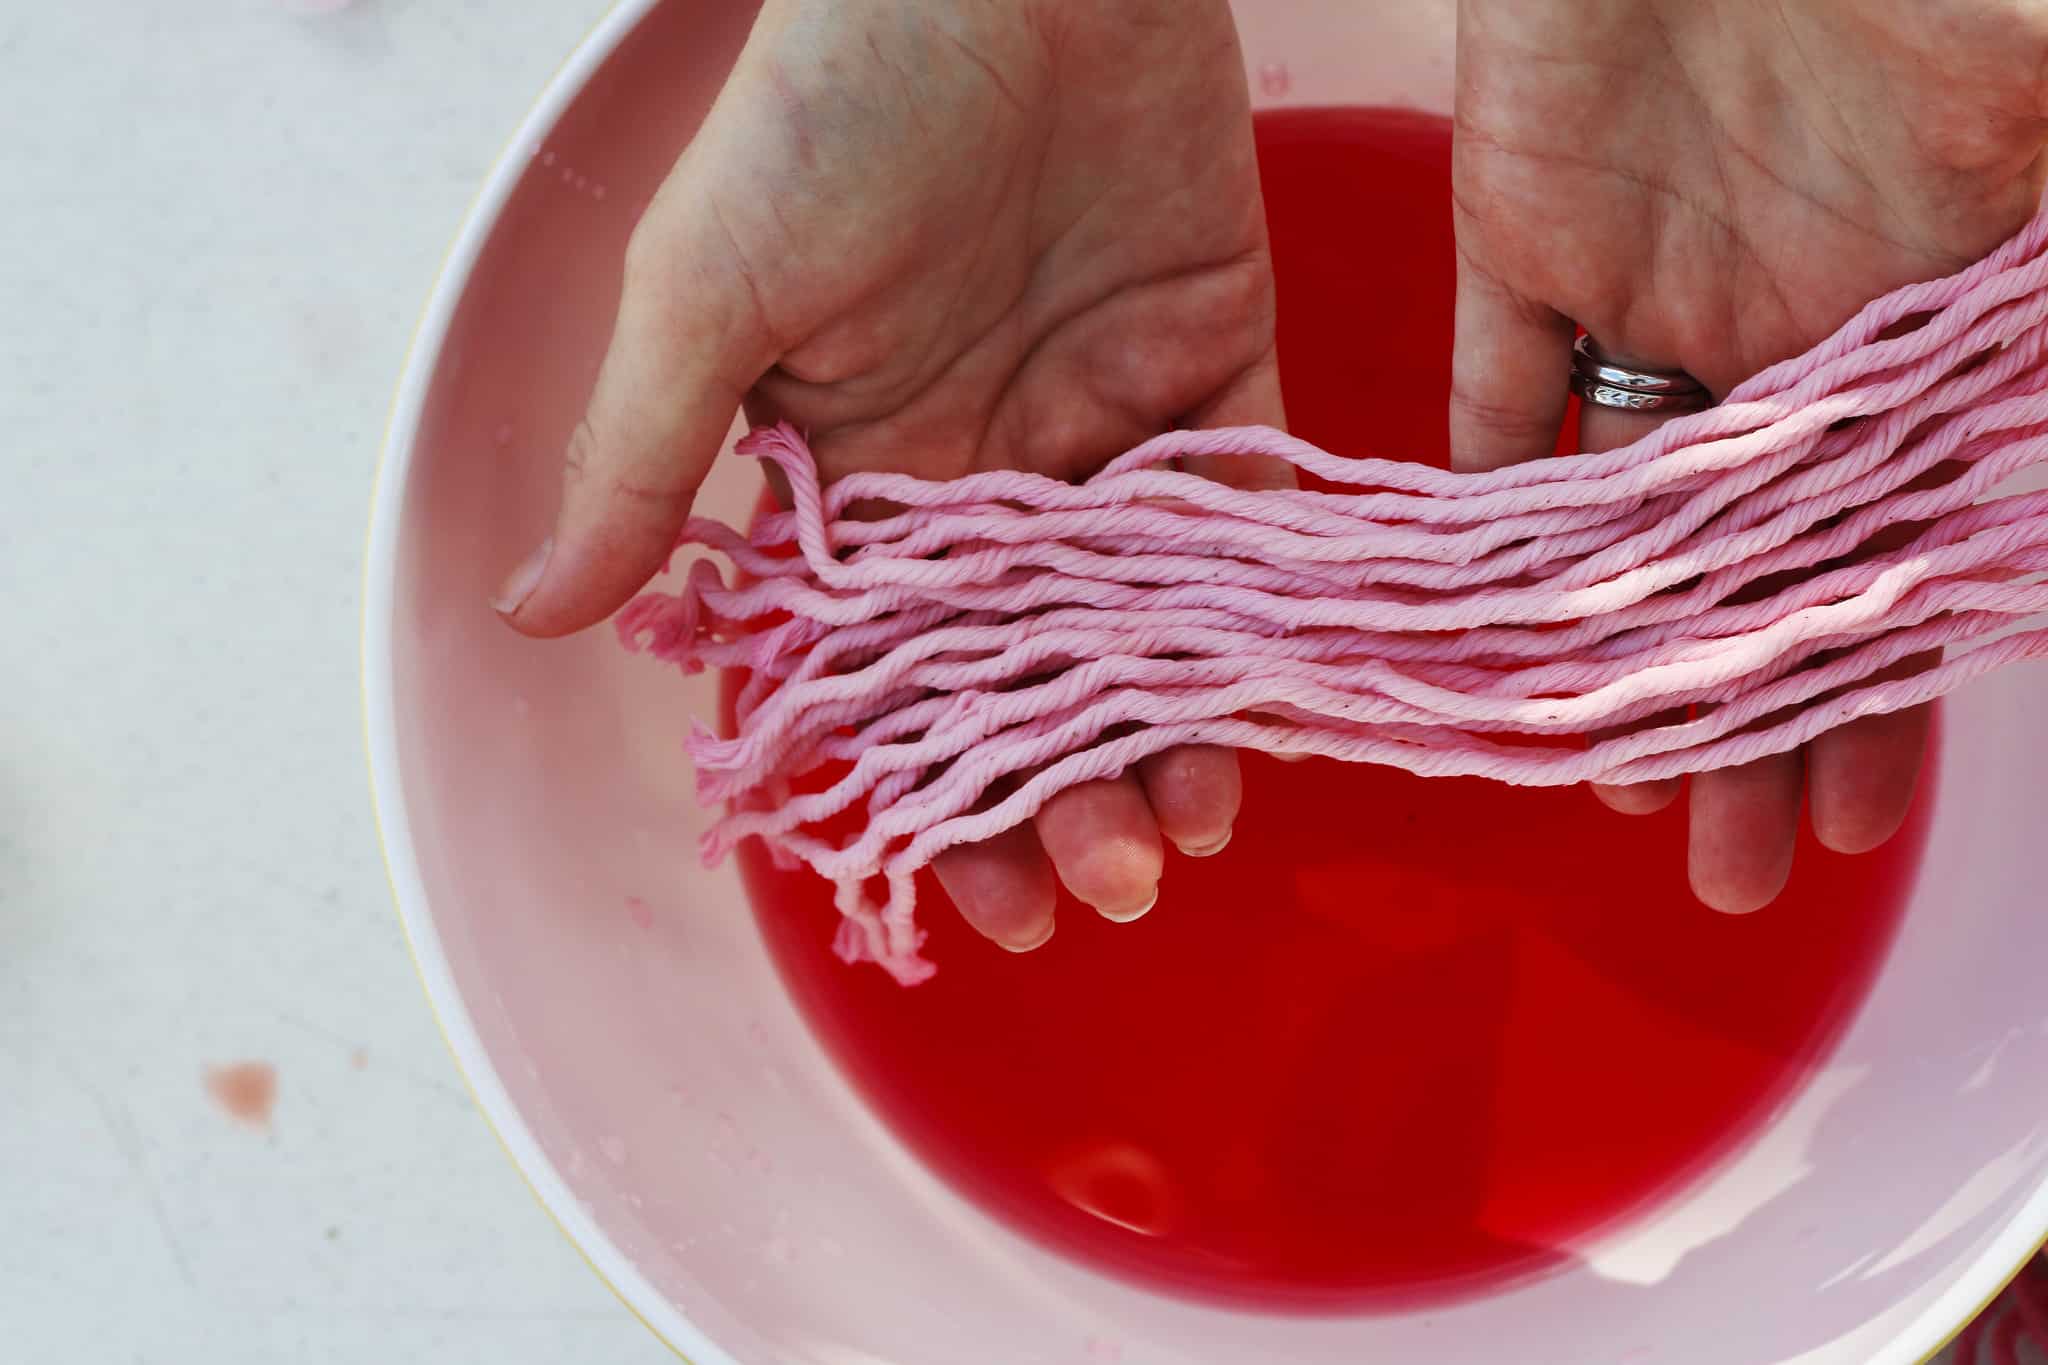
- Soak the bottom half of the macramé piece in water (the part you are dyeing). If the rope is wet it will take to the dye easier.
- You can section off each portion of fringe for each color using rubber bands—Elizabeth just eye-balled it.
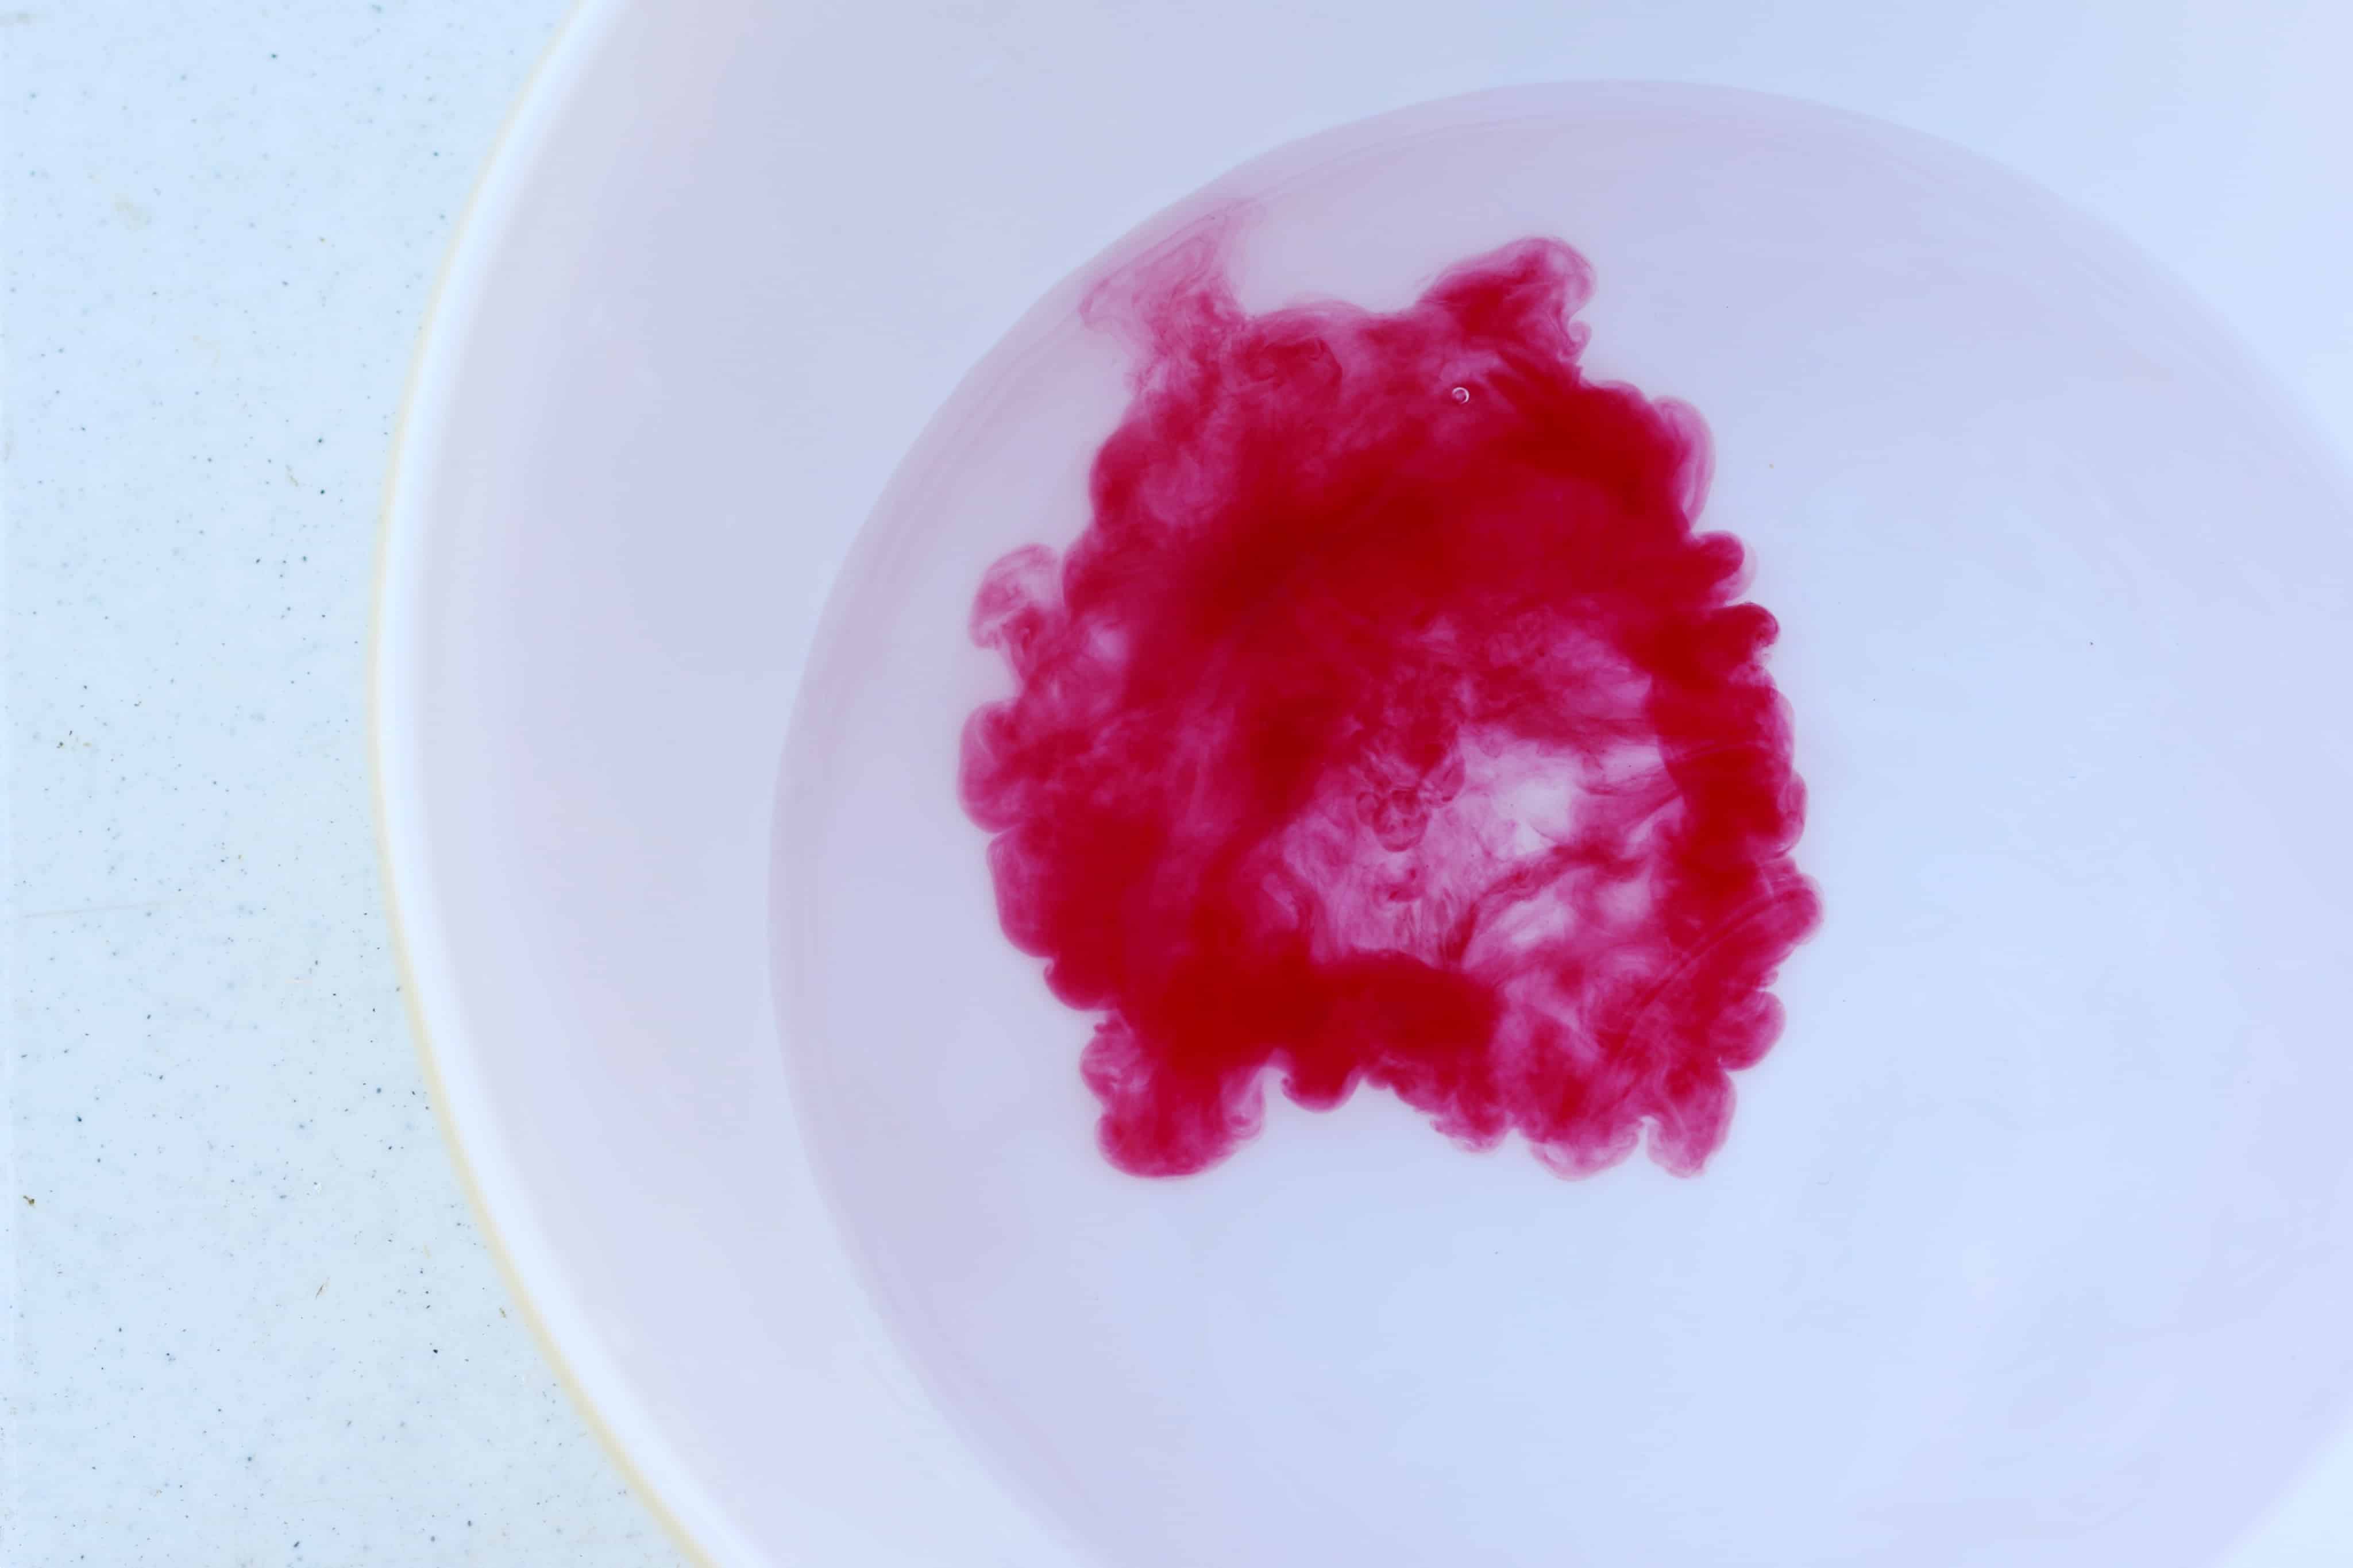
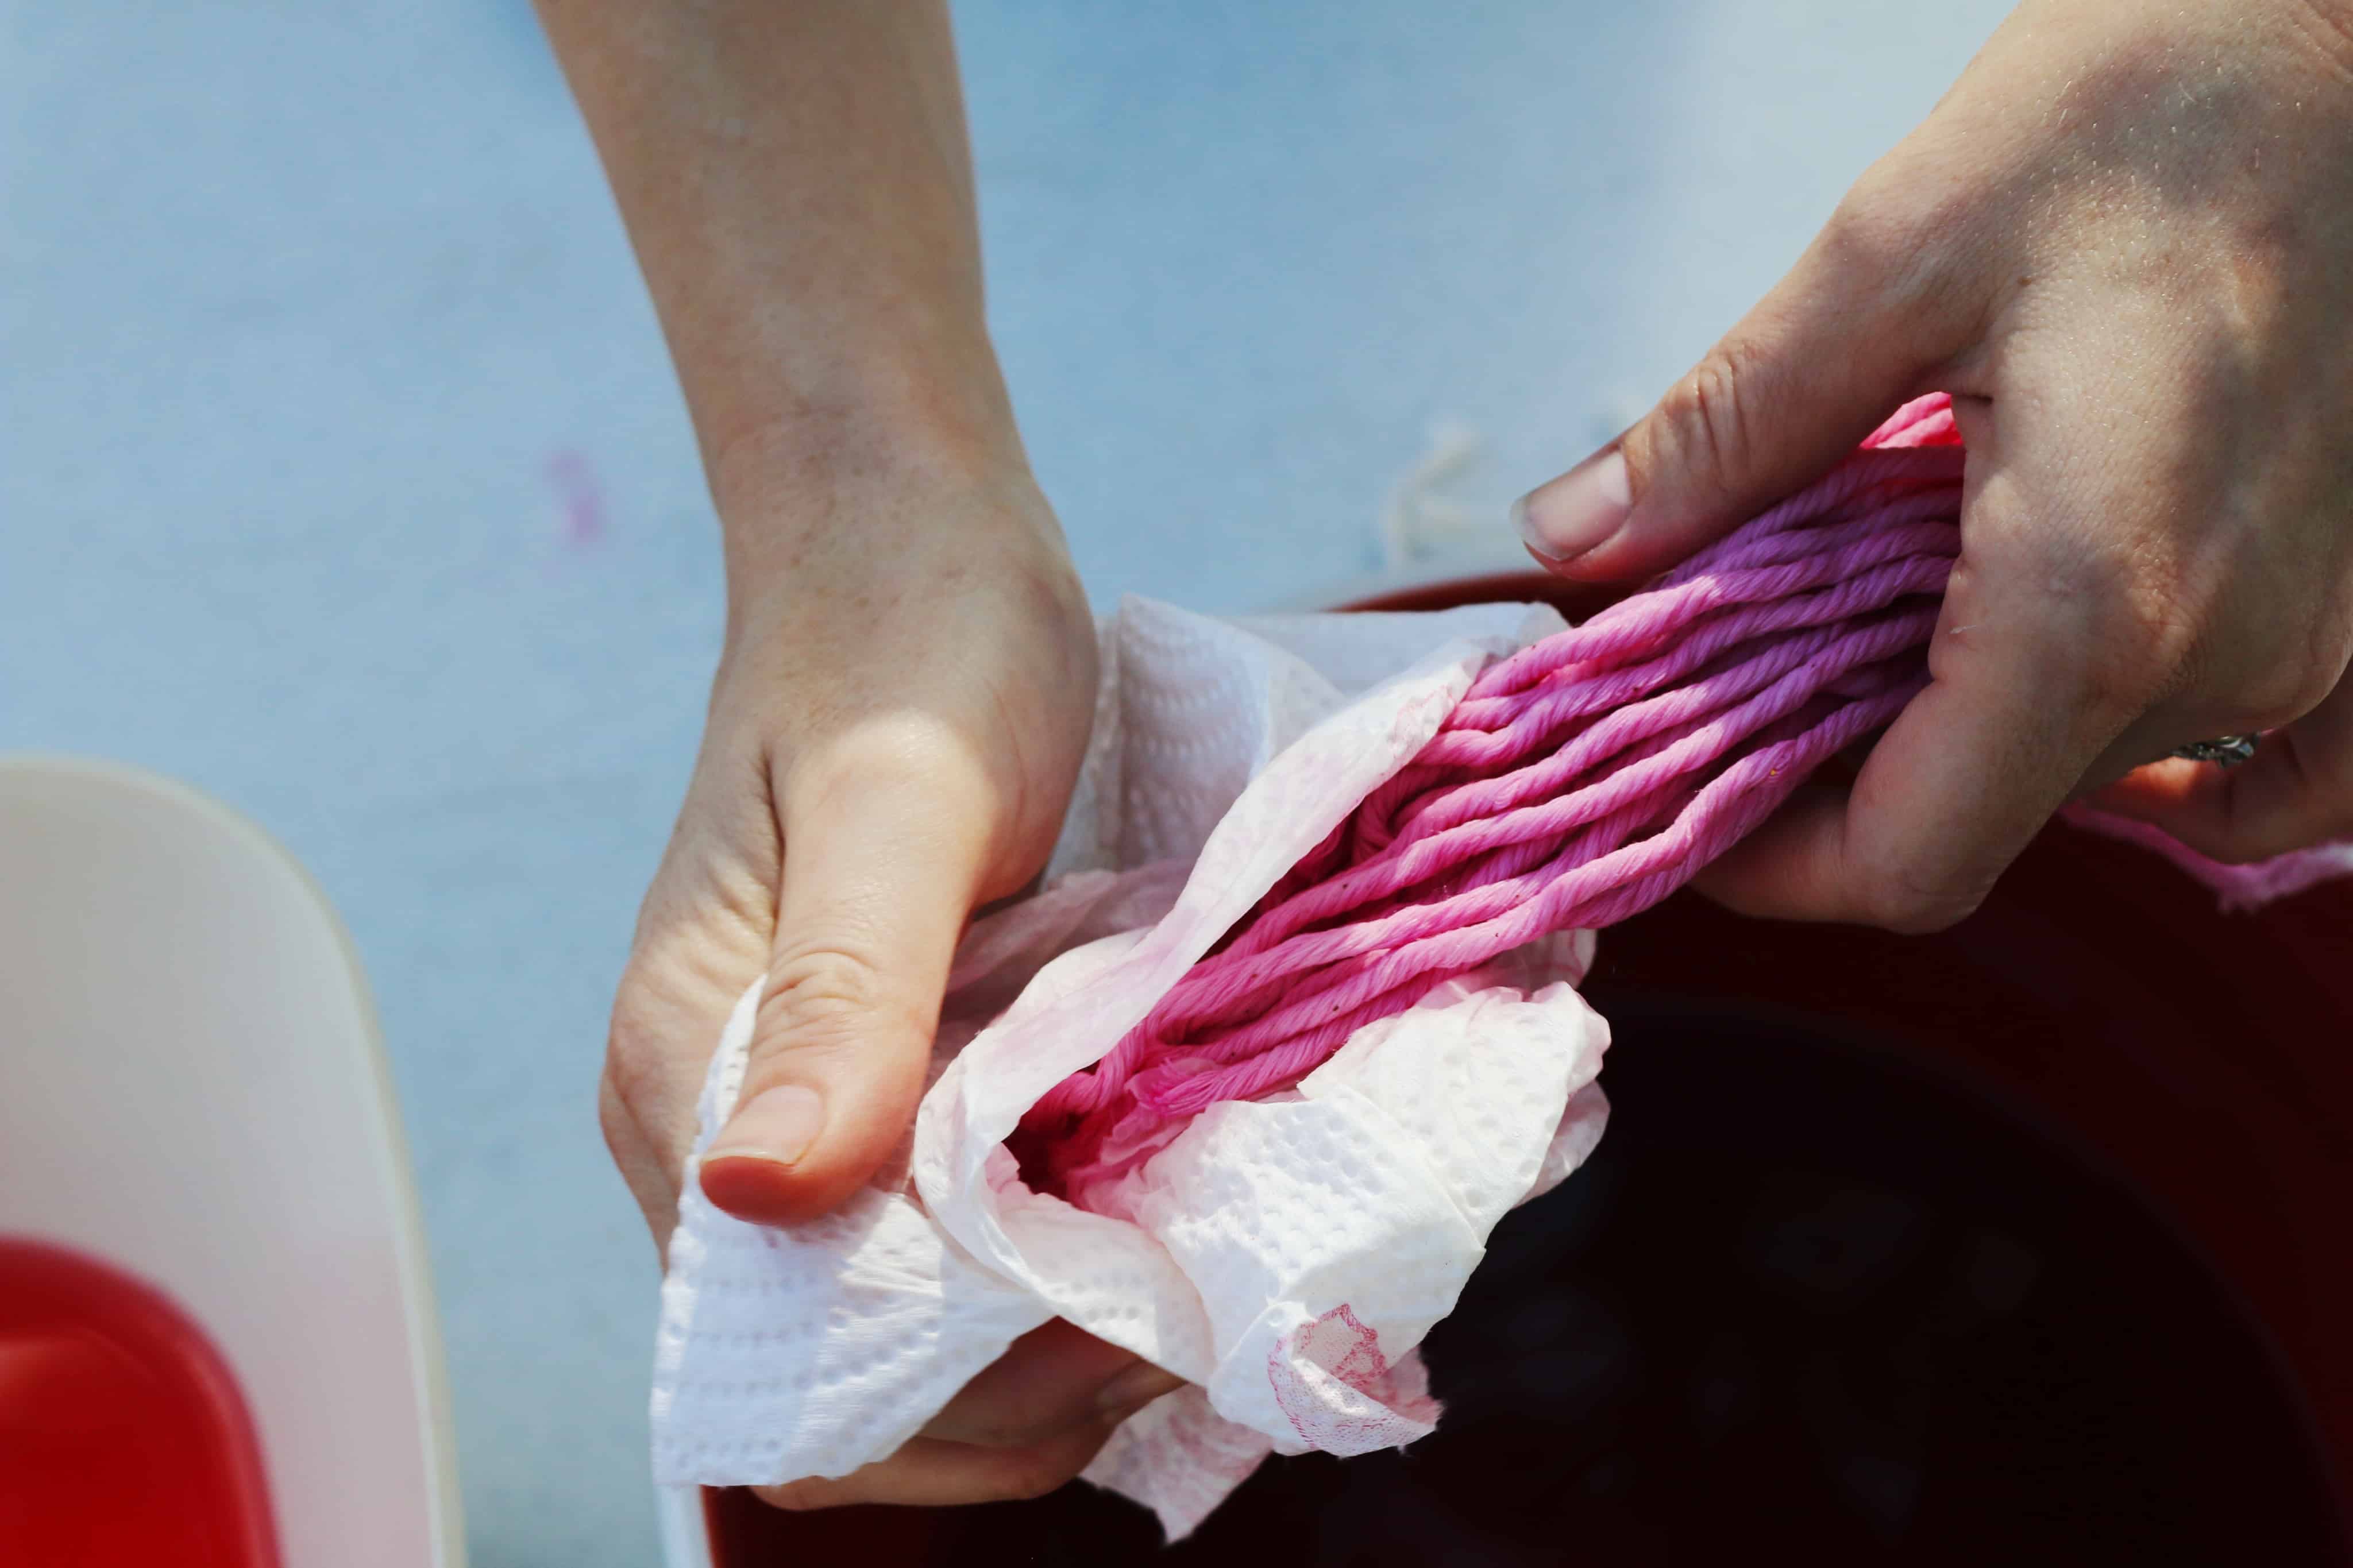
- Take your first section of fringe and dip it in the first bowl of color. Elizabeth left each section in the dye for a few minutes and just mixed it around a bit with a spoon. Make sure you are careful not to go past the line of half-hitch knots you made when you are dipping the fringe. Once a section is dyed to your liking, carefully lift it out of the water and ring it out with a paper towel.
- When each section is complete hang your macramé in a safe place to dry. If it’s still dripping just take a paper towel and blot it to remove excess dye.
- Dry for several hours or overnight.
- Display your dip-dyed macramé wall hanging and enjoy!


Posts You May Like
