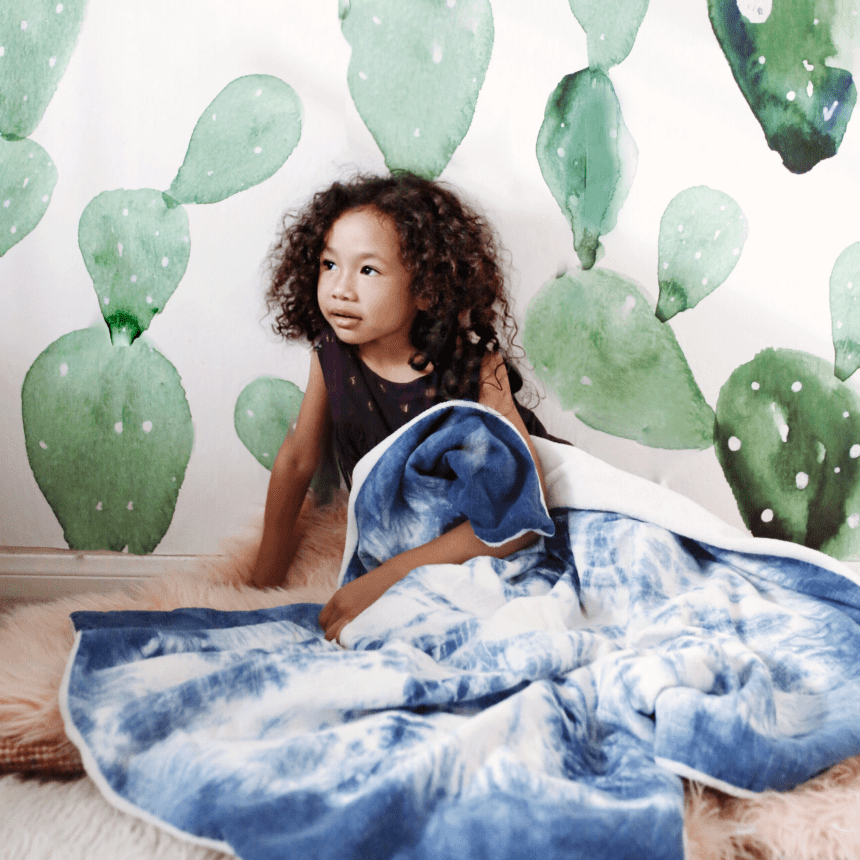
Indigo Shibori Dyed Blanket
Our friend @kikhaly created this beautiful Shibori dyed blanket for her daughter to snuggle up with! Using the Kanoko technique and Evening Blue dye, she was able to create something super unique that you would have a hard time finding anywhere else. The Kanoko style is one of the easier Shibori techniques to do because it only requires a rubber band and some twine. Learn how to achieve this look below!
Supplies
- Blanket
- Evening Blue All-Purpose Dye
- Rit ColorStay Dye Fixative (Recommended)
- Twine
- Rubber Band
- Dishwashing Liquid
- Measuring Cup
- Large Metal Spoon
- Paper Towel
- Plastic Table Cover
- Plastic Gloves
- Salt
Time
Total: {{ partial.tLWQ.total }}
Difficulty
Intermediate Total: {{ partial.tD8Y.total }}
Instructions
- Cover table with plastic. Gather supplies.
- Pre-wash blanket with detergent, rinse and leave wet.
- To create a Kanoko shibori pattern, pinch the center portion of the blanket and hold it in the air, letting the 4 corners drop.
- About ½” from the pinched center, wrap blanket tightly with a rubber band.
- Then wrap cotton twine in a crisscross pattern down the length of the blanket. Pattern will vary based on the spacing and wrapping of the twine. This will result in a long blanket wrapped with cotton twine.
- Set aside wrapped blanket to prepare the dyebath.
- To prepare dyebath: Fill large dye container with 3 gallons very hot tap water (140F). If water is not hot enough, heat some water in a cook pot or teapot. Shake dye bottles before pouring and wear rubber gloves when measuring dye. For a dark Indigo shade, add ½ cup Denim Blue dye and approximately 2 tablespoons Navy dye to hot water. For a softer shade, use ½ cup Evening Blue. Stir well. Note: More dye may be needed, depending upon the weight and size of the blanket
- For cotton fabrics, add 1 cup of salt to dyebath. This helps to intensify the color. Then add a squirt of liquid dish detergent. Stir well.
- Test dye color by dipping a paper towel into the dyebath. If color is too light, add more dye; if color is too dark, add more water.
- Immerse wrapped blanket into dyebath. For a high contrast pattern, keep the wrapped blanket in the dye for about 3 to 5 minutes to keep the wrapped part dye-free. For more color and less white areas, let the wrapped blanket set in the dyebath for 10 to 20 minutes.
- When desired color is achieved, remove the wrapped blanket from the dyebath. Wearing rubber gloves, squeeze out excess dye. Do not remove cotton twine.
- Recommended: To enhance the color and reduce color bleeding, use Rit ColorStay Dye Fixative immediately after dyeing and before washing, following package instructions. Let wrapped blanket set in fixative for 20 minutes.
- Carefully remove rubber band and twine from the blanket and unfold.
- Rinse blanket in cool water until rinse water begins to run clear.
- Then wash blanket in warm water with mild detergent in washing machine with an old towel, rinse and dry.
Posts You May Like


