
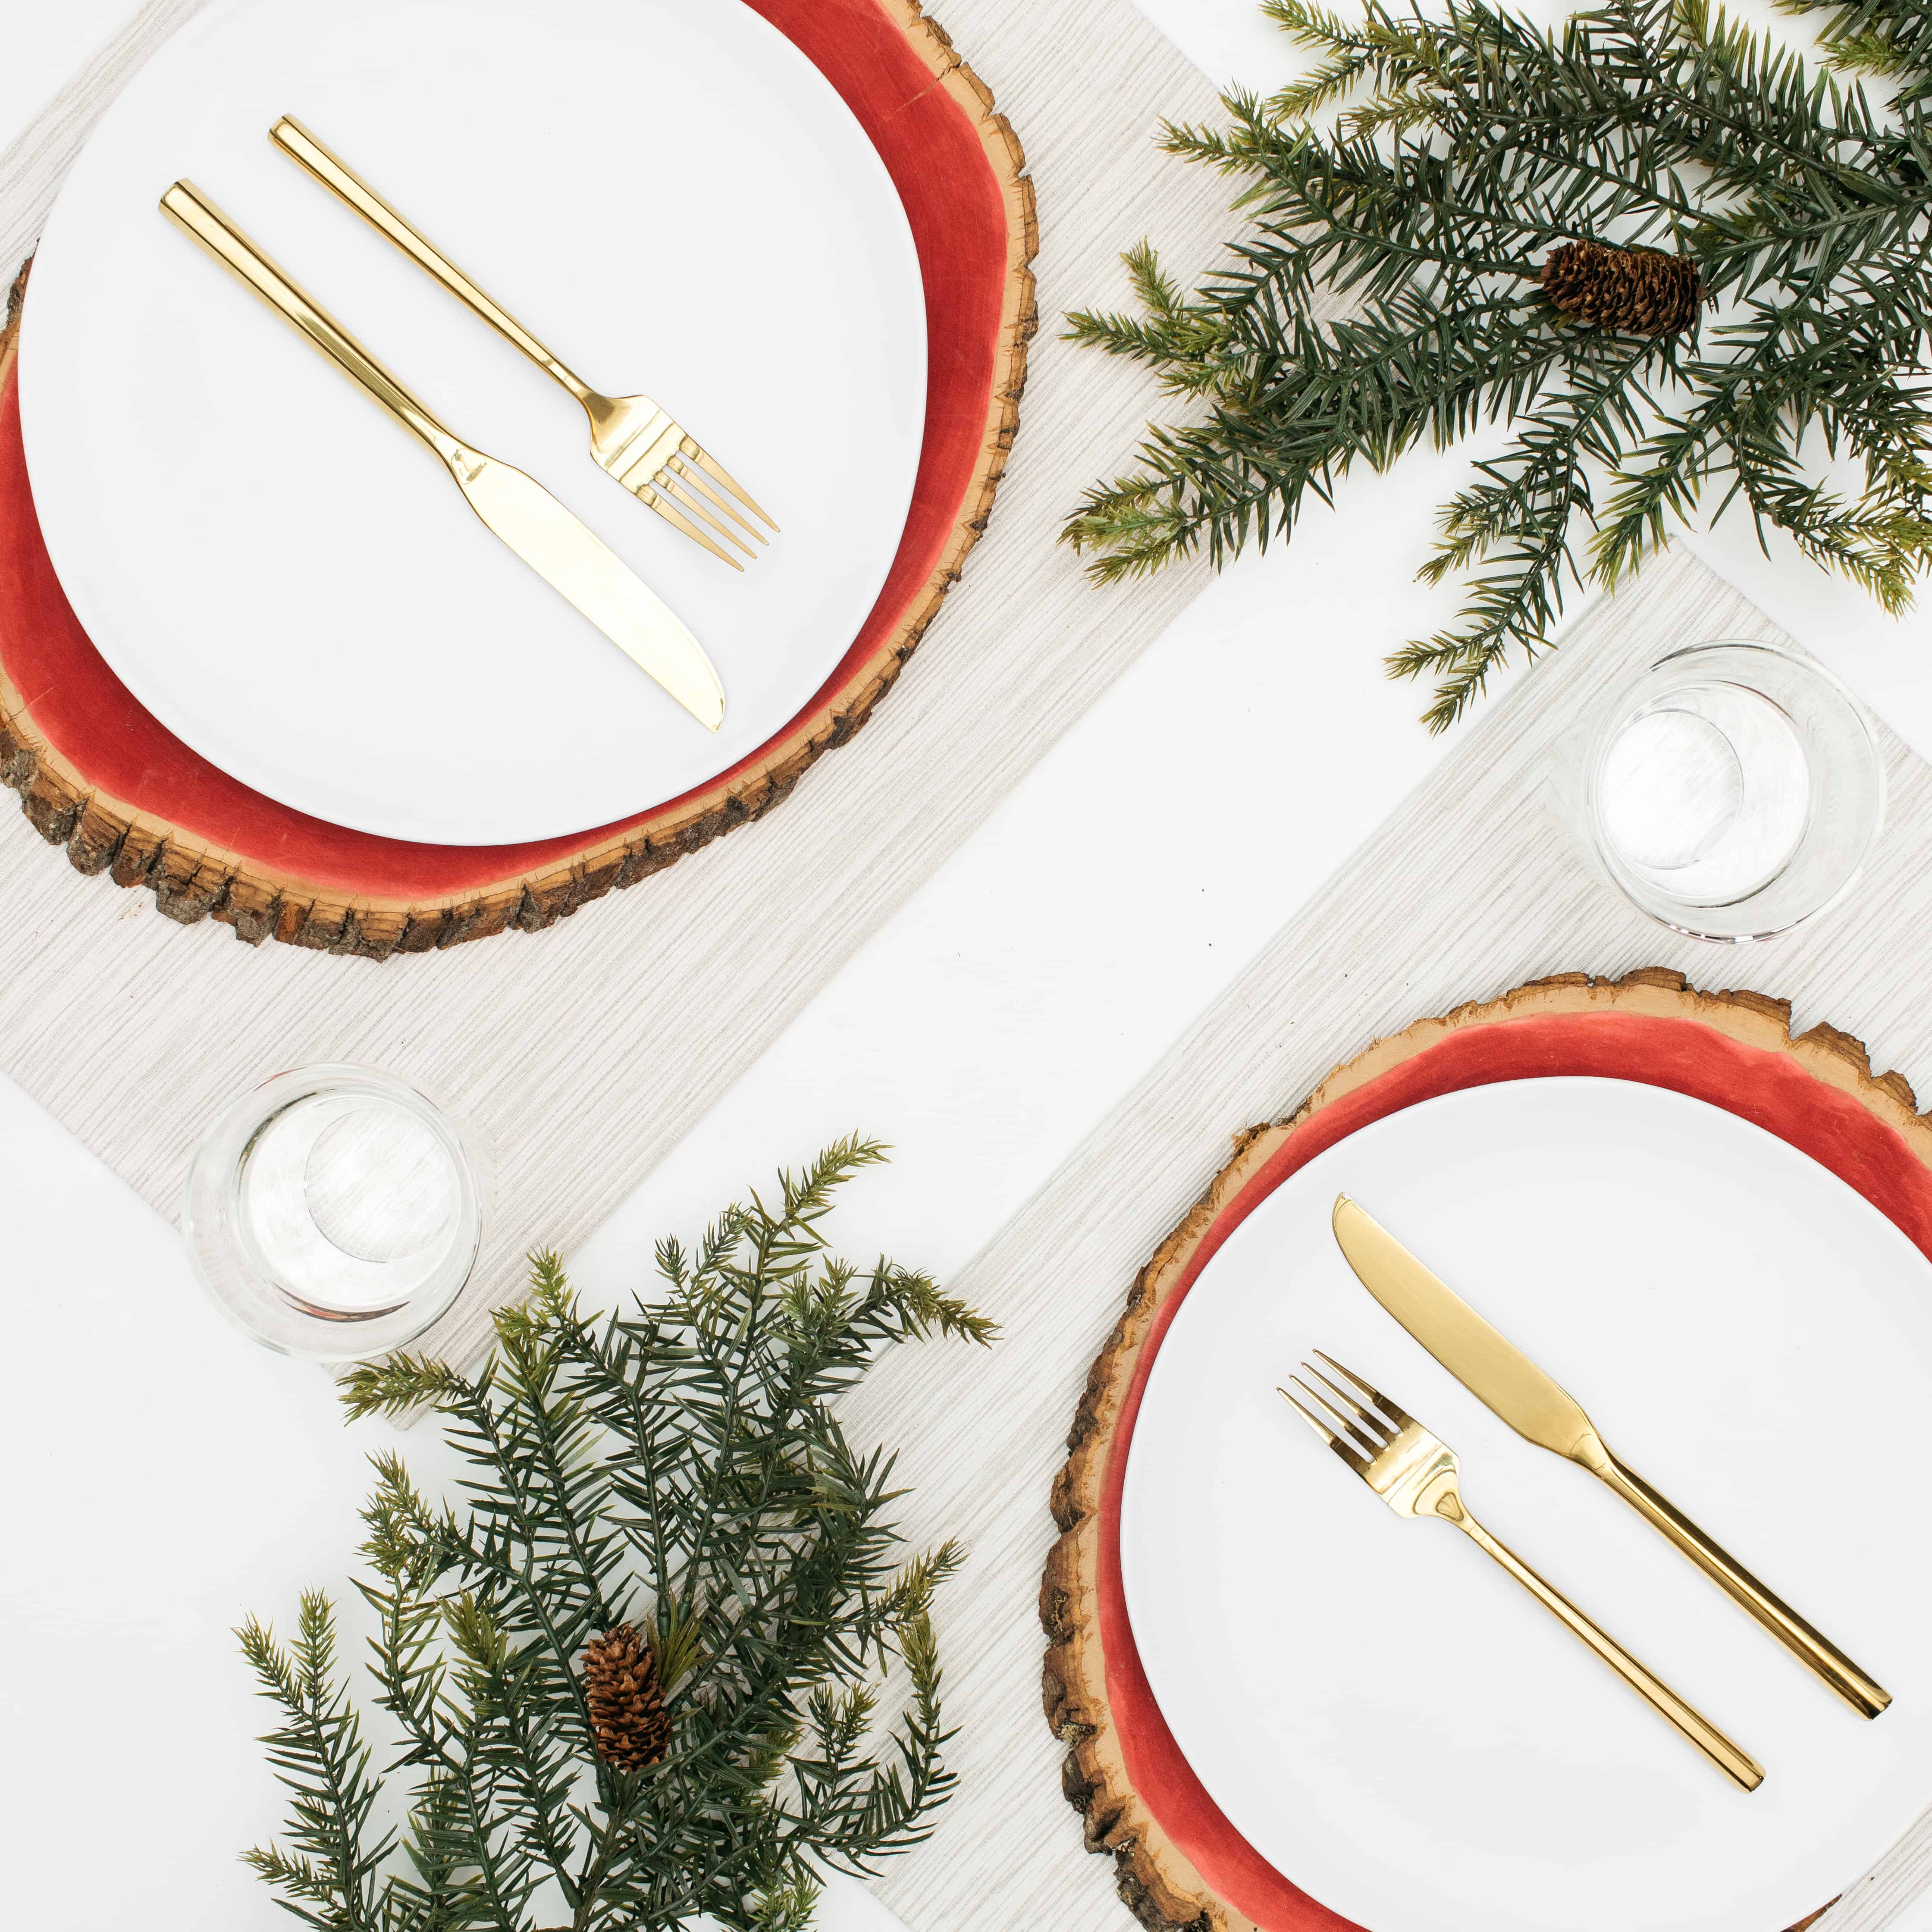
Supplies
- Walnut Hollow Basswood Country Rounds with bark edge, 11" x 13", 3/4" thick
- Rit All-Purpose Liquid Dye: Cherry Red and Cocoa Brown
- 3-Cup Container
- Measuring Cup
- Measuring Spoons
- Plastic or Metal Stirring Spoon
- Rubber Gloves
- 1 1/2" foam brushes
- Sand Paper #220
- Tack Cloth
- Fine Steel Wool
- Clear Polyurethane
- Paper Towels
- Jar or Dish for Holding Drying Wood Round
- Plastic Table Cover
- Optional: Jelly Jars to Store Dye
Time
1-2 Hours Total: {{ partial.tPSE.total }}
Difficulty
Beginner Total: {{ partial.tFPL.total }}
Instructions
- Cover table with plastic. Gather supplies.
- Sand wood lightly, if necessary. Wipe clean with a tack cloth.
- Dye preparation: Shake dye bottles before pouring. Wearing rubber gloves, mix together 1 cup of very hot water with 1 1/2 teaspoons of Cherry Red dye and 1/4 teaspoon Cocoa Brown dye in a 3 cup dye container. Stir well.
- Test dye color on the back side of wood round or with a scrap piece of similar wood. If color is too light, add more dye; if color is too dark, add more water. Dye will appear lighter when dry.
- Brush dye on wood round using a foam brush. Avoid brushing dye on edge of bark. Unwanted dye drips can be removed by sanding wood immediately. Start on one side and then turn over to other side. Wood round can be placed on a dish or jar to elevate it from the work surface when dye-staining and drying. Keep dye hot during the wood staining process for better dye absorption. Reheat dye in the microwave for one minute. Tip: Dye can be stored in jelly jar, then reheated and reused several times.
- Let wood round dry. If color is too light, reheat dye and apply a second coat. Let dry overnight.
- To seal dye-stained wood, apply a coat of clear polyurethane using a new foam brush. Let dry. If a second coat of polyurethane is needed, rub wood lightly with fine steel wool. Remove dust with a tack cloth before applying polyurethane.
- Tip: To make the charger plates more versatile for different occasions, consider dyeing each side a different color.

Posts You May Like
