
Supplies
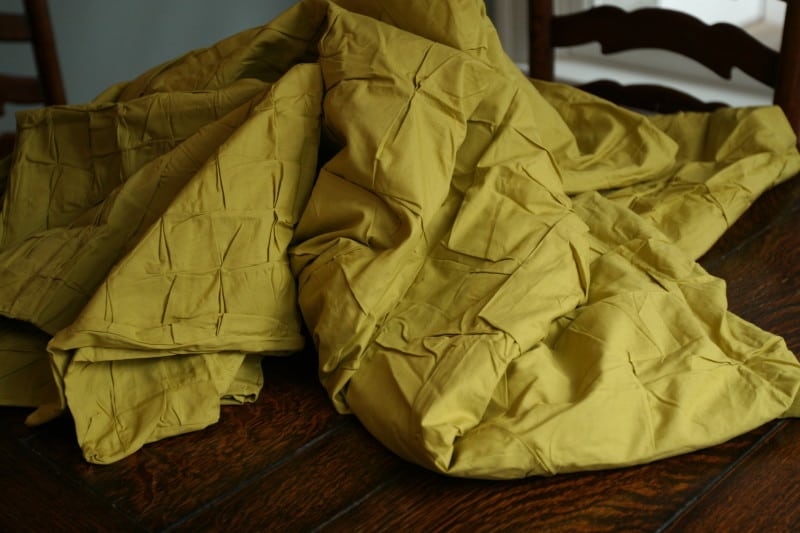
- 100% cotton duvet cover and shams
- Harvest All-Purpose Liquid Dye
- Rit Color Remover
- Large metal spoon
- Paper towels
- Rubber gloves
- Stove pot
Time
Total: {{ partial.tVM8.total }}
Difficulty
Intermediate Total: {{ partial.tFUX.total }}
Instructions
- Gather supplies and bedding and cover work area with plastic table cover.
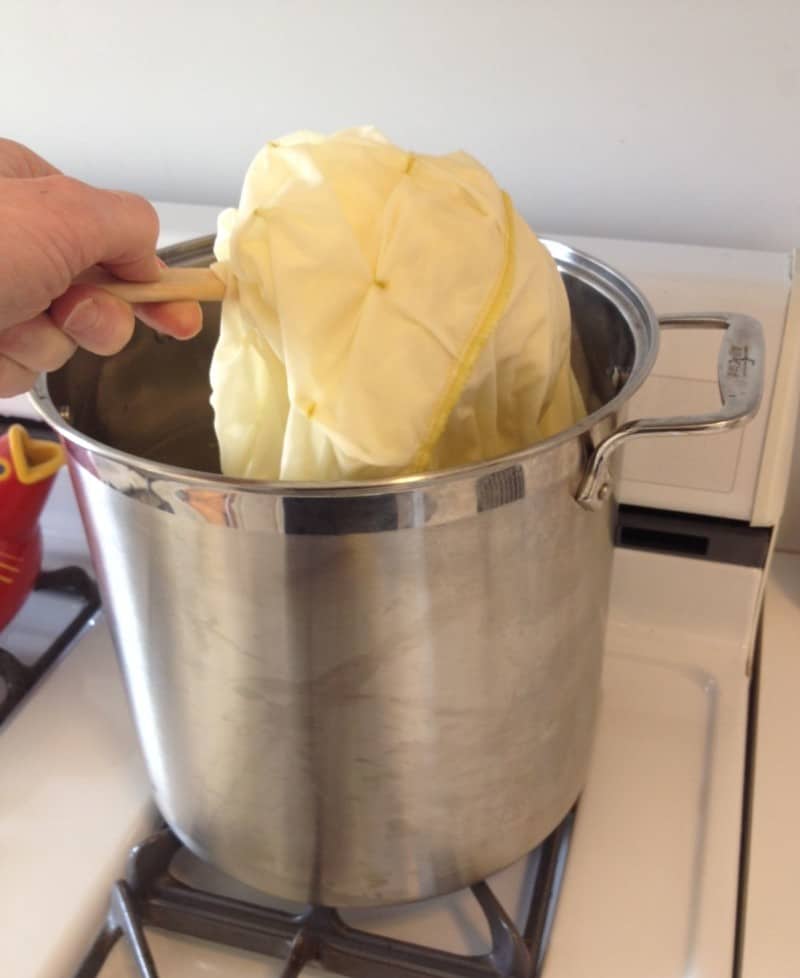
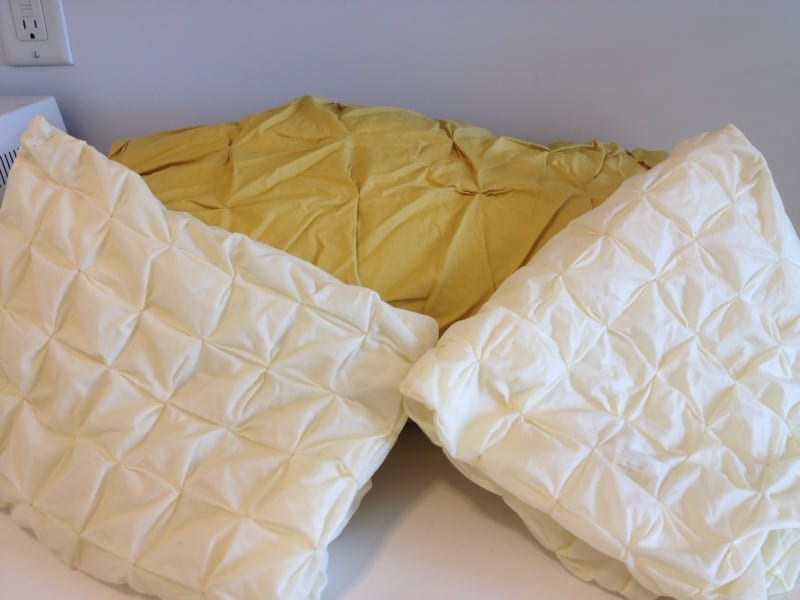
- Removing Color: We added one full packet of color remover to a large pot of hot water and added the two standard sized shams.
They started losing color after about 30 minutes and had it thoroughly removed the color in 90 minutes. The stitching kept most of its color (Color Remover doesn’t work on polyester, which is what most thread is made from) but we had a feeling you’d barely be able to see this once it was dyed (and we were right!). We needed to use heat to remove the color as they were commerically dyed and held onto their color therefore using a washing machine wasn’t an option.
-
Next we needed to remove the color from the duvet cover. The duvet was too large to fit in a soup pot so we went extreme and did it in an 80 quart professional pot on a grill. That’s right, we don’t take dyeing lightly at Rit!
 For the less extreme dyer, a huge bucket or container from Home Depot filled with very hot water that’s refreshed regulary should do the trick. We used 3-4 packets of Color Remover given the size of of the duvet.
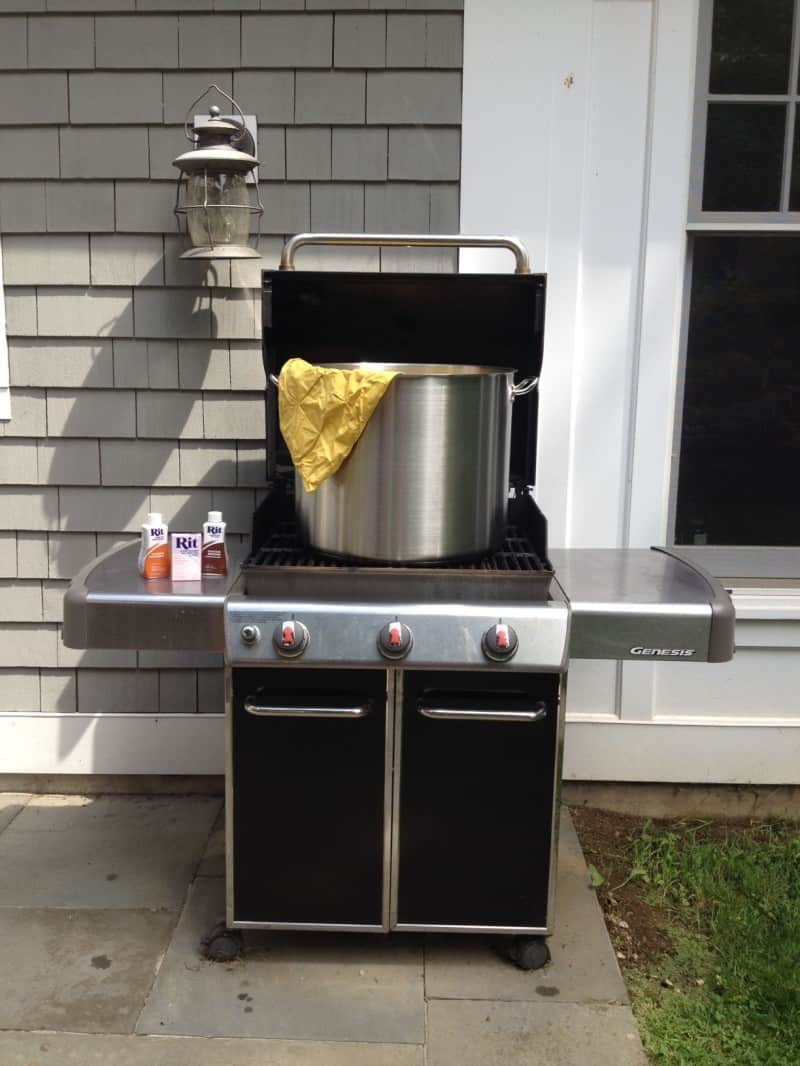
- Once the duvet and shams are white, it’s time to dye them! First, we washed them to ensure all of the Color Remover was gone and then we placed them in the washing machine.
- Set water temperature to the hottest possible setting and a wash cycle of at least 30 minutes or longer. The longer the item is in the dye, the darker the color will be.
- Wearing rubber gloves, mix the well-shaken liquid dye (we used 3 bottles of Harvest dye) with 4 cups of very hot water in a large container. Stir well and set aside.
- In a separate container, dissolve 1 cup of salt in 4 cups of very hot water. Set aside.
- Add 1 tablespoon of dish detergent to the container of salt and water to help promote level dyeing.
- Start the cycle.
- Remove detergent cup from detergent tray.
- Pour the dye solution into the dispenser. Then, pour in the salt solution. Flush the dispenser thoroughly with 4 more cups of hot tap water.
- Let the cycle run.
- To enhance the color and reduce color bleeding, use Rit ColorStay Dye Fixative immediately after dyeing and before washing, following these instructions.
- Rewash item in warm water with mild detergent. This will help even out the color.
- To clean the washing machine: Using hot water and the “high” level setting, clean the washer with 1-2 cups of liquid bleach. Make sure to wipe around the inside of the lid and pour a little bleach through the internal dispenser as dyes can get into these areas. Fill washer to highest water level with the hottest water temperature setting. Add detergent and 2 cups chlorine bleach and run a full wash cycle with 3 to 4 old towels.


Posts You May Like
