Bottle Brush Tree Pumpkins
BEGINNER
1 hour
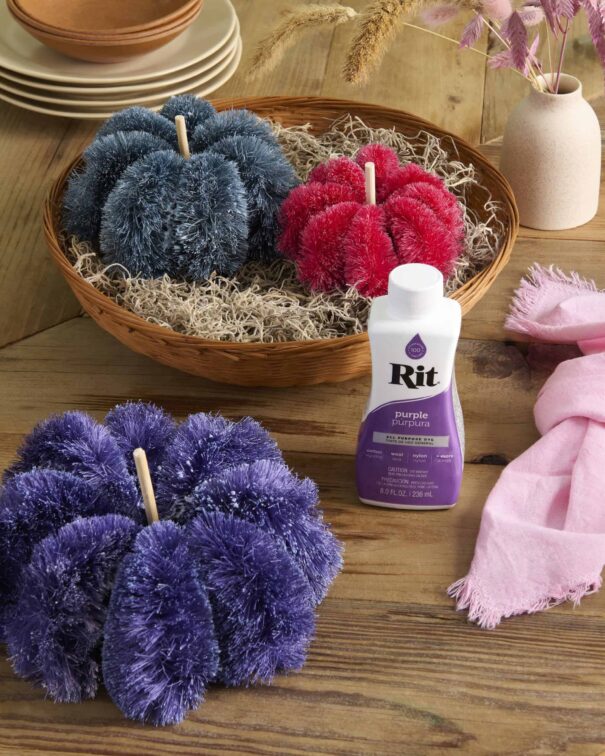
Who says bottle brush trees are just for winter? With a little dye and a lot of imagination, we’re giving them a whole new life—as adorable mini pumpkins for fall.
Supplies
- Rit All-Purpose Dye in Purple, Royal Blue, Cherry Red
- (12) Small White Sisal Bottle Brush Trees
- (6) Large White Sisal Bottle Brush Trees
- Medium Glass Jars for dyeing
- Hot Glue Gun and Sticks
- Wooden Dowel
- Measuring Cup and Spoon
- Paper Towels
- Tongs
- Rubber Gloves
Instructions
- Fill glass jar with about 12 ounces of very hot water. Shake dye bottle before pouring. Wearing rubber gloves, add 1 to 2 tablespoons of your favorite Rit All-Purpose Liquid Dye. Stir well.
- Test dye color by dipping a paper towel or spare tree directly into the dyebath. If color is too light, add more dye; if color is too dark, add more water
- Submerge your tree directly into the dyebath. It will dye within a few seconds. The longer the tree stays in the dye, the darker it will be.
- Experiment with dyeing different parts of the trees for different looks: Dye just the bottom, dye just the top or even tilt the jar to dye a diagonal color line for variation. To achieve an ombre effect, dip the whole tree in quickly and then pull it out slowly allowing the bottom portions of the tree to spend a few more seconds in the dyebath.
- Remove your tree from the dye bath and rinse in cool water.
- Lay trees flat on clean, dry paper towels until completely dry.
- Once dry, bend the top corners of each tree downwards to create a curve.
- Using hot glue gun, adhere 6 trees together side by side to create the pumpkin shape as shown.
- Cut wooden dowel to size and adhere to the center opening of the pumpkin.